Here are our release notes for FG Funnels from July 26th, 2023 through August 2nd, 2023. If you have any questions about these updates, or other questions about FG Funnels, please reach out to [email protected] or live chat in the app and our team will be happy to help.
CRM Contacts
Global Unique Identifier
Ability to choose the unique fields in your contacts
What’s changed?
Now you will be able to choose which field you want to keep as the unique identifier in your contact.
If a location has a use case to ALLOW duplicate Emails but NOT ALLOW duplicate Phone numbers or vice versa, now they can do so.
Previous option to allow duplicate contact is retained where an account will be able to create duplicate contacts without any unique fields
Available Options for Uniqueness:
Only Email
Only Phone
Email and Phone Both
Payments
Automated receipts for Invoice and Text2Pay link payments
This allows businesses to send a confirmation receipt when an invoice is successfully paid by the contact/lead
This covers one-time invoices, recurring templates, and Text2Pay link payments
Customization Options: Businesses can set a custom title for the receipt, prefix, and start number for receipt numbers, and choose a custom email template to send out receipts.
Receipt Delivery: Receipts are sent as a PDF attachment to the contact’s email using the selected template.
Custom Template Values: Receipt custom values are available inside the email builder, allowing businesses to use a custom template for sending receipts.
Funnels & Websites
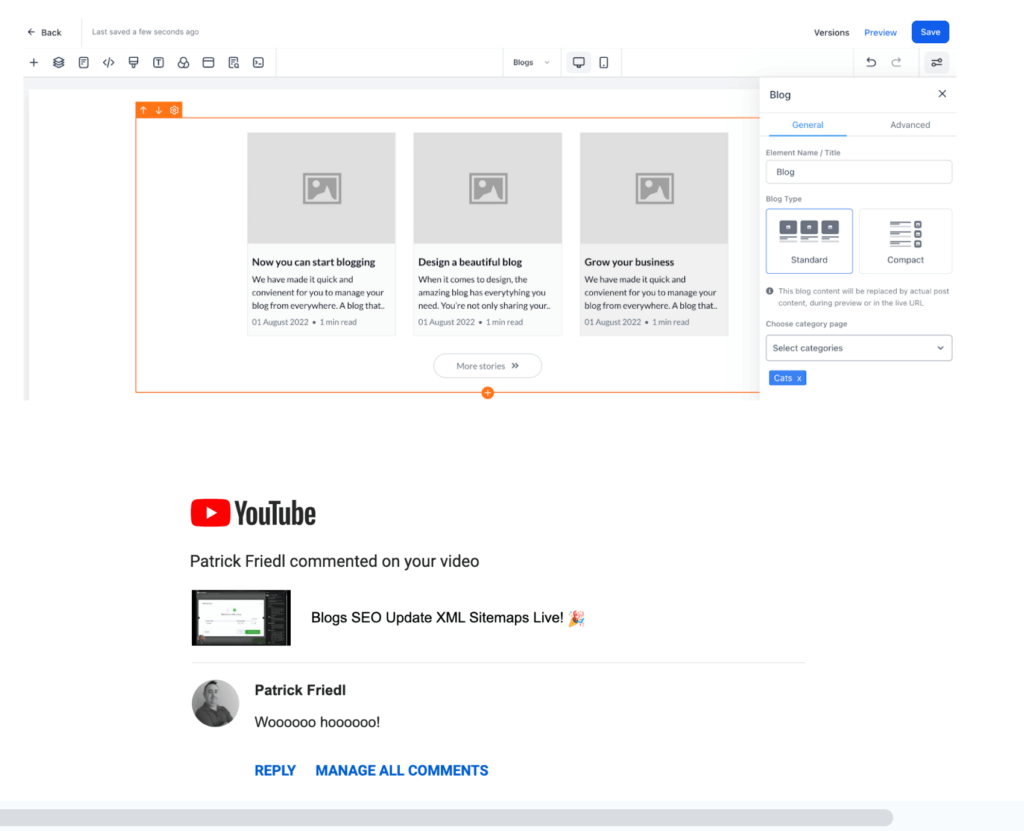
XML Sitemaps generation for blogs and categories Now Live
What’s New?
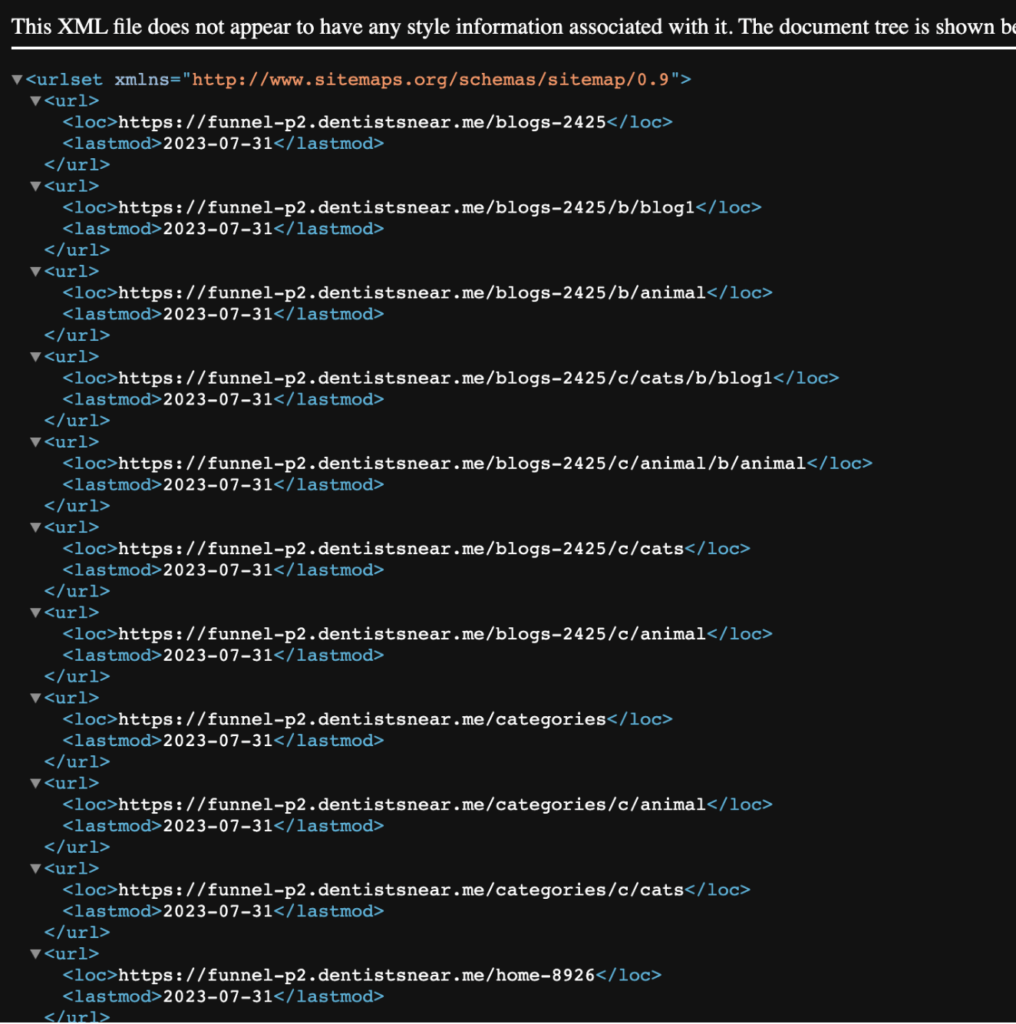
With this update, business owners can now index the urls for the blogs that are added to the funnel/website page(s).
Supports automatically discovering the blogs and categories in the funnel/website page and crawl the urls while just saving the funnel page in the funnel builder.
Old Behaviour
Previously, In the sitemaps, we are just indexing the funnel url, funnel/website page urls and also any custom paths that are added.
New Behavior
Now, along with the funnel url, funnel page urls and also any custom paths, we are also now indexing the blogs and categories that are added to the funnel page(s)
How It Works
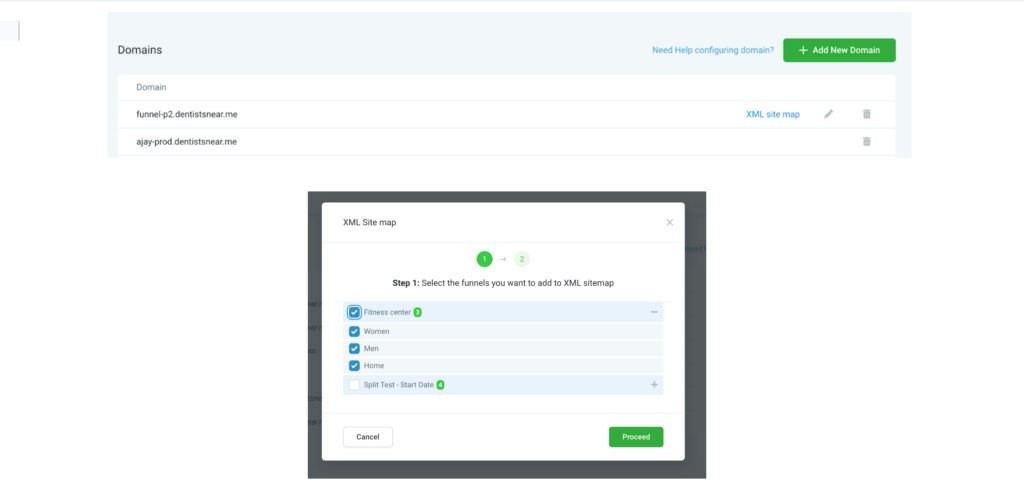
Indexing the blog urls in a funnel page(s) is very straightforward. Navigate to domain settings -> XML Site map -> Select the Funnel/website page(s) with blogs/categories you want to index.
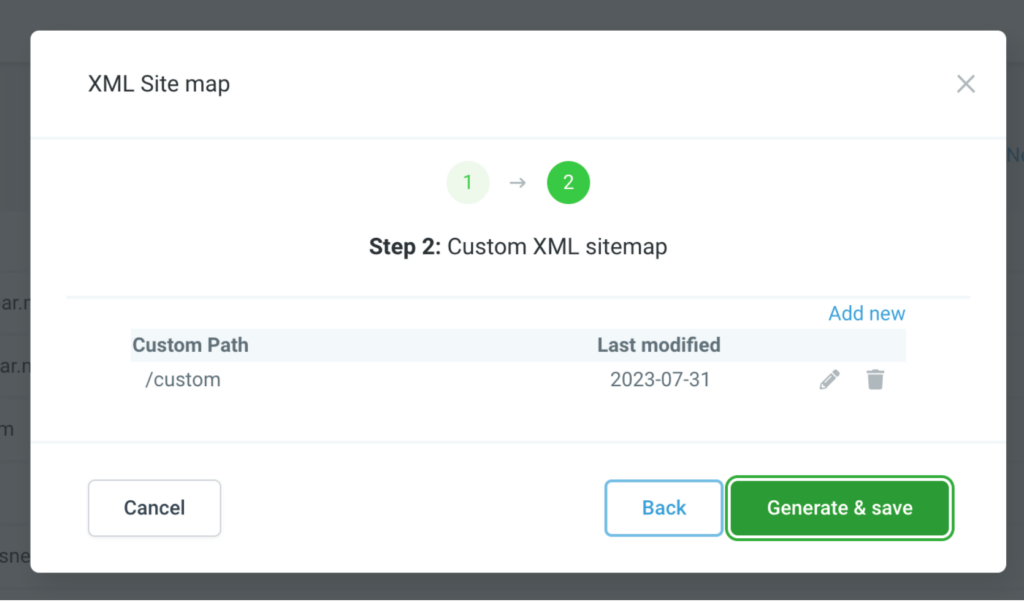
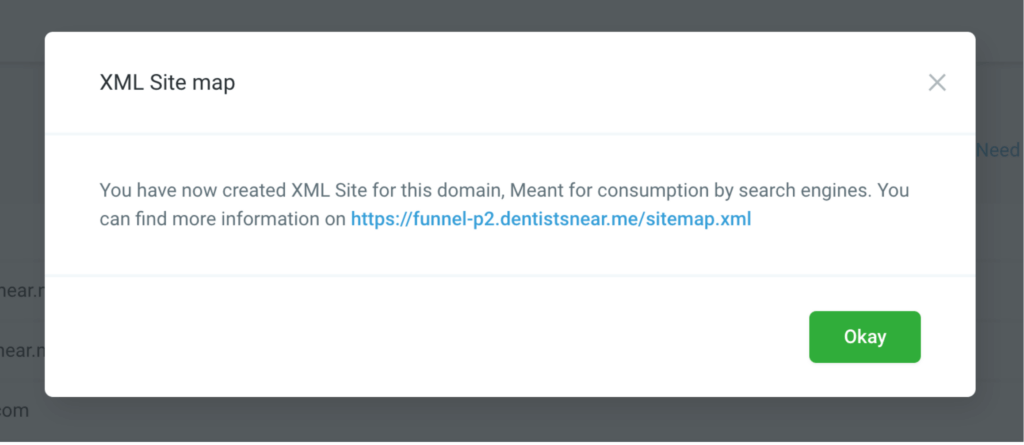
Once you select the funnel/website page -> continue -> provide any custom path if you want -> click Generate and save. You will be provided with the sitemap url.
Pain Point Solved
Automatically crawling the funnel/website page on saving the page if page contains blog/category navigation element in it. This way user no need to go to domains page each time they modify their funnel page.
Note: Automatic crawling works only if the funnel/website page is selected for crawling. You can check this by navigating to domain settings -> XML Site map.
Sticky Editor Enhancement( New Funnel/Website Builder)
Major User Experience issues faced by users are now resolved
Old Behavior:
Sticky Editor overlapping the element settings even when not editing text
Sticky Editor opening up without selecting any text
Save button is blocked by tooltip.
New Behavior:
The sticky editor will be showing up below the text
The sticky editor will show only if text in the elements are selected.
Increase the products purchased limit in order forms
What’s New?
With this update, the product purchase limit is increased from maximum 10 to 999.
Business owners can now set the limit to 999 maximum in funnel products which will be reflected in the order forms.
Previously, It was only 10 quantity for each product. So Users can only purchase product with quantity 10 maximum.
Now, We have updated the product limit to 999 and also Changed the user interface for updating the quantity of product in order forms.
How It Works
Go to Funnel products -> click edit on any product -> In Additional options change the limit and save
Once you save the funnel, go to your order form page and you can see the order form with new quantity dropdown.
Pain Point Solved
In one single purchase users and buy 999 number quantity of products.
Affiliate Manager
Manually attributing sales to affiliates
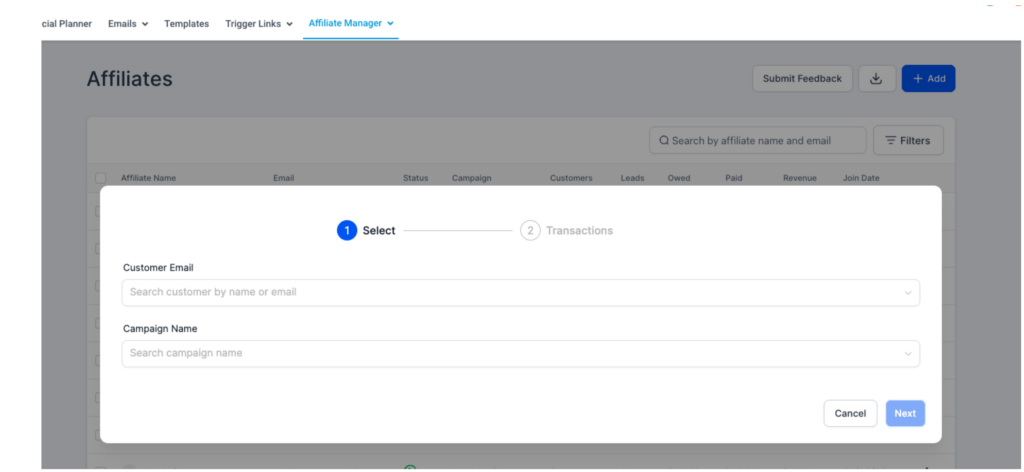
We are excited to announce the latest update to our affiliate management system, introducing the highly requested “Manual Sale Attribution” feature for Affiliate Admins. With this powerful addition, affiliate admins gain the ability to manually attribute sales to affiliates, granting them greater control and flexibility over their affiliate program’s performance.
What pain point did we solve for the customer?
In cases where customers are referred by affiliates without using the affiliate link or signing up from devices where the affiliate cookie isn’t set, admins can now manually add the leads to ensure proper credit for the affiliates’ efforts.
For offline sales made by affiliates, admins can create manual invoices and attribute the sales accurately to the respective affiliates.
How can the affiliate admin do this?
Go to the Affiliate Manager and navigate to the Affiliates screen.
Click on the three dots located on the right side and select “Add Manual Sales.”
A pop-up will appear, requesting the customer’s email. Enter the email of the customer that the affiliate referred.
Next, enter the Campaign Name whose configuration you wish to apply to that customer
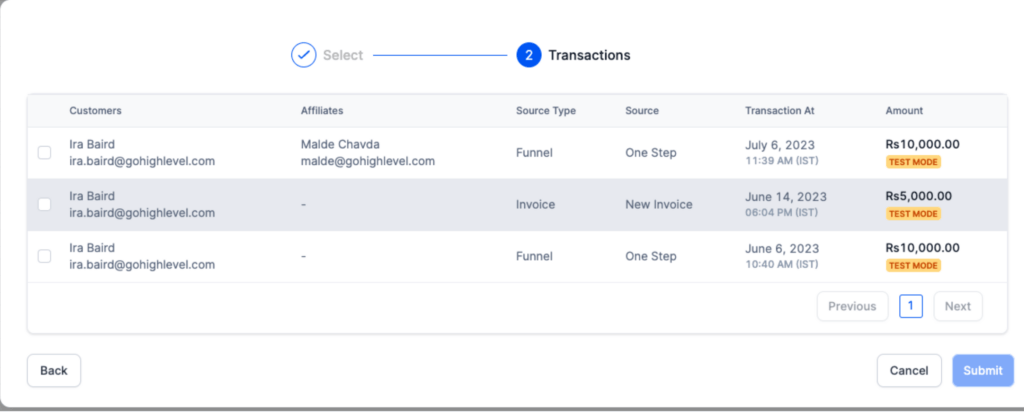
All transactions made by the customer will be displayed, allowing you to select the ones you want to attribute to the chosen affiliate.
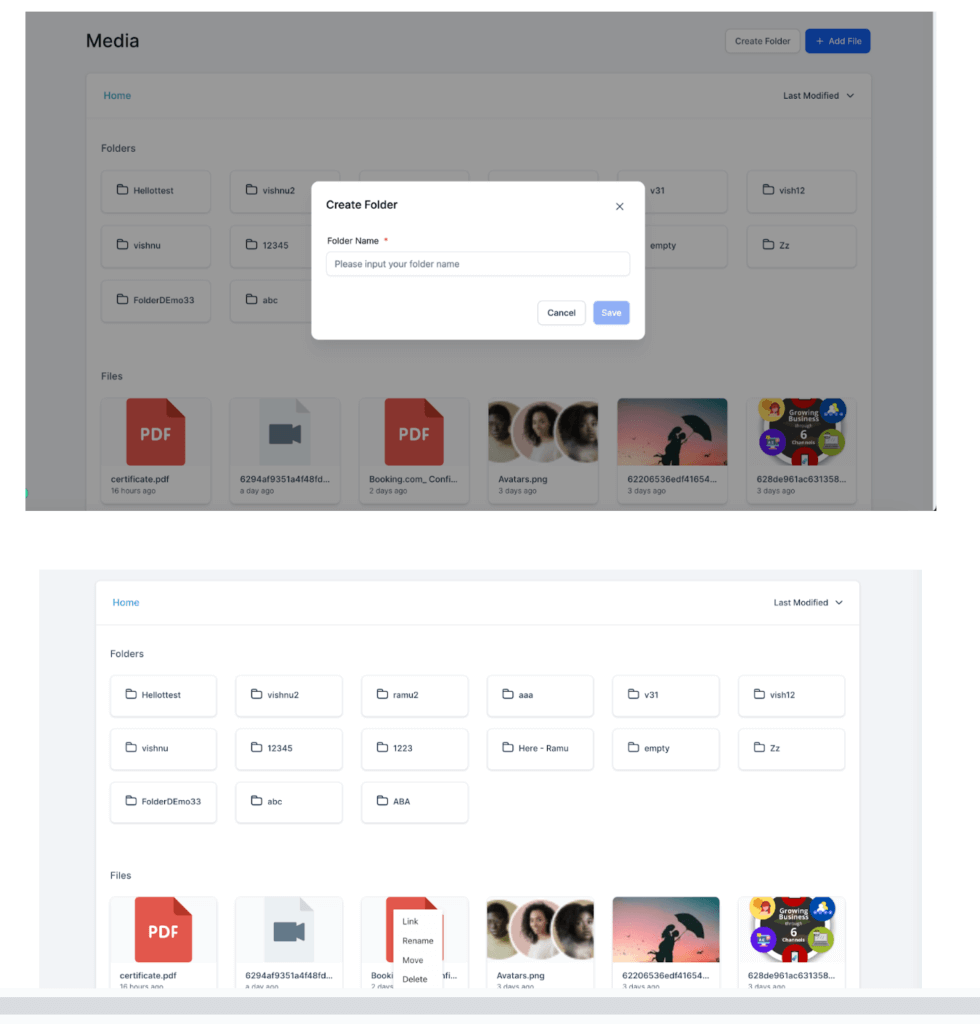
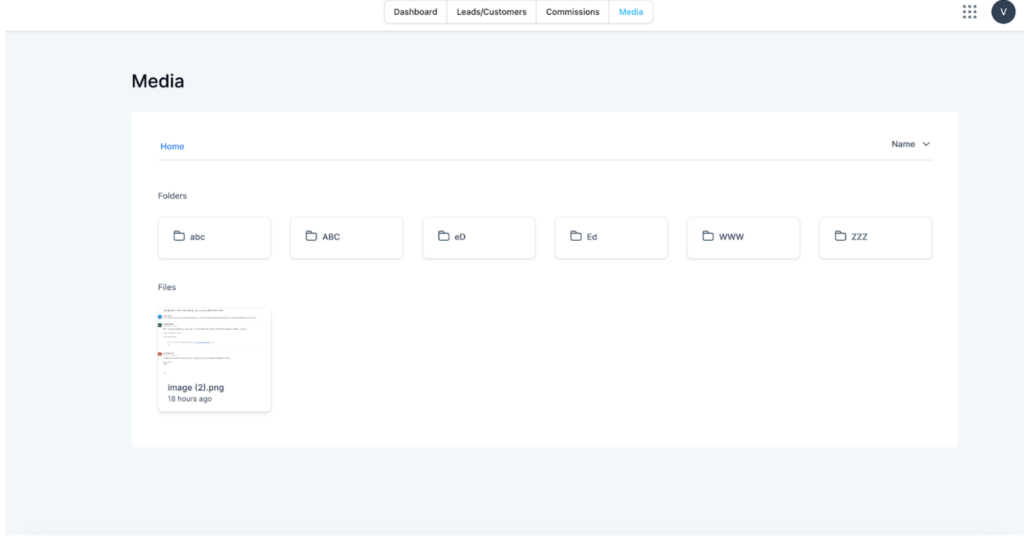
Introduced the Media screen for sharing branding material with affiliates
We have released a new screen in the Affiliate Manager called ‘Media’ to upload the marketing media that can be downloaded and used by the affiliates. This release will facilitate seamless collaboration between affiliate managers and affiliates by giving them the flexibility to share content.
How will this release help the user
Empowering Affiliate Managers: This release will empower Affiliate Managers with the ability to upload media, such as images, videos, promotional banners, documents, and more via the Media screen that will get reflected directly on the Client Portal.
Centralised Media Repository: The uploaded media files are securely stored in a centralized repository within the Template Library ensuring easy access and organization for both Affiliate Managers and affiliates. The affiliate admins also have the flexibility to categorize their media files in folders.
Effortless Content Sharing: By making media readily available to affiliates, the Affiliate Manager streamlines content sharing, enabling affiliates to access the latest marketing materials instantly. Equipped with a diverse array of promotional resources, affiliates can effectively promote your products or services, resulting in increased brand visibility and sales potential.
How can the affiliate admin do this?
Go to the Affiliate Manager and navigate to the Media screen.
Click on Add File
You will be directed to the Template Library to either chose the existing files/folder or upload new media
Once the selection is made, the chosen files and folders will reflect in the Media screen and also on the Client Portal screen.
Template Library
Surveys
Why should you use the Template Library in Survey?**
Adoption: Get started with a few clicks rather than starting from scratch.
Time Efficiency: Templates provide pre-designed, reusable look and feel elements components that can be easily integrated.
Personalisation and Customization: While templates provide a standardized foundation, they can still be personalized and customized to meet specific customer needs. CRM users can modify templates by adding personalized details, such as names, specific selections or tailored messages.
Consistent Branding: Template libraries enable organizations to maintain consistent branding throughout customer interactions. Get it in different business categories and tags associated.
Where will we find the Survey Template Library?
Go to Sites > Survey > Add Survey
Select to start from scratch or Choose from Template
Select the option, view the full form and details like preview and if any customization / pre-setup required.
Click on Continue to add a Survey Template.
Email Builder
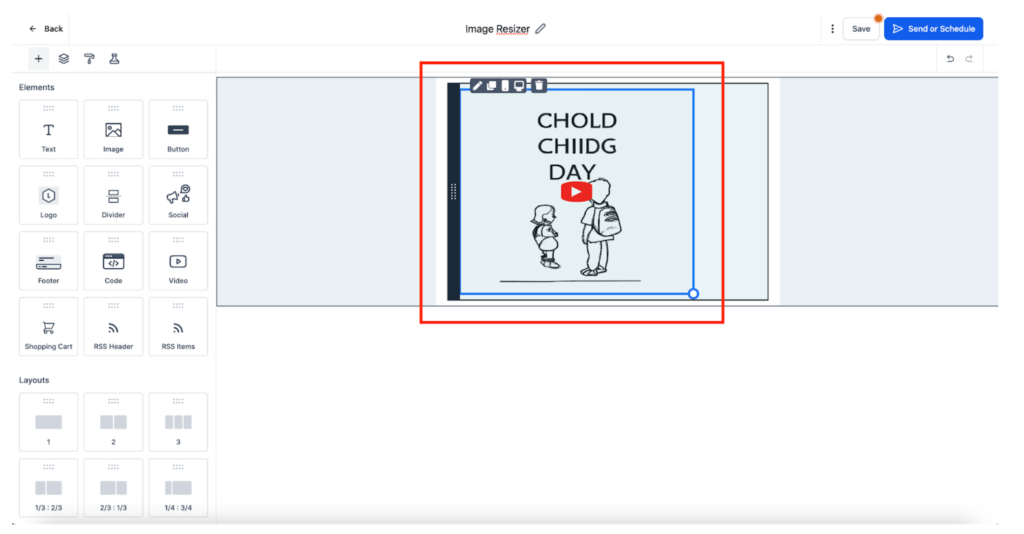
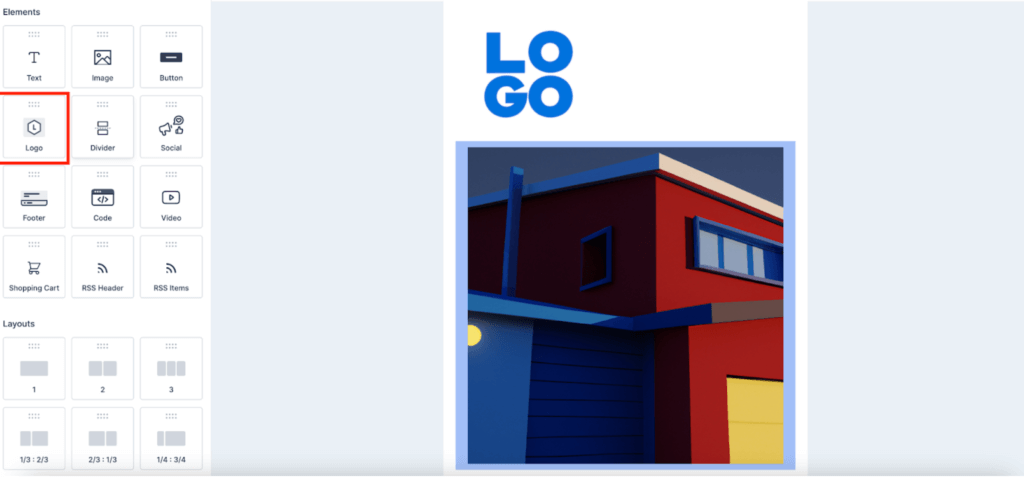
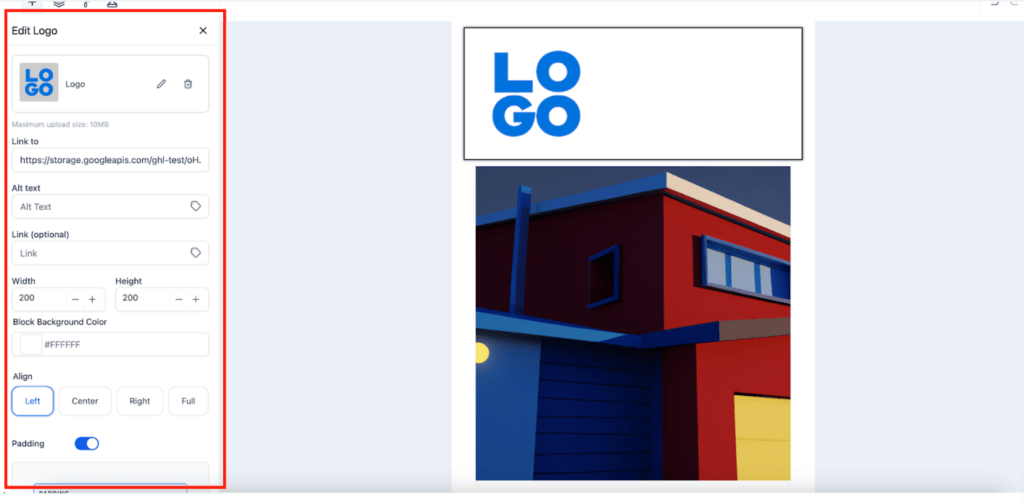
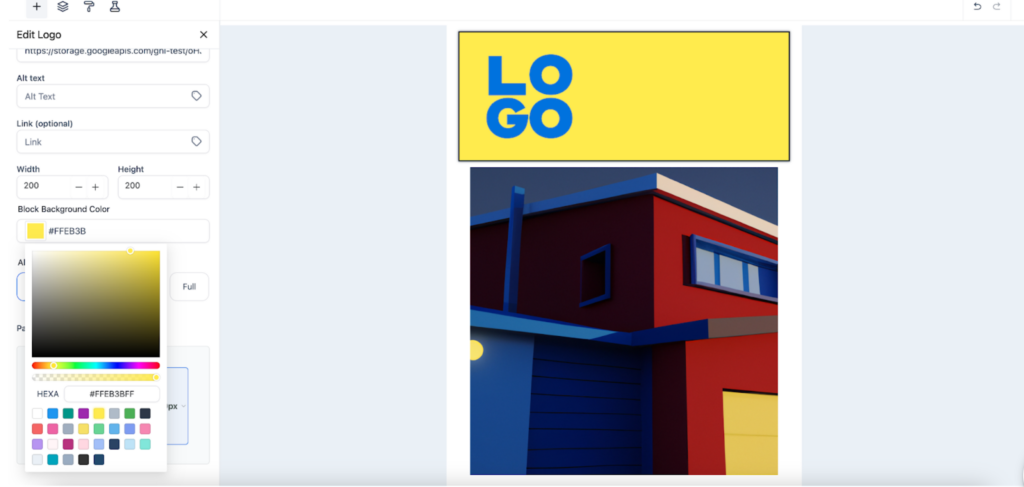
Logo Element and Image Resize
With the logo element and image resize, it will help you build emails seamlessly to attract more customers with relevance.
Why did we add a logo element?
1. Logo element will help reduce down number of clicks and custom coding.
2. It will help you bring your location logo and you will be required to drag and drop inside the builder.
3. Resize or replace your logo with relevant branding and consistency.
Note: The logo will be used from the sub-account logo. You can replace the logo from the template library to match your branding. Next time, it will bring up the most updated logo.
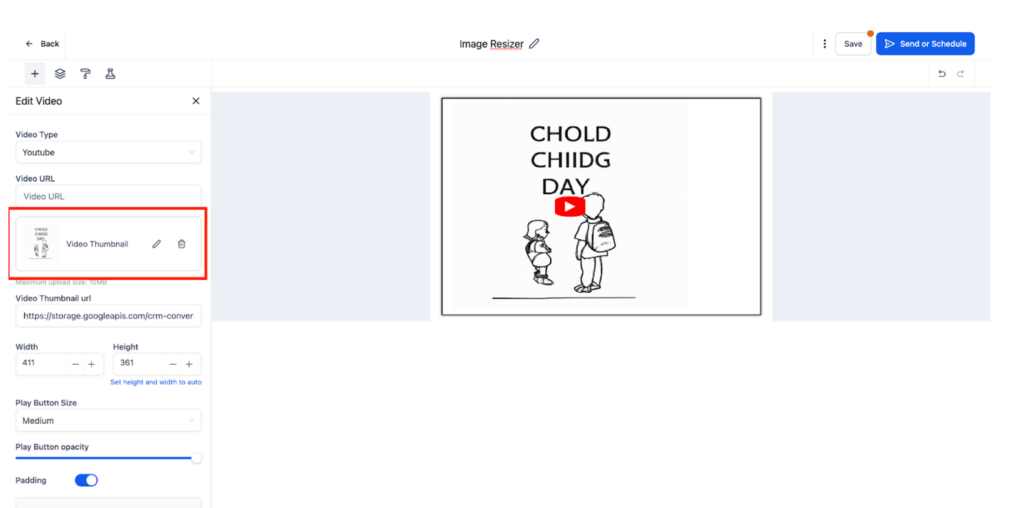
Resize your image
based on your use, add any image from the media library and you will be able to drag the images. You will be able to choose between height/width or resizing inside the builder area.
Using drag functionality to resize images in Email Builder offers several benefits:
1.User-Friendly InterfaceDragging to resize images provides an intuitive and user-friendly interface. Users can visually adjust the size of images by dragging the corners or edges, mimicking real-world interactions. This eliminates the need for complex input fields or settings, making the resizing process more accessible to users of varying technical expertise.
2. Real-Time Preview: With drag functionality, users can see a real-time preview of the image’s size changes as they drag. This instant feedback allows users to visually assess the impact of resizing and make adjustments accordingly. It enhances the user experience by providing immediate visual confirmation of the changes, eliminating the need for additional steps or clicks to preview the resized image.
3. Time Efficiency: Drag functionality enables users to resize images quickly and efficiently. Rather than relying on manual input or complex resizing options, users can simply drag the image corners or edges to the desired size. This saves time and effort, especially when resizing multiple images or working with a large number of visual elements.
4. Improved Collaboration: Dragging to resize images simplifies the collaboration process, especially when multiple users are involved in designing or editing. Users can easily communicate and agree on the desired size adjustments by visually dragging the image. This promotes collaboration, reduces communication barriers, and streamlines the design iteration process.
These benefits contribute to a more efficient and user-friendly image resizing experience in website and application development.
Notes:
Old set width and height to auto button has been replaced with new Full Align option. (for image and logo elements)
In Full Align – height and width fields will be disabled.
If user clear both width and height, then align will switch to Full
For old templates with image elements will show unsaved changes for the first time.
Additional Release
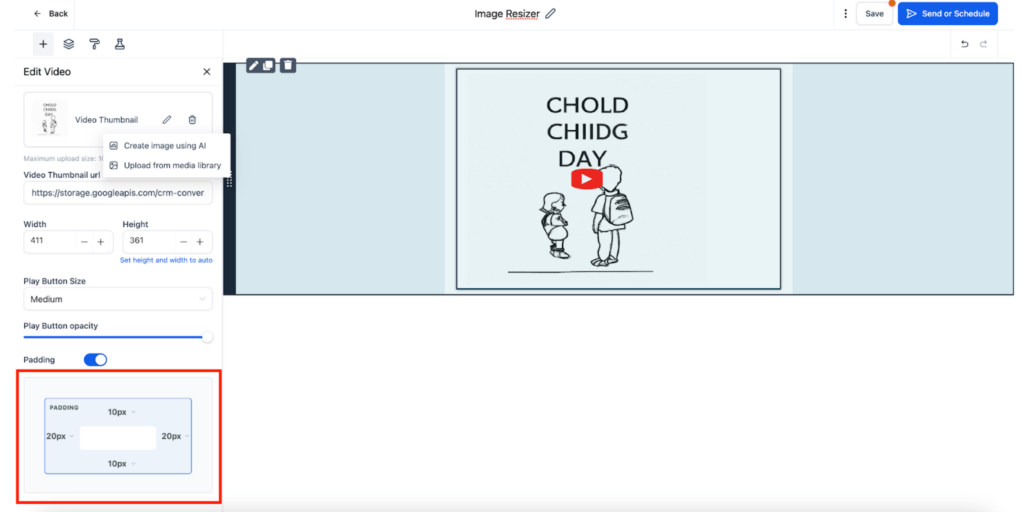
We have added a new padding and align option in the email builder for all the elements.
Image AI is now available again in new editor
Color picker picker has been updated to the new GHL UI color picker.
Added missing and new i18n labels.
Blogs
Blogs is now Multilingual
We have implemented multi-language support for Blogs.
What’s new for the user?
Users have the option to choose their preferred language from a comprehensive list of available languages.
How can the user set up their language preference?
There are two ways to do it. One uses the User’s profile settings and another uses the Business Profile Settings.
To select a preferred language for a user go to Settings -> My Profile -> Platform Language
To select a preferred language for a business go to Settings -> Business Profile -> Platform Language
The language selected under My Profile will take a preference over the language selected under the Business Profile
Beta Features
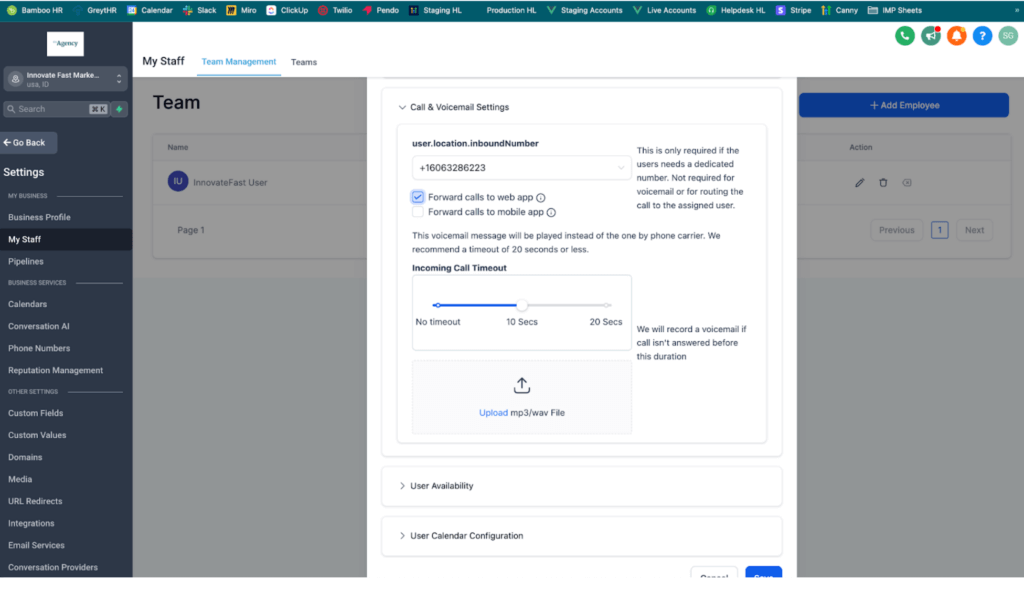
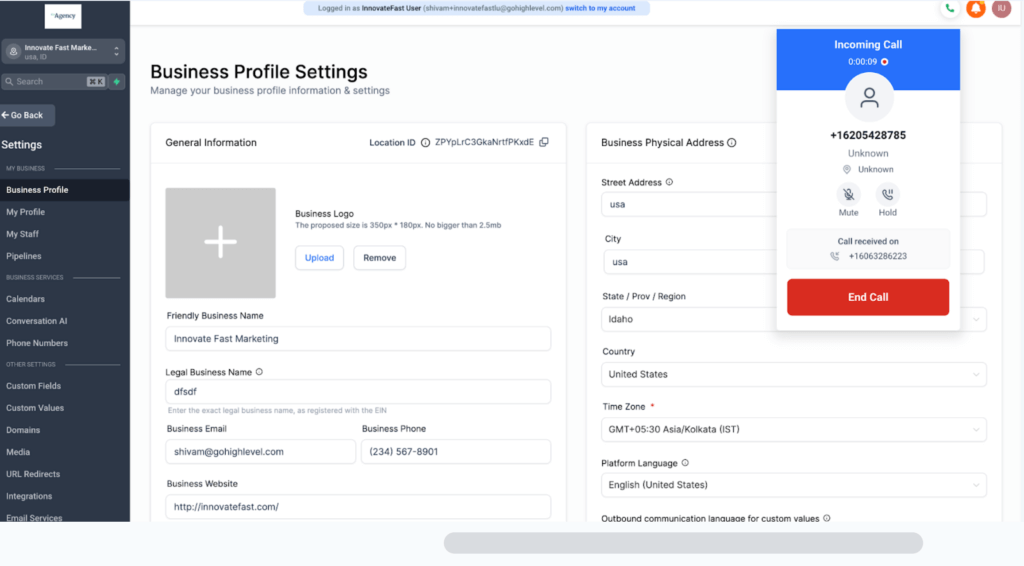
LC Phone-Incoming Call in Web App
The Incoming Call in our Web App is live on the new My Staff v2 UI, which can be enabled from Labs.
Once that is done, a new checkbox “Forward calls to web app” is available at a user level under My Staff(Team Management), Call & Voicemail Settings.
Now if the user is logged in and someone calls the number assigned to the user the call will come into the web app.