It is time for all the latest updates in FG Funnels from the week of March 27th through April 1st, 2024. If you have questions about any of these updates, or FG Funnels in general, please reach out to [email protected] or live chat in the app and our team will be happy to help.
Calendars
Pre & Post Buffer
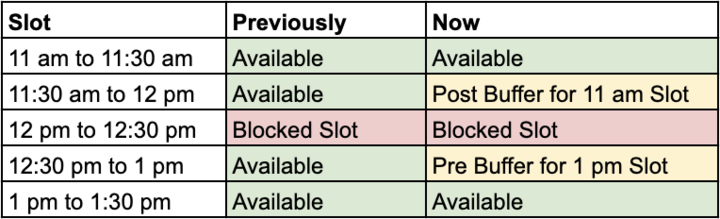
With this enhancement, we now consider blocked slots when applying pre and post buffers for appointments. This ensures that buffers do not overlap with blocked slots, providing appropriate buffer times for appointments.
Previously, if a 30-minute appointment with a 30-minute interval & 30-minute pre and post buffers was set, and a slot from 12:00 PM to 12:30 PM was blocked, the next available slot displayed would be 12:30 PM and the previous available slot displayed would be 11:30 AM, ignoring the blocked slot entirely.
Now, considering the same scenario, the next available slot would be 1:00 PM, accommodating the required 30-minute pre-buffer. The previous available slot would be 11:00 AM, considering 11:00 AM to 11:30 AM as the duration of the appointment and 11:30 AM to 12:00 PM as the required post-buffer.
How to Use?
Choose the calendar to which you want to add buffers for appointments.
Navigate to the “Availability” section.
Specify the duration you want for both the pre and post buffers and click on save.
Informative Rescheduling Experience
This enhancement empowers bookers with a more informative rescheduling experience. By displaying essential details such as Meeting Location and Former & New Appointment time, bookers can better comprehend their adjusted appointments.
Previously, the reschedule confirmation page did not show the Former Time or the Meeting Location. Now, when using the reschedule link, bookers will be presented with the following details for enhanced clarity:
Duration of the appointment
Former appointment time, displayed with a strikethrough for differentiation
New appointment time
Meeting location
Timezone information
Along with this, bookers can seamlessly add scheduled appointments to their Google, Outlook, or iCloud Calendar with the ‘Add to Calendar’ button.
Partial Payments for Calendar Bookings
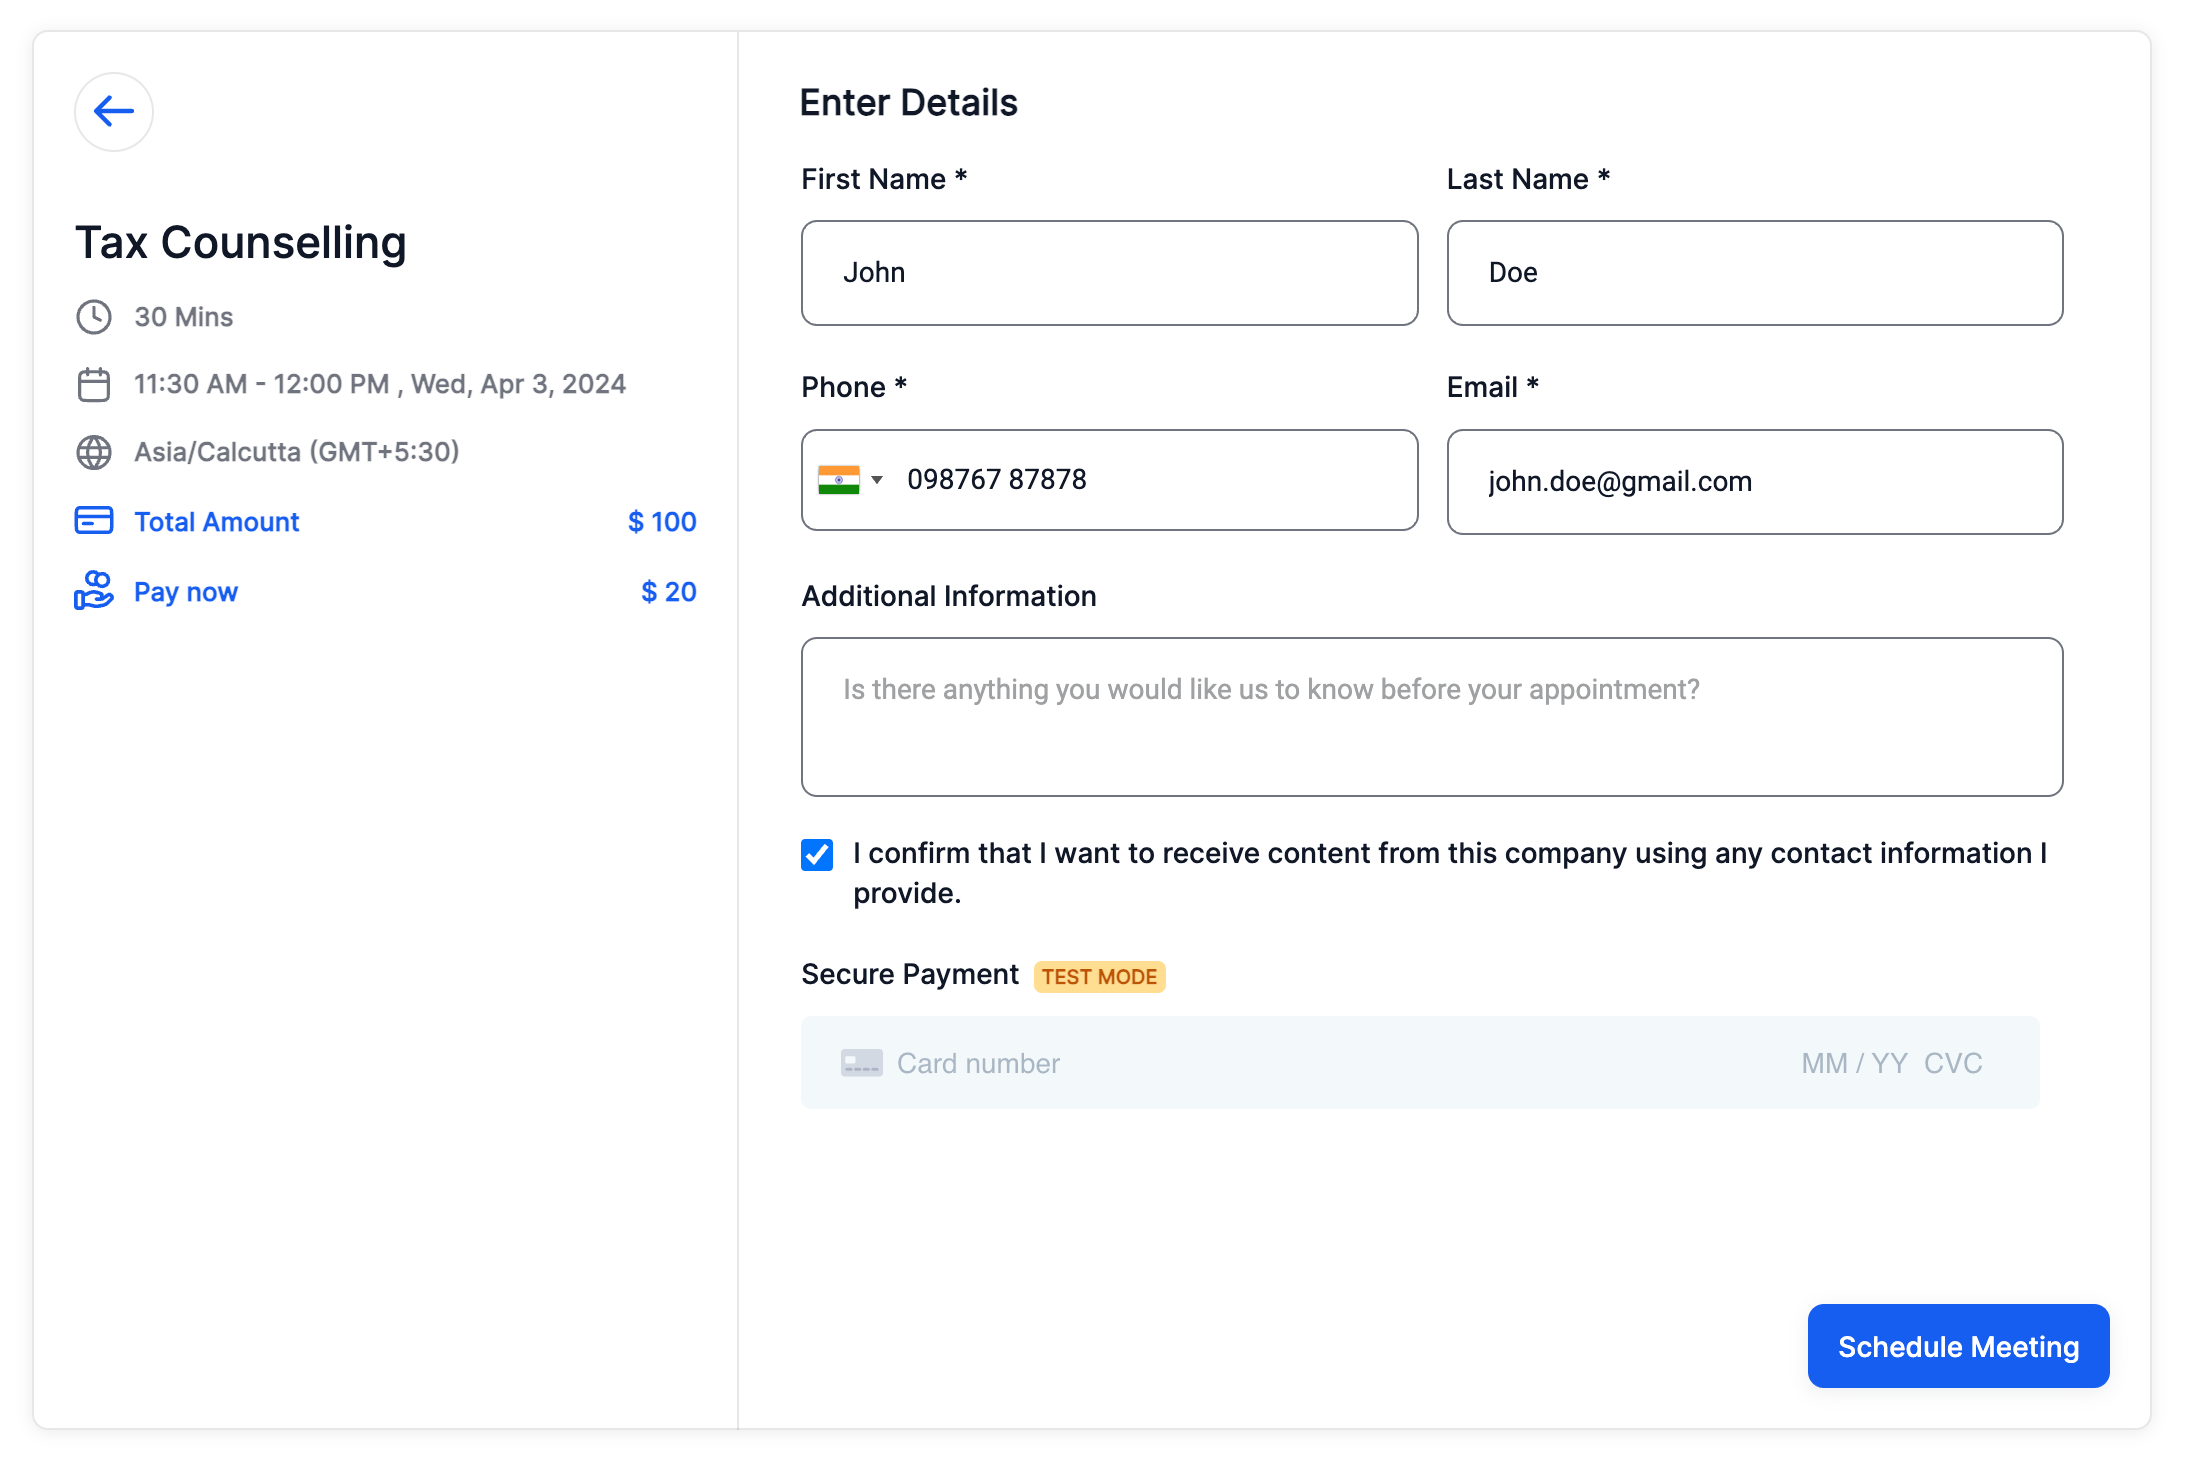
Partial payment offers bookers the opportunity to secure bookings by paying a deposit upfront, with the remaining balance settled at a later time. Users can now collect either the full amount or a deposit amount from bookers, aiding in seat reservations.
Users can set a flat amount or a percentage of the total booking cost, which will be charged to the booker at the time of booking.
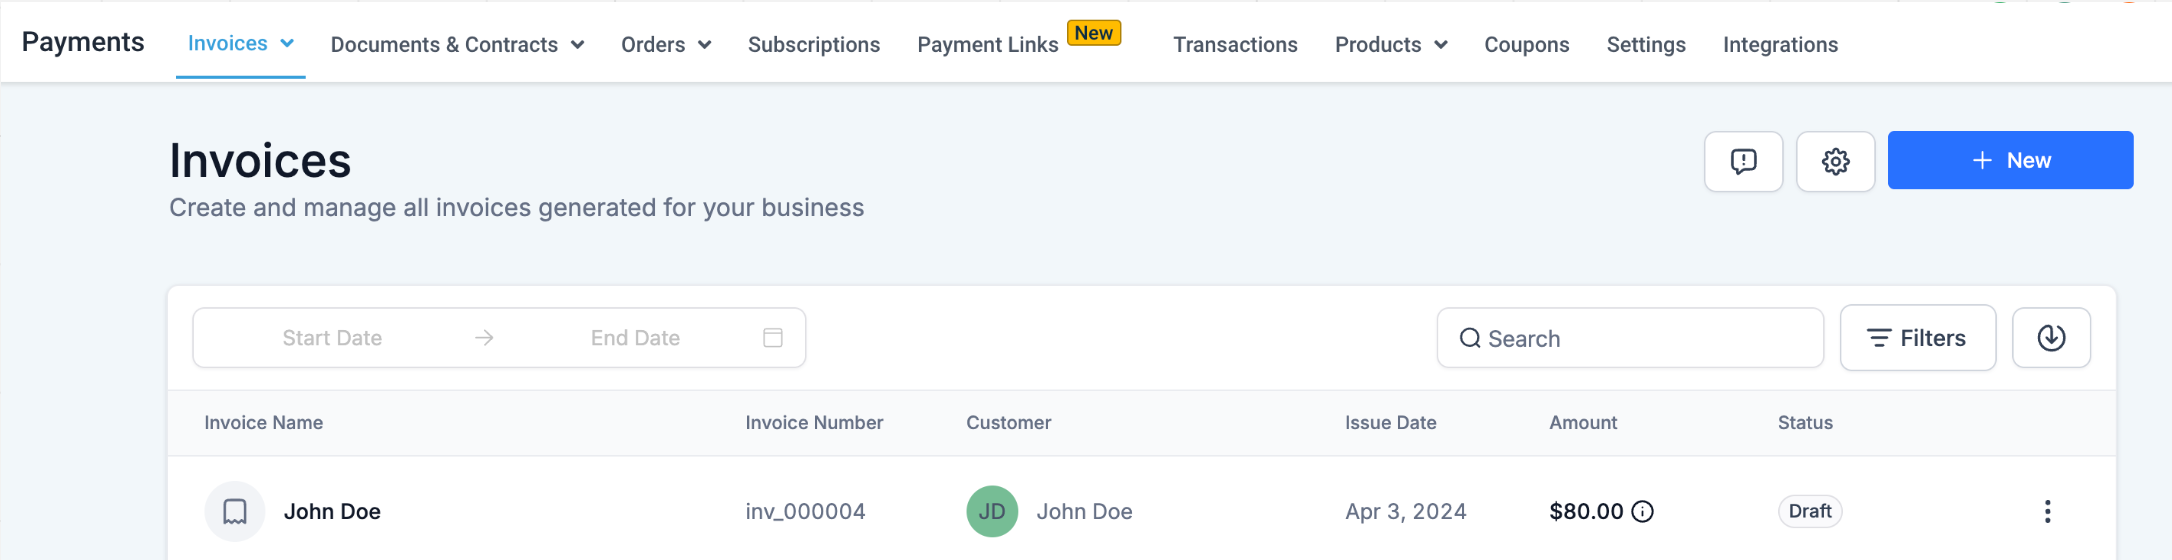
The remaining amount (to be paid) will be displayed under the Payments > Invoices tab, serving as a reference for future payments.
Note:
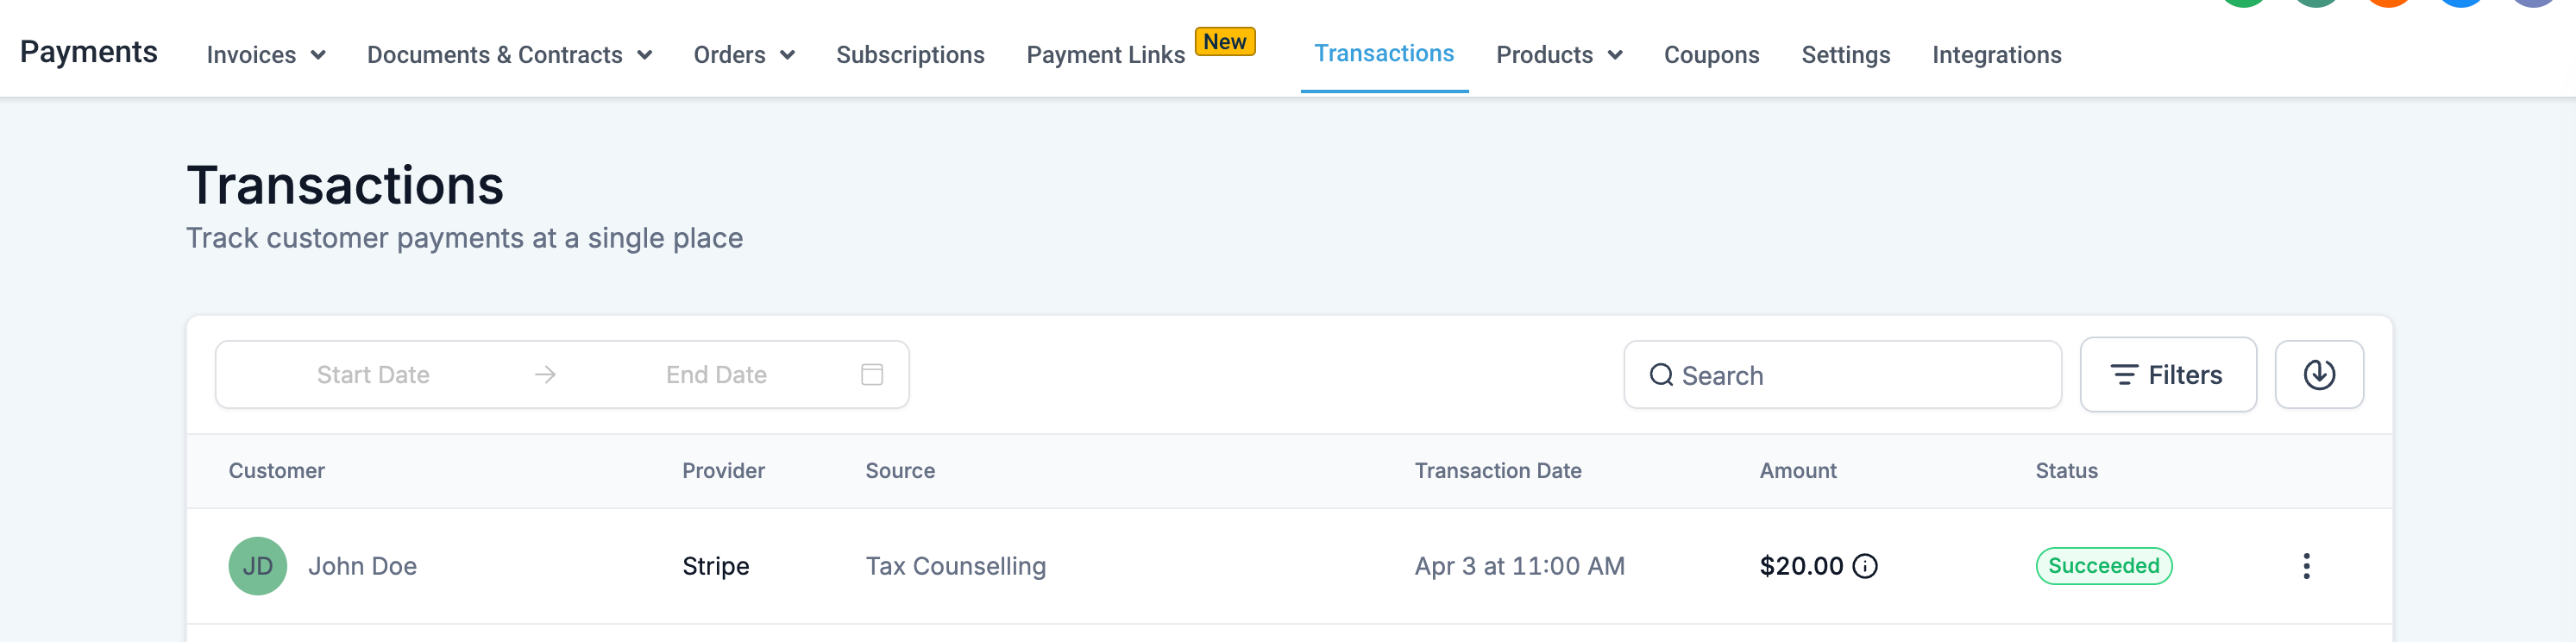
When partial payments are enabled, two entries will appear in the payments section:
Transaction -Displays the amount charged during booking (Deposit Amount).
Invoices – Indicates the pending amount to be collected from the booker (Total Amount – Deposit Amount). Invoices remain in draft status, and users must manually collect the pending amount.
How to Use?
Ensure that a payment gateway (Stripe / Authorize.net) is integrated.
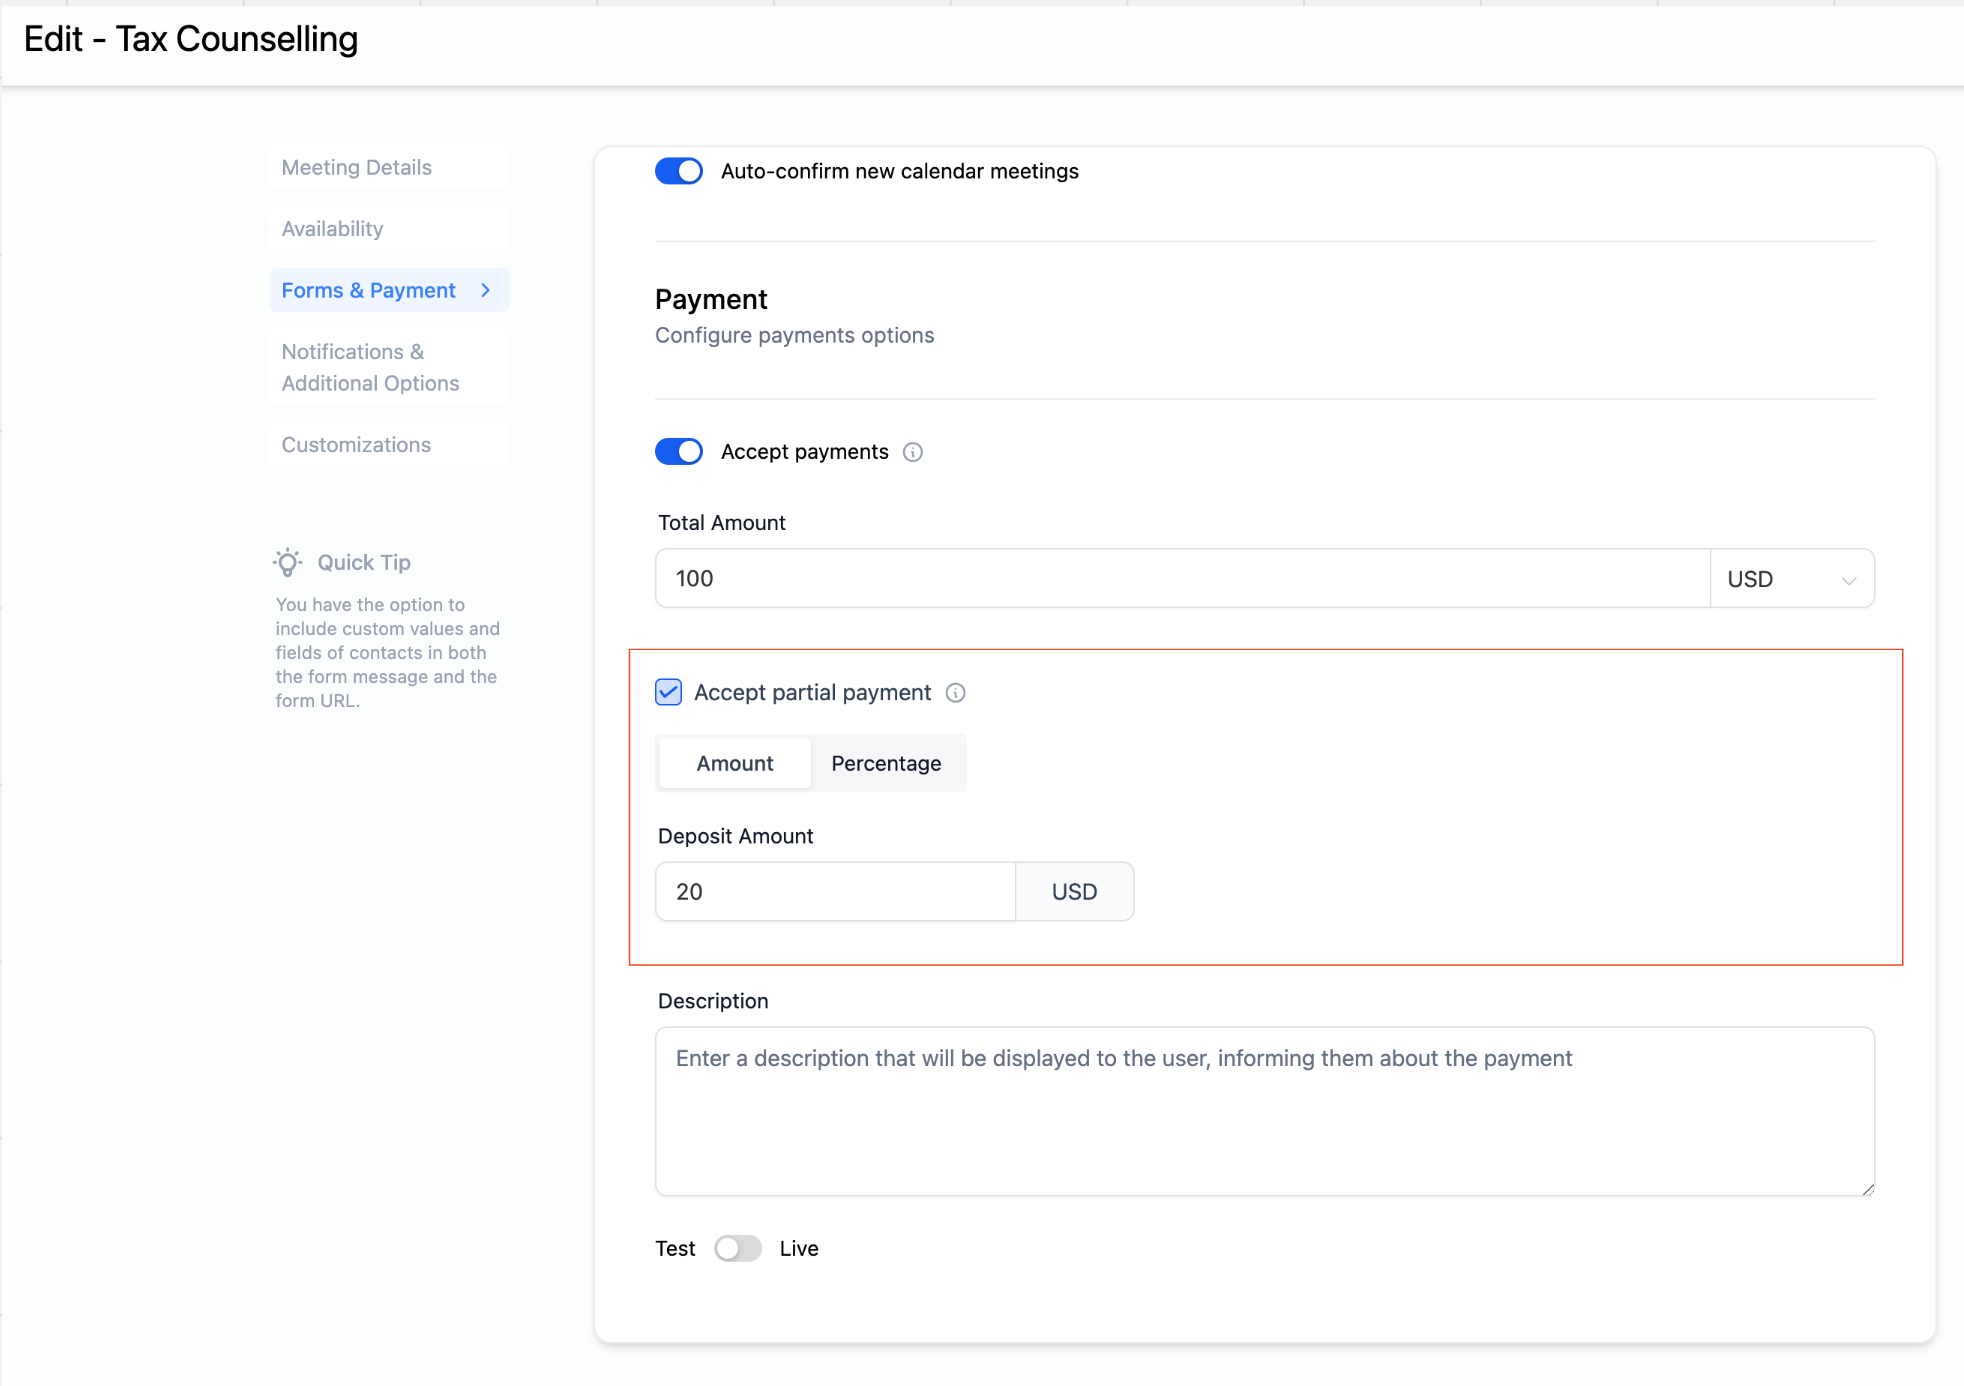
Enable the “Accept payments” toggle for the calendar in Calendar Settings > Forms & Payments section.
Enter the total amount and select the currency.
Enable the “Accept partial payment” checkbox.
Choose between a Flat Amount or a percentage (Percentage is calculated based on the total amount).
Optionally, enter a description.
Click on “Save.”
Documents and Contracts
Customizable Email Subject
Users are now able to change the subject of the email that will be sent along with documents and contracts.
How to Use?
Navigate to Settings under Documents and Contracts
Change the subject line within Customer Notifications for customer facing emails
Change the subject line within Team Notifications for internal emails
Document Management
Documents and Contracts will now be available in the document management section under the Contacts tab.
This will list documents associated with the contact irrespective of the criteria that the contact was a primary or a secondary recipient. Sent and Completed documents will be listed here. Users will be able to download the PDF, view source of documents, copy link in case of sent documents
IVR
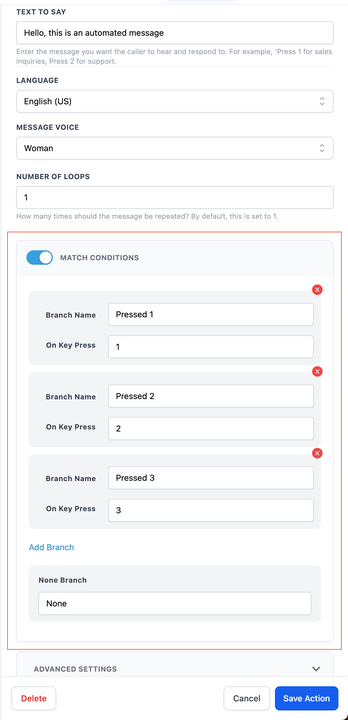
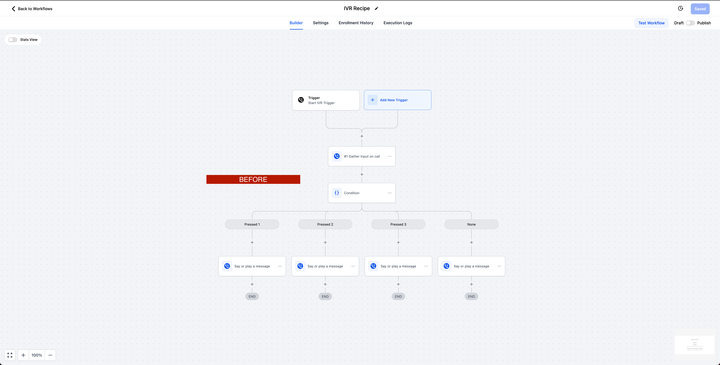
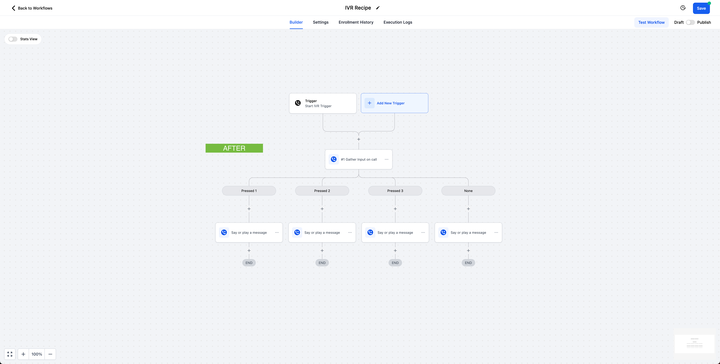
Added Match conditions for IVR Gather Input Action
We have added “match conditions” option for IVR Gather Input action. With this enhancement, the IVR Gather action now contains the branching options “Match condition” for all the Keypress options which the users want to configure in the “IVR Gather” action.
Audit Logs
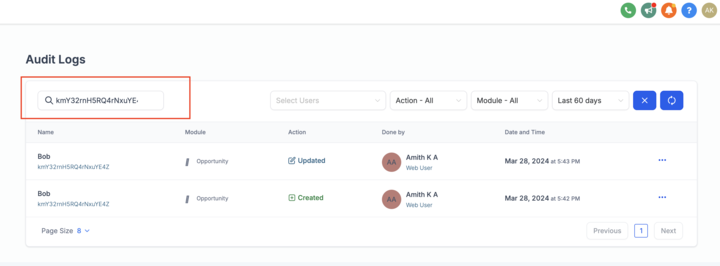
Streamlined Access to Opportunity ID and Audit Logs
Users can now locate the opportunity ID directly at the bottom left of the opportunity dialog box. Clicking on the opportunity ID seamlessly redirects to the audit logs for that specific opportunity.
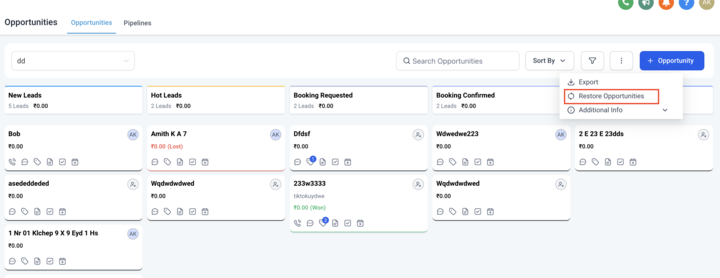
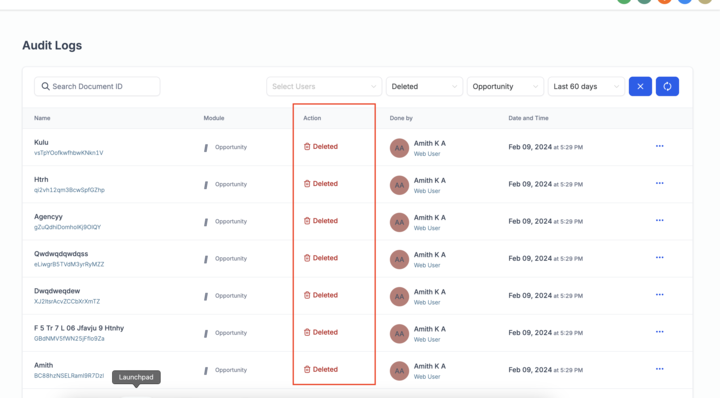
We’ve also added a new option under the kebab menu on the top right of the Opportunities page. Clicking on “Restore Opportunities” opens the audit logs with deleted opportunities filtered.
Payments
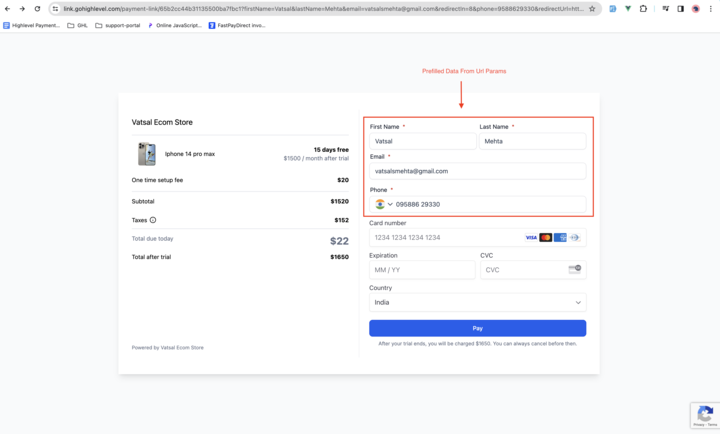
Customized Data Prefilling Support
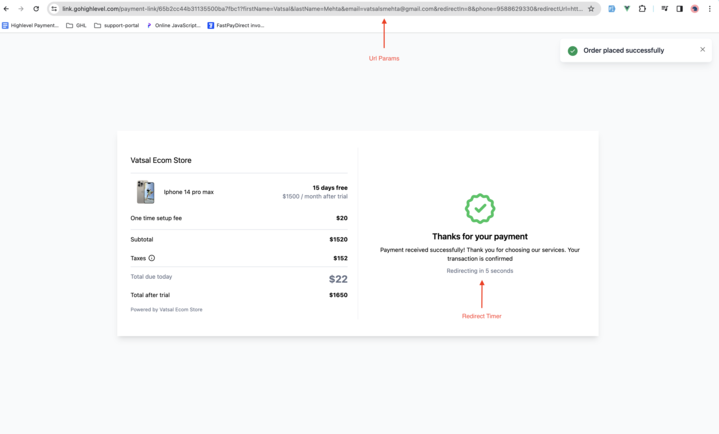
Payment links have been enhanced to support prefilling customer data, streamlining the payment process for business users. Now, by simply appending the customer’s firstName, lastName, email, and phone to the URL search parameters, the payment link will automatically populate with these details when opened.
Additionally, users can utilize URL parameters to redirect customers post-payment to any desired website or URL. Include additional parameters, such as setting a timer for the redirect, and choose whether to redirect within the same tab or a new one.
This level of customization empowers businesses to tailor the post-payment experience according to their preferences and requirements.
Email Builder
Media Thumbnail Support in RSS Feeds
Websites like youtube, now include media thumbnails in their RSS feed. Hence, many of our users have expressed the desire to enhance our RSS campaign capabilities to support this functionality.
We are delighted to introduce support for thumbnails under the media group of RSS feeds. This enhancement ensures a more advanced and visually engaging experience when creating RSS campaigns in the Email Builder.
Conversations
Improved User Experience for Facebook and Instagram Messaging
What’s New?
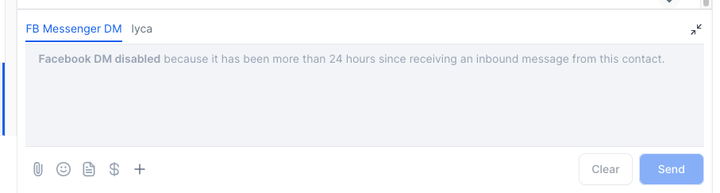
24-Hour Window Notification: Previously, customers encountered frustration when attempting to reply to messages outside Meta’s 24-hour window policy for Facebook and Instagram messenger. They would be met with an error message, causing confusion and inconvenience.
Real-Time UI Feedback: With this release, users will now receive clear and concise UI feedback indicating when they are outside the 24-hour window for sending messages. This proactive notification will help users understand their messaging limitations and manage expectations accordingly.
Temporary Message Suspension: Additionally, users will be informed that they cannot send further messages until they receive a reply from the Facebook/Instagram user. This feature aims to streamline communication and prevent unnecessary attempts to send messages that may not be deliverable.
How to Use:
Simply engage in messaging as usual within our platform.
If you attempt to reply to a Facebook/Instagram message outside the 24-hour window, you will receive clear UI feedback indicating the limitation.
Once a reply is received from the Facebook/Instagram user, messaging functionality will resume as normal.
Live Chat
Capture contact details
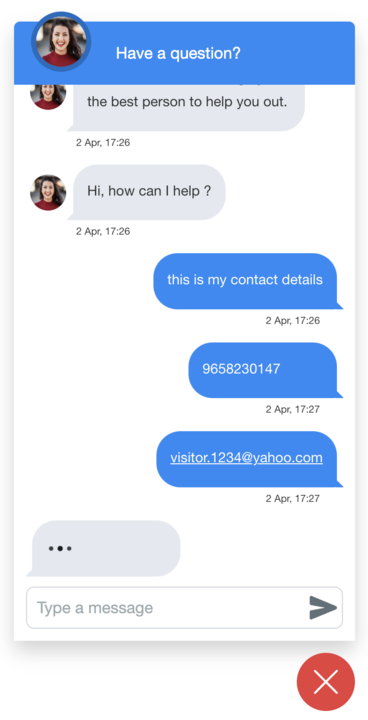
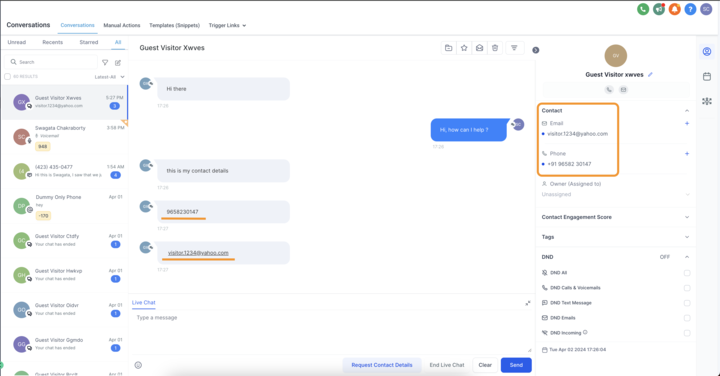
Our live chat feature now automatically captures a contact’s Phone Number and Email if sent through Live Chat message.
For example, if the following message is sent through live chat – Hi, this is my number 9876543210- the system will capture this number as the contact’s phone number.
If the contact already has a phone number, the system will ignore the number in the message. If there is already an existing contact with that phone number, the system will merge the Live Chat visitor contact and conversation with the existing contact.
If the existing contact is a contact created by another visitor (through FB, IG or another Live Chat), in that case the system will not merge the contacts. All the above is applicable for capturing emails as well.
How to Use?
In a Live Chat send a Phone Number or Email as a message. Our system will parse the message and capture the details.
Communities
Search Members By Email & Leaderboard Updates
Search Members by email
Group Admins/Owners can now search for members under the members page while also tagging them in comments and posts using email Ids.
LeaderboardUpdates
Group Admins will now not be a part of the leaderboards to allow for non admin members to rank in leaderboards. We believe this will bring more engagement in the groups by motivating members to generate quality content.
Domains
Migration to CloudFlare (Custom Hostnames)
We are thrilled to announce the migration of new branded domain connections to CloudFlare
Key features & benefits:
Added security features
Easy prevention of DDoS attacks
Easy generation of SSL certificates and auto renewal from CloudFlare
How to switch?
New branded domains
Domain connect: automatically added with domain connect flow
Manual addition: add new CNAME – brand.ludicrous.cloud
Old branded domains:
Navigate to location settings -> General Information
Remove the branded domain -> Save
Re add same domain with domain connect flow/manual flow -> Save
Forms & Surveys
Email Verification
We have finally launched the Email Verification feature for our Forms and Surveys module. This new functionality allows form and survey participants to verify their email addresses directly within the form or survey, enhancing the integrity of the data collected and providing a more seamless user experience.
What’s New?
Email Verification Button: A “Verify Email” button is now displayed next to the email input field in forms and surveys.
Verification Code: Users receive a unique verification code via email, which they need to enter into the form to confirm their email address.
Enhanced Data Accuracy: This feature aims to minimize errors and fraudulent submissions by ensuring that the email addresses collected are valid and accessible by the users.
User-Friendly Process: Designed to be intuitive, guiding users through the verification process smoothly.
Verified Email Field: In addition to the email verification feature, we’ve introduced a “Verified Email” field in form and survey submissions. When an email is successfully verified, it will be marked as “Yes” under the “Verified Email” field, allowing for easy identification of verified email addresses.
How It Works
Users will enter their email address in the designated field of a form or survey.
Upon entering a valid email, the “Verify Email” button will become visible.
Clicking this button sends a verification code to the user’s email.
Users must enter this code back into the form or survey to verify their email address.
Opportunity Custom Fields
With this release, we are thrilled to introduce the ability for users to incorporate opportunity custom fields within forms and surveys. This feature empowers users to enhance their data collection process by seamlessly integrating opportunity-related information into their forms and surveys.
What’s New?
Opportunity Custom Fields: Users can now effortlessly add opportunity custom fields to their forms and surveys, enabling them to gather specific data related to opportunities.
Opportunity Settings Configuration: Users have the flexibility to configure opportunity settings by selecting a pipeline, stage, status, and opportunity value for each form or survey.
Create Pipeline Option: In the opportunity settings modal, users can conveniently create a new opportunity pipeline by utilizing the Create Pipeline option.
Dropdown Categorization: Custom fields are now categorized into two dropdown categories – Contact and Opportunity, facilitating organized data management.
Collapsible Format: All custom fields are neatly displayed under their respective parent folders in a collapsible format, ensuring a streamlined user experience.
Automated Opportunity Creation: Upon form or survey submission, an opportunity is automatically created and mapped to the contact generated from the submission, enhancing efficiency in opportunity tracking.
How It Works
Access the form or survey builder under Settings > Sites.
Navigate to the custom fields section under Add Form/Survey Element.
Select the Opportunity category.
Add desired opportunity custom fields to the form or survey.
Configure opportunity settings as needed and save the form or survey.
Submit the form or survey to automatically generate and generate an opportunity to the associated contact.
Certificates
Custom Values & Preview Certificates
Custom Values in Certificate Builder
We have migrated all custom values to the certificate builder. This allows users to use standard custom values like user, contact and right_now. Users can also use manually created custom values in Settings > Custom Values.
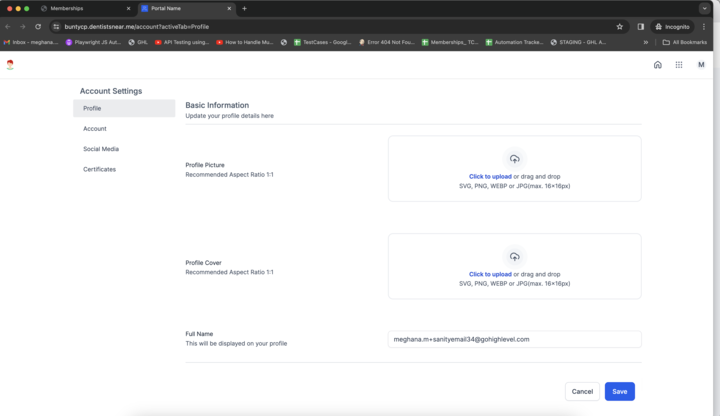
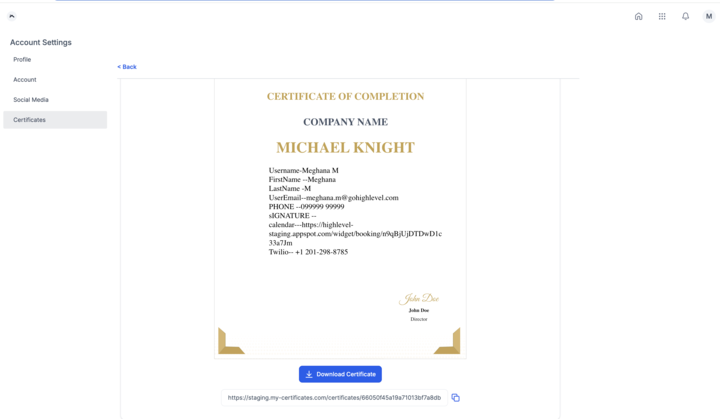
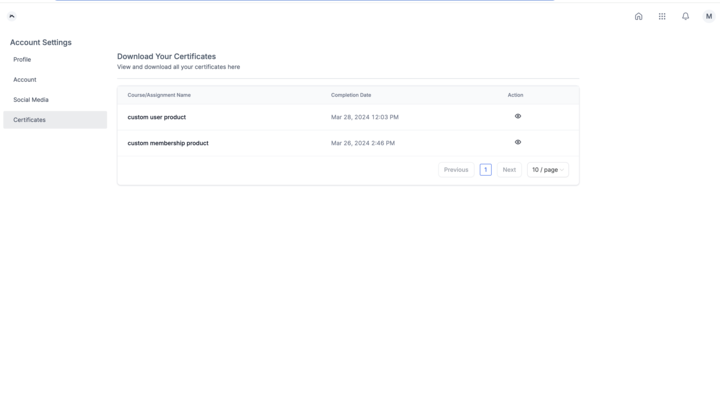
Preview & Download Certificates in Client Portal Preview
We have introduced the ability to download and preview certificates from the client portal.
Courses
Course Notifications for Client Portal Domains
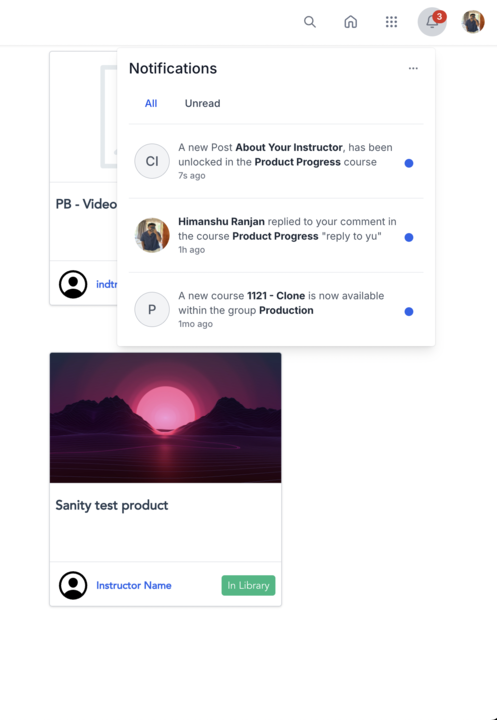
New Notifications
Stay connected with Comments: Notifications will be sent whenever someone comments on a course or replies to a comment, keeping users connected and facilitating smoother interactions within the learning community.
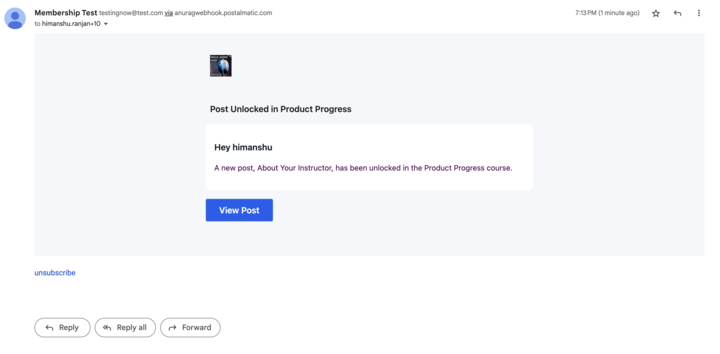
Unlocked Content: Receive notifications whenever a previously locked post or category becomes accessible.
Timely Access to Drip Content: Receive notifications when drip content becomes available in your courses.
Enabling Instructors Interaction: Instructors will now receive notifications for learner comments, fostering better communication between them and learners.
UI Enhancements
We’ve Integrated a single Navbar component across all the child apps within client portal to enhance the portal experience.
Contacts
Automate Follower Management
Previously, users faced challenges automating the addition and removal of followers in contacts, leading to inefficiencies and manual workarounds. As a response, we’ve introduce the ability to add and remove followers directly within contacts via workflows.
How It Works:
Seamlessly integrate the add and remove follower actions into your workflows in the Contacts section.
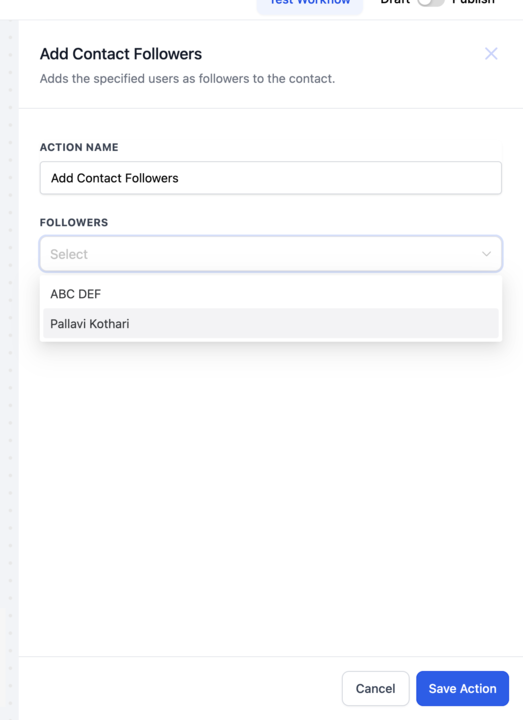
Use the “Add Contact Followers” for automating addition of followers to a contact by selecting users you’d like to add as the follower
Use the “Remove Contact Followers” for removing all or selected followers from the contact.
E-Commerce
Shipping & Delivery Rates
E-commerce store owners can now define manual delivery charges based on shipping zones. A zone can be created by selecting countries (by “Add Zone”) and manual rates can be defined inside a zone using Add Rates. Store owners can define multiple pricing for each zone, and multiple Shipping zones can be created with different delivery charges.
While defining rates, delivery rates can be defined according to the total amount in the cart. For eg- Free Shipping, if the order amount is above $500 or else, charge $10 if it’s below $500.
This feature can be found under Payments > Settings > Shipping & Delivery.
Workflows
Facebook & Instagram Comment Automation
Instantly engage with each comment so you attract customers faster than ever before and never miss an opportunity with a potential lead.
To use this feature Facebook account should be integrated. To use the actions in the workflows, the Facebook User comments on a post or Instagram User comments on a post trigger should be available.
Important points to note:
In triggers “Page is” is the first field to be selected. All the other fields are dependent on it and if the “Page is” filter is deleted all the other filters will also be deleted.
Up to 3 buttons can be added in the Interactive Messenger action.
No further actions can be added after the “Call” button.
After the call button the contact will directly move to the Default Branch.
By default a wait of 10 seconds is added which is editable.
If no button is selected, contact will go to the “Default Timeout” branch.
If Reply to DM is selected, the system will check if there is any conversation that happened within the last 24 hrs and if yes then it’ll send a message else it’ll fail to send.
Reply to DM will be used in 2 scenarios. First one is when you want to start the conversation with the user who has send you a DM and second when you want to continue the conversation with the user after the Reply to comment via DM. For eg. when in the first action Reply to comment via DM is selected as Reply Type, subsequent actions will haveReply to DM as Reply type.
When using Reply to comment via DM, if the contact has not replied to the First Interactive Messenger action then Interactive Messenger Action will not work in the Default Timeout Branch.
For Reply to comment via DM a 7 day window is applicable. You need to send a reply to the comment via DM in 7 days otherwise the delivery will fail.
Funnels & Websites Builder
Support for Subscript and Superscript in Text Editor
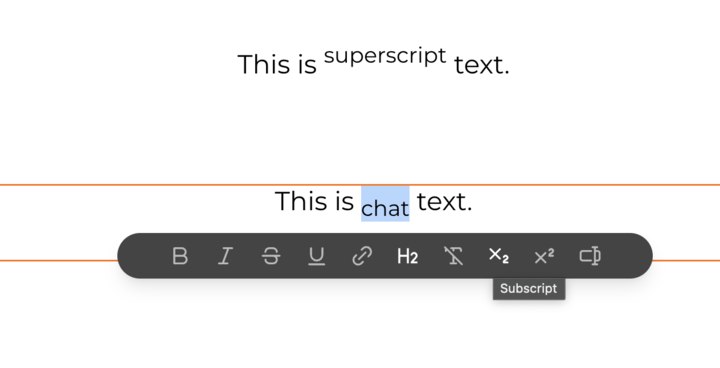
This new feature allows users to effortlessly format their text with raised (superscript) or lowered (subscript) characters, adding versatility and clarity to their content in funnels or websites.
The superscript and subscript uses the sup and sub tags for better SEO and HTML structure.
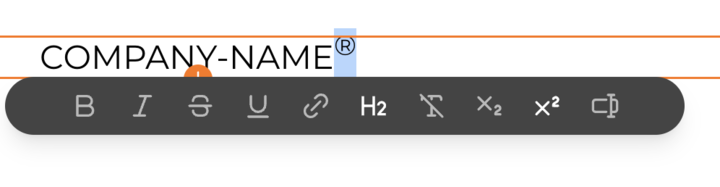
Superscript text is generally used for exponents, measurement units, or trademark symbols like TM, SM, ® etc.
Subscript text is generally used for mathematics and chemical formulas. It can also be used to denote footnote numbers.
How to use it?
Add or edit any elements with a text editor like headline, sub-headline, paragraph etc.
Select the characters or words.
Toggle the subscript or superscript icons from the text editor bubble menu.
New Features In Labs
Statistics Dashboards in Email Campaigns
We’re thrilled to introduce Enhanced Email Campaign Statistics, offering detailed analysis reports for the past 7 and 30 days. Unlock valuable metrics and track performance trends effortlessly.
What does it include?
Conversion Summary: Gain insights into key metrics such as orders placed, total revenue, order rate, and average order value at a glance.
Engagement Summary: View a summarized funnel overview of delivered, opened, clicked, and ordered metrics for deeper engagement analysis.
Performance Analysis: Track metric trends over time including sent, opened, clicked, and unsubscribed metrics.
Top Performing Emails: Identify the top 5 revenue-generating emails to set performance benchmarks effortlessly.
Recent Email Analysis: Access the 10 most recent emails for in-depth analysis.
Coming Soon:
Analyze campaigns over the last 60 and 90 days for broader insights.
Identify top-performing campaigns based on open rates.
How to Access:
Navigate to Email Marketing.
Click on Campaigns.
Select the Statistics option.
Choose the date range: last 7 or 30 days.
For performance trend analysis, select the relevant metric from the dropdown in the Performance Analysis section.
Note:
These reports currently focus solely on emails from Email campaigns. This is currently available on Beta Labs, so ensure you have the permission enabled under Settings>Labs.