
Today’s post is going to walk you step by step through the initial setup of your FG Funnels account. In our community, we call this the “hazing” because it’s the most techy part of the whole thing. We have Natalia who hosts a daily call where you can get support from her. It happens every day at 11am EST. Click here to join one!
Once it’s done, it’s done!
We recommend you pay someone to do it if you’re not up for the task, otherwise, let’s roll up our sleeves and get started.
First things first: You will need several things to make setup smooth and painless. And while there are multiple ways to do the same thing, we are giving you the ideal scenario. The more tech savvy you are, the more you can go rogue.
Everyone will need:
*Many of you will want to know what kind of domain. I’ll explain in a minute!
Yes you can set up your account without all of this, but this is the easiest way. I promise it’s worth it to just do what I suggest.
We do have all these steps on video in our Tips + Tricks course here.
Let’s first start with best practice for how to use domains in general. FG Funnels is a full website and funnelbuilding platform with membership capabilities. You can choose to have EVERYTHING on one domain,
You would create different paths like:
But more times than not, it’s actually easier to have a few domains you’re working with.
So perhaps it’s like this:
Some people like to use subdomains (like school.cat.com, and course.cat.com), but in my experience, there’s more tech savviness involved than if you just forked over the extra $10.99 a year for several domains. For now, DON’T do this.
Basically, get comfortable with having multiple domains in your business. It’ll make your life easier. They aren’t expensive and give you flexibility.
For setup, we’re going to start with ONE domain. Regardless of how many other domains you have right now in other places, we want to use an UNUSED one for setup. You can change it later.
Buy a generic domain. For example, my main domain is juliestoian.com. So maybe I will buy…
Pick something and buy it at GoDaddy or Namecheap (we like GoDaddy since it’s fairly simple to navigate).
If you’re a domain hoarder and have one you can use, perfect.
ONE LAST SUPER important point. If the unused domain you’ve chosen happens to be in a place like Wix, Squarespace, or ClickFunnels, there’s an issue here.
Because these monthly subscriptions allow you to buy domains right in their software, they do this to keep you on the platform. You essentially cannot cancel the service until you release the domain from that platform. That is a TRANSFER of ownership. Depending on the company it might be a PITA. So you need to contact them and transfer ownership to a place like GoDaddy.
This next step is critical. Most people don’t realize what goes into domain management, so without putting you all to sleep, I’ll say this:
You want a fast DNS Zone Editor. Most places like GoDaddy and others take 24 hours to propagate DNS changes with their dinky zone editors. Not a good idea. Secondly, they don’t have any fancy page rules features that you need to redirect www to non-www and so on and so forth.
Lastly, we want your pages to load quickly. This is why we recommend everyone FIRST place their domain in CloudFlare.
So in this step, we’re taking your domain, adding it to CloudFlare, and giving your DNS zone editor an upgrade! You can use a FREE CloudFlare account.
When you’re finished, this will be your setup:
To make this happen, we need to change the nameservers of the domain. It’s the thing that assigns the domain to its corresponding zone editor. When you buy a domain at GoDaddy, the nameservers say GoDaddy. Now we want them to say Cloudflare.
For this step, we’re going to need two tabs open on your computer. On one tab, open up your DNS settings in CloudFlare. On the second tab, navigate to your settings in your FG Funnels account.
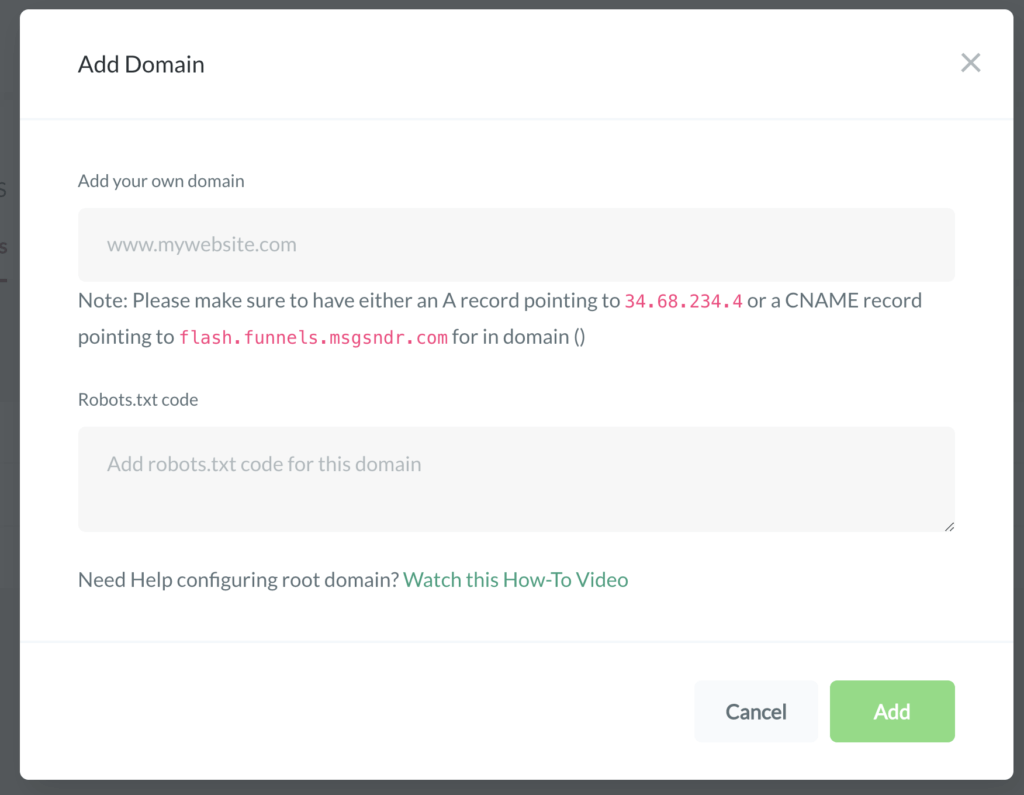
6. Add that into Cloudflare. Click ADD NEW RECORD. This is what it should look like. Click save.

7. Then toggle back to FG Funnels, and now click ADD. It’s VERY possible it’ll throw an error. Even though DNS in Cloudflare is fast, it takes a bit of time.
8. Get up, walk the dog, make a cup of tea, and then come back. Hit Add again. It should work this time.
Now that the root domain is added, we need to deal with people who might type in www.yourdomain.com. We want that to end up in the right place and not give a 404
9. In Cloudflare, click ADD RECORD. This is what it should look like (make sure it’s proxied for redirect):

Almost there!
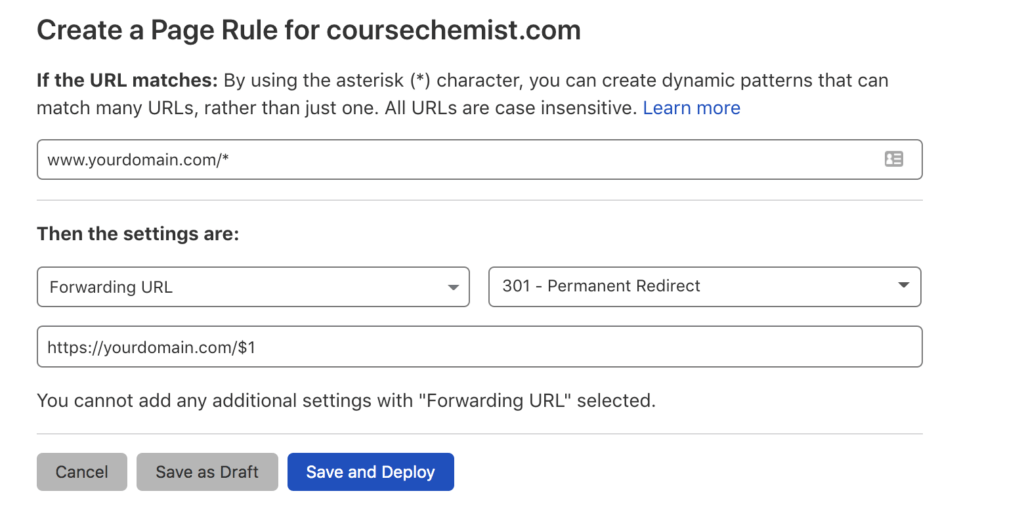
We need to set up a page rule (this is another handy feature of Cloudflare). We want people who type in www.yourdomain.com/contact or any other path, to easily get to your site.
10. Go to Page Rules in Cloudflare. Set up a page rule like this. Replace yourdomain.com with your actual domain.
Some of you might be saying, okay this is fine, but this isn’t the final domain I want. I have a real domain.
Go ahead and set up EVERYTHING – your website, funnels, etc. using this domain. Once it’s ready to go live, you can then transfer your existing domain into FG Funnels using the steps we outlined.
PLEASE NOTE… if you have a domain that has lots of subdomains, email addresses, etc. when you move the domain into Cloudflare, it moves all the records. Sometimes the proxy setting can make things a bit wonky. You might want to hire someone to do it so you don’t have to stress.
Okay so now we’re moving onto setting up your email inside of FG Funnels.
In order to use the full features of the automation, we need an SMTP provider. We wrote an ENTIRE post on this here, which explains in easy-to-understand language, what SMTP is.
There are lots of SMTP providers you can use: Our recommendation is the $35/m version of Mailgun. We could spend a lot of time on this post explaining why, or we could say – after 1500+ setups, this is the best. Use this.
When you get an account, PLEASE make sure you’ve signed up for that plan specifically, AND you’ve verified your account info first. The FREE account will not work as intended in our software – there will be throttling (which means limited sending) and you also won’t see replies in your inbox. Choose the $35/m plan.
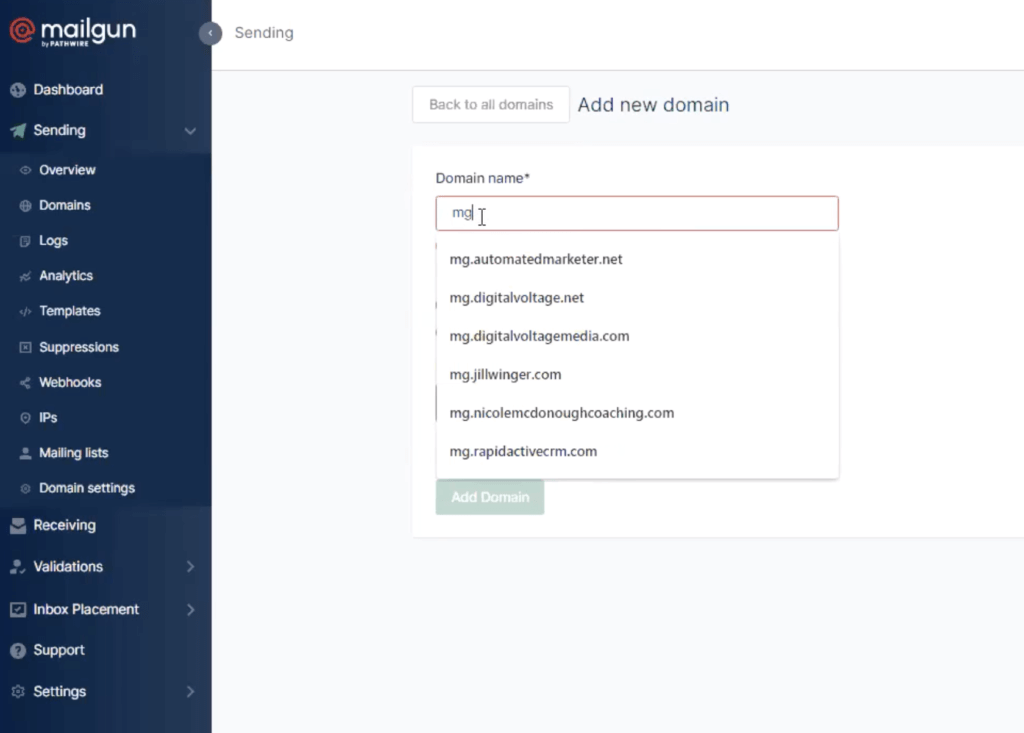
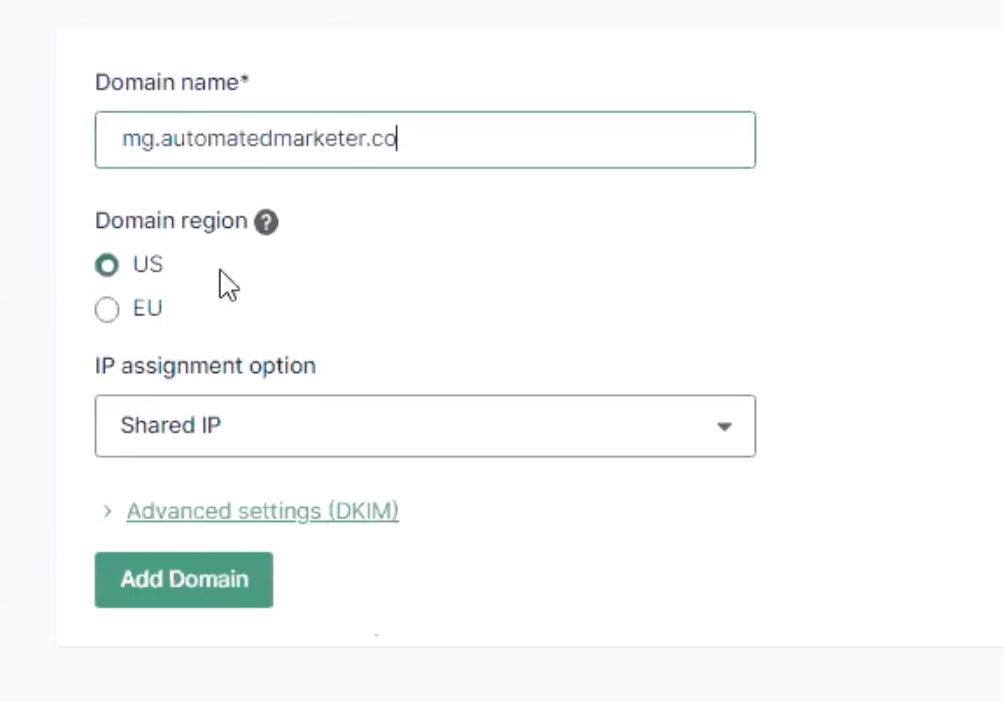
Once all that is done, follow the steps:
IMPORTANT if you’re in the EU. Do not choose EU because it will not work. Just choose US.
So what did we just do? We created a subdomain that your emails will send from. A lot of people don’t know this, but every email you send actually uses a domain. Since we’re using our main domain for our funnels, etc., we use a SUBDOMAIN for the email.
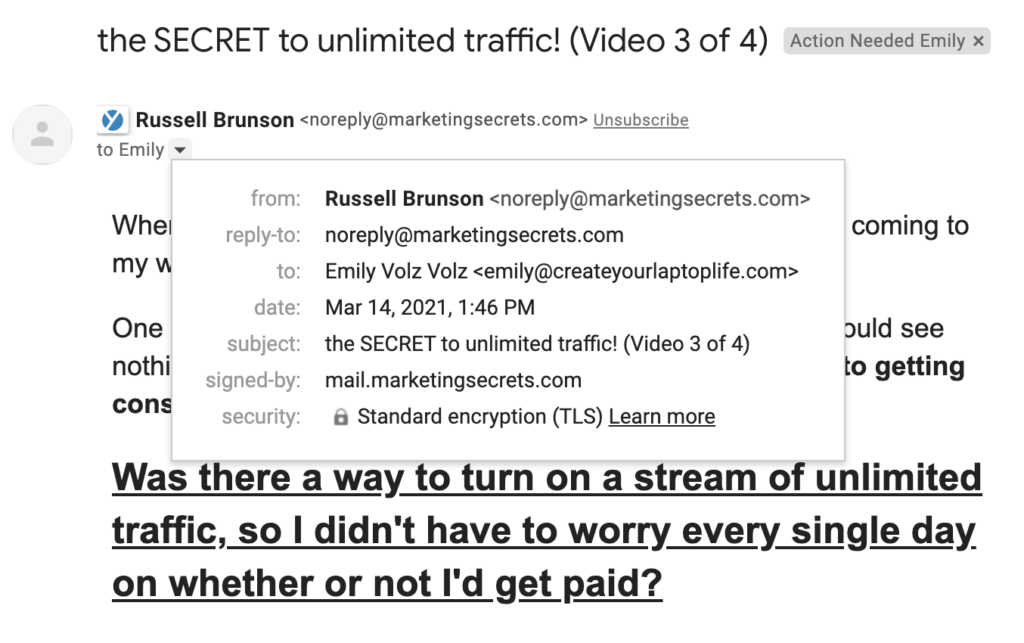
Every marketing email has a domain. Check this email we got from Russell Brunson. Where it says “Signed by” – that’s the domain he’s using. Mail.marketingsecrets.com.
Most basic email service providers do all this for you using their own subdomains. Ultimately this impacts deliverability so it’s best to have your own, and that’s what we’re having you do in Mailgun.
Now that we’ve done that, we have to update our DNS records. If you’ve been following along, you’re going to log into CloudFlare. If you don’t use CloudFlare, log into your domain registrar and go to manage DNS.
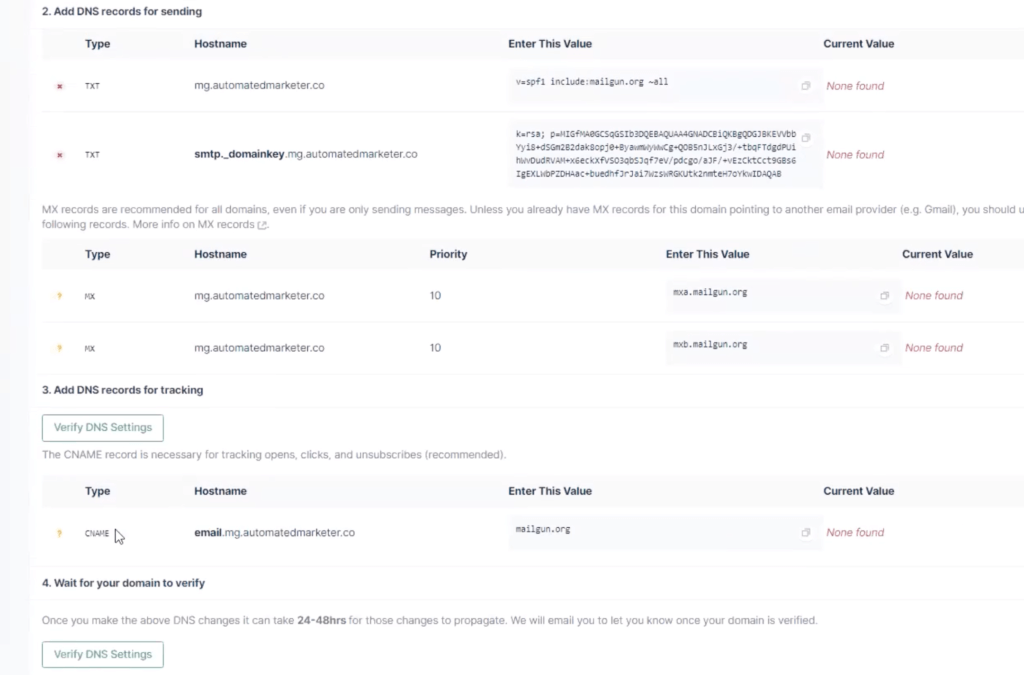
We have to add a few different types of records:
Mailgun is going to give you all the instructions as shown here.
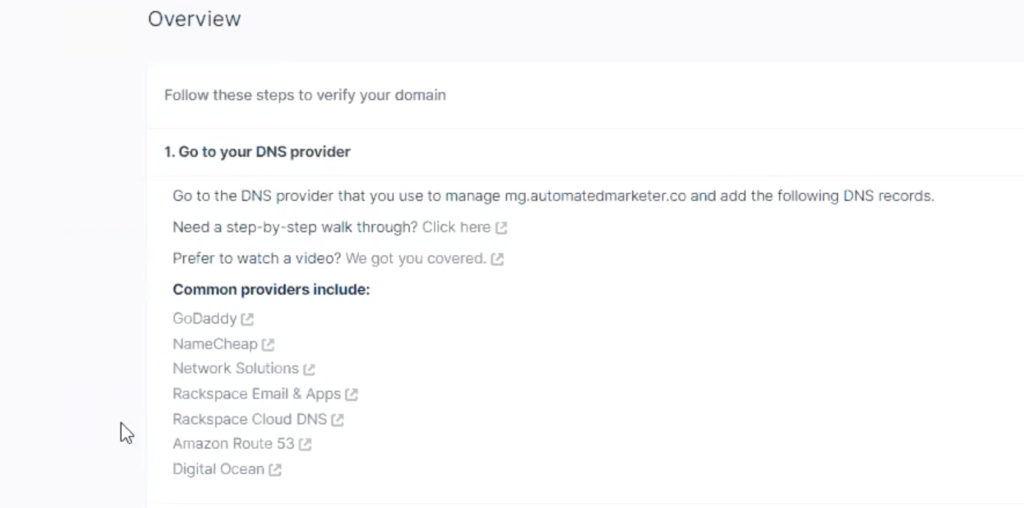
They’ve provided instructions for lots of classic domain registrars, though remember – you will do this in cloudflare if you are using cloudflare. You’ll also notice they are listed below the instructions.
You can watch our team walk through it in this video (it starts at about 12 minutes in).
When you’re done hit VERIFY DNS settings in mailgun. If you are using Cloudflare, it’ll be minutes. If you’re using something else, it could be 24-48 hours before those settings verify.
Now it’s time to give us your API key so we can turn on your mailing feature.
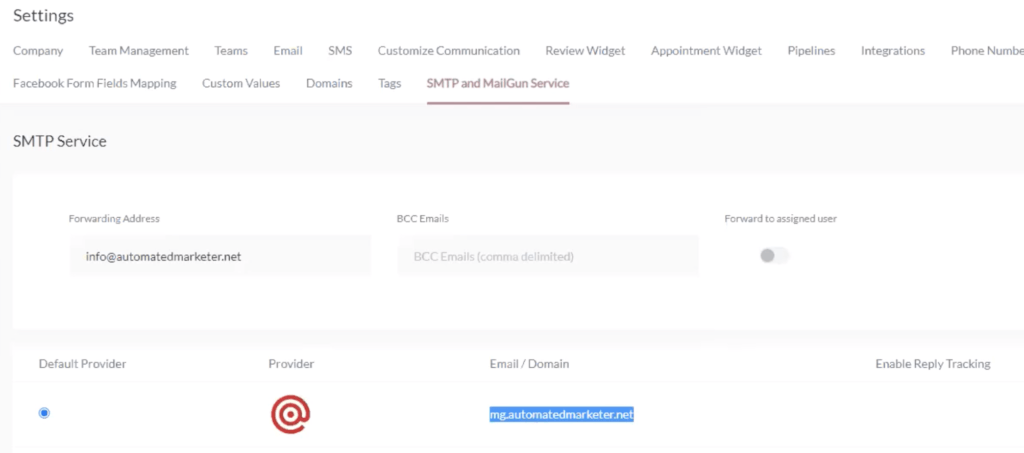
Be sure to click the little blue icon to make it your DEFAULT provider.
You can also add a forwarding address so your replies to your email go right into your inbox. PLEASE NOTE, when you do this, if someone replies to an email and you start responding from your inbox instead of the FGF app, it “breaks” the conversation in FGF and you won’t see the remaining convos in there. Just a heads up on that.
This is an ongoing step you do every time you set up a new campaign or automated sequence.
Inside the campaigns, you want to configure the send + from name.
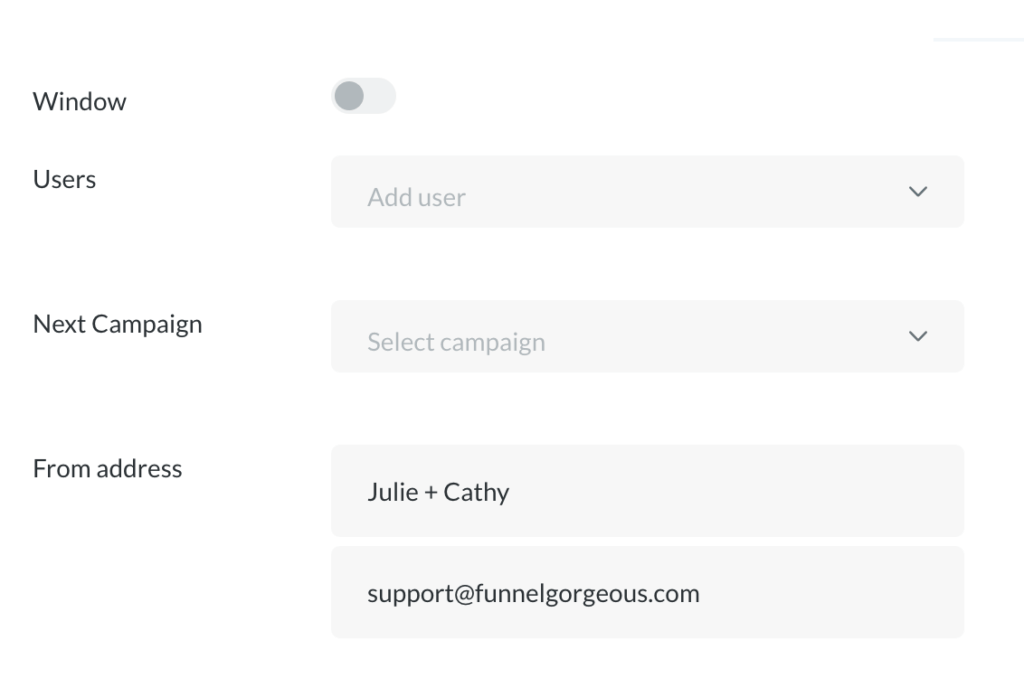
There are two ways to do it:
This is where you might realize, “Oh wait! I don’t have a professional email address.” That FROM email address should be a professional address like [email protected] – not [email protected]. You don’t want to just put anything in those fields because it could make your email go to spam.
Our best advice is to have a professional email address with Gsuite or what’s now called Google Workspace. Then use that same email address for every campaign. It’s important that the name and email address match what it says in your inbox.
If you followed along so far, you have your domain setup, and you now have your Mailgun setup and you can see the replies to your email in the conversations tab of FG Funnels and possibly in your inbox if you set up forwarding.

![]()
![]()
![]()
![]()