Here are our release notes for FG Funnels from September 27th, 2023 through October 4th, 2023. If you have any questions about these updates, or other questions about FG Funnels, please reach out to [email protected] or live chat in the app and our team will be happy to help.
Affiliate Manager
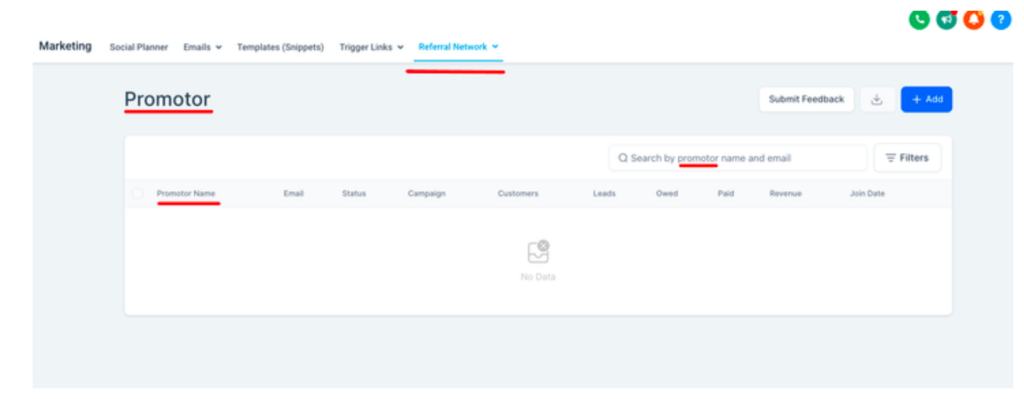
Affiliate tab Customization
Name Affiliate manager tabs to anything you like in any language with the new Catalyst Network Command Center! With these dynamic customization settings, you can Name the affiliates as promoters or referrers, Campaigns to Funnels, Payout to Payment.
Renaming tabs from “Affiliate Manager” to a different name can offer several advantages:
Customization: By choosing a name that aligns more closely with your specific operations or industry, you can tailor the tab’s label to better reflect its purpose within your system.
Clarity and Understanding: A new name can make the tab’s function more intuitive, reducing the potential for confusion among users who may not be familiar with the term “Affiliate Manager.”
Alignment with Branding: The renamed tab can be designed to better align with your brand identity, creating a more cohesive and professional user experience.
Increased User Engagement: A more descriptive or appealing tab name can potentially draw more attention and encourage users to explore and engage with the content or features behind it.
Improved User Experience: A well-chosen tab name can enhance the overall usability and navigation of your platform, making it easier for users to find and access the information or tools they need.
Enhanced User Satisfaction: When users find it easier to locate and use features, they are more likely to have a positive experience with your platform, which can lead to higher satisfaction and retention rates.
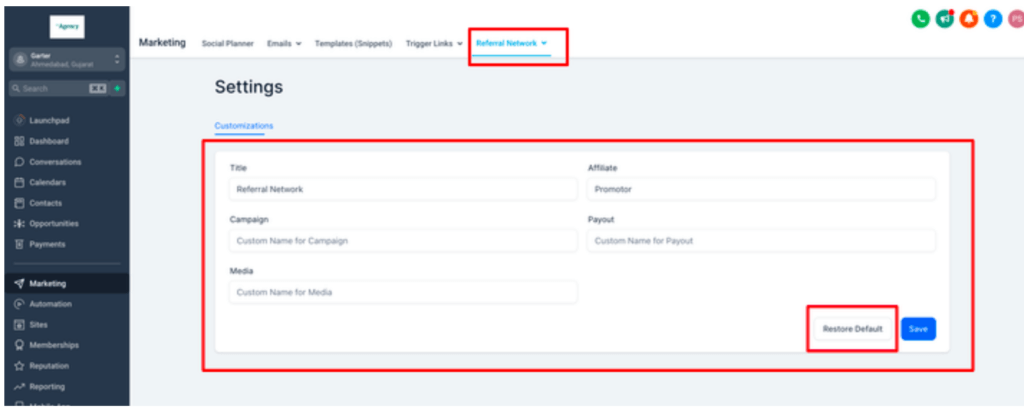
How to rename the Affiliate Manager?
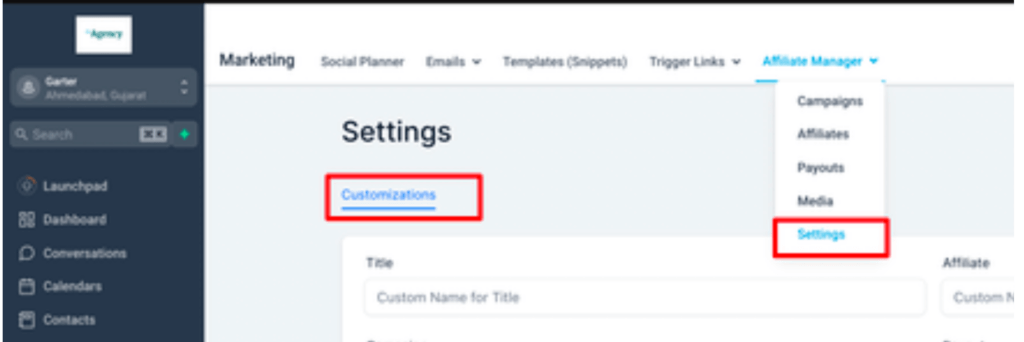
Go to Marketing > Affiliate manager
Go to Settings in Affiliate Manager
Rename the tabs according to your brand
Proposals and Estimates
Automatic Invoice Creation
Now, businesses have the power to effortlessly create invoices right after a potential lead accepts or signs a proposal/estimate.
What’s Included:
The generated invoice mirrors the line items, taxes, and discounts applied to the products list within the proposal/estimate.
Businesses can conveniently review the invoice, make any necessary edits, and send it to their client for payment using the “View Invoice” action in the finalized list view.
Rest assured, if there are no product line items associated with the proposal/estimate, an invoice won’t be generated.
Furthermore, if the document contains multiple product list elements, we’ll create a comprehensive invoice that combines all line items and discounts associated with each element.
Workflows
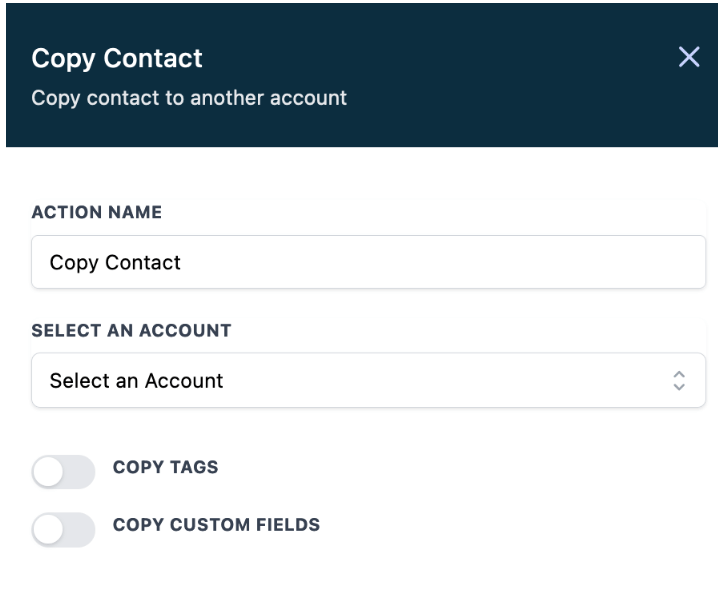
New Premium Action -> Copy Contact to another Sub-Account
Story behind it
After releasing Inbound Webhooks, our clients found ways to do many many things we never anticipated
One of these things (that even brought a couple of lovely tickets our way) was the new ability to Webhook Out and Webhook In Contact Details from one Sub-account to another.
It was a very clever workaround, but the functionality seemed straight forward for us to build out, so we went to the drawing table and started planning it
Why did we do it?
Even though there is a workaround, most clients won’t figure that out on their own, besides, the workaround can have some issues also within it
Clients will now be able to have Contacts shared across Sub-accounts and with that provide their different approaches, automations, processes and so on depending on the Sub-account it is in.
This will allow them to be more organized, in a simple manner, just by adding a Workflow Action with a few clicks.
How did we do it?
UI: New Premium Action where you can select the Sub-Account and option to copy tags and custom fields.
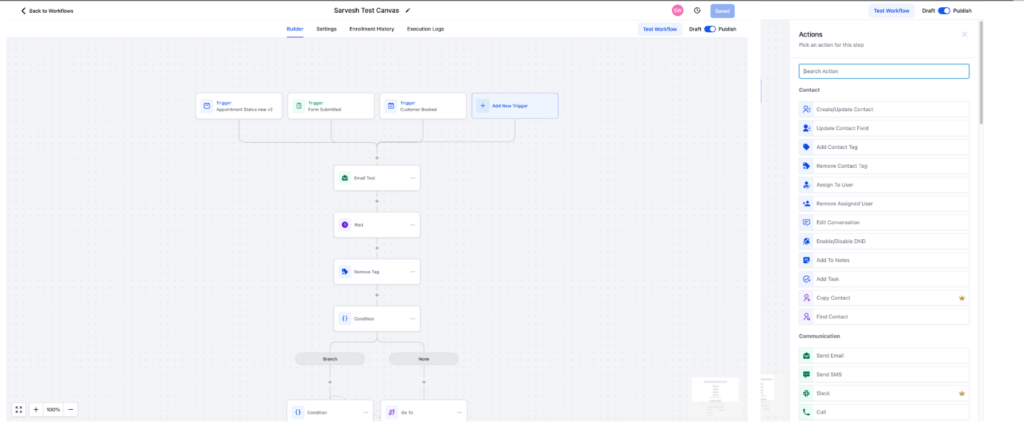
Reorganized Actions and Triggers(Beta)
Actions and triggers have been regrouped into new categories for easier navigation.
Each category is now color-coded to provide a visual aid in distinguishing between different types of actions and triggers.
Enhanced Sidebar Design(Beta)
The header and footer of the sidebar have been updated.
Labs (Experimental Features)
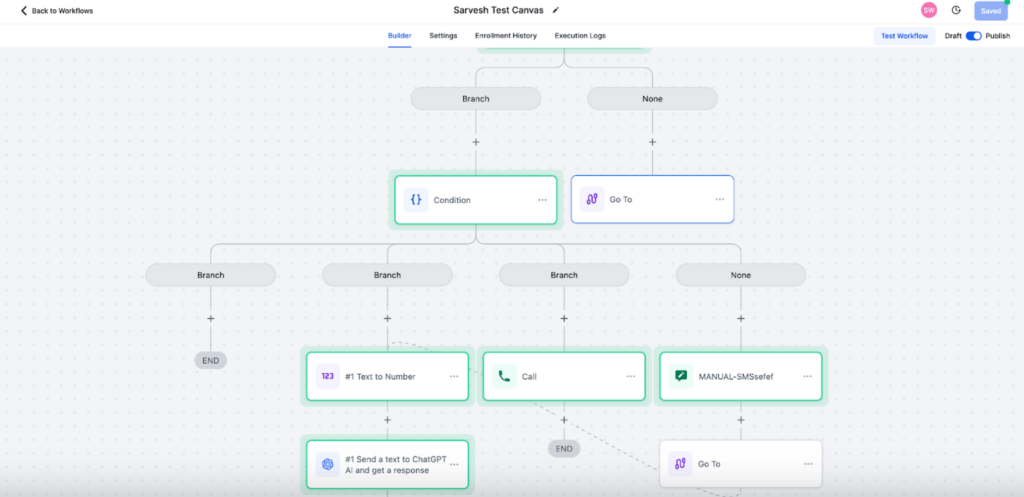
Revitalized Workflow Builder:
The workflow builder has undergone a major revamp to enhance usability and performance.
Transitioned to using vueflow library for a more robust under-the-hood operation.
Improved Workflow Visualization:
Introduced Zoom In/Zoom Out functionality to aid in navigating large workflows.
The new Infinite Canvas layout provides a boundless space, making it easier to manage complex workflows.
Incorporated d3 integration to intelligently calculate node positions, ensuring optimal layout and readability.
Added ‘Fit to Screen’ feature to quickly adjust the workflow view to fit your screen.
Introduced a Minimap for better navigation within large workflows
How do I enable the New Workflow UI in my location?
Go to location settings -> Labs -> Enable “New Workflow Builder” feature
Conversations
Emails in Conversations
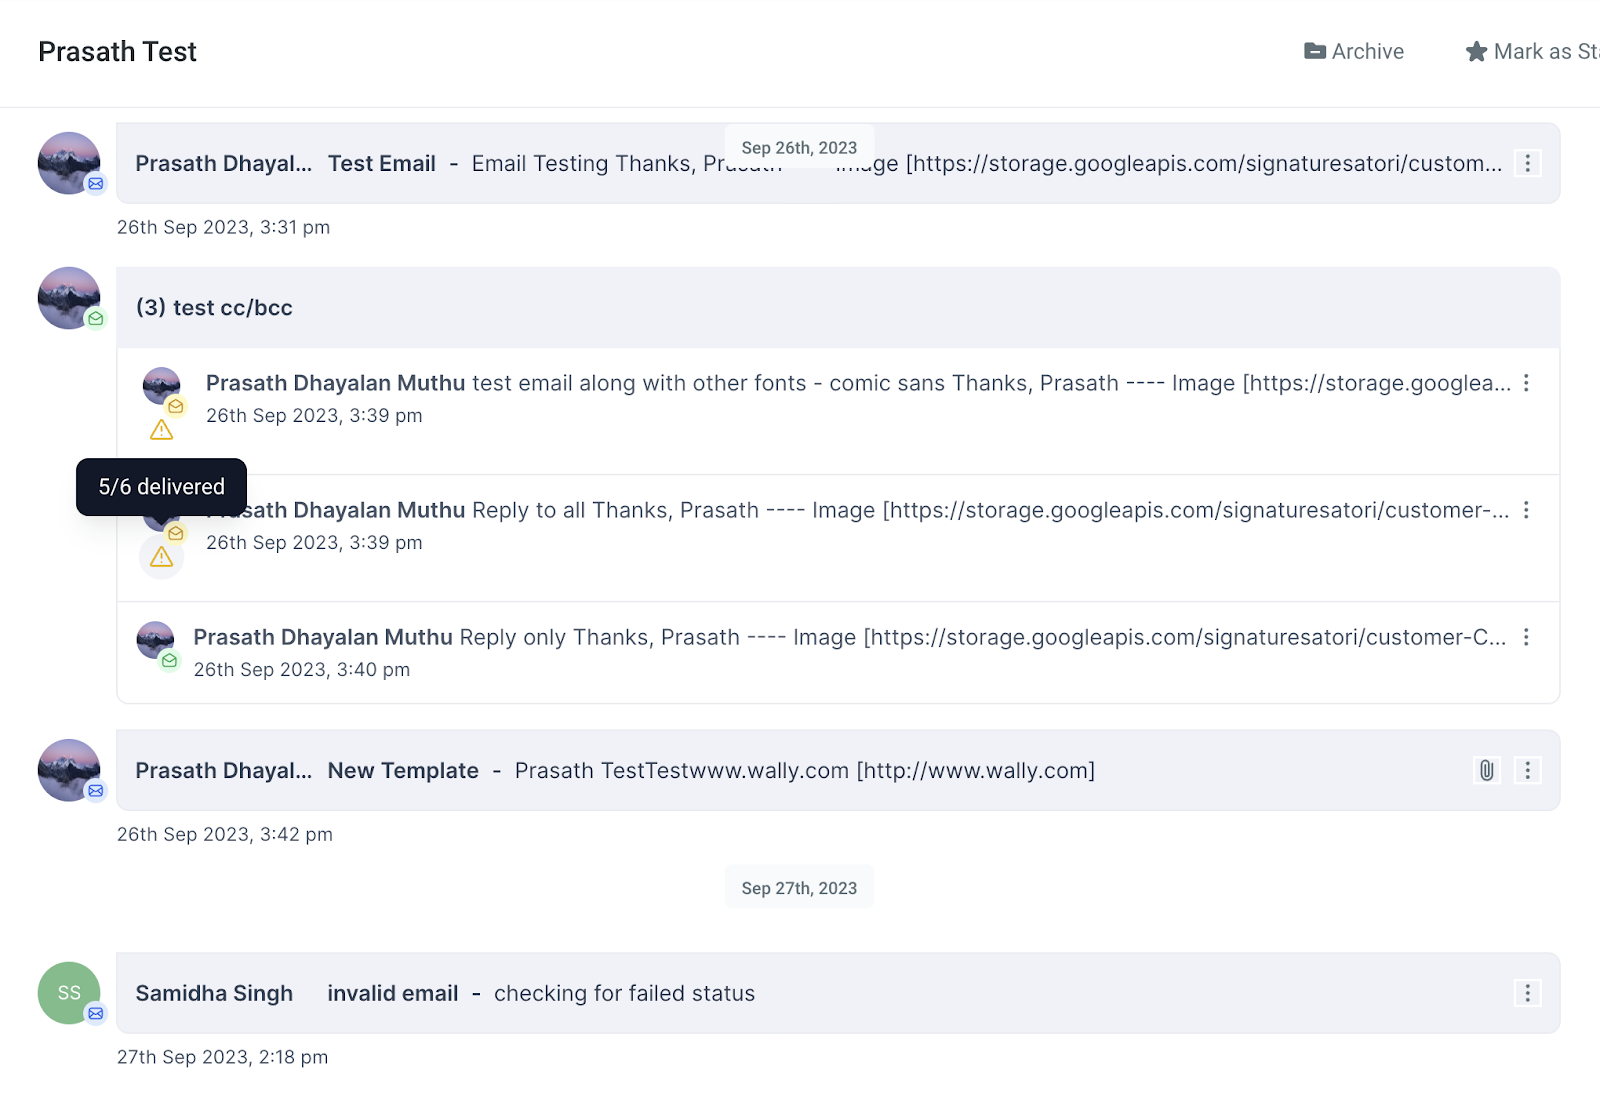
We have enhanced the way emails appear in Conversations. This will enable users to manage their communications in a more streamlined and effective way
What’s new:
Email Threading : Emails are now organized into easy-to-follow threads. All emails will appear in chronological order, to manage conversations efficiently.
Status Tracking: Users can gain real-time insights when an email has been opened, delivered, or failed. If there are multiple recipients, we have introduced partial delivered status as well.
Sleek View: Users can now view all the info about their emails in a single line. This condensed view will enable users to get a brief overview at a single glance, making it easier for them to navigate through multiple communication at the same time
Reply and Reply all in threads: Users can choose to send replies to just the ‘from recipient’ or reply to ‘all the recipients’ in the email, making it easier to manage threads without the hassle of manual recipient selection.
Impact:
Efficient Communication: The new email look simplifies email threading, ensuring all related messages are intuitively grouped together for a more efficient conversation flow.
Enhanced Transparency: Status tracking provides valuable feedback on the delivery and engagement of users’ emails, which helps in improving communication strategy.
Simplified Inbox Management: The sleek condensed view offers a clutter-free inbox, reducing distractions and enhancing productivity.
Availability:
The feature is available in Labs by the name ‘Emails in Conversation’
Email Builder
Save All Your Elements
Saved elements in an email builder are like your secret weapon for creating stunning, on-brand emails in a flash! They’re the pre-designed magic that makes your campaigns pop and ensures every email shines with your unique style and message. With these gems at your fingertips, you’ll breeze through your email marketing with style and consistency!
Here are some common examples of saved elements in an email builder:
Headers and Footers: Standardised headers and footers with your company’s logo, contact information, social media links, and other branding elements. These can be added to emails consistently.
Call-to-Action (CTA) Buttons: Reusable CTA buttons with different text and styles that you commonly use in your emails. This ensures a consistent look and encourages action from your subscribers.
Text Blocks: Common text blocks such as product descriptions, company introductions, or boilerplate content that you frequently include in your emails.
Image Galleries: Pre-designed image galleries or carousels that showcase products or services. You can swap out images as needed.
Social Media Icons: Standardised social media icons and links to your social profiles that can be added to your emails.
Newsletter Sections: Sections for news or updates that you regularly share in your email newsletters.
Testimonials: Pre-formatted sections for customer testimonials or reviews.
Legal Notices: Sections containing legal disclaimers, unsubscribe links, and privacy policy information required for compliance with email regulations.
Using an email builder to save elements or templates can offer several advantages:
Time Efficiency: Saving elements allows you to reuse them in future emails, saving you time on design and content creation.
Consistent Branding: You can maintain a consistent look and feel across all your emails, reinforcing your brand identity.
Reduced Errors: When you save elements, you reduce the chances of making mistakes or omitting important information, as you can use tested and approved templates.
Improved Productivity: It enables you to create emails more efficiently, freeing up time for other tasks or projects.
Customization: You can customise pre-saved elements to suit specific campaigns or messages, without starting from scratch.
Collaboration: If you’re working in a team, using saved elements can streamline collaboration, as everyone has access to approved templates.
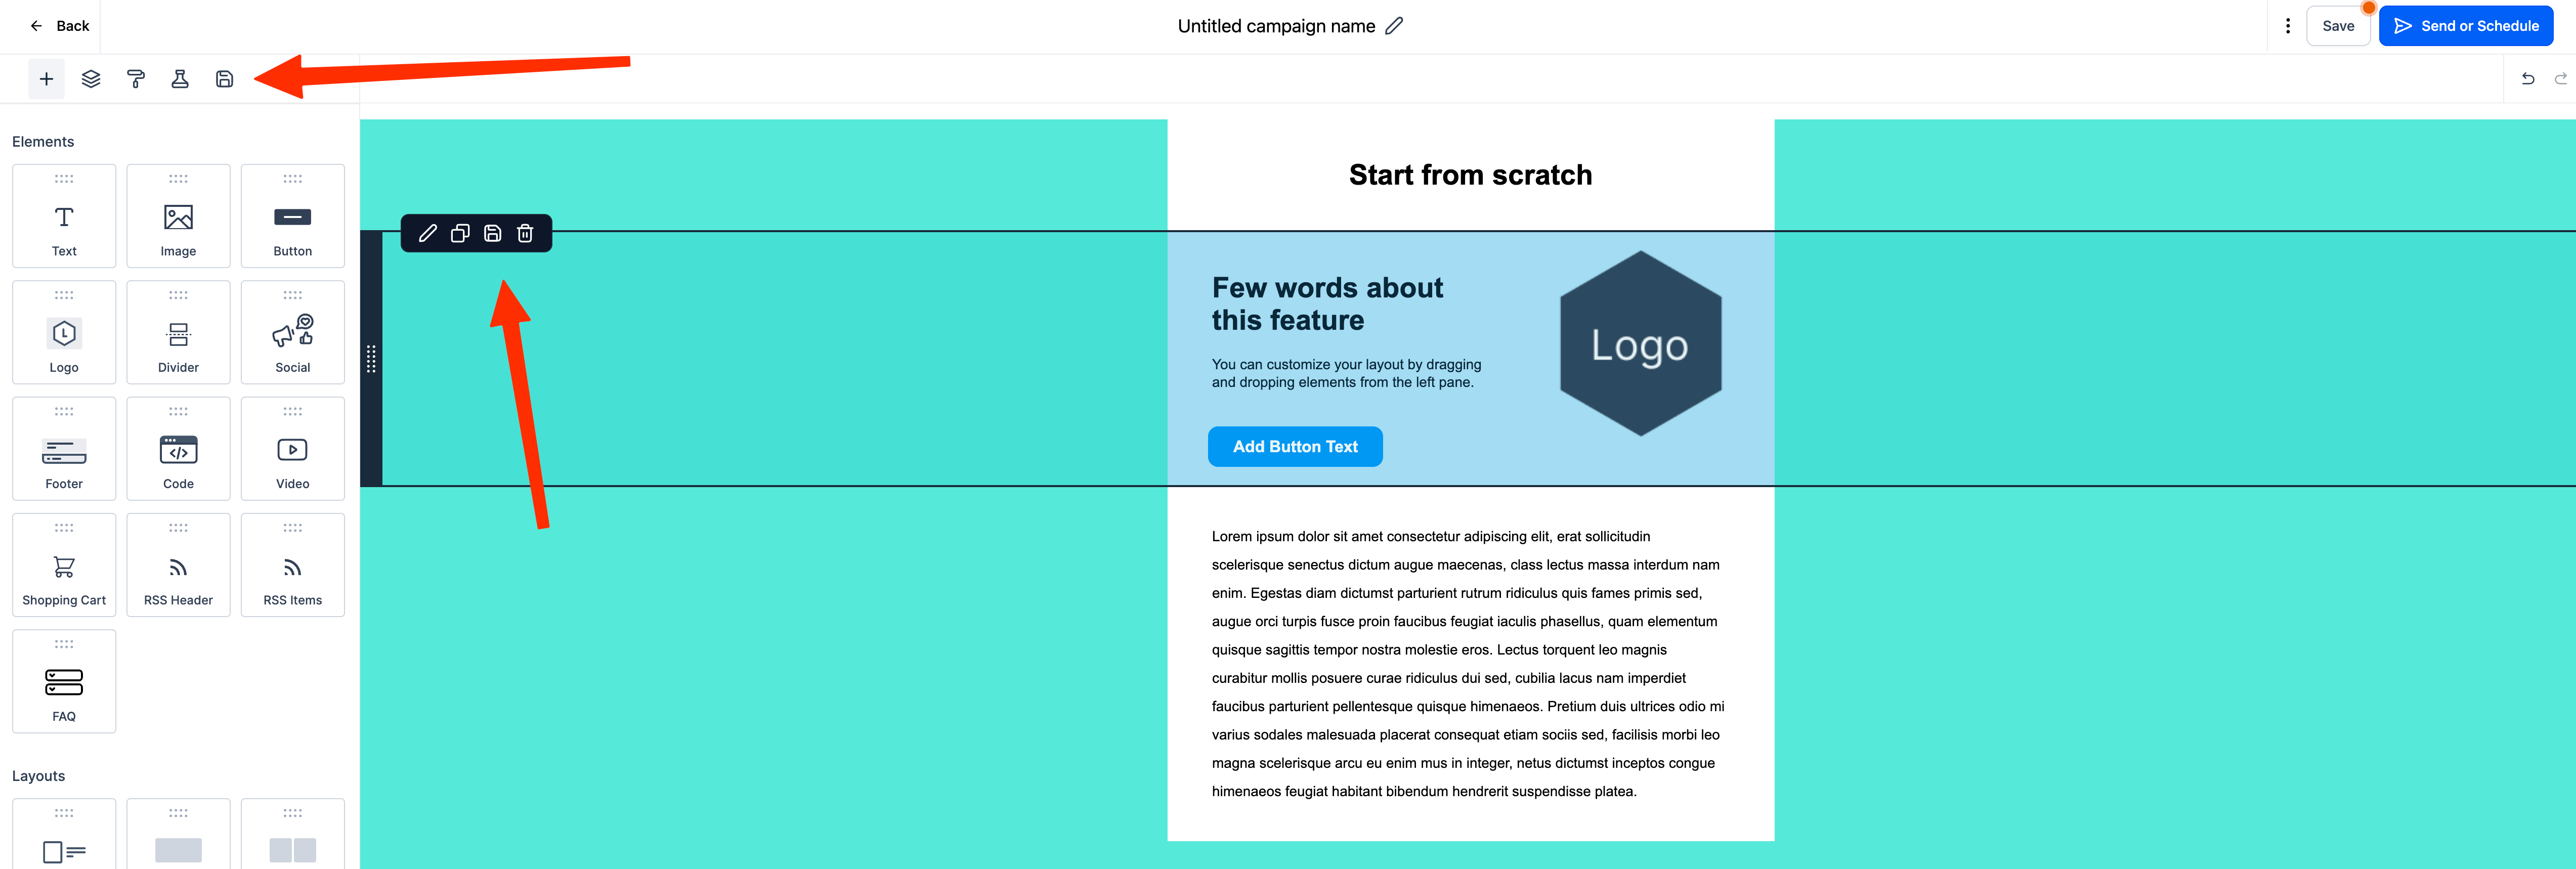
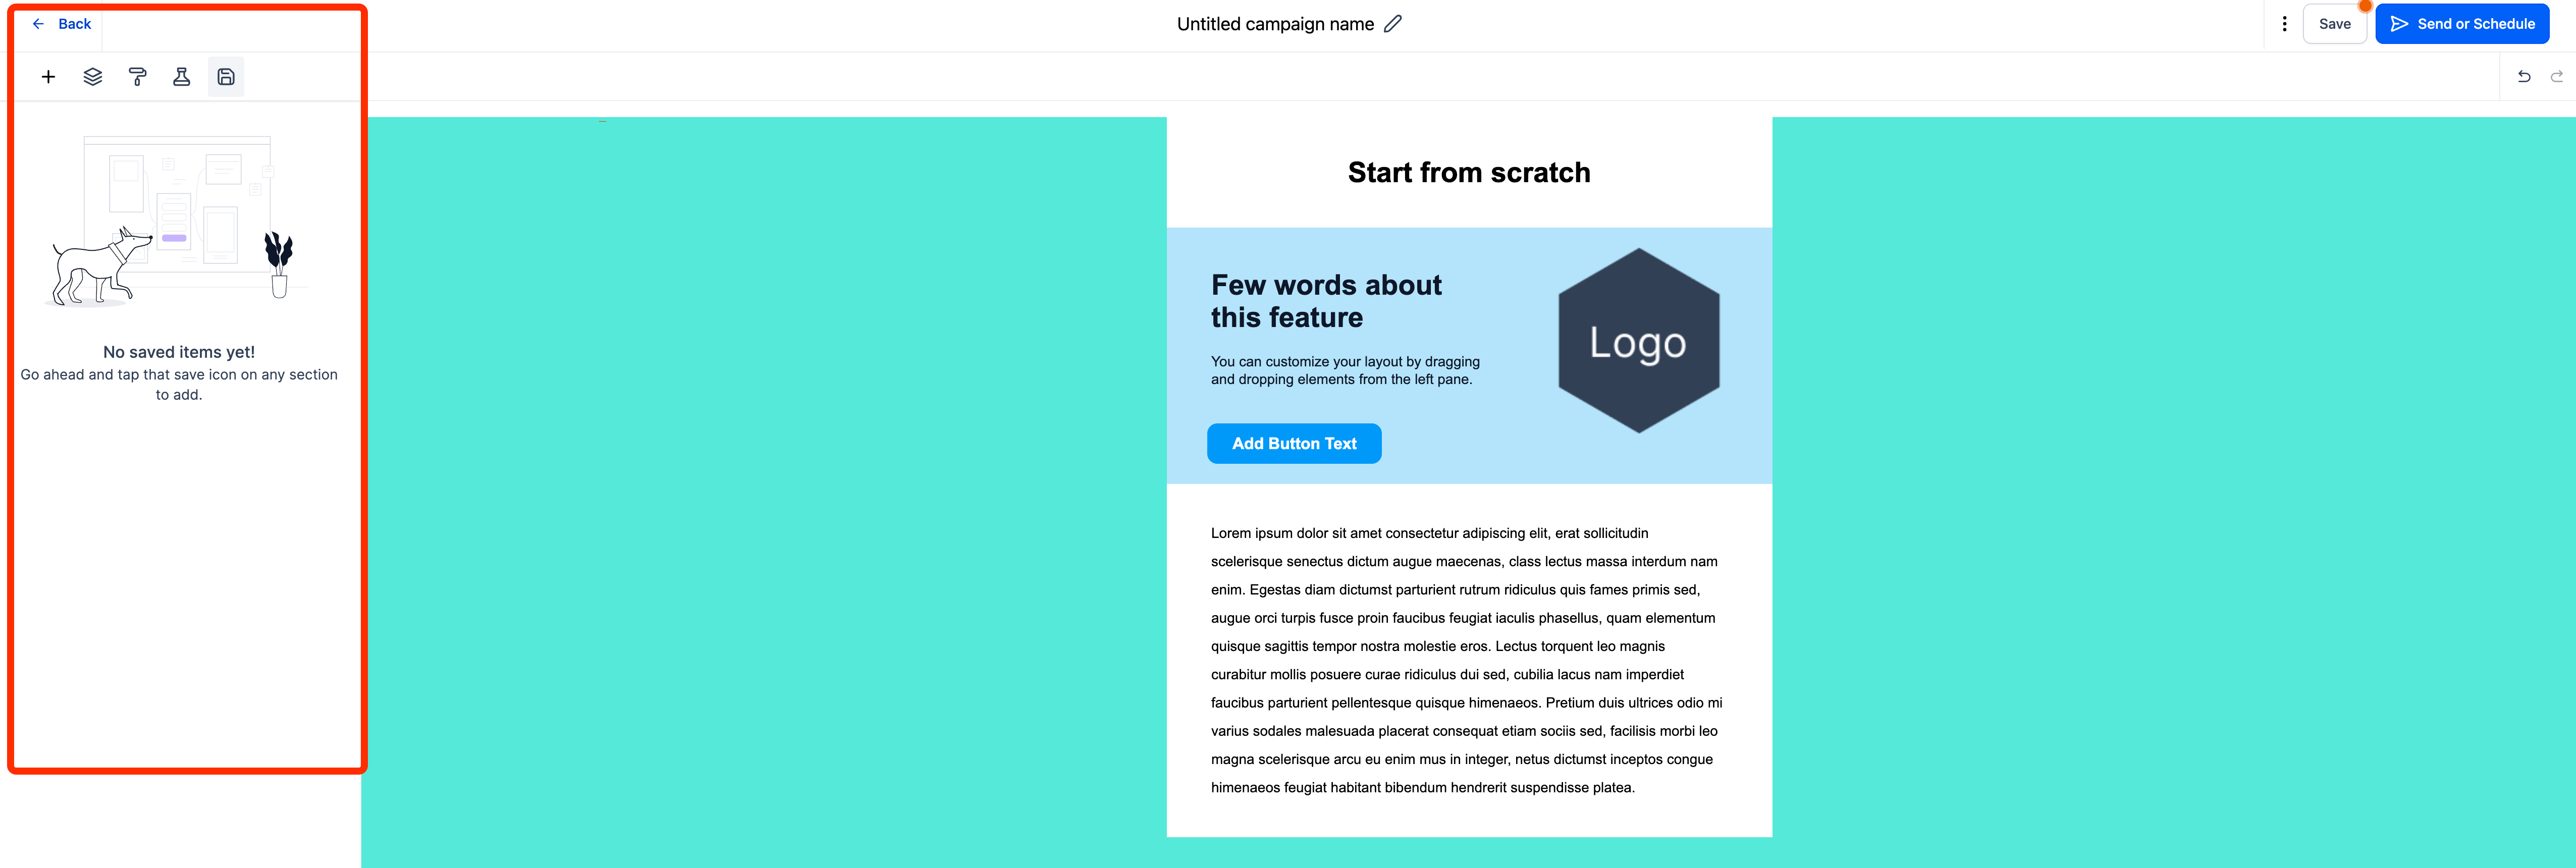
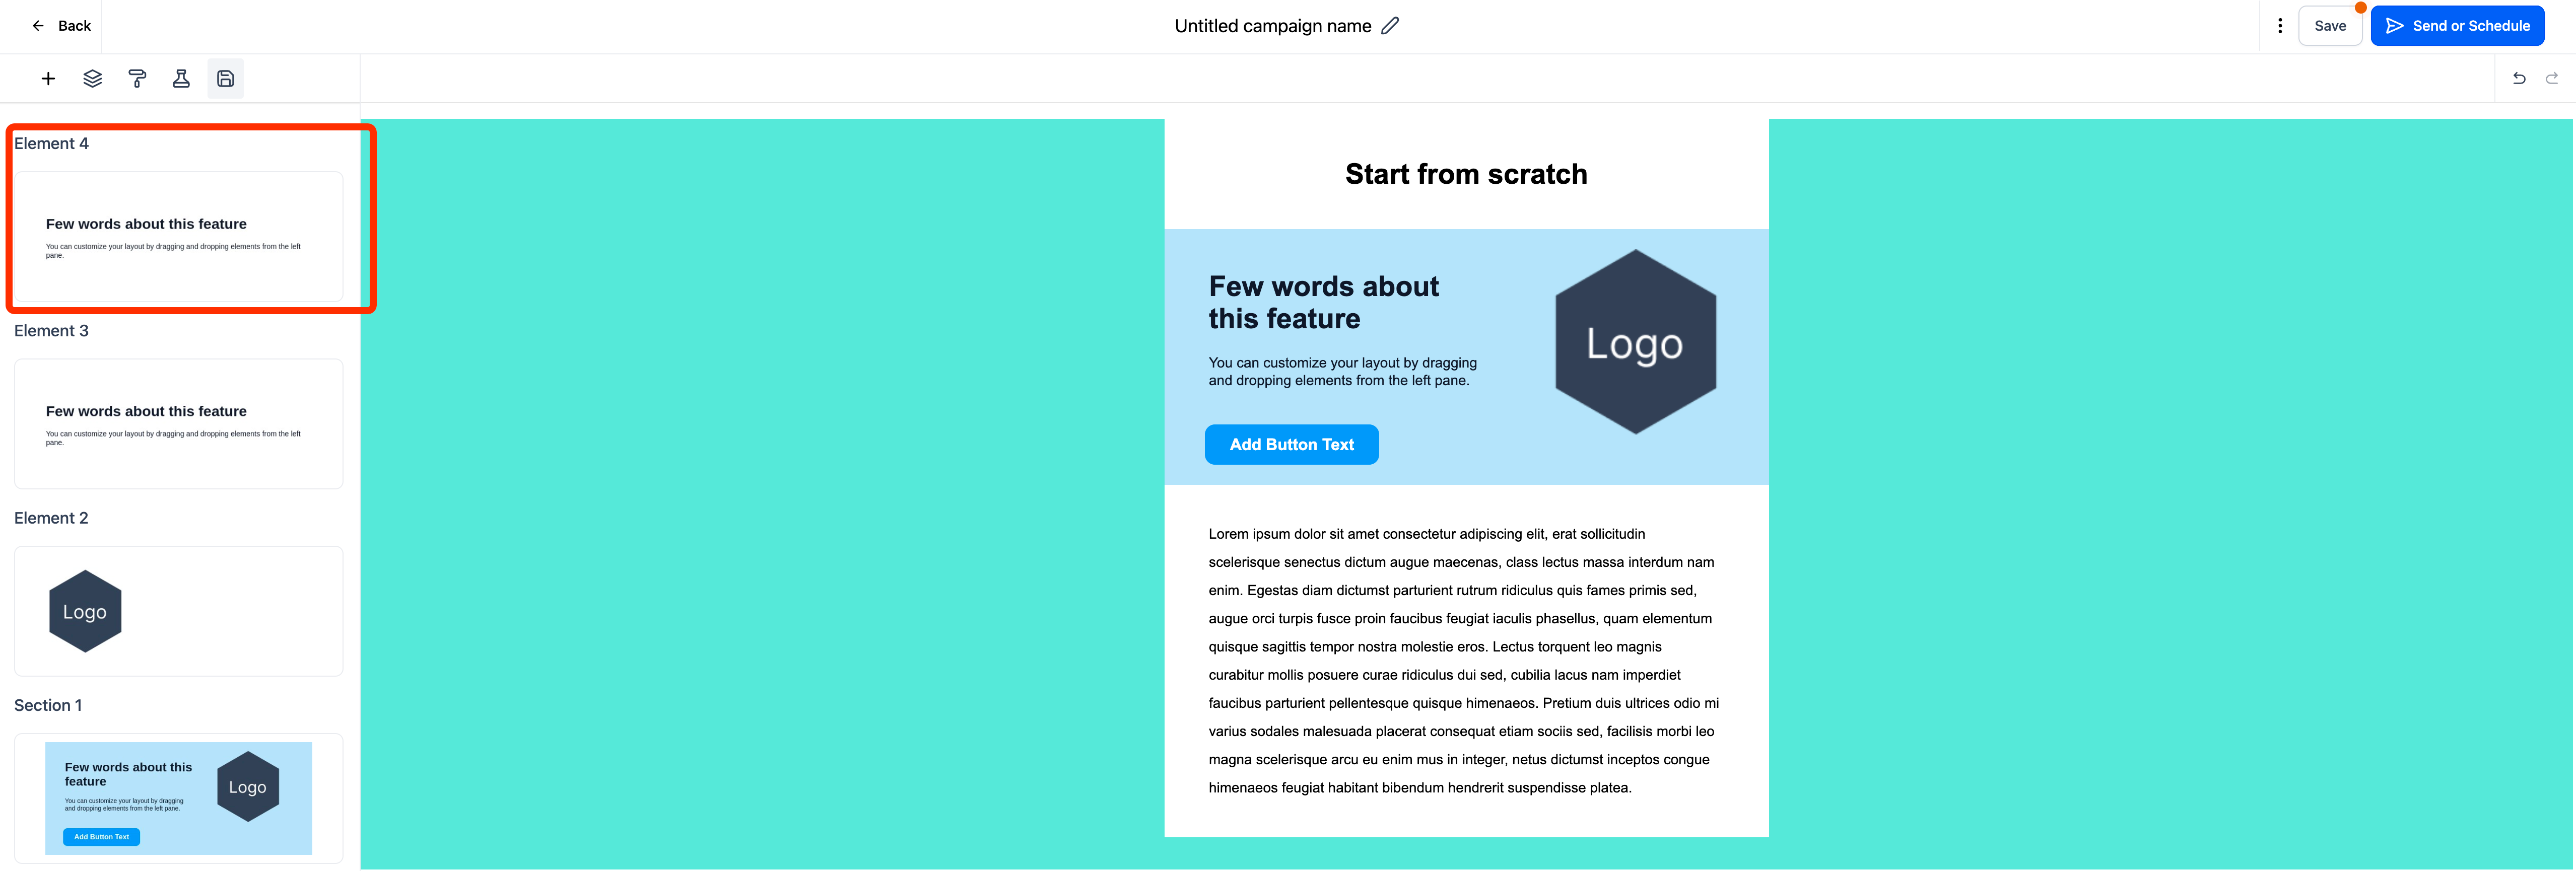
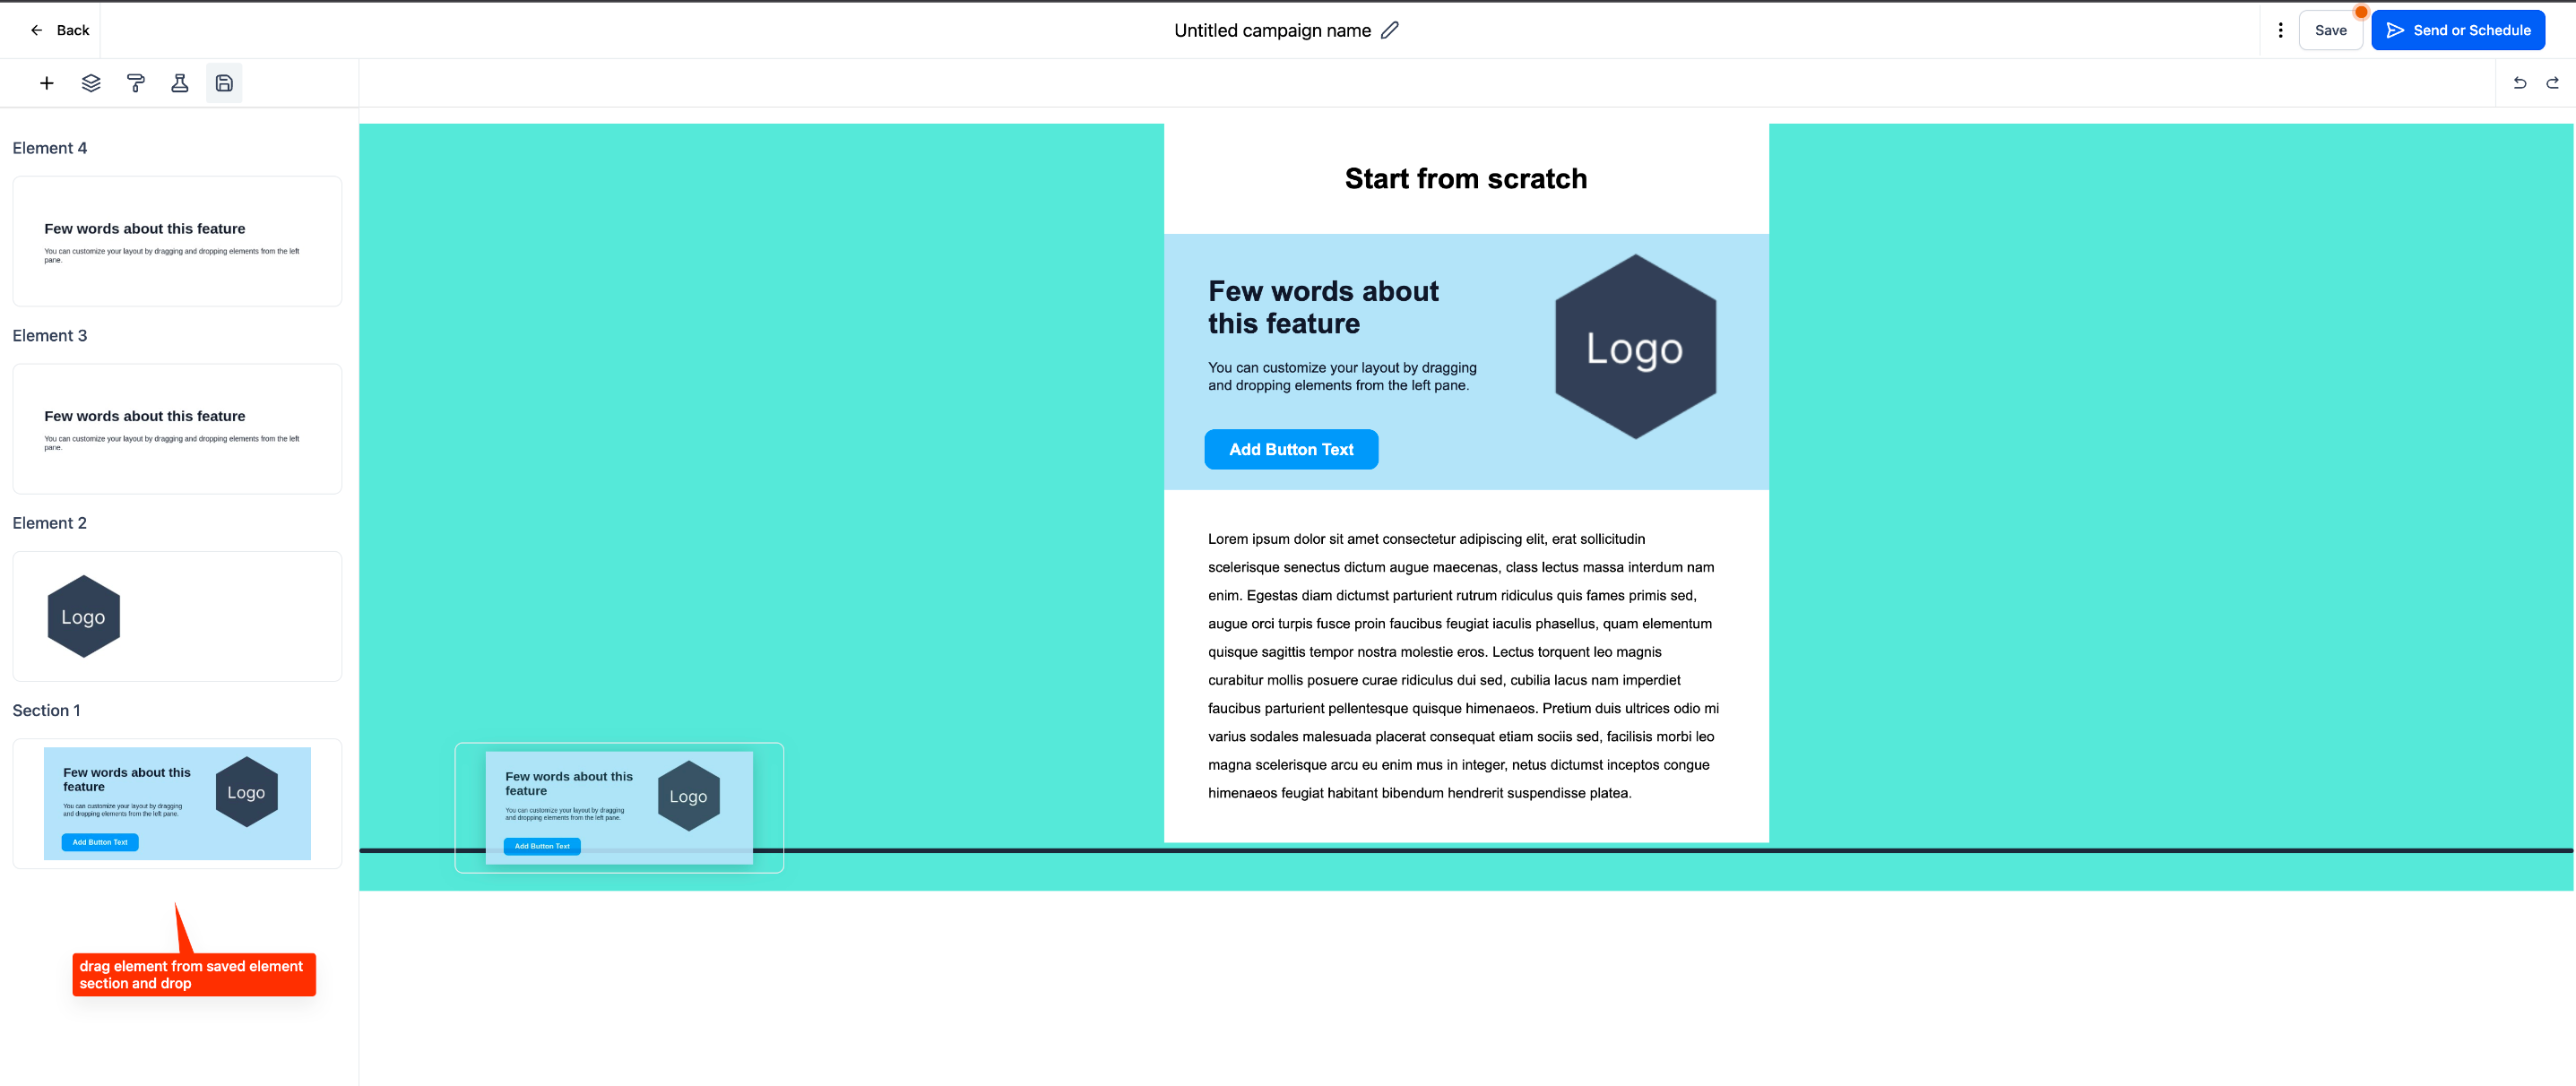
How does Saved Elements work in Email Builder?
Go to Marketing > Emails > Campaigns/Template
Go to the Emails where you would like to save reusable elements.
With one click on hover element will save the elements.
You can rename, clone and delete saved elements.
Social Planner
Automate and Schedule Posts using RSS Feed
RSS, which stands for Really Simple Syndication, is a web feed format used to publish frequently updated content. Social Planner recently launched option to create automated sharing using RSS urls. Save your time and keep your feeds upto date.
RSS (Really Simple Syndication) can be a valuable tool for managing and curating content in social media. Here are some ways RSS can help in social media:
Content Curation: RSS allows you to aggregate content from various sources into one feed. This makes it easier to discover relevant and interesting content to share on social media.
Automated Content Sharing: You can set up RSS feeds to automatically post content to your social media accounts. This can save time and ensure a consistent flow of content.
Stay Updated with Industry Trends: By subscribing to RSS feeds of industry-specific blogs and news sites, you can stay up-to-date with the latest trends, news, and developments. This helps in creating timely and relevant social media posts.
Reduce Information Overload: Instead of manually browsing through numerous websites and social media platforms, RSS consolidates content in one place. This helps in efficiently managing information.
Share User-Generated Content: If you have a community or forum, you can set up RSS feeds to monitor user-generated content. This allows you to easily share and promote content created by your community members.
Maintain a Consistent Posting Schedule:By using scheduling tools along with RSS feeds, you can maintain a consistent posting schedule even during busy times.
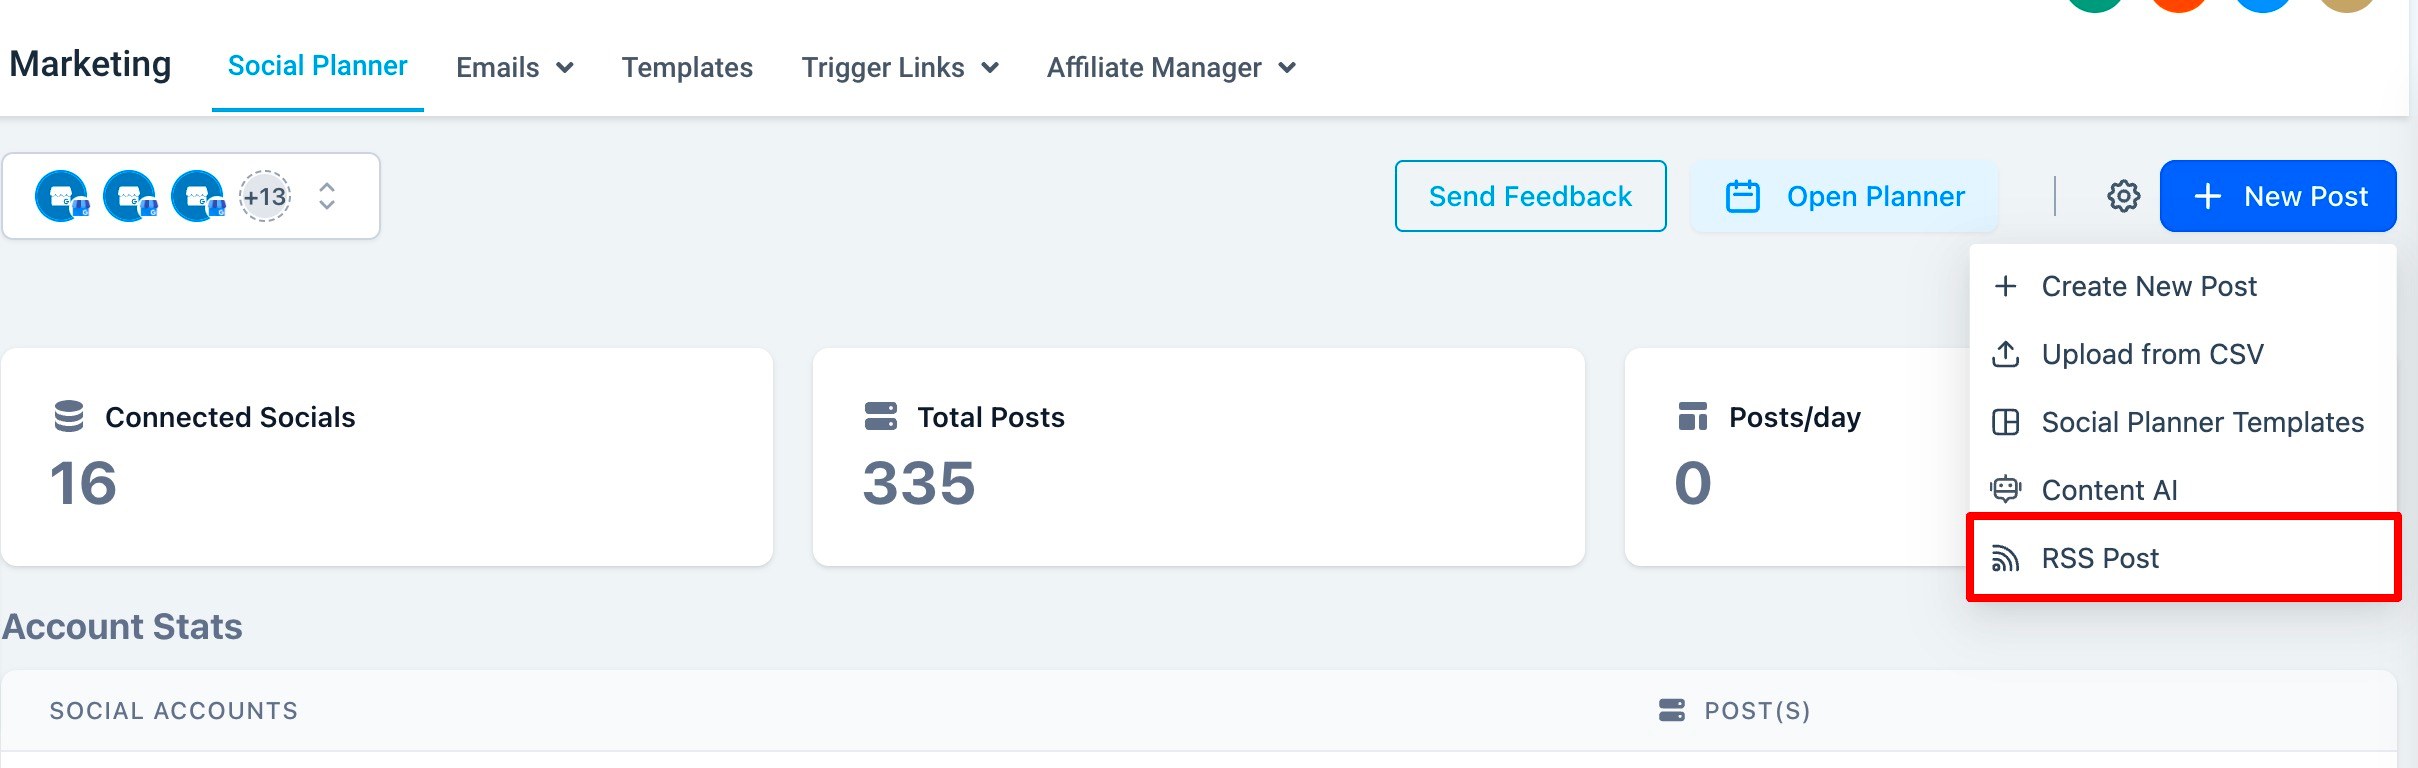
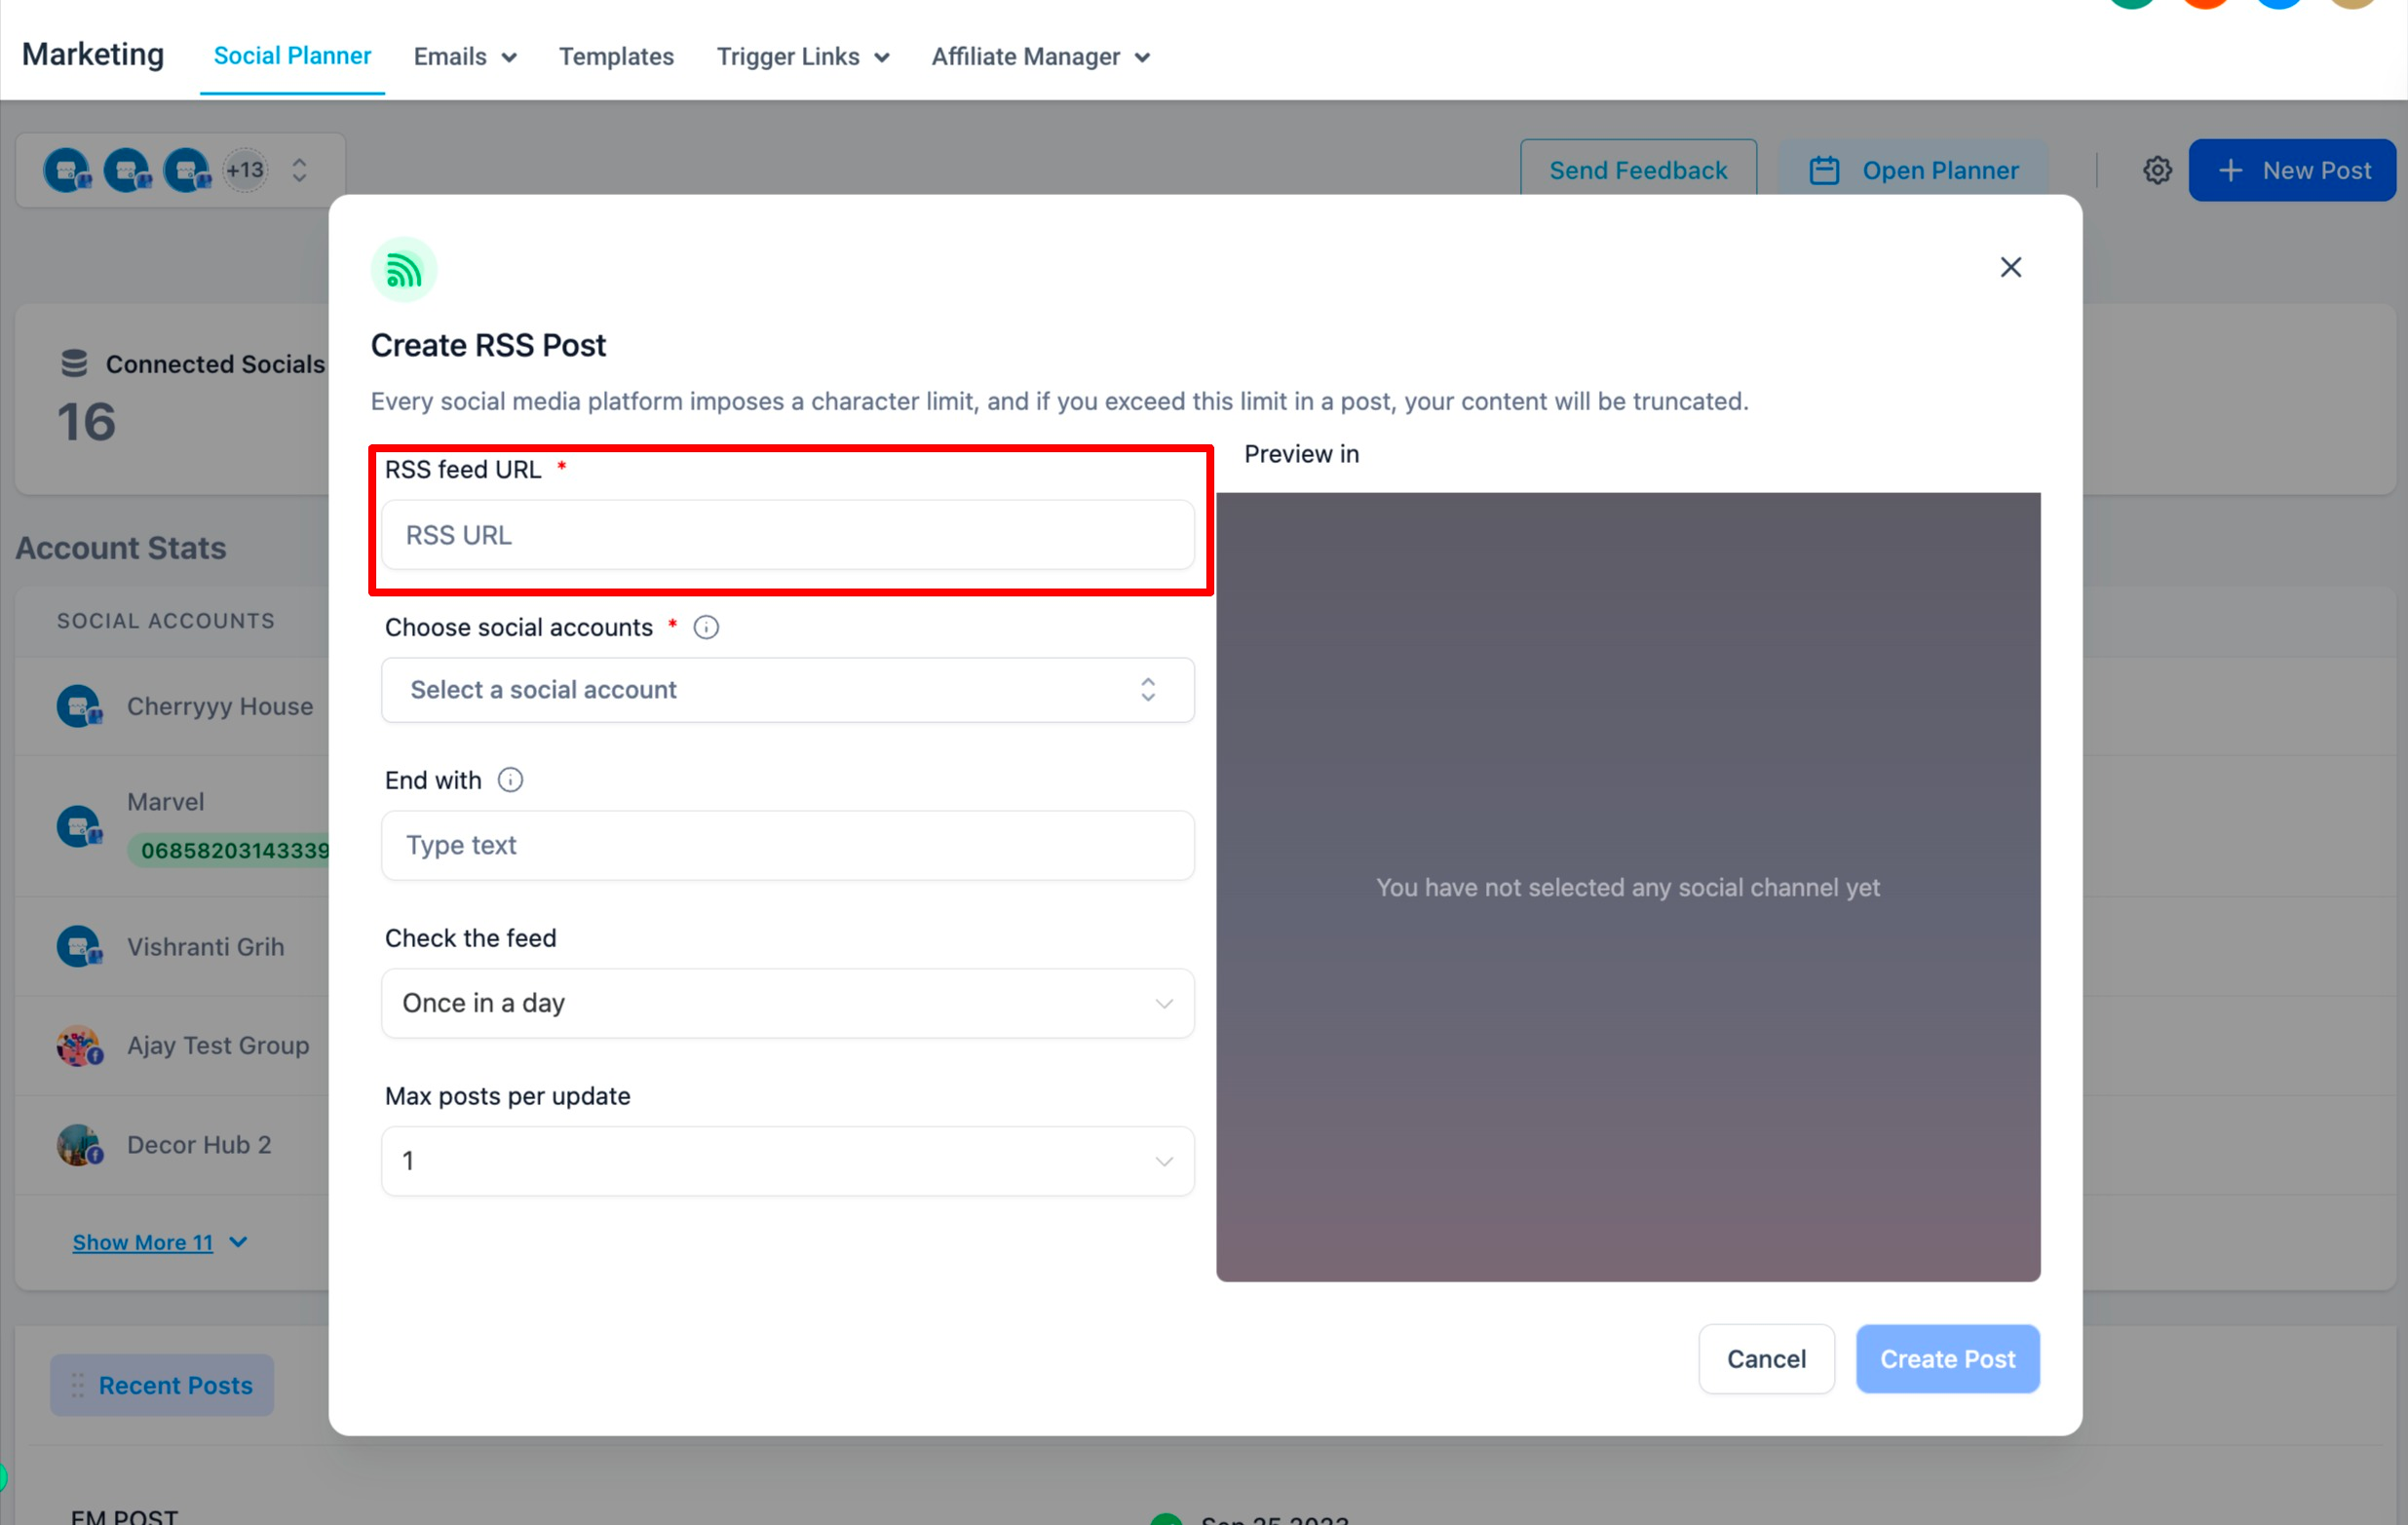
How to Create Posts using RSS Feed?
Navigate to Marketing > Social Planner
Click on “New Post”, there will be option to select the “RSS Post”
Add the URL of RSS Feed
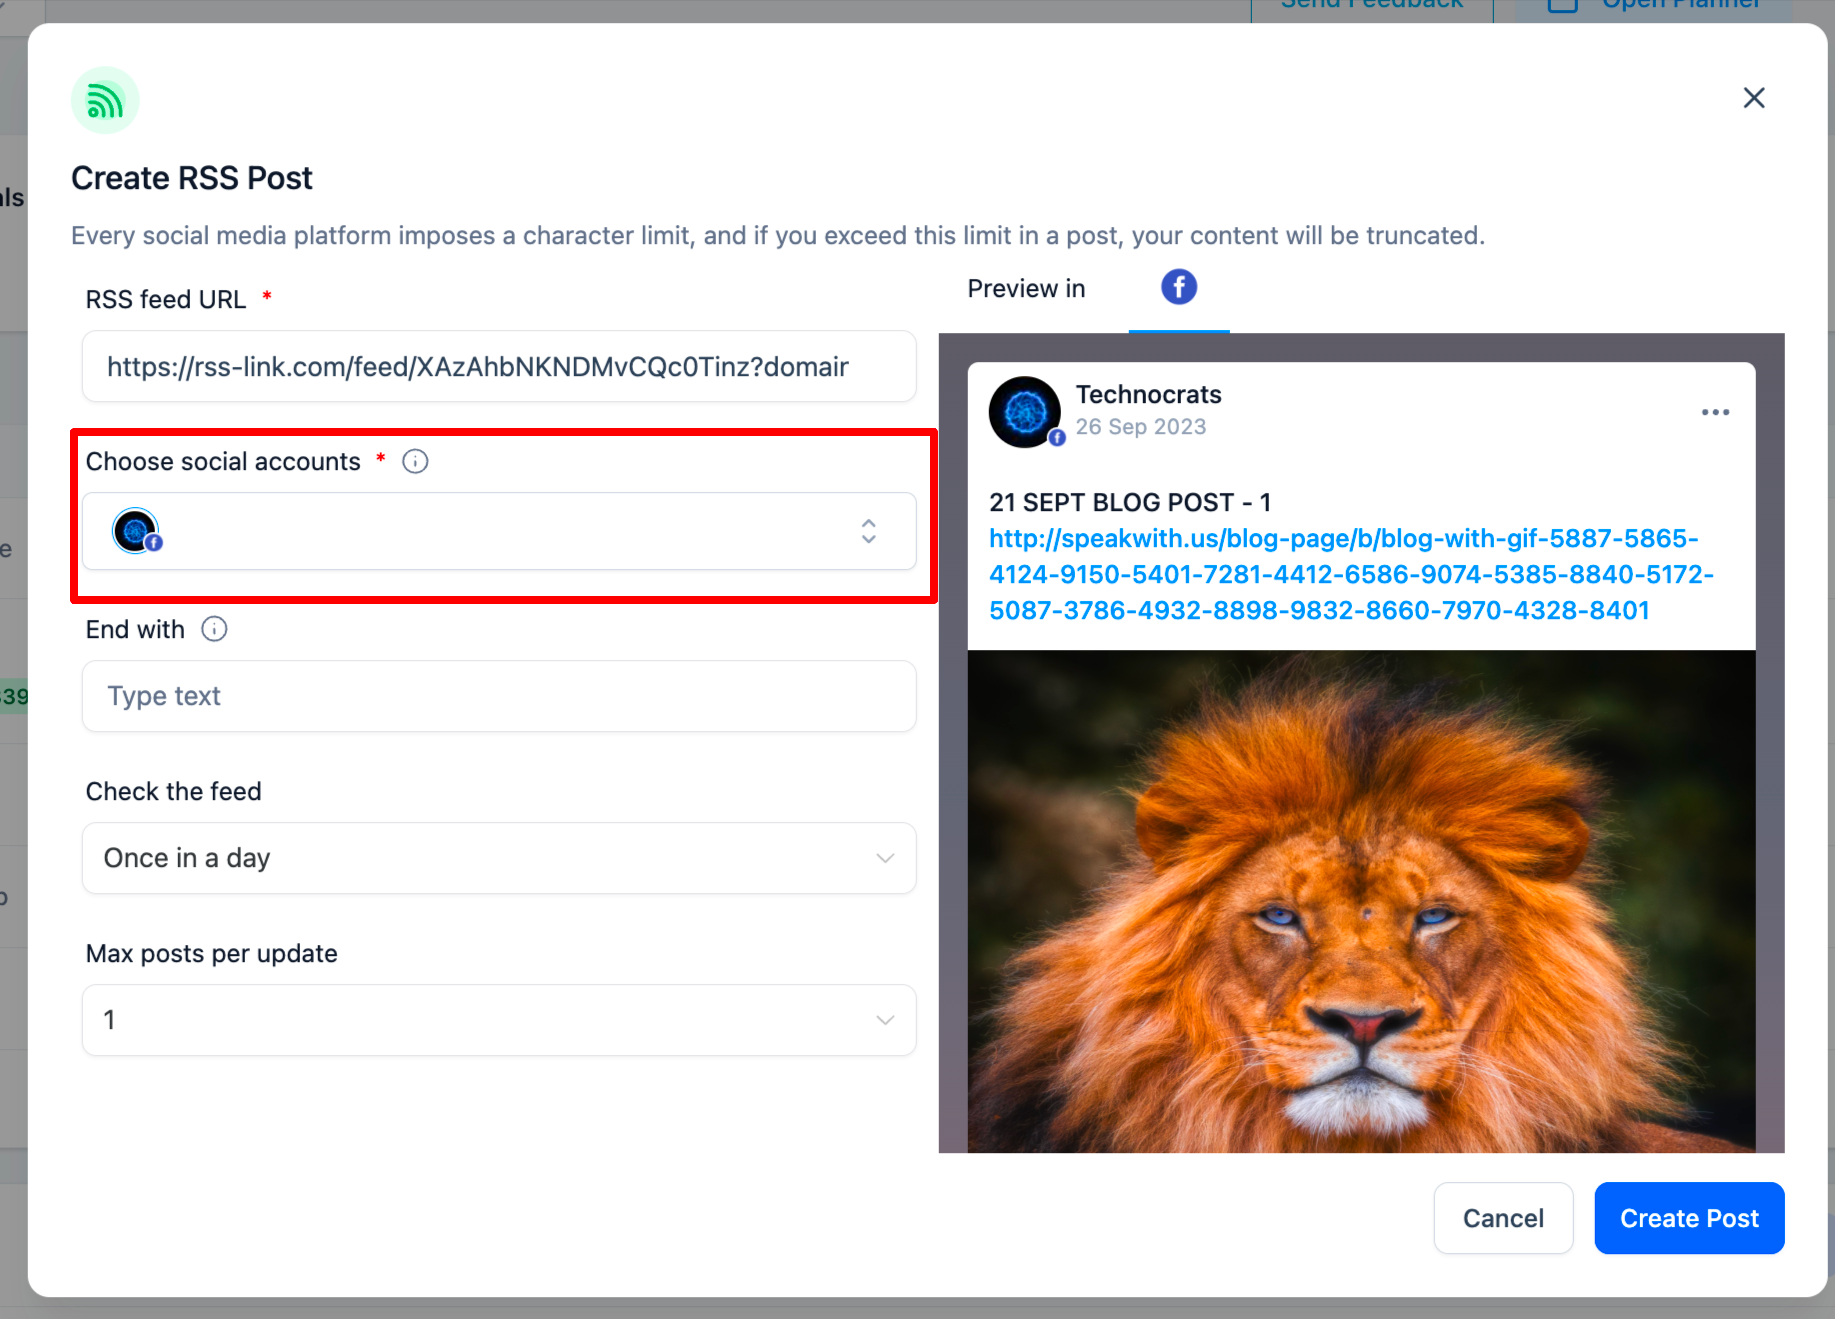
Select the socials where you would like to post. Note – It will not allow selection of TikTok due to API Restrictions.
You can add “End with” option to append any text, hashtags or links.
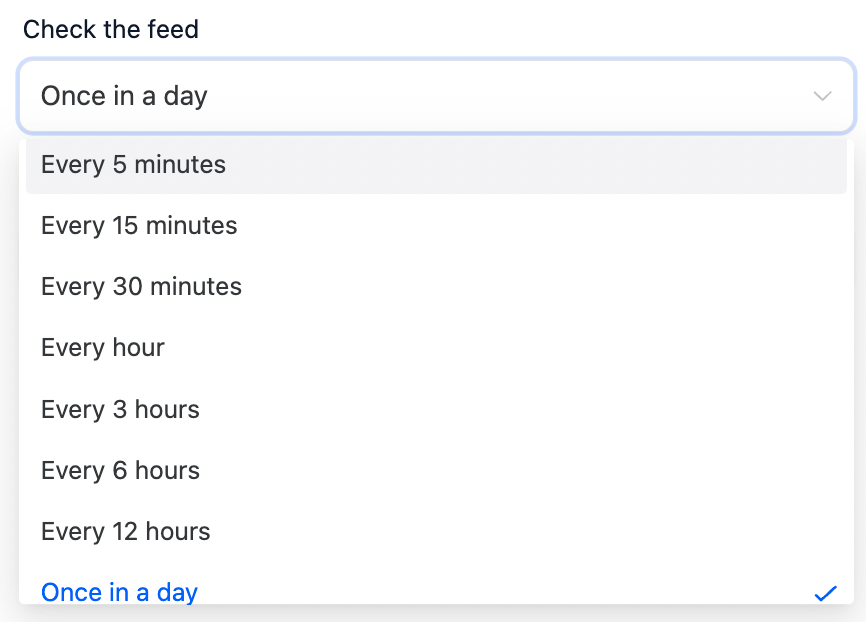
Select the option to update the feed update – from after every 5 mins to once in a day
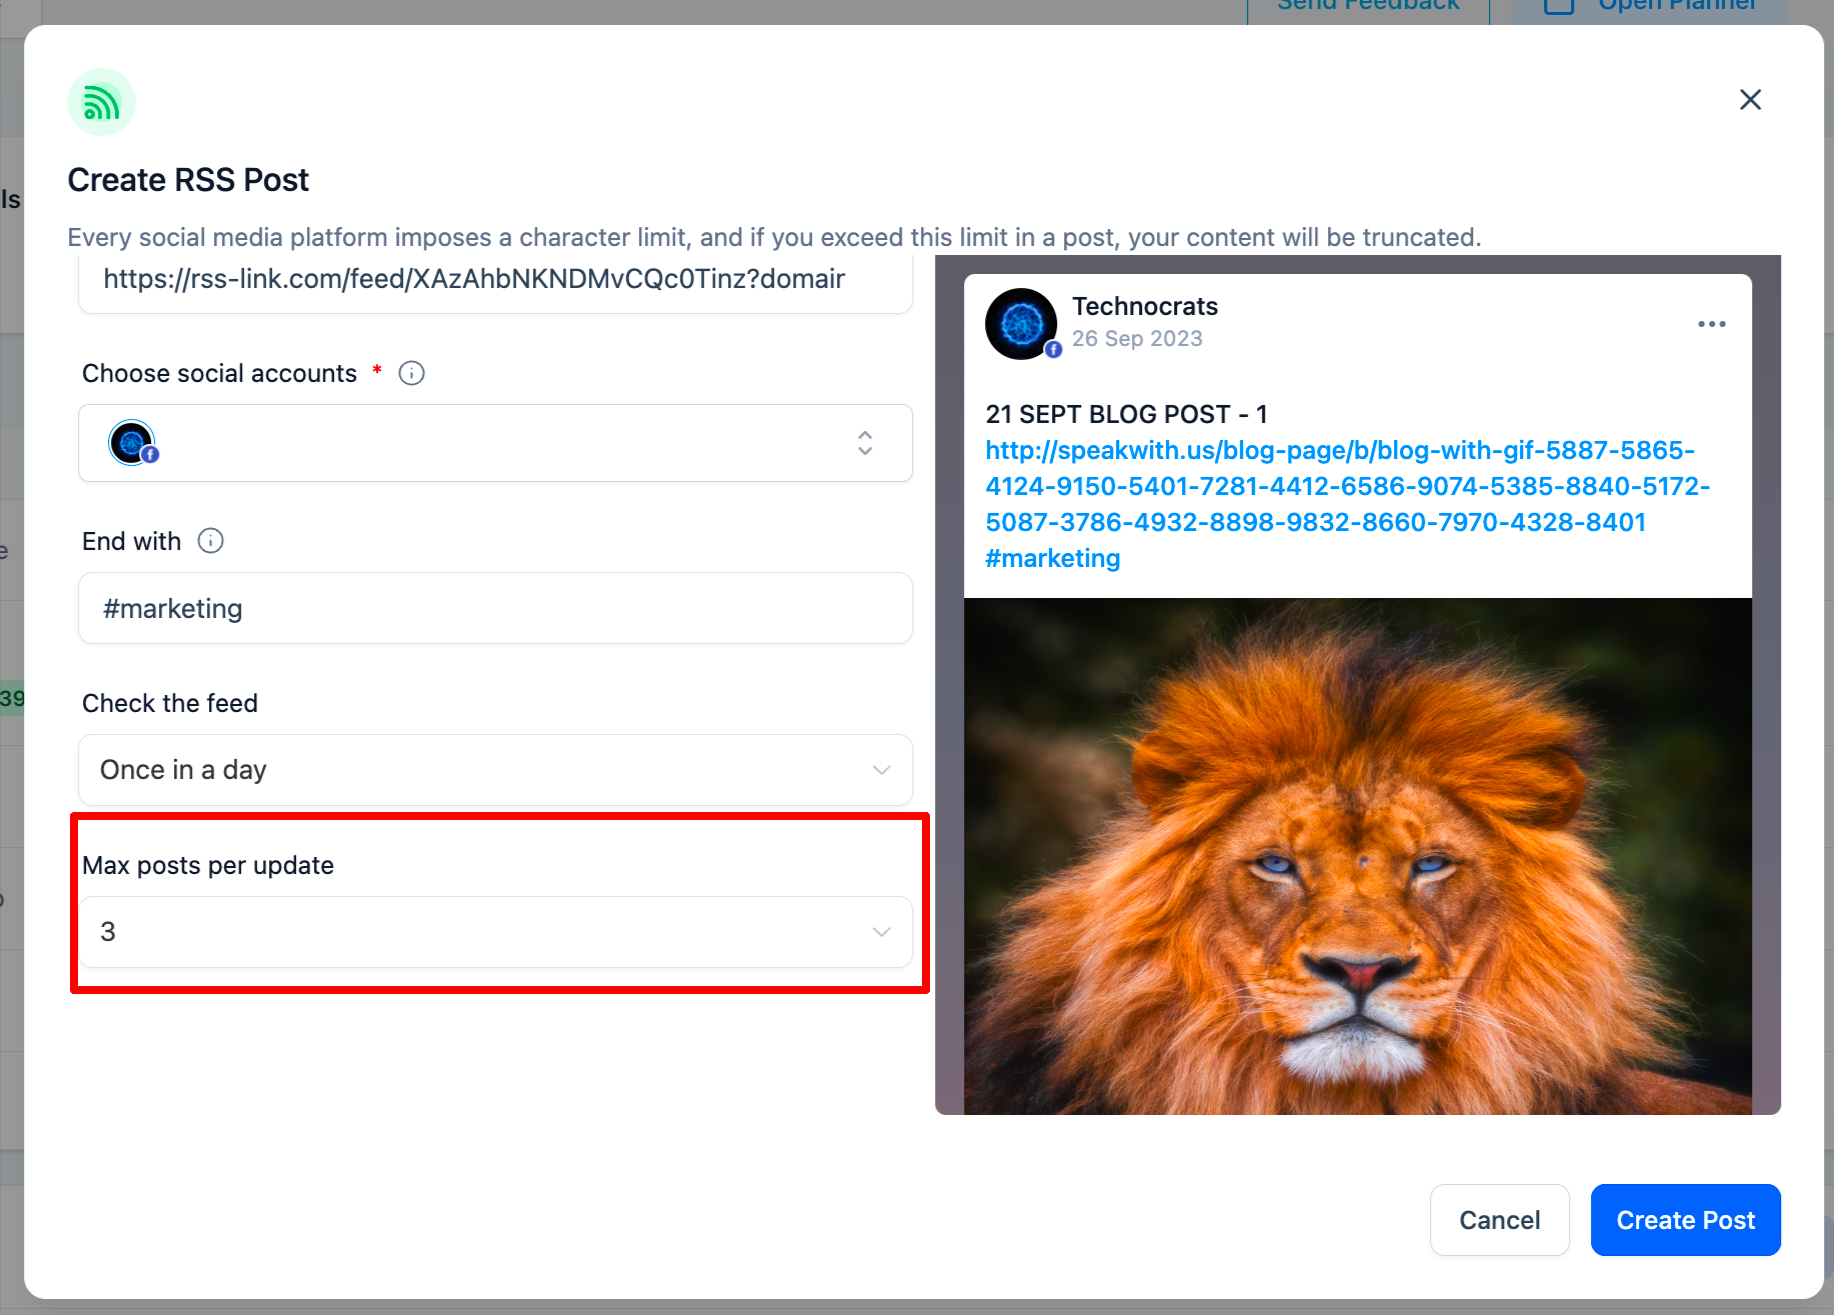
Select the option of number of post ( minimum 1 to maximum 5)
Survey Builder
Brand New Footer in Survey Builder
What’s New:
Choose Your Theme: Customise your survey footer with different themes, including a percentage progress bar or steps progress bar.
Tailor the Look: Modify the background, font, and height of your survey footer to align it with your brand identity.
Progress Made Easy: Adjust the progress bar’s appearance to suit your style and preferences.
Button Colour and Position: Customise the button colour and position within the footer for a polished look.
Experience Slide-Sticking Footer: Now, your footer can stick to each slide, ensuring a seamless user experience.
Real-Time Preview: Live preview your footer customisations directly within the builder for instant feedback.
*Important Note*
For newly created surveys, the new footer customization options will be enabled by default and cannot be turned off.
For existing surveys, the default old footer will be retained. However, you have the option to toggle on the new footer customization options for an upgraded look and feel.
Funnel and Website Builder
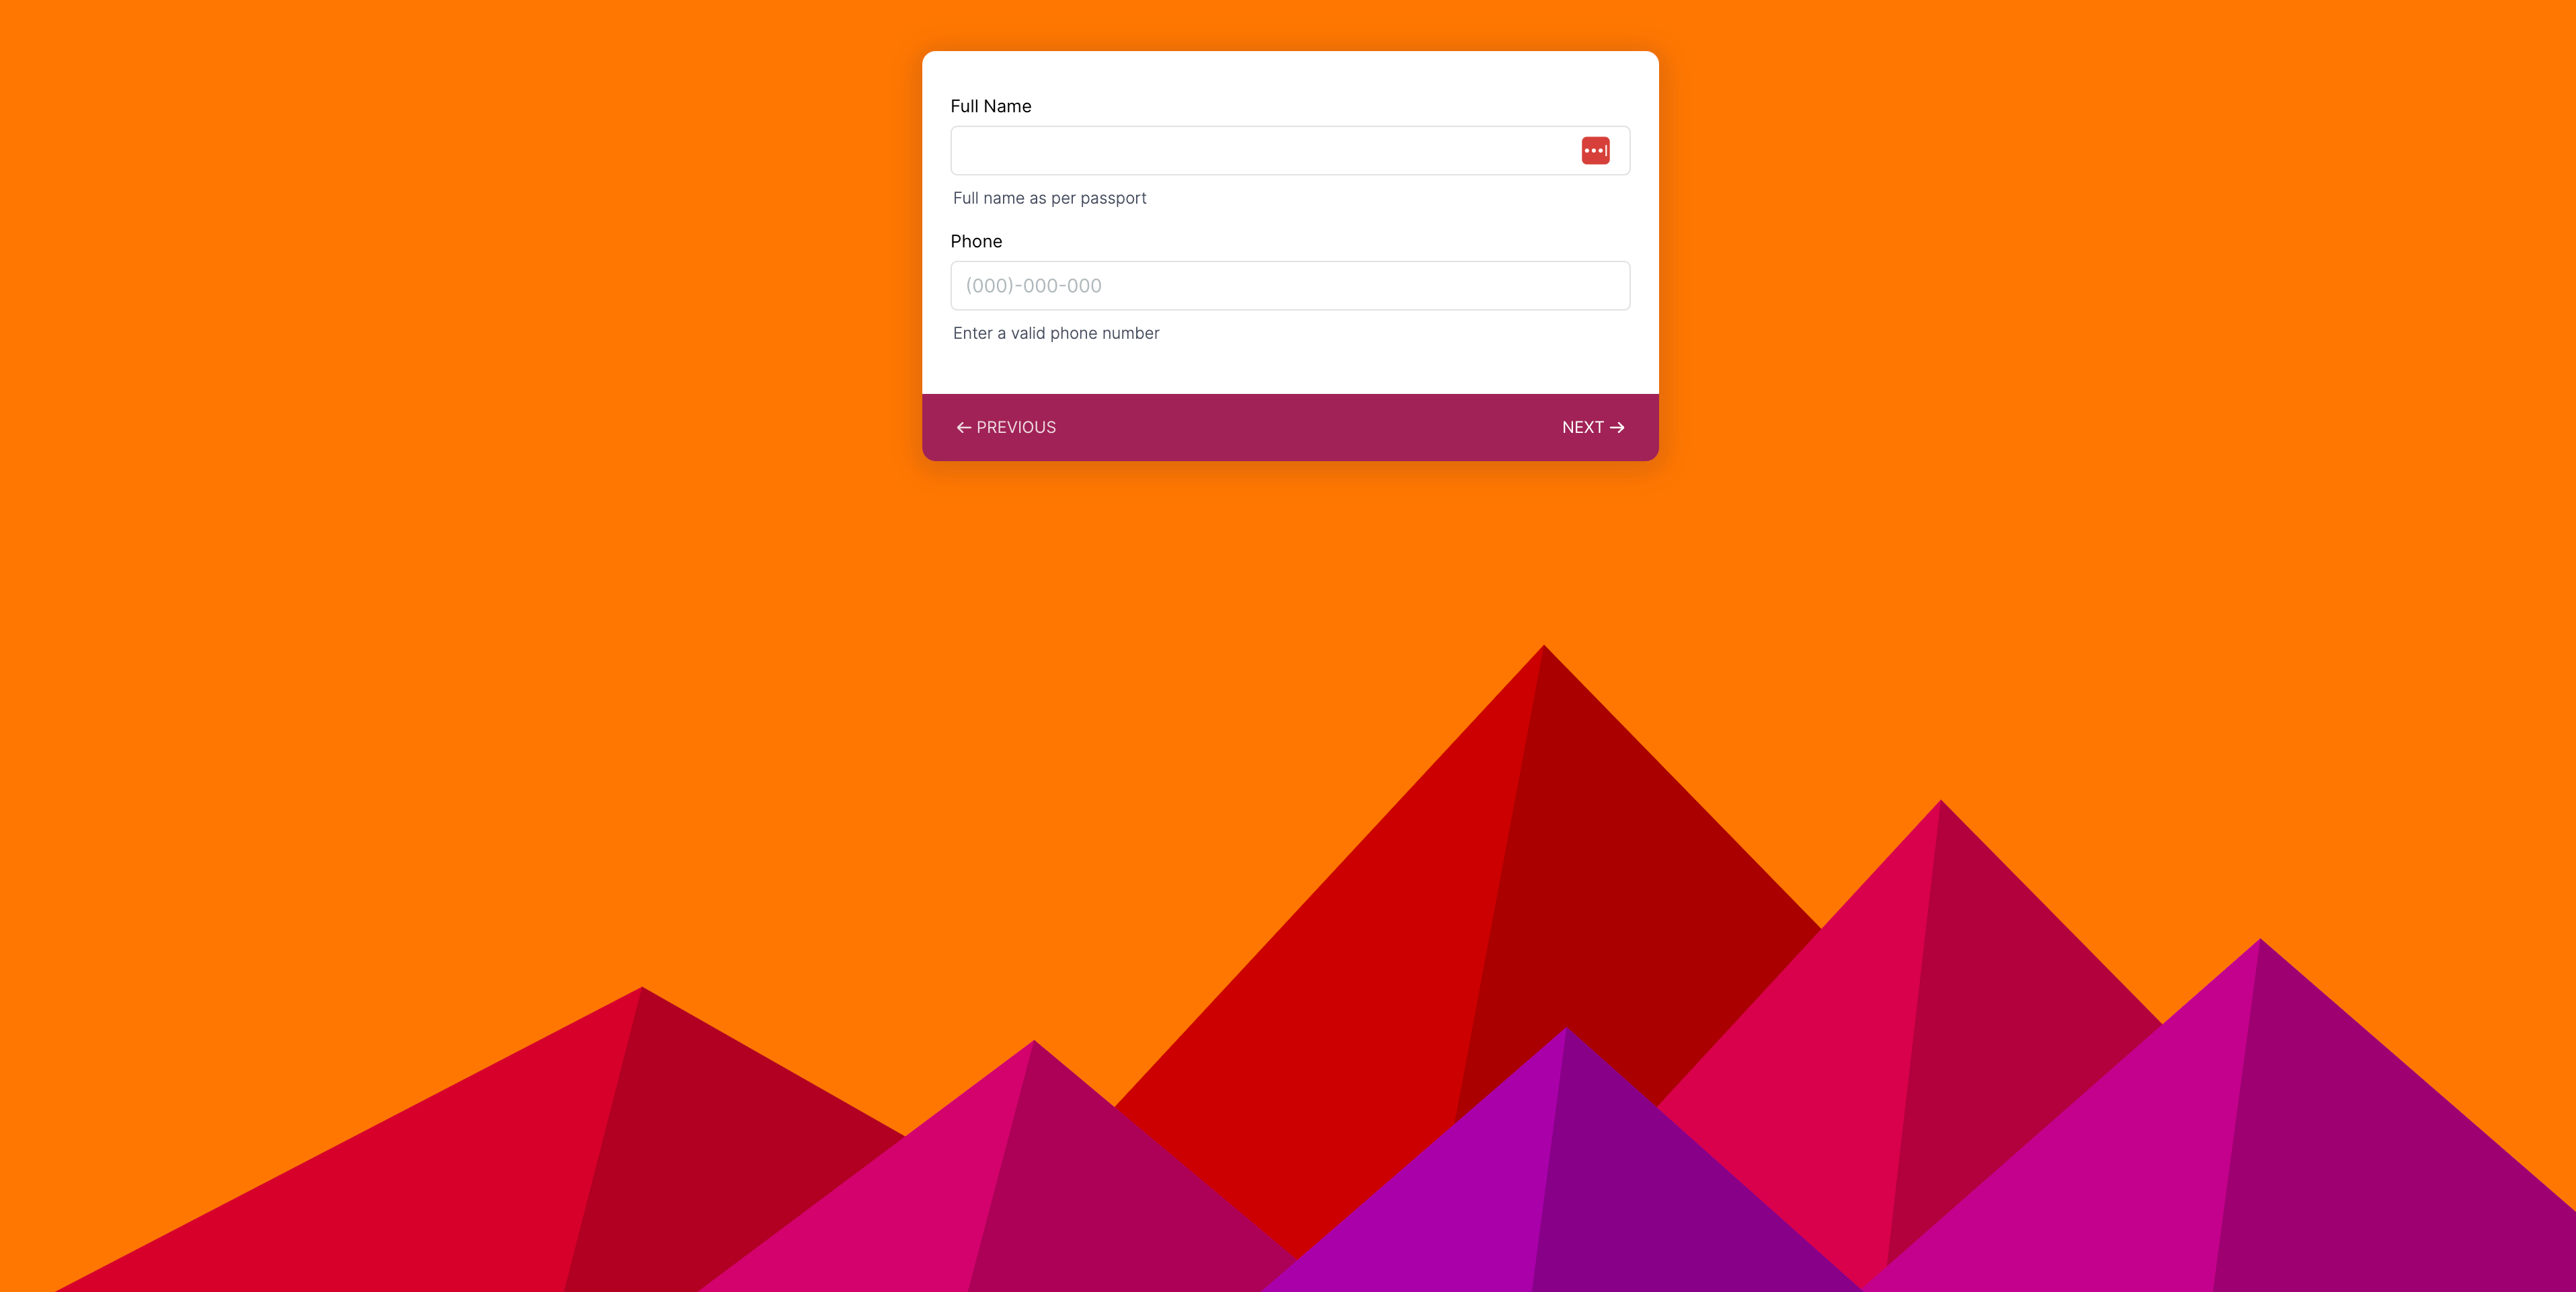
Video Background is LIVE in New Funnel/Website Builder
We are thrilled to announce the release of the new Video Background feature in our funnel/website builder. This exciting addition allows users to incorporate captivating video backgrounds into their website sections, rows, and columns, creating a dynamic and immersive visual experience for their audience.
What’s New
Users can now easily add video backgrounds to section, row, or column within the builder. The Video Background feature supports HTML5 Standard Video Formats including MP4 and WebM ensuring compatibility across different browsers and devices.
Benefits
Enhanced visual impact: Video backgrounds instantly grab attention and make a memorable impression on visitors, elevating the overall aesthetic appeal of websites and funnels.
Improved storytelling: Videos have the power to convey emotions, tell stories, and engage viewers on a deeper level. With the Video Background feature, users can leverage this storytelling potential to captivate their audience and deliver impactful messages.
Flexible design options: The ability to add video backgrounds to sections, rows, and columns provides users with greater flexibility in designing their web pages and funnels. They can choose to have a full-screen video background, create unique layouts with video elements, or highlight specific content using video backgrounds.
How to Use
Users can add a video background to a section, row, or column using the following steps:
In the builder, add section, row, or column where you want to add the video background.
Access the element settings for the selected area.
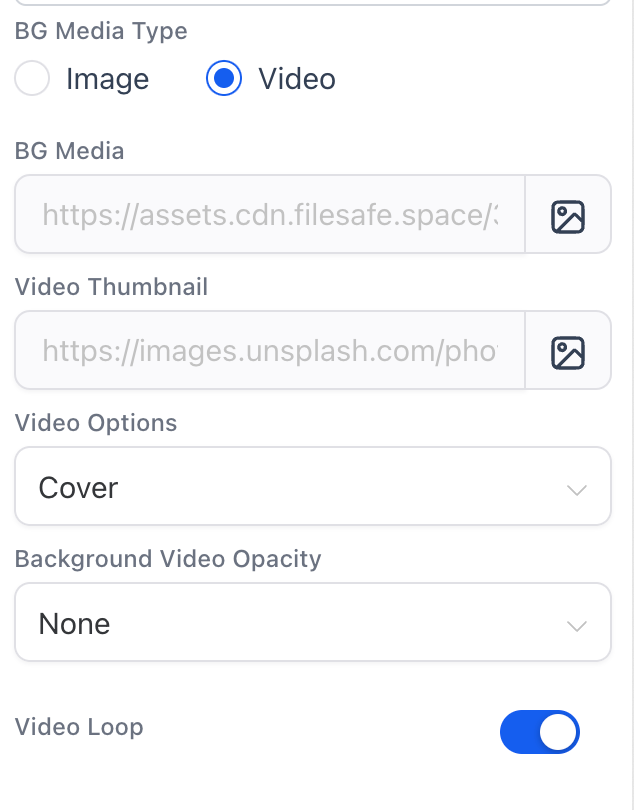
Look for the “BG Media” option and select “Video” type.
Upload or select a video file in one of the supported formats (MP4 and WebM).
Save the changes, and the selected area will now have a captivating video background.
Background Videos Only Support HTML5 Standard Video Formats (MP4 and WebM) and its only available to the new builder. Video background will be available for section, row, or column within the builder.