
Welcome to your weekly round up of updates through October 23rd, 2025. This week is all about speed and clarity. We polished the Page Builder so new pages look great out of the box, leveled up the AI Knowledge Base (faster crawls, more sources, auto-refresh), made Ask AI more capable and easier to use and so much more. If you have any questions regarding these updates, email us at [email protected] or hop into live chat inside of the app.
We’ve refreshed defaults in the Page Builder so new pages look modern and consistent out of the box. Typography now uses Inter for both headlines and body, default images and placeholder content are updated, and two new colors (Cobalt and Smoke) are available. All new elements added from Page Builder → Add Elements get the updated styling automatically.


Your AI bot now discovers and extracts hidden content in accordions, tabs, modals, and dynamic sections, capturing much more training data from modern sites (React, Vue, Angular, and more). Crawling runs faster with detailed observability and a safe interaction engine. No setup required—just trigger a crawl and your bot learns from more of your site.

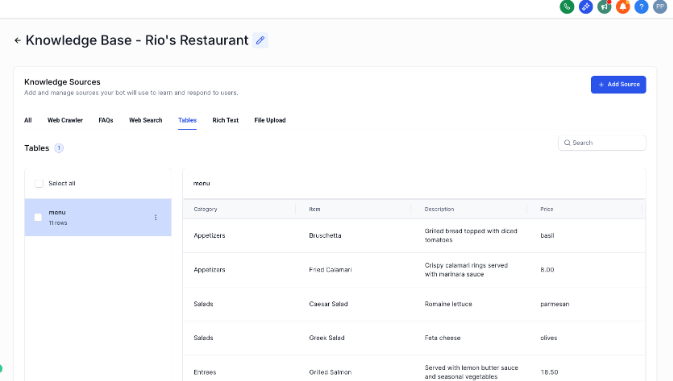
You can upload structured data from CSV and Excel so agents can search tables with natural language queries. The system detects schemas automatically, supports pagination, and lets you configure which columns are searchable or required.
Keep external content in sync with scheduled refreshes so your bots stay current without manual effort.

You can upload Word docs and PDFs directly, or add content through a rich text editor. Parsing and structuring are automatic so ingestion is clean and ready for training.
Location → Labs → Enable “New Knowledge Base Sources”
Ask AI can guide you from setup to send in one flow—domain checks, content, subject line testing, audience selection, and scheduling. The final link respects your white‑label domain.

Ask AI now uses the latest FG Funnels Knowledge Base to answer platform questions and provide smart fallbacks when actions error out.
A cleaner interface with planning before actions for better grounding, clearer steps, and more reliable results.
Connect your FG Funnels sub‑account to ChatGPT via MCP for secure, on‑demand access to Contacts, Opportunities, Calendar Events, and more—right from ChatGPT.
Step 1: Enable Developer Mode in ChatGPT
Step 2: Create the Custom Connector
Step 3: Authorize via OAuth
Step 4: Verify the Connection
Step 5: Start Using It

Run multiple keyword heatmaps with flexible radius and grid sizes, see average ranking scores, and drill to pin‑level competitor details with clickable GBP links. Choose which heatmaps appear in shared reports or PDFs. Enable in Labs and use it in both Prospecting Tool and Sub‑Account Marketing Audits.

Configure email and in‑app notifications across six triggers (Unconfirmed, Confirmed, Cancellation, Reschedule, Reminder, Follow‑Up). Target Contacts and/or Assigned Users, personalize templates, and use new service‑specific custom values.

Hide payment amounts for Pay in Person or Card on File, show amounts without a payment provider, auto‑generated slugs, AM/PM format option, and preserved order for variants and add‑ons.
Assign service‑specific forms (uses global form when multiple services are booked). Free‑slot logic now aligns only the first start time; subsequent services follow immediately, improving availability for mixed durations.

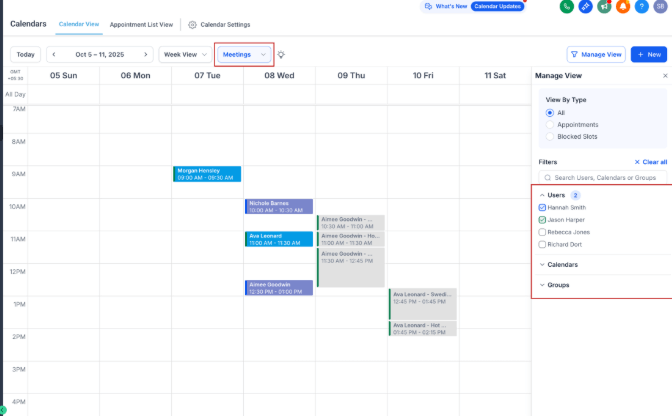
Create reusable schedules and assign them across calendars and users from one place. Every user gets a default schedule, and all existing settings were migrated automatically.

Send SMS for Unconfirmed, Confirmed, Canceled, Rescheduled, Reminder, and Follow‑Up events. Choose per‑recipient templates, test messages, and enable per calendar or service.

Collect payments with PayPal alongside Stripe, Authorize.net, NMI, Razorpay, and Square.

Use WhatsApp on all calendar event types with per‑recipient templates, approved template selection/creation, and test sends.
Add miscellaneous fees and set manual taxes for Services (v2). Each service has an associated product—attach tax rates to apply automatically at booking.
Mobile now supports local presence dialing with international support, smarter fallbacks, city‑level precision, and a redesigned number picker.
Set up and manage recurring appointments from mobile with standard or custom patterns, series edits, and flexible end conditions.
Account Admins can receive instant order confirmations by Email or SMS when orders are placed. Enable per channel and customize templates.

FGF Notifications

![]()
![]()
![]()
![]()