It is time for all the latest updates in FG Funnels from the week of April 24th through May 1st, 2024. If you have questions about any of these updates, or FG Funnels in general, please reach out to [email protected] or live chat in the app and our team will be happy to help.
Workflows
IVR End Call action
New End IVR call action allows workflow owners to terminate IVR calls directly, rather than waiting for users to disconnect or end the IVR call when the workflow concludes, as is the current practice.This provides flexibility and control to the workflow owners to end the call and not leave the customer with an infinite elevator music.
How to Use?
In the workflow builder, click Add Action
Search for “End IVR call“
Select from the following set of options
End abruptly – By default IVR would be terminated instantly without any warning or a message.
Text message – Workflow owners can type a message along with the number of loops before the IVR call is terminated
Voice message – Workflow owners can choose to upload a voice message or branded music or any other audio format to be played before the IVR call is terminated along with the loops
GPT 4 Turbo
Users have the option in the “GPT Powered by OpenAI” action to switch/select between GPT 3.5 Turbo and GPT 4 from the “Model” field dropdown.
Action Type
Select from new Action Types:
Analyze Text Sentiment
Summarise Text
Translate
Custom
How to Use?
Click the “+” icon and search for “GPT powered by OpenAI”
Select the Model within the action
Use Custom action type if you want to write the prompt
Use Any other Action type to get pre populated prompts
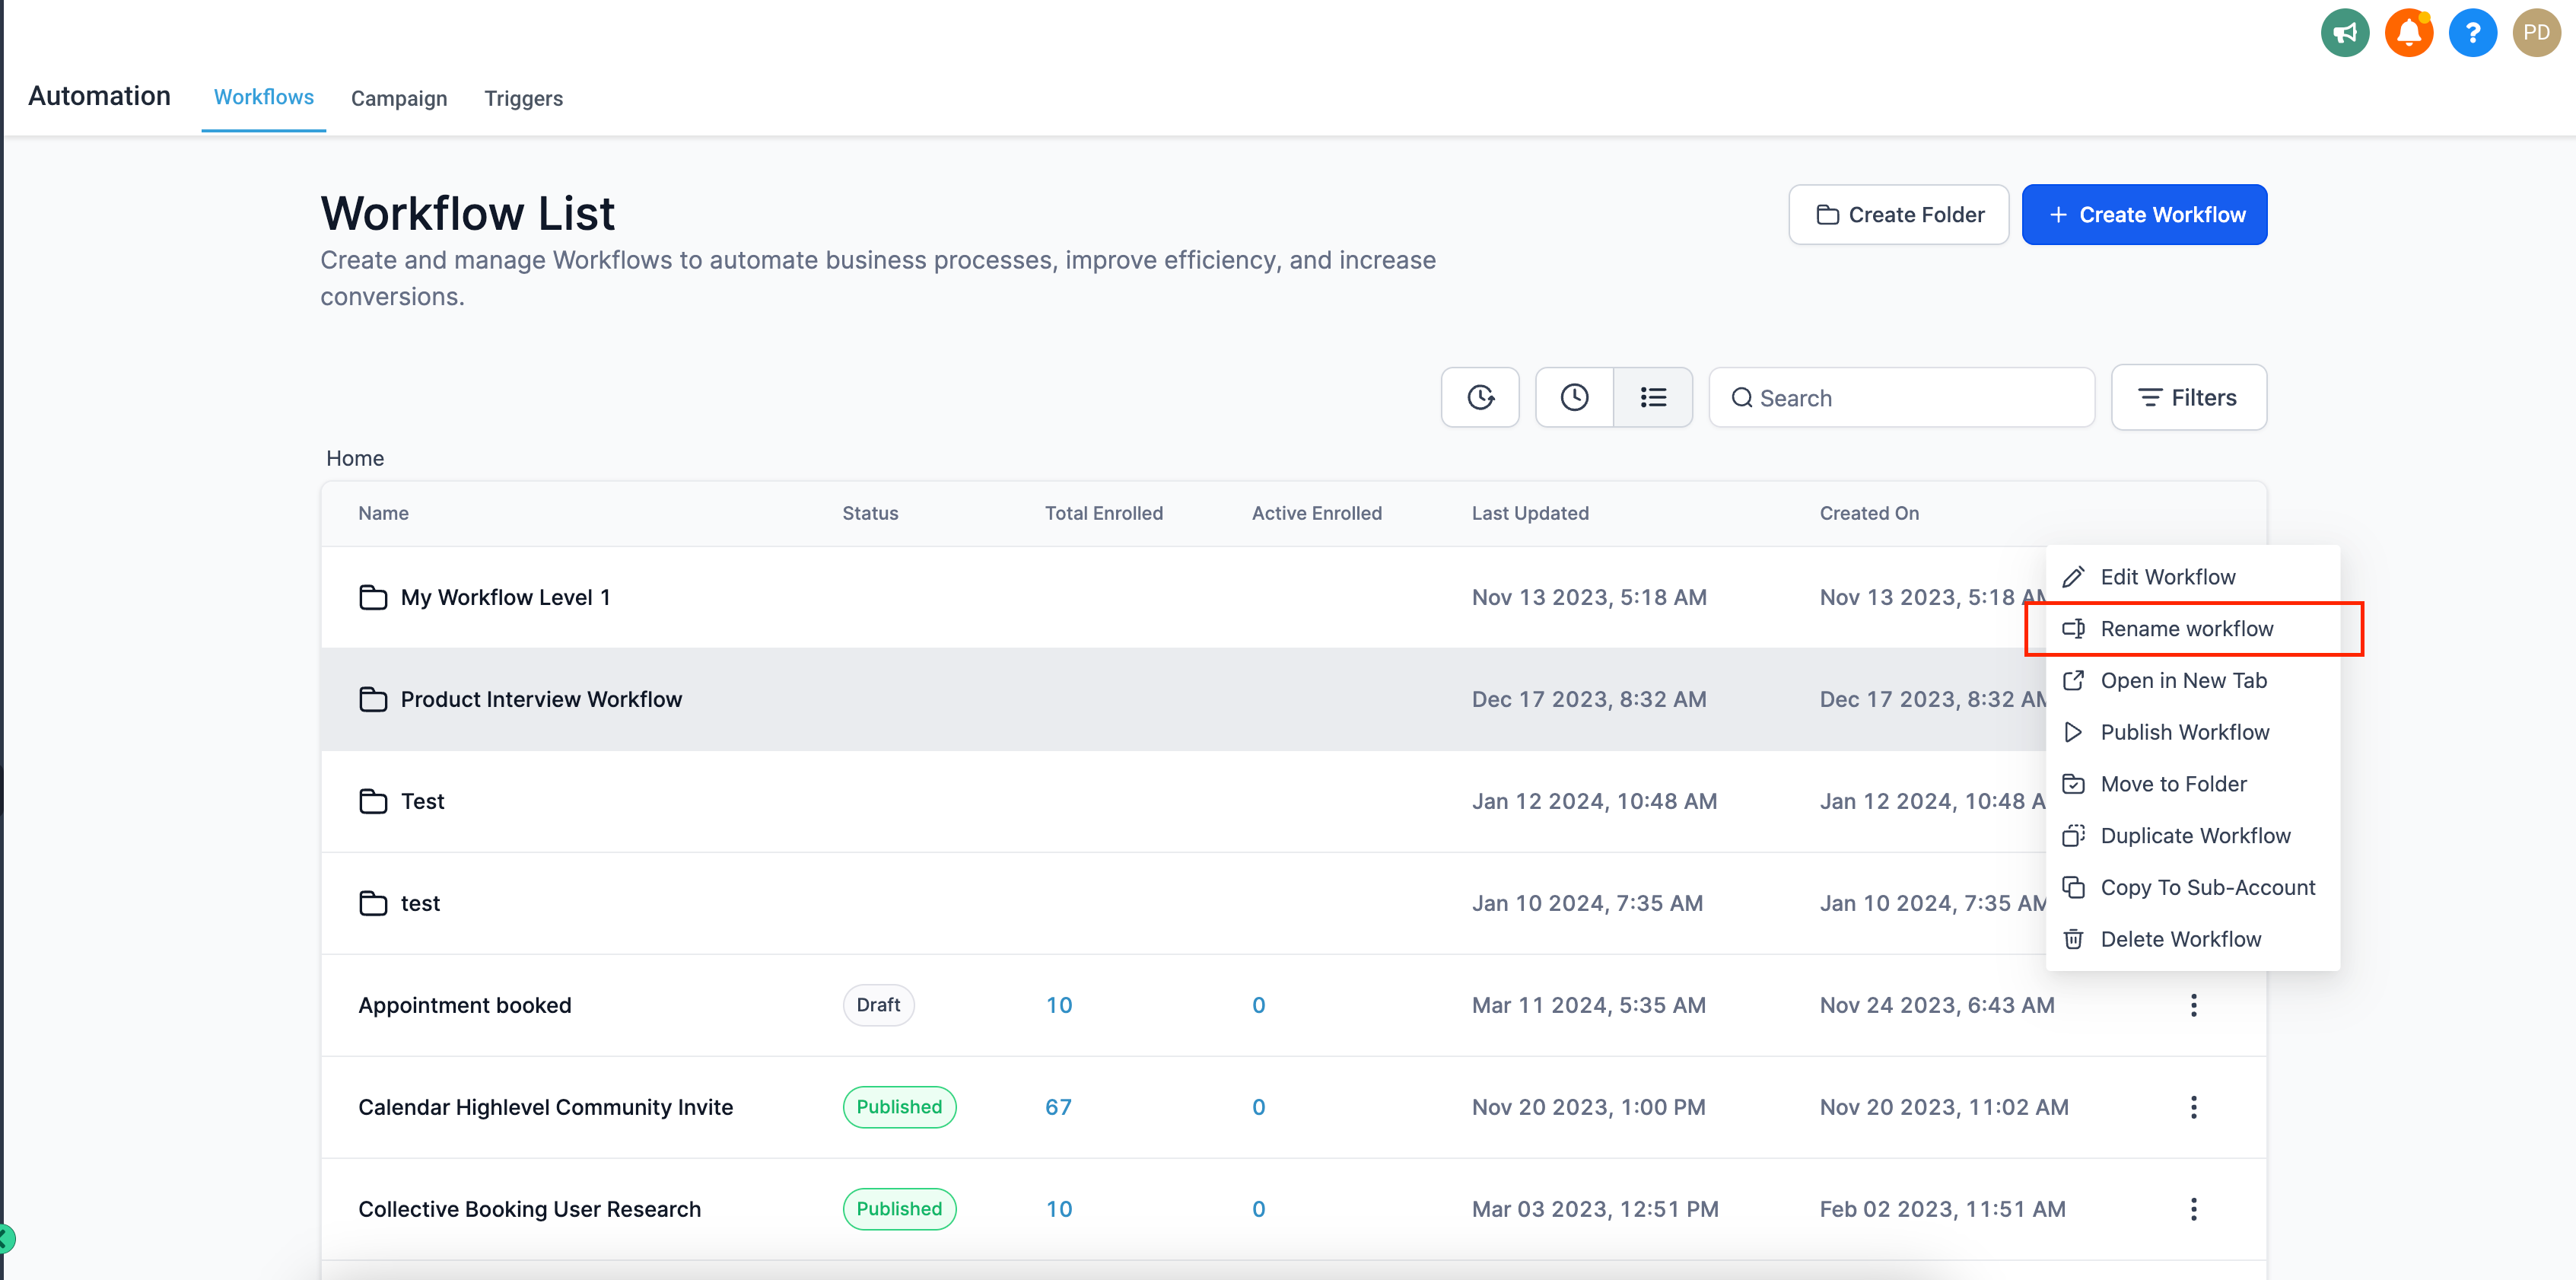
Rename Workflows Directly from the Landing Page
Now, you can easily rename your workflows without having to open them individually.
How it works?
Locate the workflow you want to rename on the landing page.
Click on the vertical three dots menu to reveal additional options.
Select “Rename Workflow” from the menu.
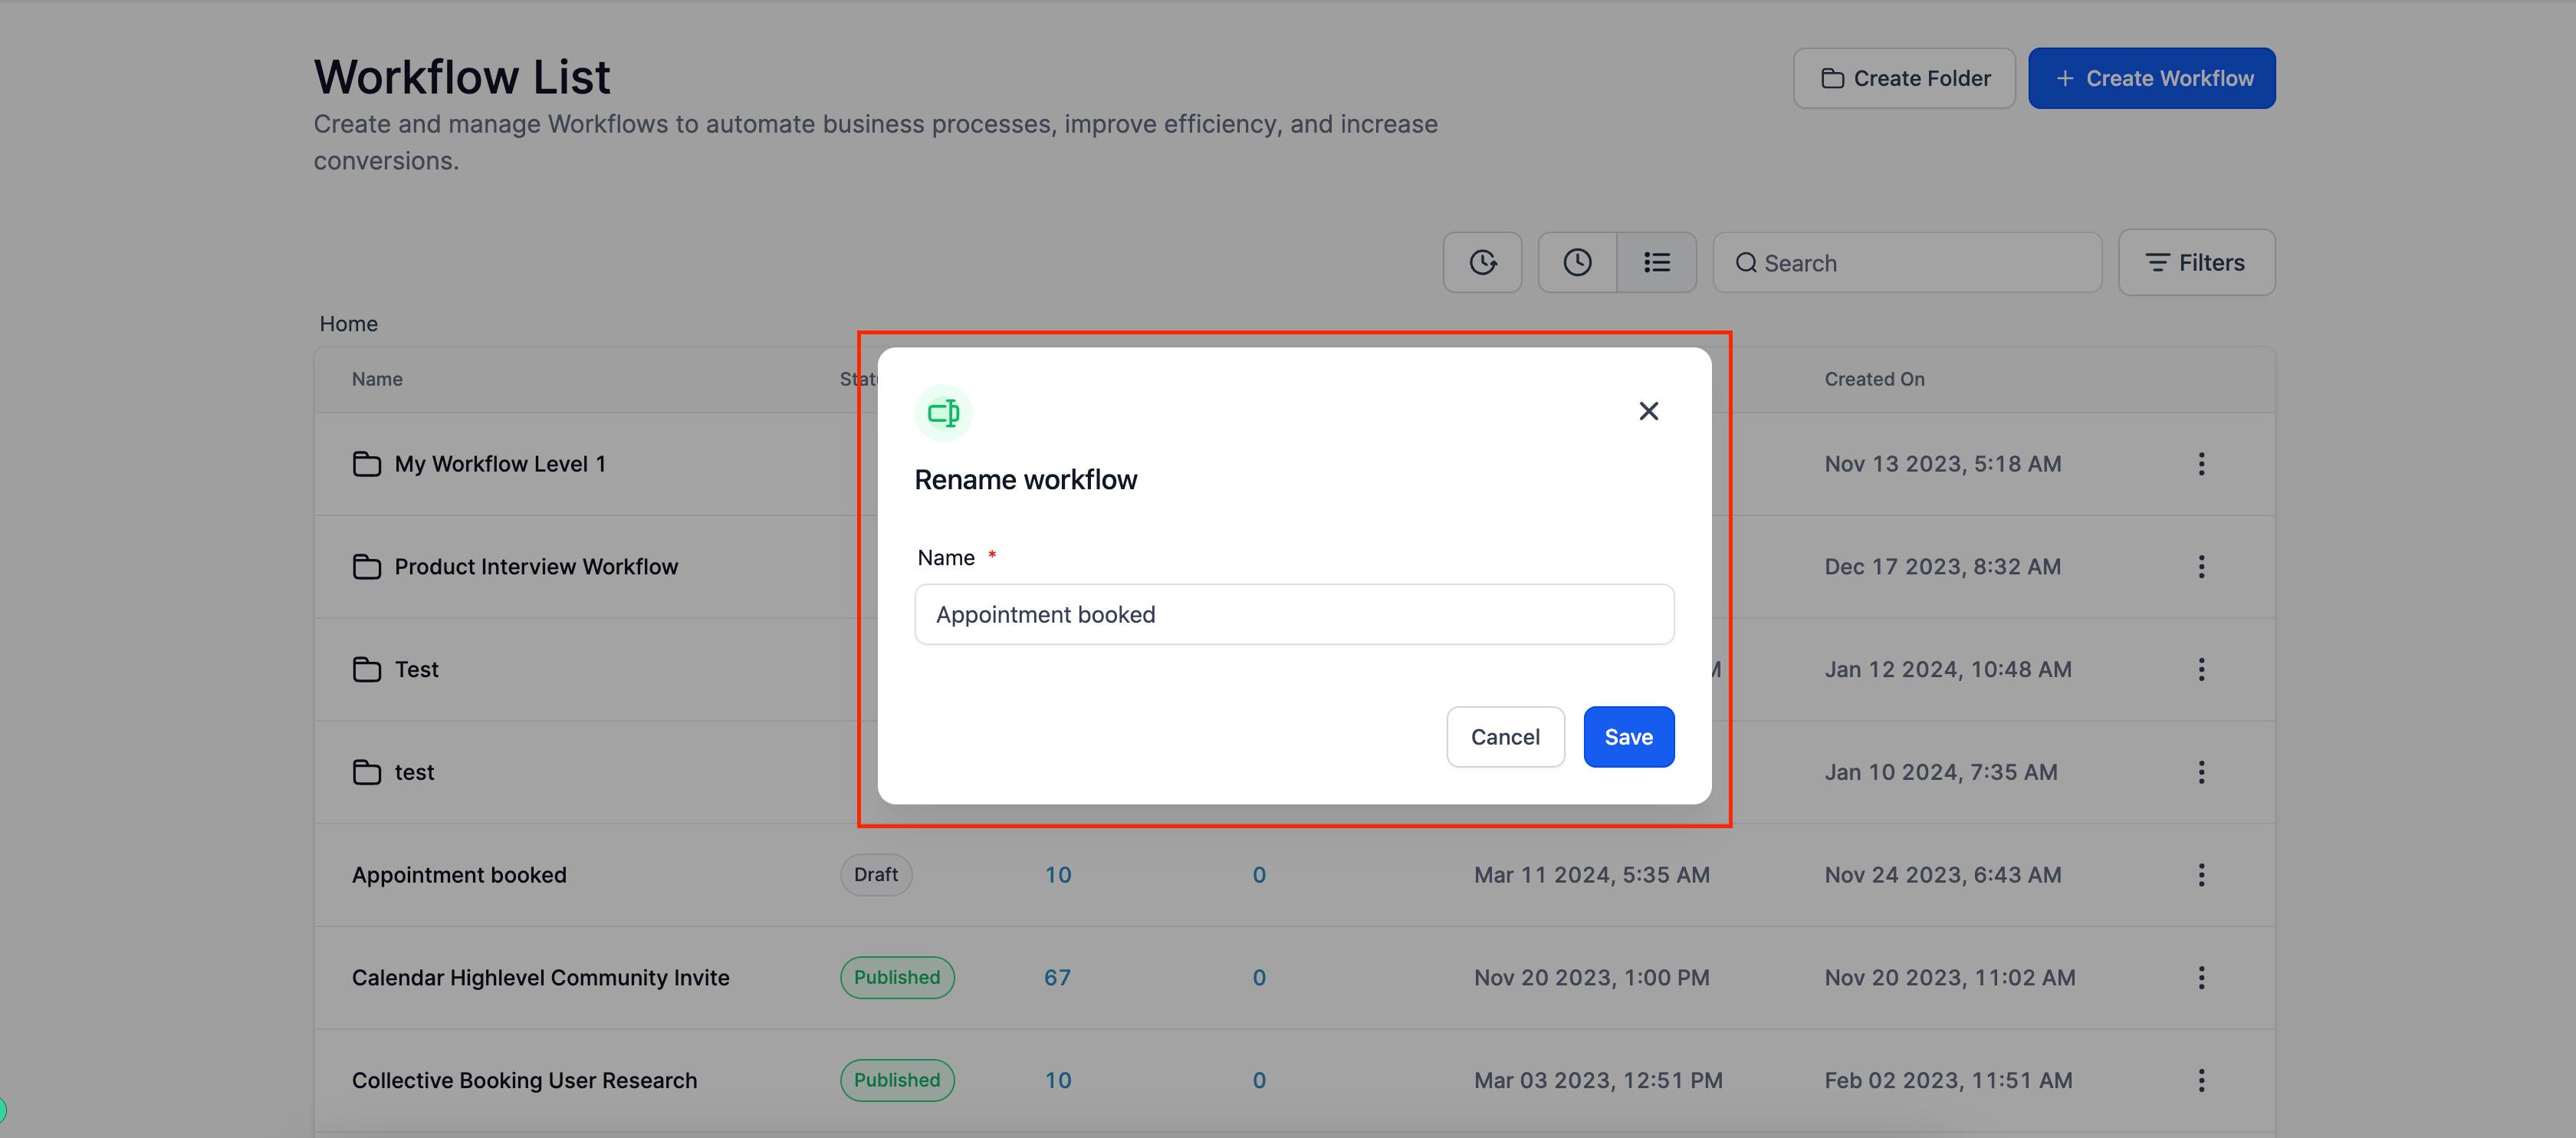
Enter a new name for your workflow in the provided field.
Click the “Save” button to confirm the changes.
LC Phone
Call Transcriptions
Transcriptions will be auto generated for all Outbound and Inbound recorded calls, and will be visible in the conversation page. Transcriptions can be enabled under Advanced settings in voice calls tab.
Mobile Payments
Multiple payment methods
We have introduced the ability to accept payments using Cash, Cards on File, and Manual Entry for mobile Point-of-Sale transactions. Admin and users can now record payments for a POS transaction on Mobile using either Tap to Pay, Cash, Cards on File, Cheque, Bank Transfer, and more!
What’s New:
Cards on File for POS: Accept POS payments using credit/debit cards. Every time a payment is accepted with a new card for a particular contact, that card gets saved automatically for future use, making it super convenient for repeat customers!
Cash Payments on POS: POS can now record cash payments, displaying the exact change that needs to be tendered for each transaction.
Manual Entry on POS: If a payment has been accepted via Cheque or Bank Transfer, an entry can be recorded for that particular POS transaction.
How It Works:
Head over to the POS tab from the bottom bar and initiate a new transaction using your Product Catalog/Keypad.
Link a contact to the transaction and review all the details of the transaction. Once you’re good to go, tap on “Choose Payment Instrument”.
Select your preferred payment method.
Enter the tip amount.
Accept payment via your chosen payment method!
Note: If you choose to accept payment via a saved card, make sure you link the relevant contact on the Review Payment screen. If the transaction does not have a linked contact, no saved cards will show up.
Record payment for Invoice
Admins and users can now record payments for an invoice on Mobile, provided they have specific permissions enabled from the agency settings. Payment can be recorded using Cards (new or saved), manual entry (cash, cards, bank transfer, cheque, others), and tap to pay (only applicable to devices with NFC support).
What’s New:
Tap to Pay for invoices: Now record a payment for an existing invoice using Tap to Pay.
Cards + Manual entry: Record a live payment using a new/saved card or record a manual entry for an already paid invoice.
How It Works:
Open the mobile app with your preferred account selected.
Using the hamburger menu from the top left of the screen, head over to the “Invoice” section.
Choose and long-press on an invoice for which you would like to record payment.
Select record payment.
Select the payment instrument.
Accept payment via your chosen payment method.
Conversations
Notes and Task Management
We’re thrilled to announce that you can now effortlessly create tasks and add notes while engaging in conversations simultaneously.
What’s New:
Seamless Notes and Task Creation: Users can now create notes and tasks directly from the conversations module’s right pane, eliminating the need to navigate outside the conversations module.
Parallel Action: Users can effortlessly take notes and create tasks while engaging in conversations, enhancing multitasking capabilities.
Edit and Delete Tasks/Notes: Seamlessly manage your tasks and notes within the conversations module with the ability to edit and delete.
Undo Delete Option: Introducing the ‘Undo Delete’ feature for both tasks and notes, allowing users to effortlessly restore accidentally deleted items and prevent data loss.
How It Benefits:
Boosts Productivity: Managing notes and tasks within the Conversations module saves time and allows users to quickly multitask.
Improves User Experience: Integration into the conversations module reduces interruptions, providing a smoother and more intuitive workflow.
Easy Recovery: The ‘Undo Delete’ feature allows users to recover accidentally deleted tasks, minimizing disruptions and preventing data loss.
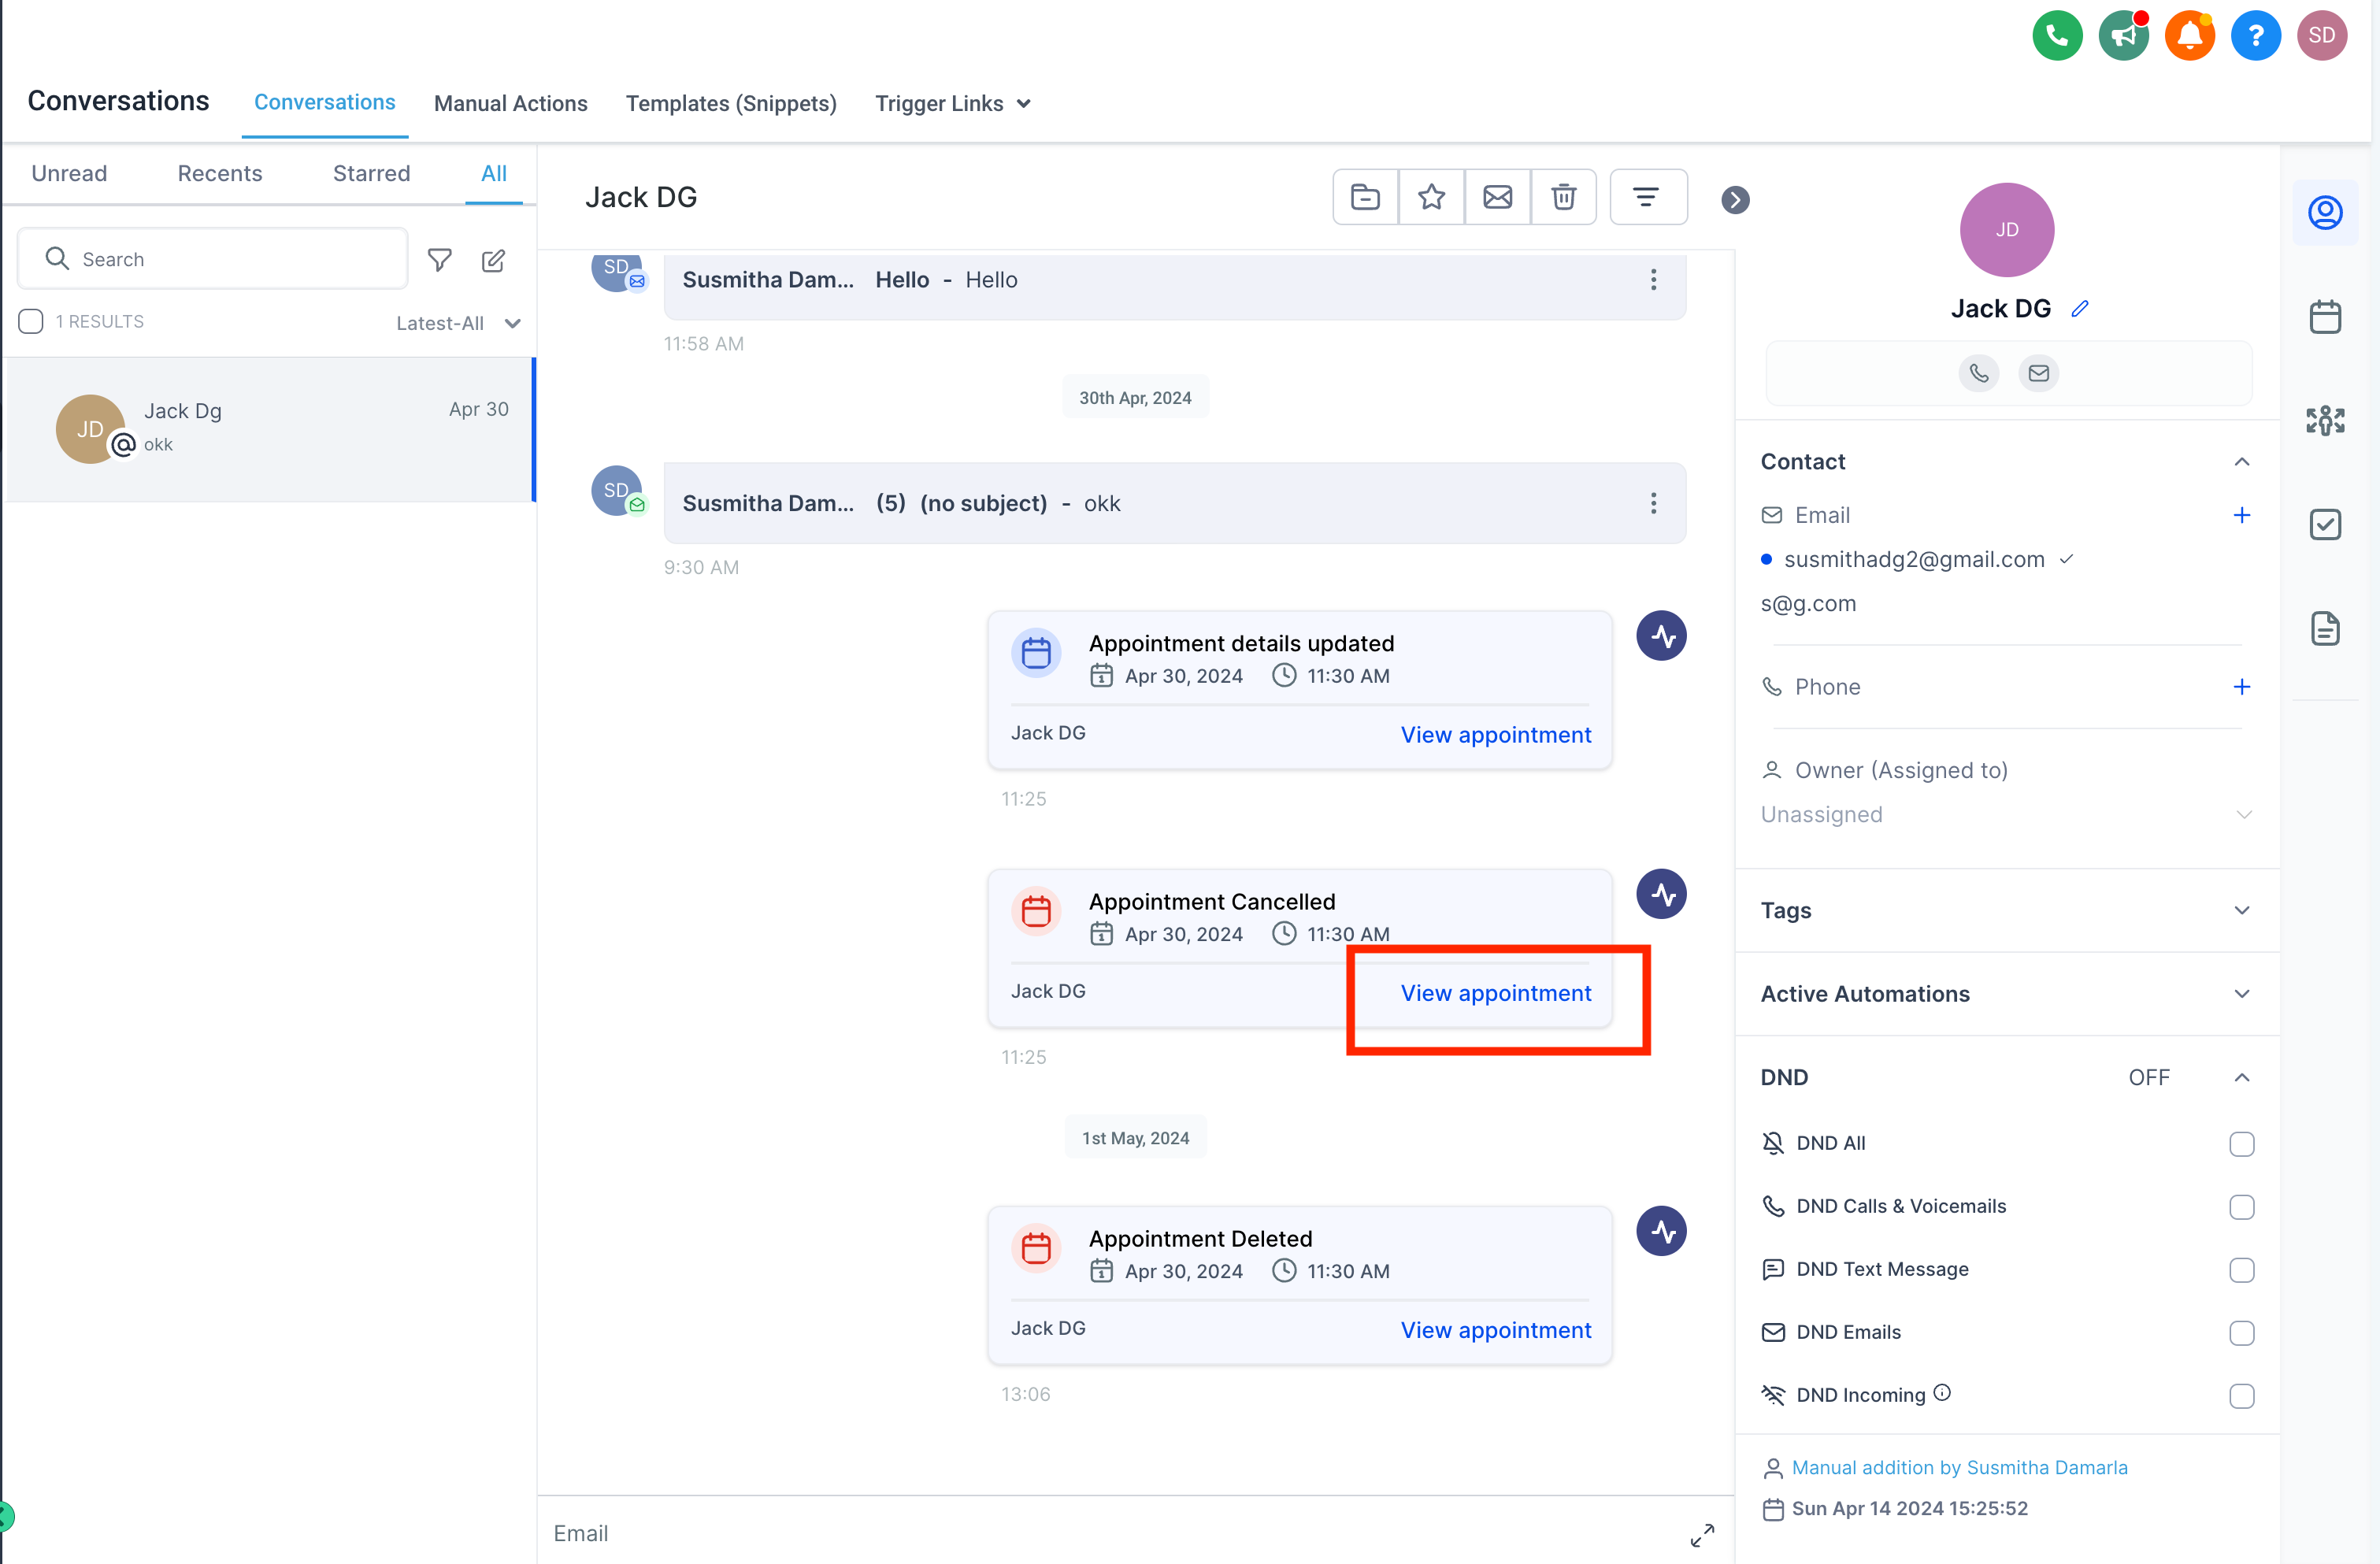
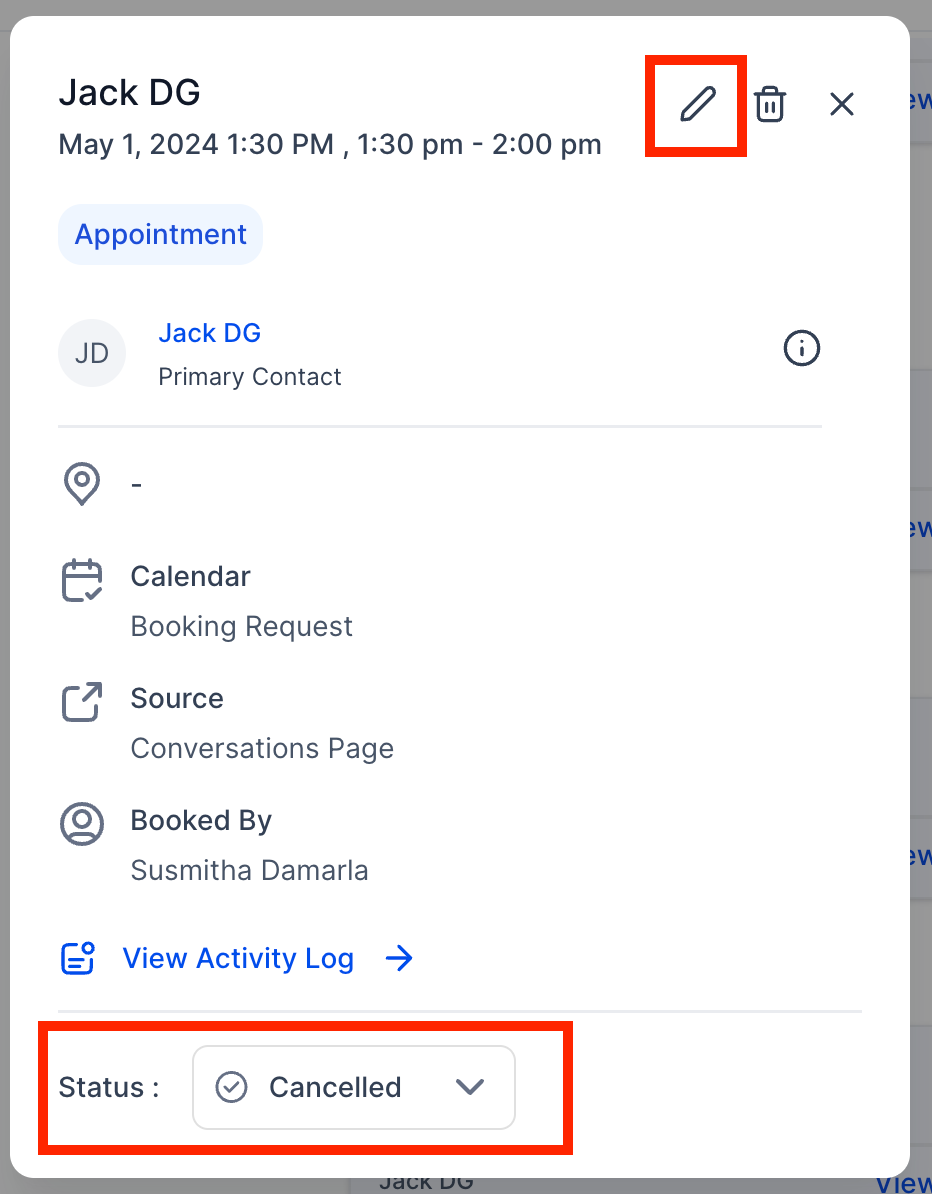
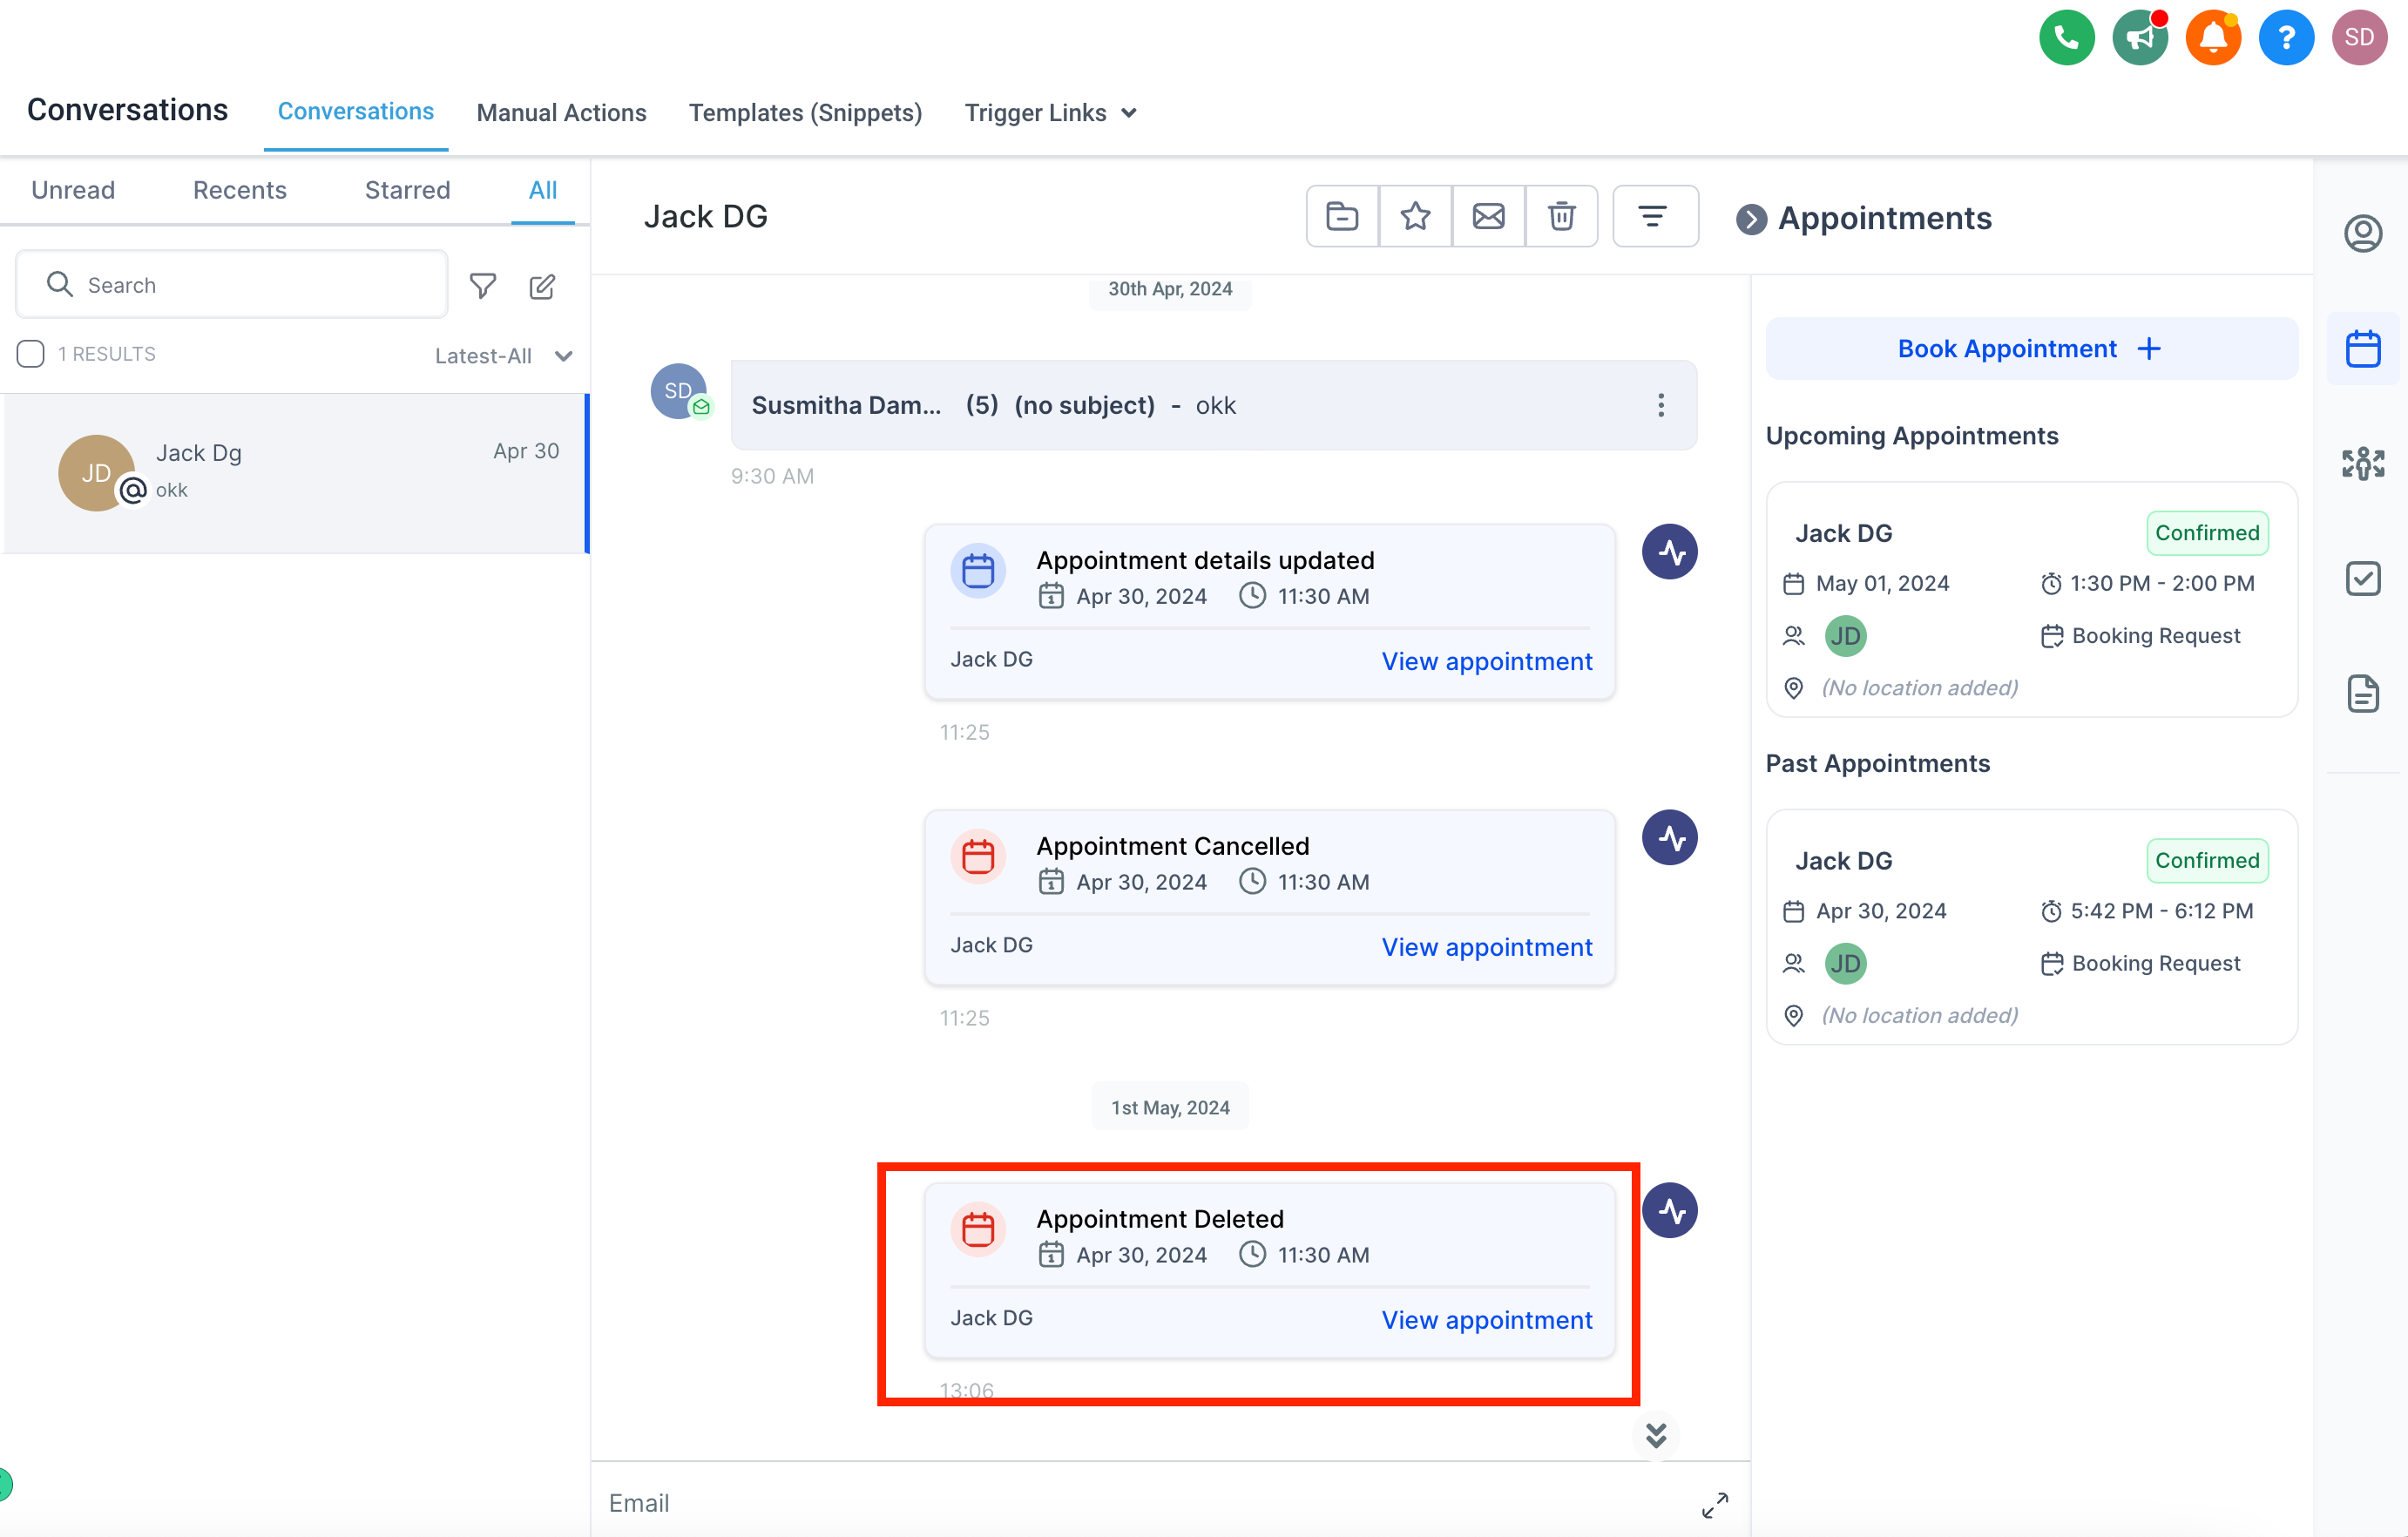
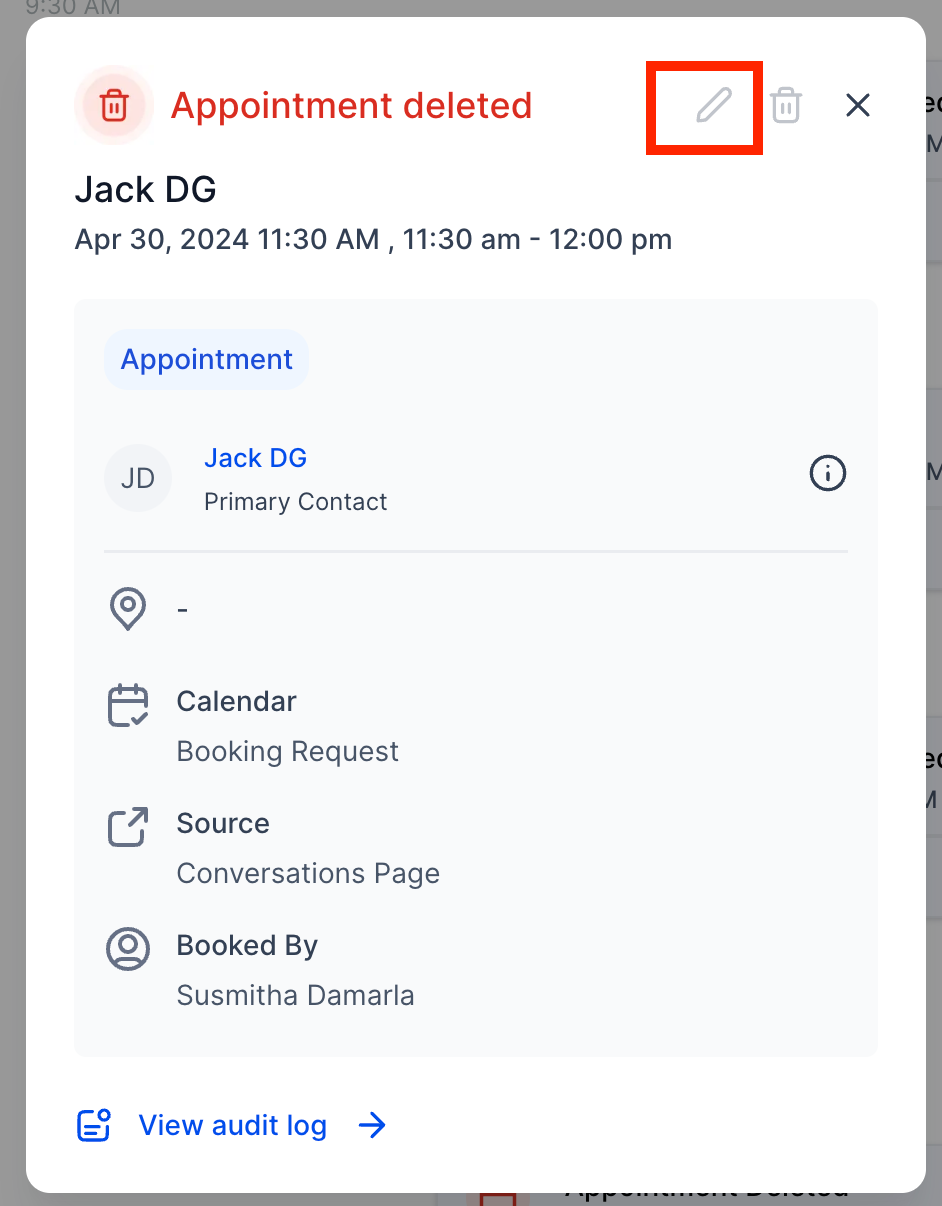
Appointment Activities
Users can now view and update the details of cancelled appointments from Conversations module.
Deleted Appointments: now reads as “Appointment Deleted” when an appointment is deleted. Users can view deleted appointments but cannot edit them.
Audit Logs
Calendar Settings
Now, users can easily track edits made to their calendars, including the timestamp, editor, and specific modifications.
What’s New?
A new team member was added? Was the availability changed? Not sure why the calendar is adding buffer time? You can track all such changes to the calendar settings from the audit logs.
Users can effortlessly check edits to their calendars, including who made the changes, when they occurred, and what specific settings were modified.
This feature simplifies troubleshooting and provides precise insights into any adjustments made, ensuring transparency and accountability.
To make it simpler, we are now also showing calendar ID in the calendar settings.
How to Use?
Navigate to Settings > Audit Logs.
Select “Calendars” under the module to view changes across all calendars.
Alternatively, for a specific calendar:
Access Calendar Settings and copy the calendar ID.
Proceed to Settings > Audit Logs.
Paste the calendar ID in the ‘Document ID’ search box and get all details specific to that calendar.
Affiliate Manager
Link/Add Affiliate’s Paypal Account
We are thrilled to introduce the ability for both admins and affiliates to seamlessly add PayPal as a payout method in affiliates’ profiles, which will streamline the payout process and leverage the Auto Payouts using PayPal feature.
For Admins:
Head over to the Affiliate’s Profile Page.
Navigate to the Payout Method Tab.
Add Payout Method.
Enter Affiliate’s PayPal Email ID.
Click Done.
For Affiliates:
Access Affiliate Portal.
Navigate to Commissions Tab.
Add Payout Method.
Enter PayPal Email ID.
Click Done.
Automated Affiliate Payouts using Paypal
Now you can process affiliate payouts directly form your account.Email Notifications will be sent to both Sender and Receiver(Affiliate).
Requirements:
Integration with PayPal Business Account
Addition of PayPal email IDs for affiliates under affiliate’s Payout Methods
How It Works:
Navigate to Payouts Page
View Approved Payouts
Select Affiliates for Payouts
Click “Pay” to pay multiple affiliates together, or the blue Pay icon for individual payments
Review and Confirm
Click “Pay Now”
Note:
Ensure PayPal Business Account integration and valid PayPal email IDs for affiliates.
Only Admins can initiate payouts using this method.
WhatsApp
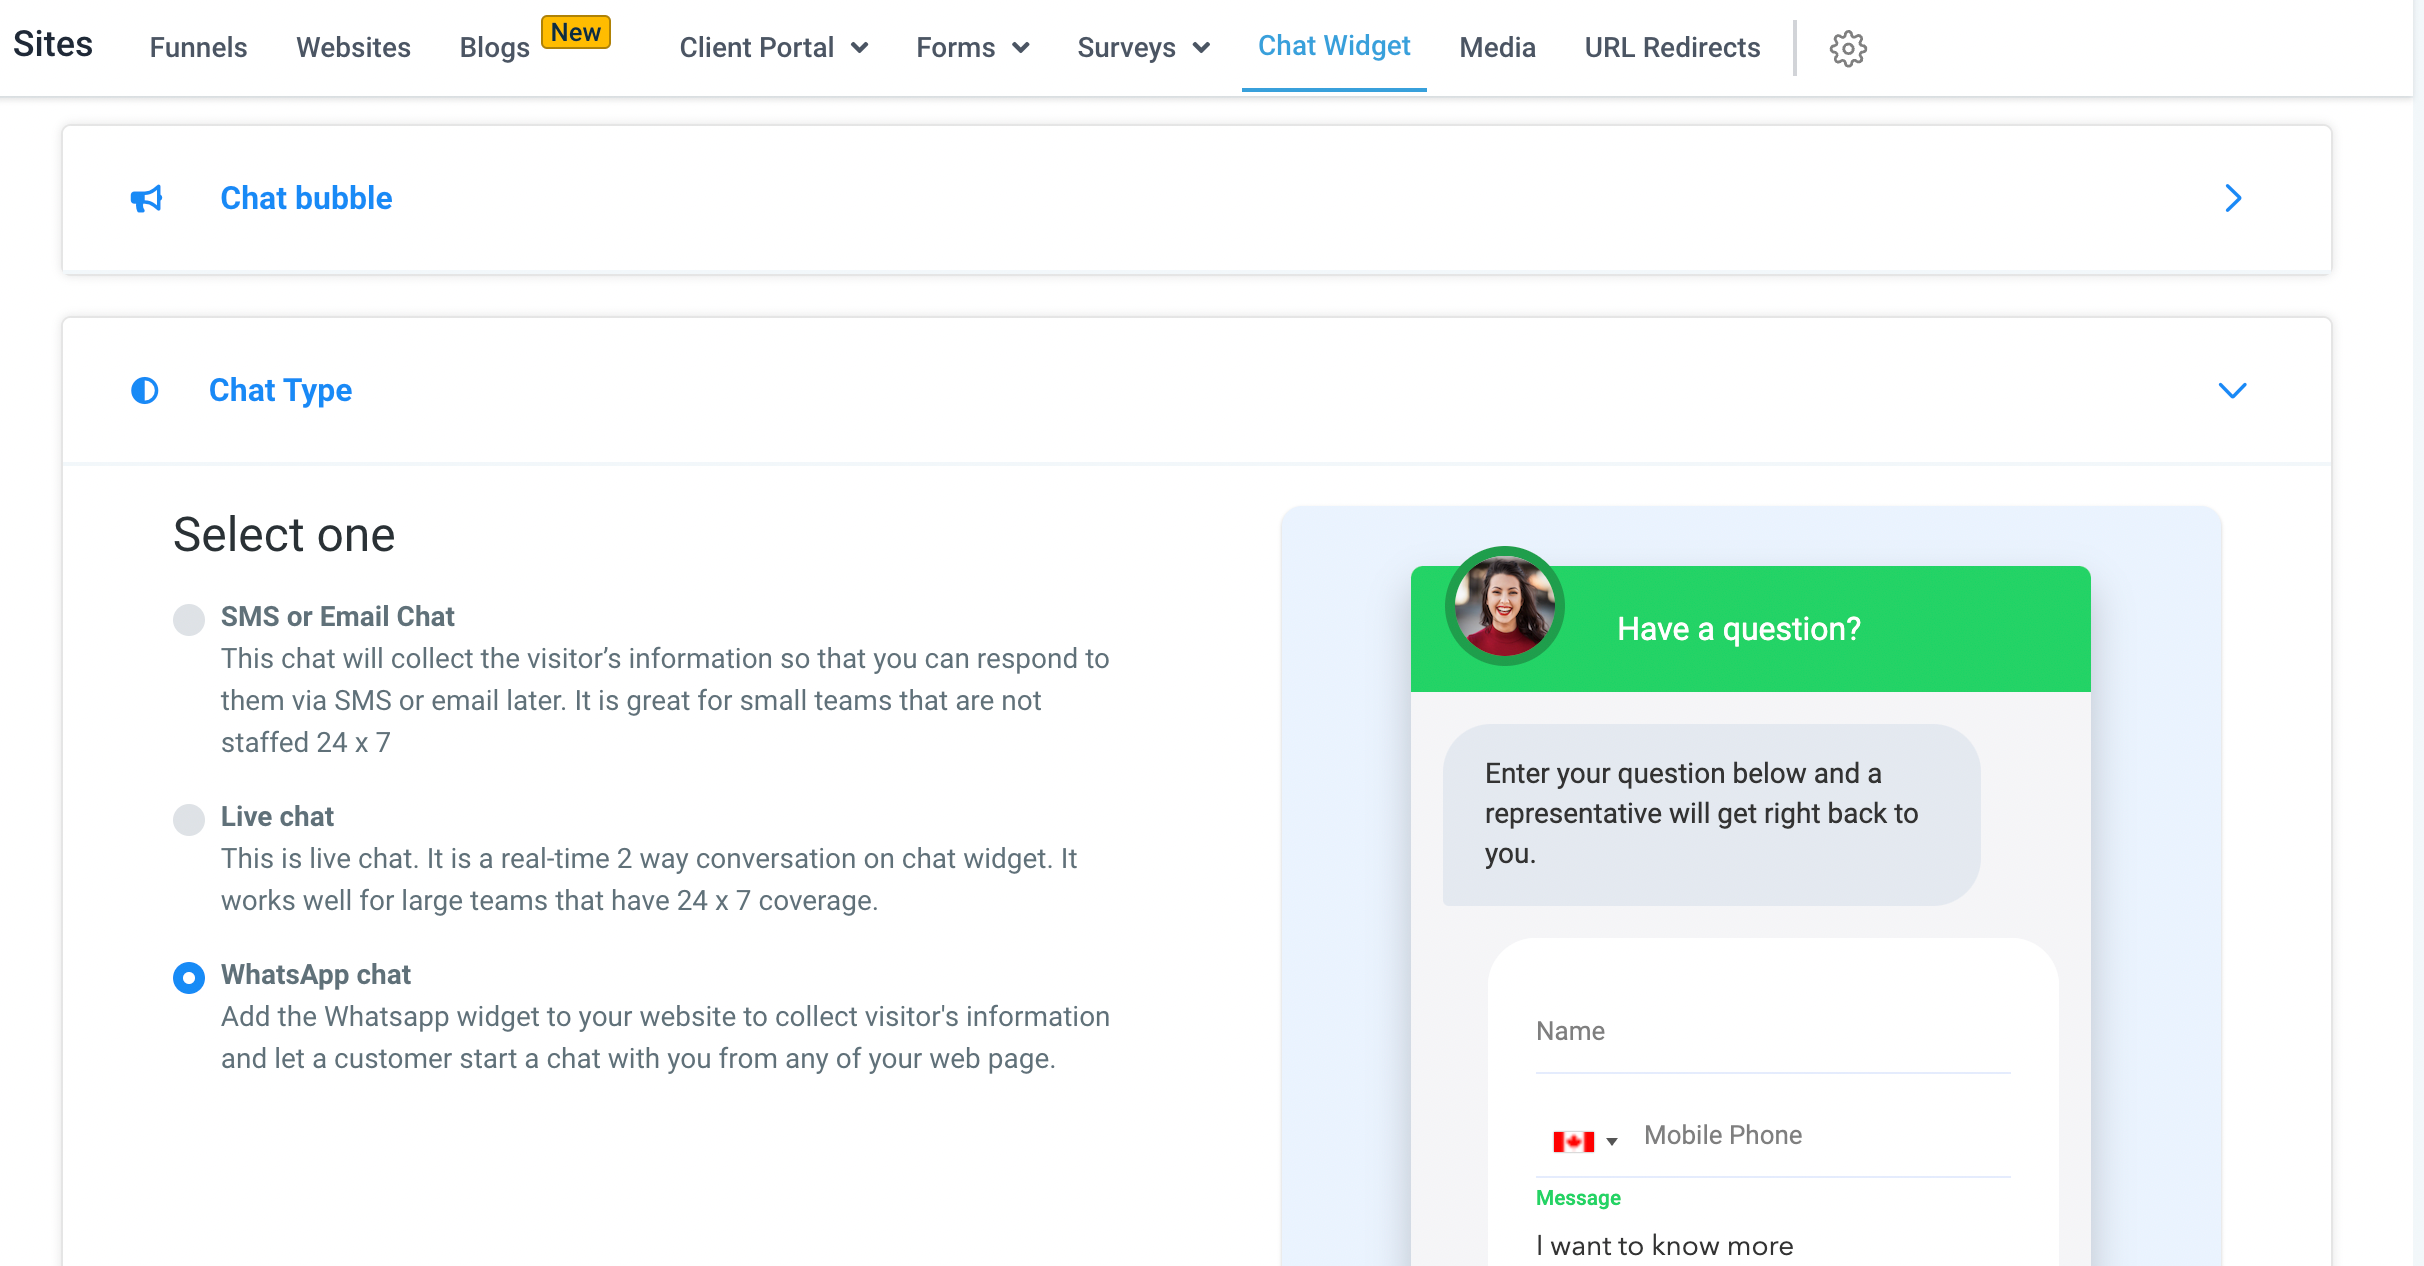
Chat Option
We’re thrilled to introduce one more option in Chat Widget with the option of Whatsapp Chat Type.
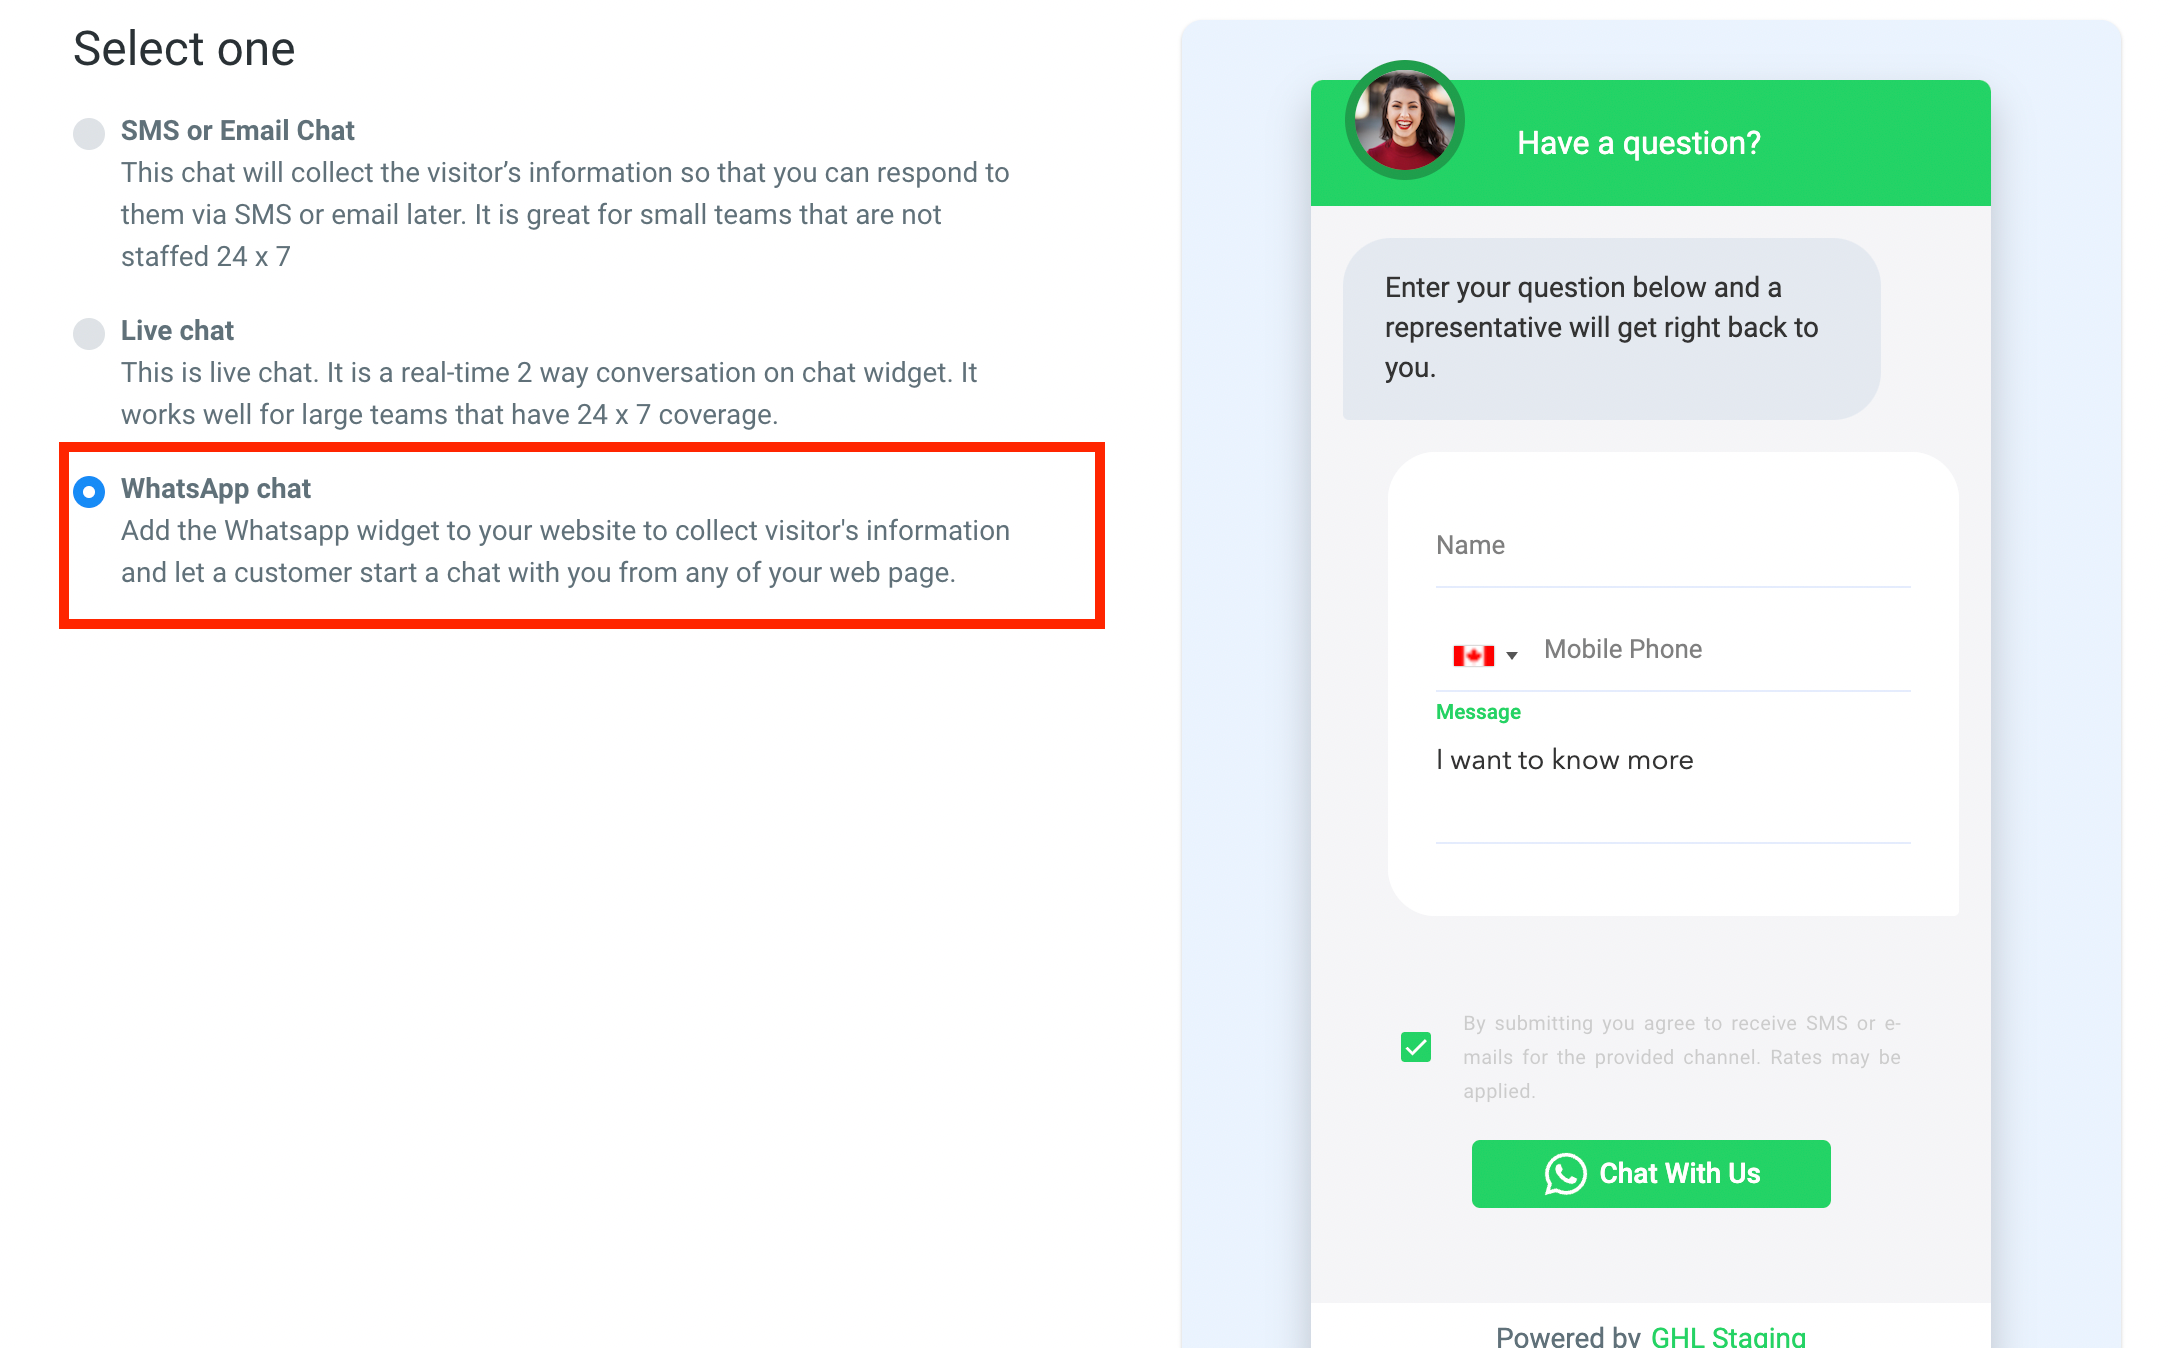
How to enable Whatsapp Chat Widget?
Go to Sites > Chat Widget
Navigate to Chat type and select the option of Whatsapp Chat
In the widget window, you can customize the text, colors, branding and forms with email/phone.
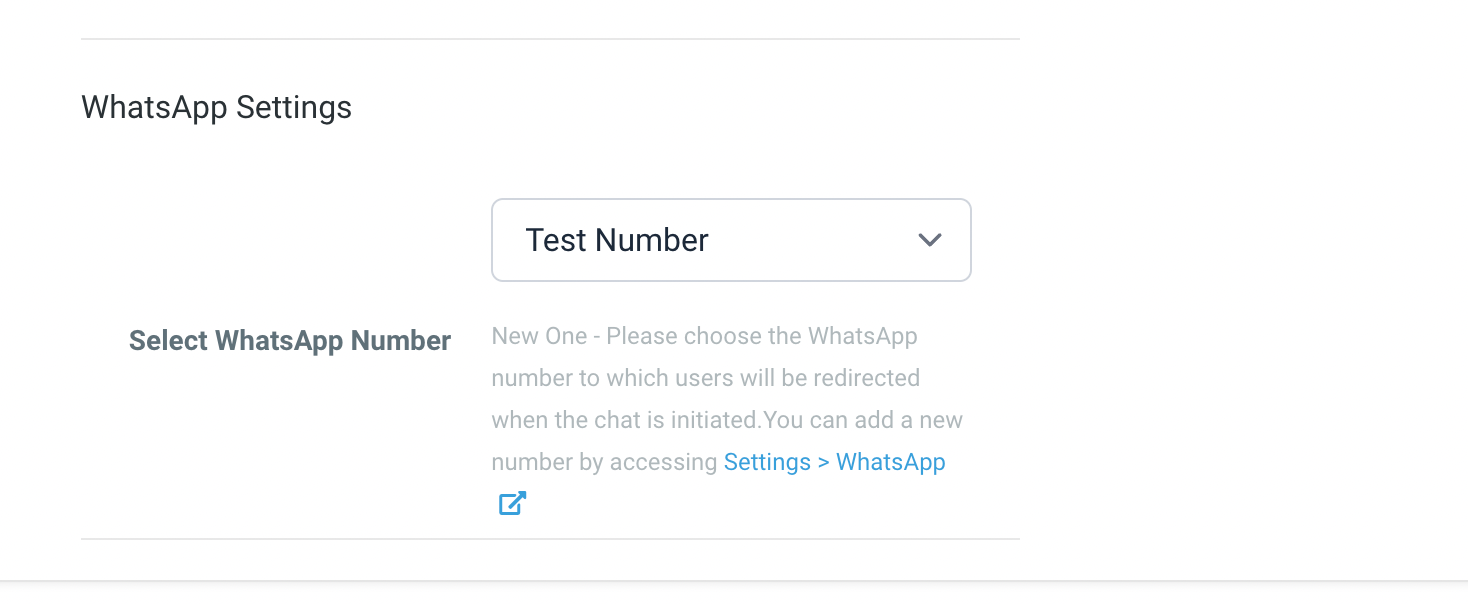
Once the setup is done, select the Whatsapp number. when a chat is initiated.
Add the code to the landing page (external providers) header code or use it in FGF by enabling the toggle in Funnel/Website Settings.
Media Templates
WhatsApp now supports sending Media templates, including Images, Videos, Documents, and Location. This feature empowers users to create high-quality marketing campaigns and boost engagement by incorporating rich media content into their communications.
How It Works:
Navigate to the Settings > WhatsApp
Select Templates > Create Template
Enter Template Name > Select Template Category > Select Language
Show Header > Select Media from Image, Video, Document and Location
Upload the Media you wish to add to your WhatsApp template
Write Template Body
Select Create > Template will be sent for approval to Meta
Email Builder
Google Fonts
We’re thrilled to announce the addition of Google Fonts to our email campaign and template builder, providing you with a diverse range of font options to elevate your email designs.
Now, users can seamlessly access and utilize Google Fonts directly within the font selector of our email builder. Font management is made effortless through the settings page, enabling users to add, delete, and control fonts with ease.
How to Use It:
Navigate to the email builder under Marketing>Emails.
Open an existing email campaign or template, or start a new one.
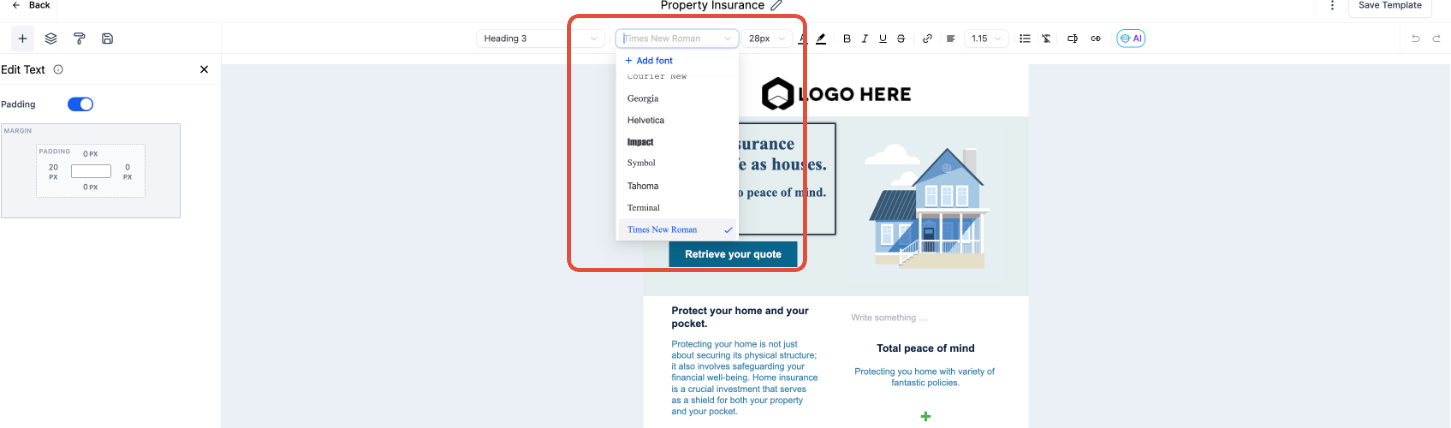
Select a text element within your design.
Choose the font selector option.
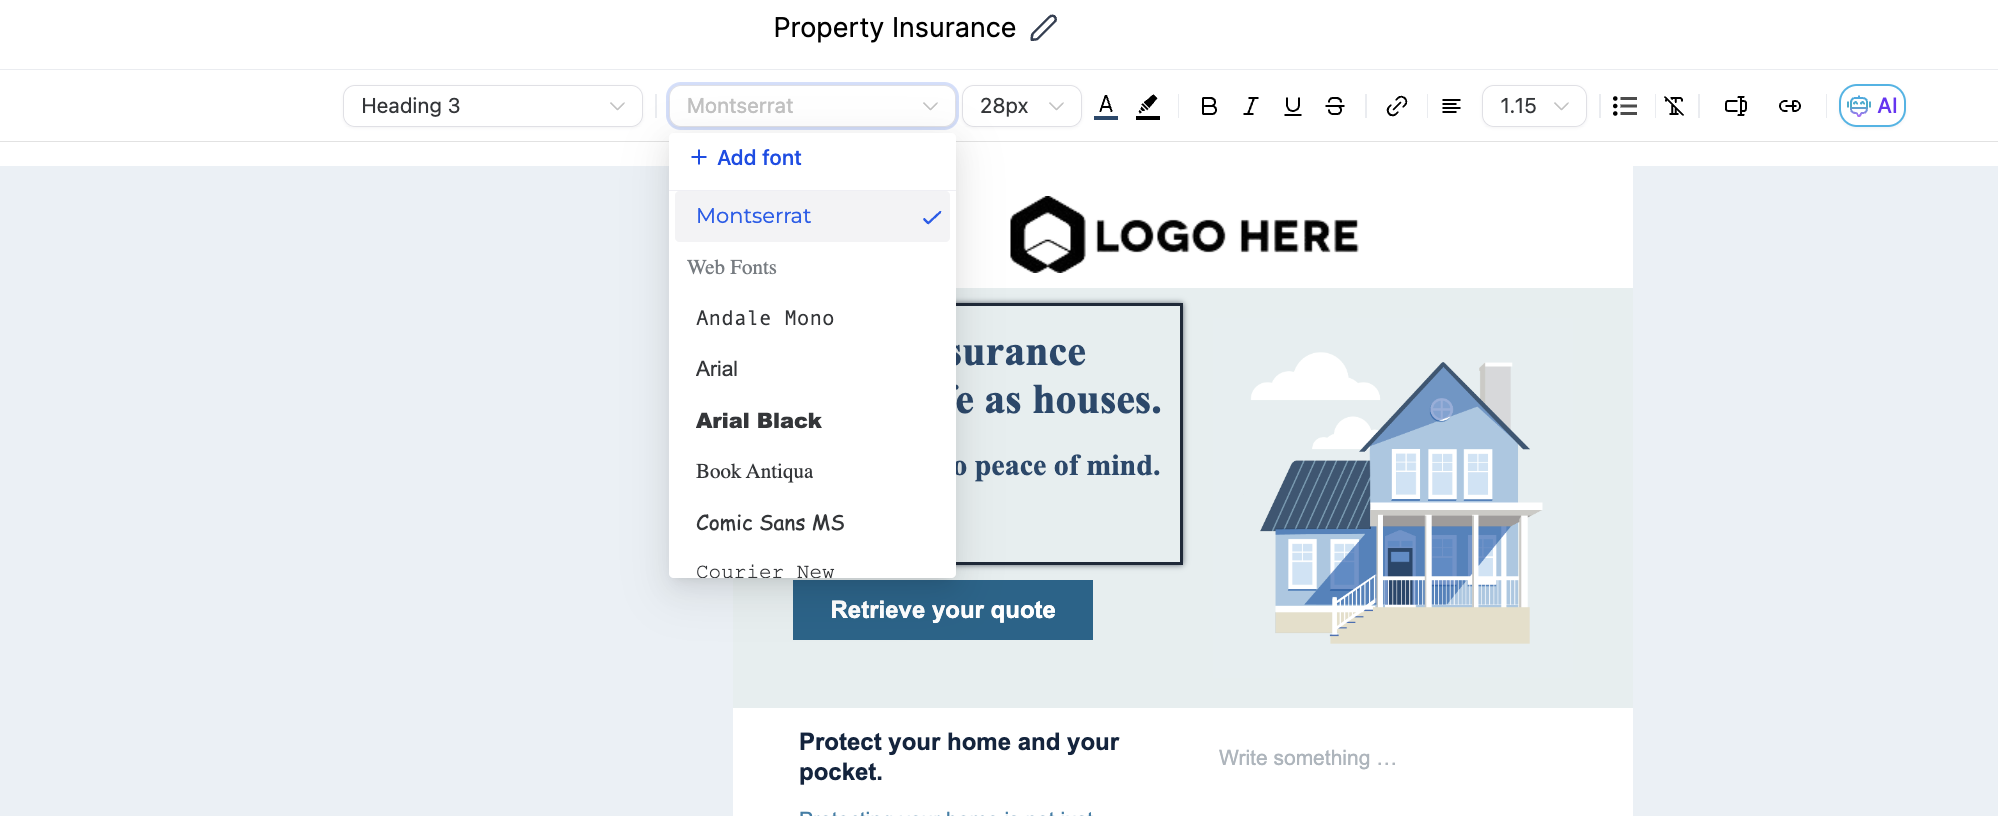
Click on “Add fonts.”
Select the desired font from the drop down in the modal. Then, select the desired font and save it by clicking on “Add font“.
Select the desired font and save it. The font will now be available in the font selector for every builder.
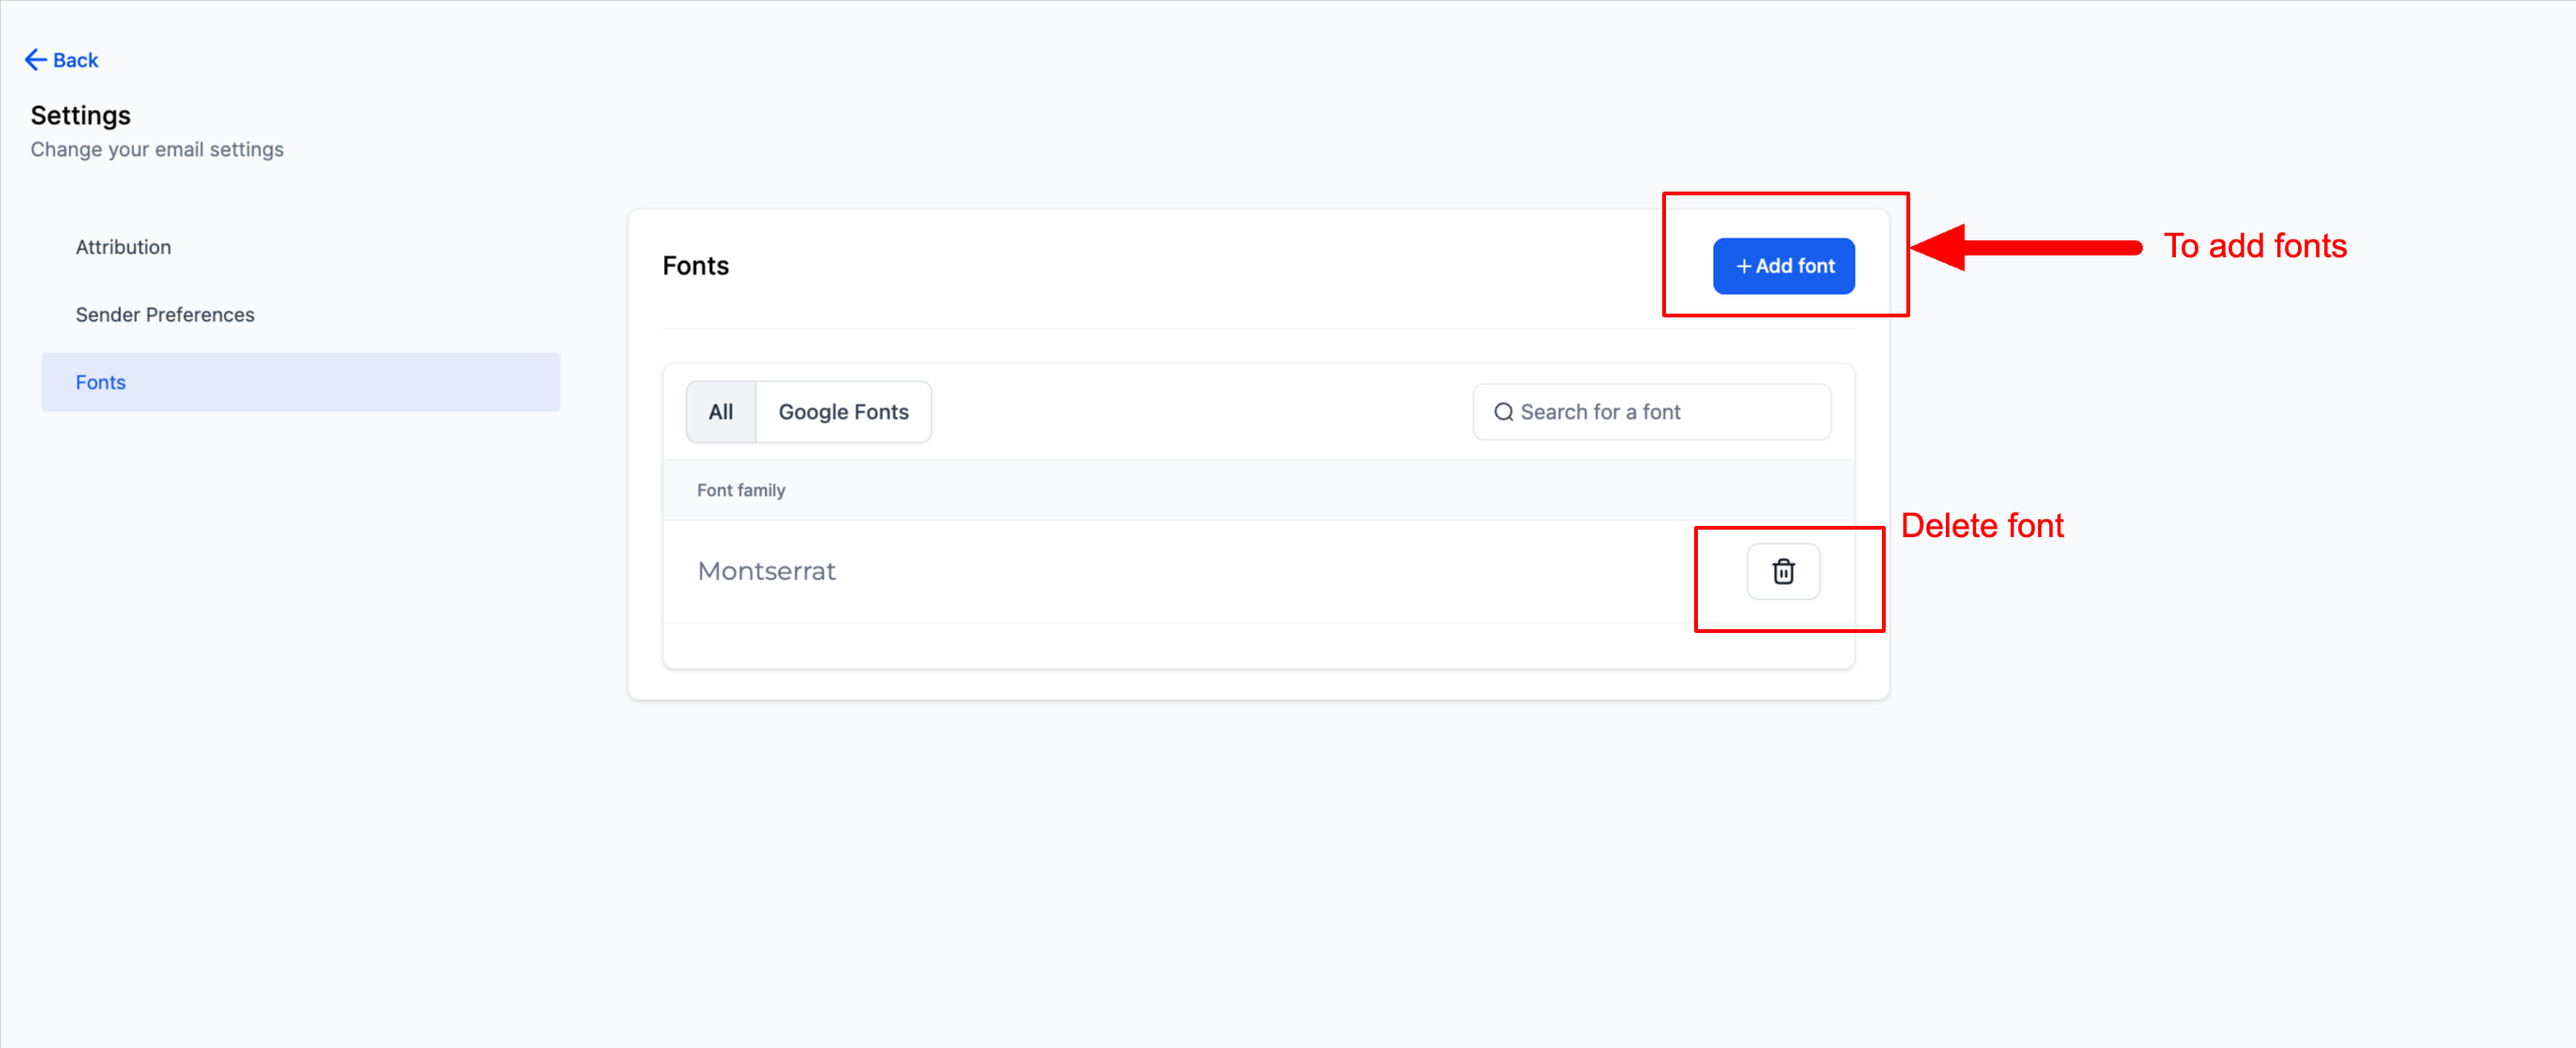
Fonts can also be managed from the settings page.
To delete a font, simply click on “Delete” next to the respective font.
Social Planner
Calendar View Enhancement For Recurring posts
We have extended and enhanced the calendar view showcasing the recurring posts queue to get the full picture. This is quick win for the team.
How It Works:
Go to Marketing > Social planner
Create new posts with the content and media.
Click on the Post Now option – Select Schedule Recurring Post
Set the recurring post the day, week, month and year to create evergreen content