Hello, again, funnel friends! We’re back with a handful of updates from the week of May 11th through May 17th, 2023.
If reading through these updates sparks a question about FG Funnels, just send it over to [email protected] and our team will be ready to answer.
Payments
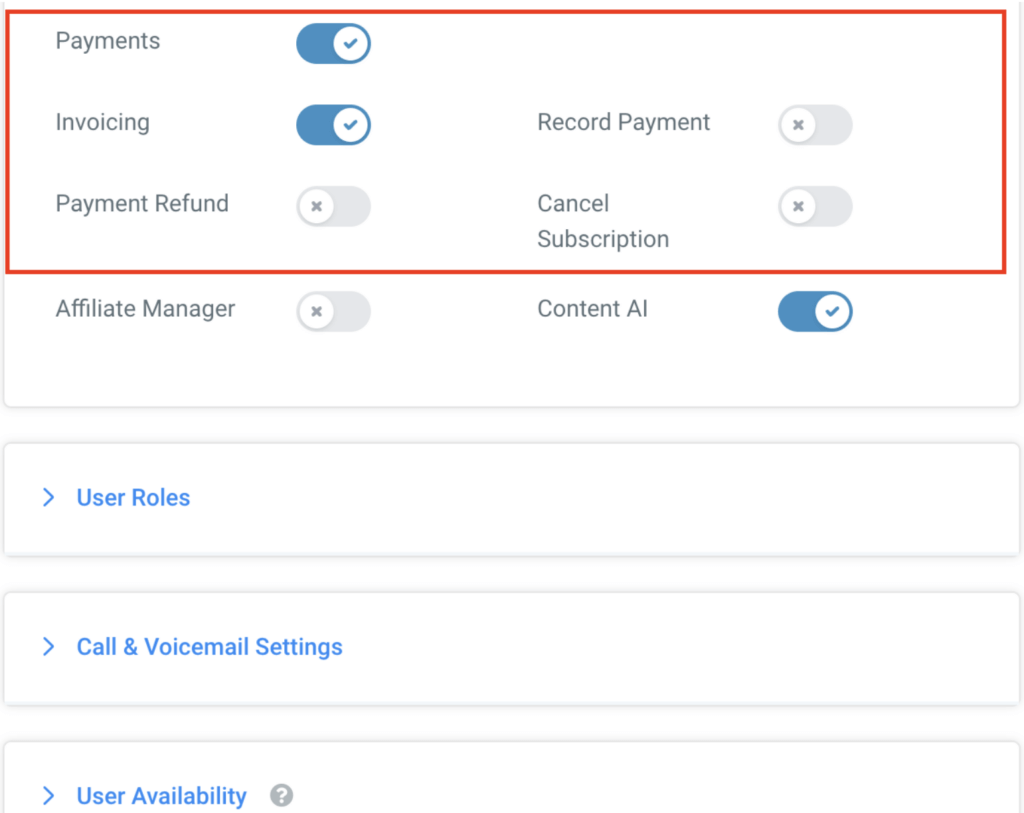
Define user permissions for payments and invoicing
Business admins can now control user permissions for business users. Disabling a permission will not allow the specific business user to access the feature.
Invoicing – User permissions to control which users will be able to see the Invoices tab under the payments menu. This permission applied to mobile apps as well
Refunds – User permissions to control which users will be able to process refunds on the Transactions page
Record payment – User permissions to control which users will be able to record invoice payments manually
Cancel subscriptions – User permissions to control which users will be able to cancel existing subscriptions/recurring templates
Payments – User permissions to control which users can access the payment menu completely
ONLY business admins will be able to define the permissions for business users
Invoicing
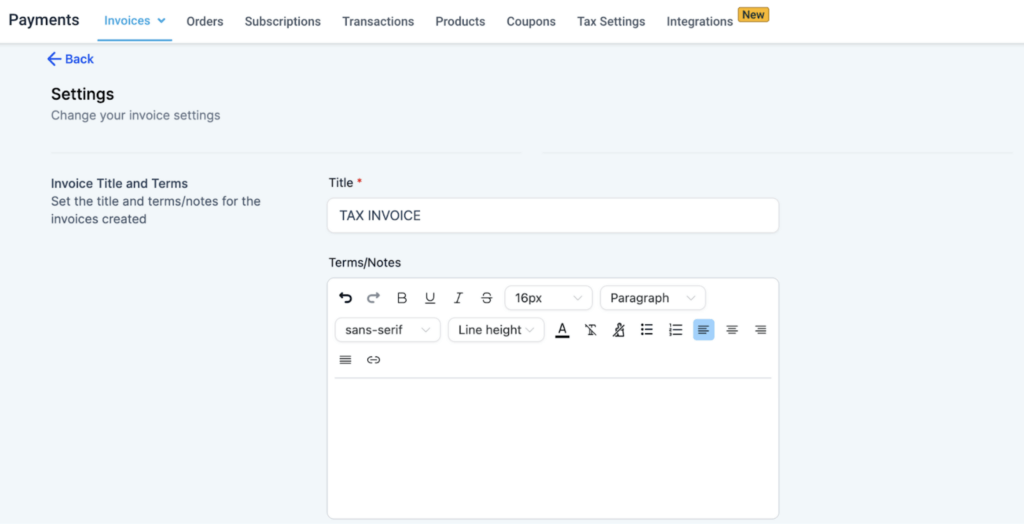
Formatting terms and notes in invoices
Businesses can now customize the terms and notes at the bottom of the invoice using the rich text editor
Head over to the invoice settings page to define custom terms and notes for all your invoices generated
Customization includes the ability to insert links, text formatting, bulleted lists, alignment, and adjust line heights
This will also solve the major pain point of not being able to insert line breaks in the terms and notes
Workflows
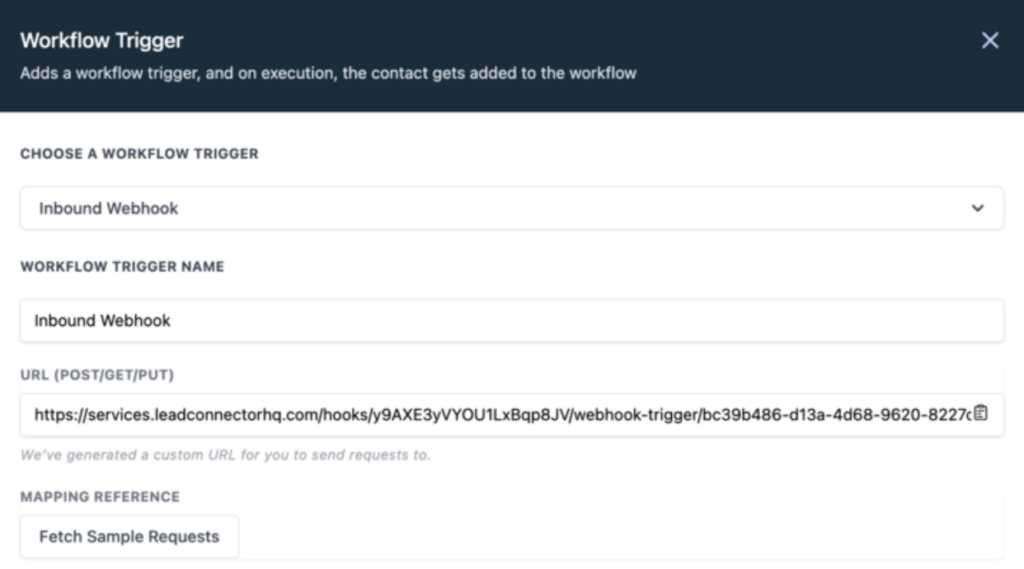
Inbound Webhook Trigger SuperCharged!
New Methods Allowed:
GET
PUT
HEAD (informative 2xx)
OPTIONS (informative 2xx)
Spaces in Custom Variables work across the Workflow App.
Query Parameters and Headers accessible inside the Workflow
UI Enhancements
How does it work?
For all Custom Variables, but mainly the Inbound Webhook ones, you can now use Spaces to reference them
Example: {{inboundWebhookRequest.Shopify Product Purchase}} will now function perfectly.
We will edit that in the backend to match {{key.[key with space]}} and handlebars will then accept it
No change required in the setups with spaces that were already made
Besides POST, Inbound Webhook Triggers can now be called by GET and PUT methods
They function the exact same and store data in the same way.
They’ll appear together with the POST requests when mapping the Reference
HEAD and OPTIONS methods will return a successful 2xx response
So that third-parties like ThriveCart and others can hit us and confirm the endpoint exists and is valid.
Headers will be saved inside the Request Payload!
And can be accessed in Custom Variables and Conditions across the Workflow
Query Parameters sent via the URL will also be saved inside the Request Payload!
And of course, can be accessed in Custom Variables and Conditions across the Workflow
Example: inbound-webhook-URL/ID?parameter=example
In the UI you can see better labels and descriptions
Why is all of this important?
All third-party apps that have Outbound Webhook integration methods should now fully function with the Inbound Webhooks
The only case where it won’t is when there is a lack of Phone or Email to reference a Contact
To which we can simply add [email protected] to the end of the URL and use that as the main Contact for the integration
This is a temporary workaround while we plan and build the ContactLess Workflows which will then raise the limitation.
Our clients should have way less reasons now to use other apps like Zapier, Pabbly, etc…
Internationalisation
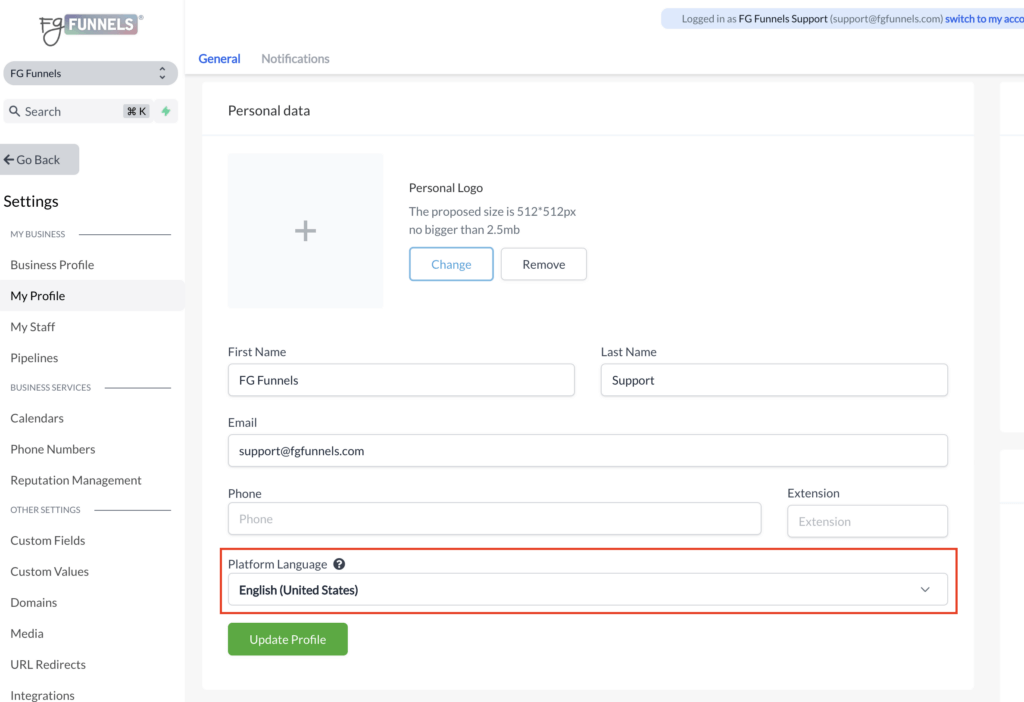
Ability to change the platform language at the user level.
Now, users can set preferences for the language in which they want to experience the platform.
User-level settings will supersede the sub-account level platform language settings, bringing more personalization for the users.
If a user is connected to multiple accounts, the platform language will be set for all of the accounts based on their preferences.
By default, the user will be under the platform language set at the sub-account level until they set their own preference.
Reporting
Attribution Report
What did we do?
We have introduced a new source called ‘Other’ to track contacts that are added to the system in one of the following ways:
Incoming Call/SMS/Email/WhatsApp/Facebook
Lead created from membership sign-up
We have introduced another new source ‘CRM UI’ to track contacts that were added to the system in one of the following ways:
Manually
CSV
API
Zap
We have introduced another new source ‘Third Party’ to track contacts that were added to the system in one of the following ways:
Via Zapier
Any other API
Why did we do this?
To optimise the Source and Medium Attribution reporting and make the leads segmentation accurate. This data on a lead helps identify where the lead found a business and how that lead landed up in a business’s CRM. Prior, we were not showing any information about leads that were added manually causing discrepancies in data and inaccurate reporting.
In cases where the first attribution was through manually adding a lead but the last attribution was through any other source (organic search, paid search etc), we were showing the first attribution also as the last attribution which was an incorrect representation.
How can we filter this data?
On the contact screen, go to filters and filter for Attribution Session Source = Other/CRM UI/ Third Party to get the list of all contacts that were manually added
How will we report this data?
We have new charts coming out in the Attribution Reporting that will show the breakdown of Lead by source and a further breakdown of that source by medium
CRM
Multiple Emails
The CRM Contact team is excited to announce the new feature enabling the import and export of multiple emails.
IMPORT:
In the Contact Import section, you will now find a system field called “Additional Emails,” which allows you to map all your extra emails. When importing, you need to add all the additional emails in a column separated by commas (,), slashes (/), or semicolons (;) and map them to the “Additional Emails” field in the system.
The uniqueness of a contact will be determined based on both the primary Email and Additional Email (if “Find Existing Contacts Based on First Preference” is selected).
In case there are multiple duplicate matches for an additional email, that particular additional email will be dropped for the contact.
If any invalid emails are found in the additional emails field, they will be discarded, and only the valid ones will be retained for a contact.
If the email column in the CSV is empty but the additional email column contains values, the first additional email will be assigned as the primary email.
When updating an existing contact, the specified emails in the CSV will be merged with the emails already associated with the contact.
The “Additional Email” column can have a maximum of 10 email ids. If more than 10 email ids are added, only the first 10 will be considered.
EXPORT:
In the Contact Export section, if you have selected the email option in the smartlist column, a new column called “Additional Email” will automatically be included in your exported CSV file, containing all the additional emails in one column and comma(,) separated.