
It is time for all the latest updates in FG Funnels from the week of April 10th through April 17th, 2024. If you have questions about any of these updates, or FG Funnels in general, please reach out to [email protected] or live chat in the app and our team will be happy to help.
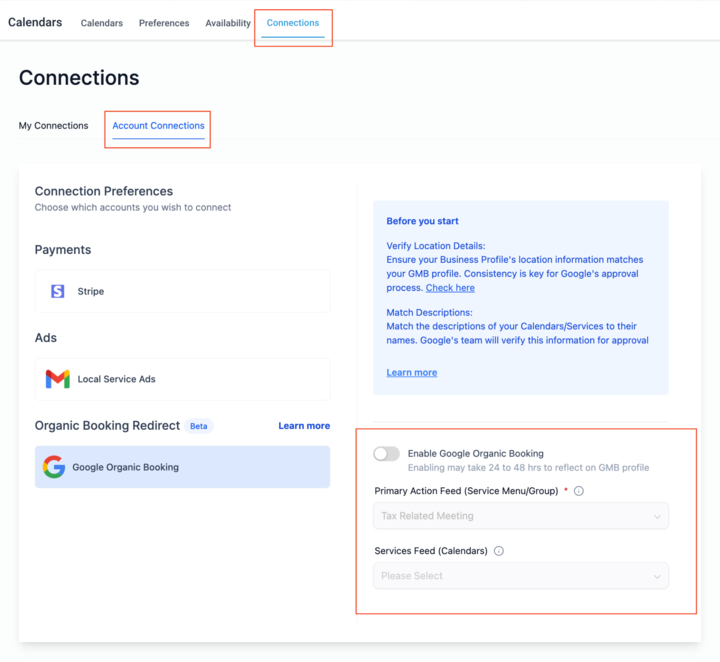
This feature is now live for locations that have either one service menu or one group created in calendars. With this integration, bookers can seamlessly schedule appointments directly from Google Search without any additional cost to the business.
Key Points to Note:
How to Enable or Disable Google Organic Booking?
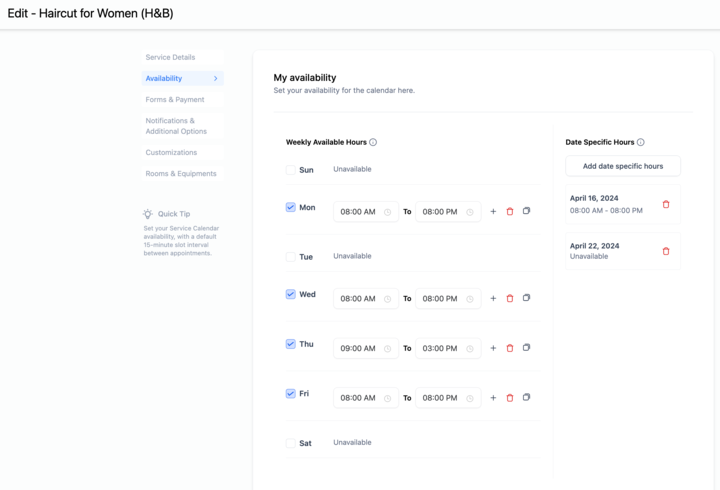
This enhancement empowers users to configure availability for service calendars. Now, in addition to staff availability, the system will also consider calendar availability when determining free slots.
Previously, service calendars only checked the availability of assigned staff members when determining available slots, creating constraints for businesses. Now, users can configure weekly available hours and date-specific hours for their service calendars.
When calculating free slots, both the configured calendar availability and the staff member’s availability will be considered.
How to Use?
We’ve added new pages to the payment integration section.
This feature introduces partial payments for end customers by allowing businesses to set minimum percentages for invoice payments, empowering them with greater flexibility and control over payment plans, ultimately enhancing client payment capture rates.
With this new feature, users can now set a minimum percentage of the total Invoice amount to be collected from the end customer. The customer can pay any amount that is equal to or greater than the percentage amount specified from the Invoicing Dashboard.
This feature is available for both one-time and recurring invoices.
Important Note:
For recurring invoices the partial payment as a feature is available for invoices that have auto payment disabled. In case of auto payment enabled and customer card it will have the option for partial payment for the first invoice but for the subsequent one’s it would autodraft the full amount.
How to Use?

We now have a consistent UI across the entire invoicing system for capturing payments. Invoicing will use the native payment element instead of a custom one.
We have also added billing fields on invoice live links as well as internal record payment modals for capturing payments.
We have upgraded to a better version of our Facebook API, which should resolve the error preventing many of our users from connecting to their FB Groups in the Social Planner.
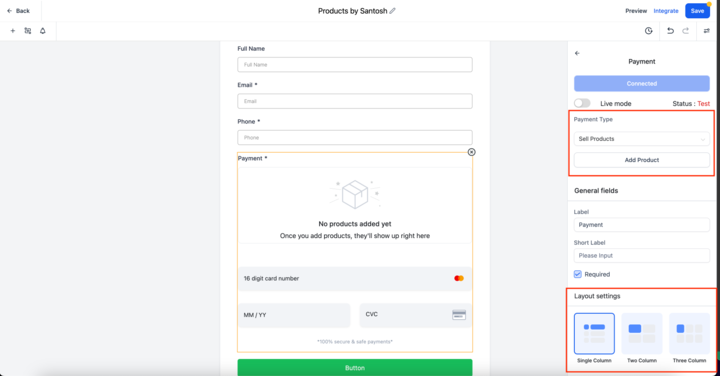
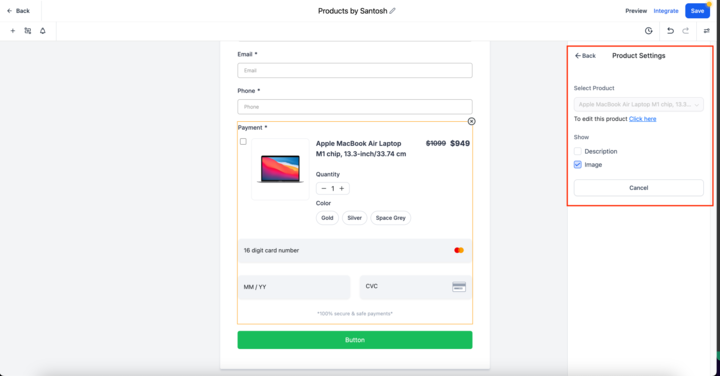
We are excited to introduce Products in Forms to enhance your Forms experience! With this update, users can seamlessly add products to their forms with better customization and layout options.
What’s New?
How to Use:
Customizations:
Tracking payments:
Upon form submission, the payment amount, order id and payment status are included in the submission details. On clicking OrderId, users will be able to order details. These details can also be exported via export options.
Email Notifications:
Email notifications also reflect the status and amount of payment.
Workflow Trigger:
Payment received triggers can be used with “Forms” as source.
Notes:
With this update, users can choose to add an order confirmation page on submissions of forms with products.
After the successful payment, the order confirmation page with basic details of the customers will be shown. The theme of order confirmation page is automatically taken from the selected form theme.
Details Shown in the order confirmation page:
How to Use:
What’s Next
Users can now include clickable hyperlinks within text fields, providing more interactive and informative experiences for respondents.
To add a link to a text field, simply insert the desired URL by selecting the text content within the text editor. The text will automatically become clickable.
Now, you can personalize your dashboard experience with the Timezone Switcher. Now, you can customize the dashboard to reflect data in your preferred time zone.
How to Get Started:
Note:
We’re thrilled to unveil a game-changing feature that will revolutionize how you analyze data: Granular Insights. With this latest update, you can dive deeper into your dashboard metrics like never before!
What’s New?
How It Works:
Important Notes:
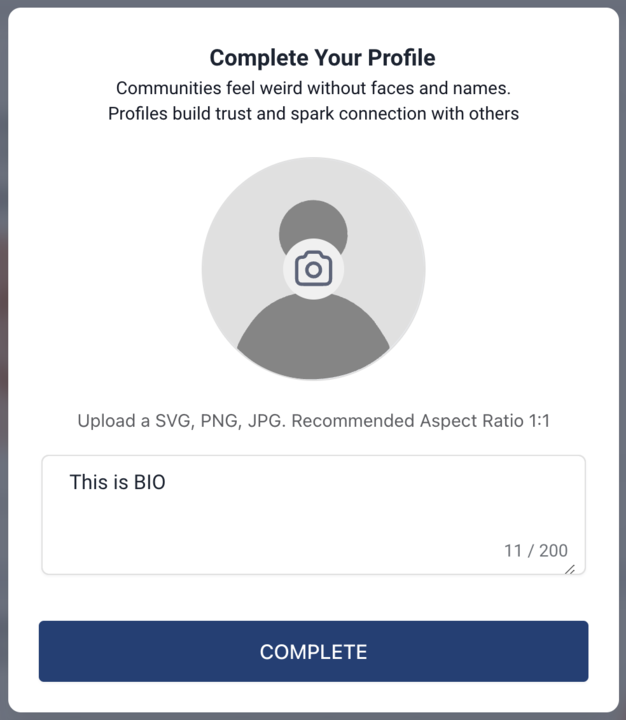
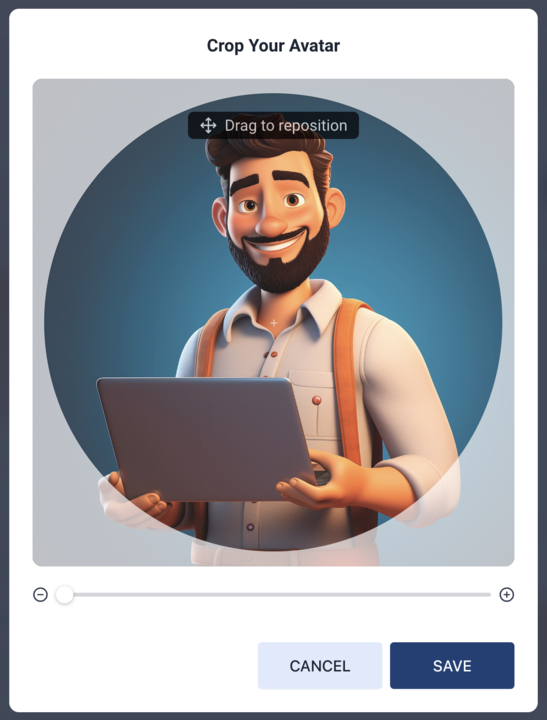
Image cropping
New users can now crop the avatars from the mandatory profile modal.
Unsubscribe from emails
Users can now unsubscribe from emails, except OTP emails/ invite emails/ payments and cancellation emails.
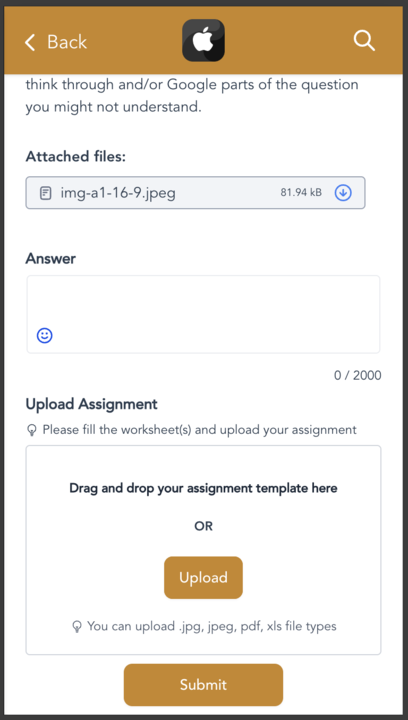
With our latest update, your students can now view assignments on their mobile devices. They can be accessed through a mobile browser and PWA.
We’ve also created a tidy gap between assignment instructions and submitted answers and files.
Location and User level permissions
User-level permissions have been implemented to manage access rights within the certificates module for various users. User level permissions can be configured from Settings > My Team > User > Roles & Permissions.
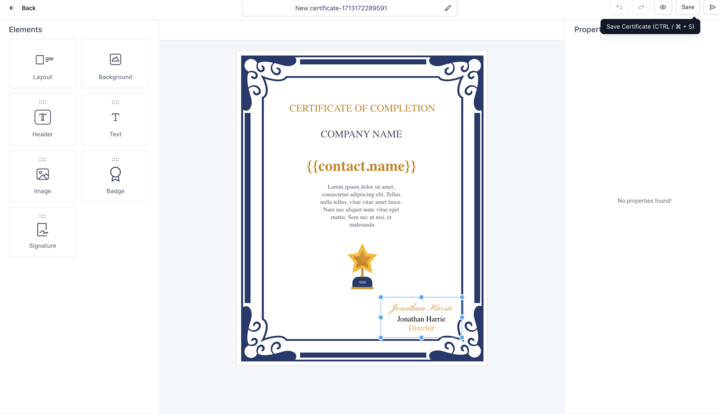
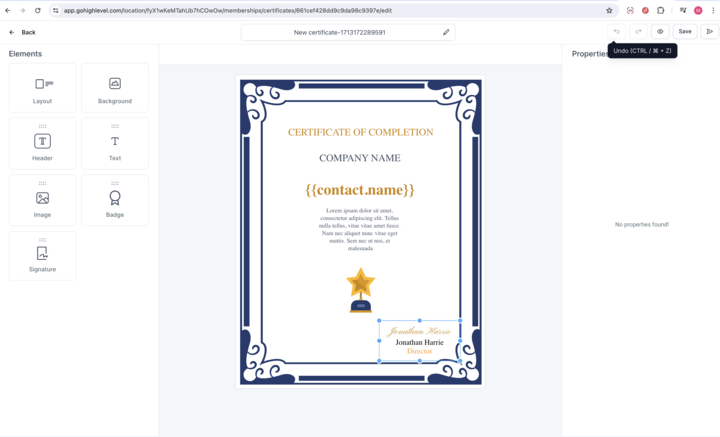
Undo Redo in certificate builder
Introducing undo redo functionality in certificate builder. Users can now seamlessly control their edits and creatively experiment knowing they can backtrack if needed.
Accessibility in certificate builder
Introducing keyboard shortcuts in the certificate builder for quick actions such as previewing, saving, and undoing/redoing edits, providing users with greater control and convenience.
Users can now utilize shortcuts like CTRL / ⌘ + Z for undo and CTRL / ⌘ + S for save in the certificate builder, enhancing workflow efficiency.
Introducing Lead Tracking for Forms, Surveys, and Calendars in the Affiliate Manager! Now, you can effortlessly monitor leads generated from these sources with ease.
What’s New?
How It Works:
What’s Next:
In the future, we’ll be expanding commission support for leads too.
FGF Notifications

![]()
![]()
![]()
![]()