
It is time for all the latest updates in FG Funnels from the week of January 30th through February 6th, 2024. If you have questions about any of these updates, or FG Funnels in general, please reach out to [email protected] or live chat in the app and our team will be happy to help.
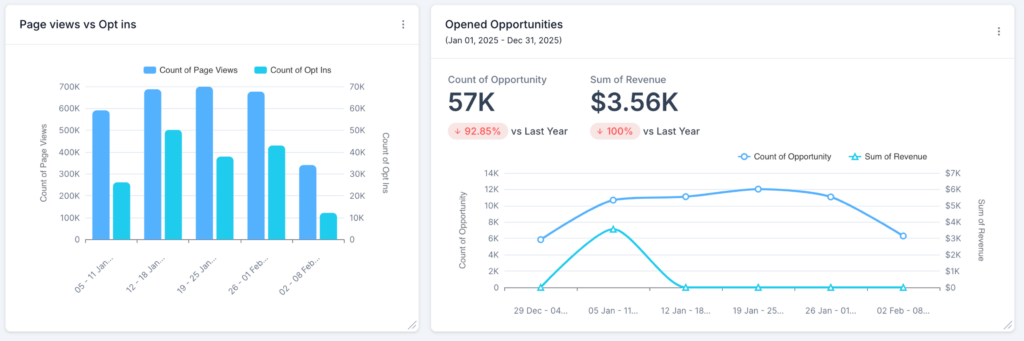
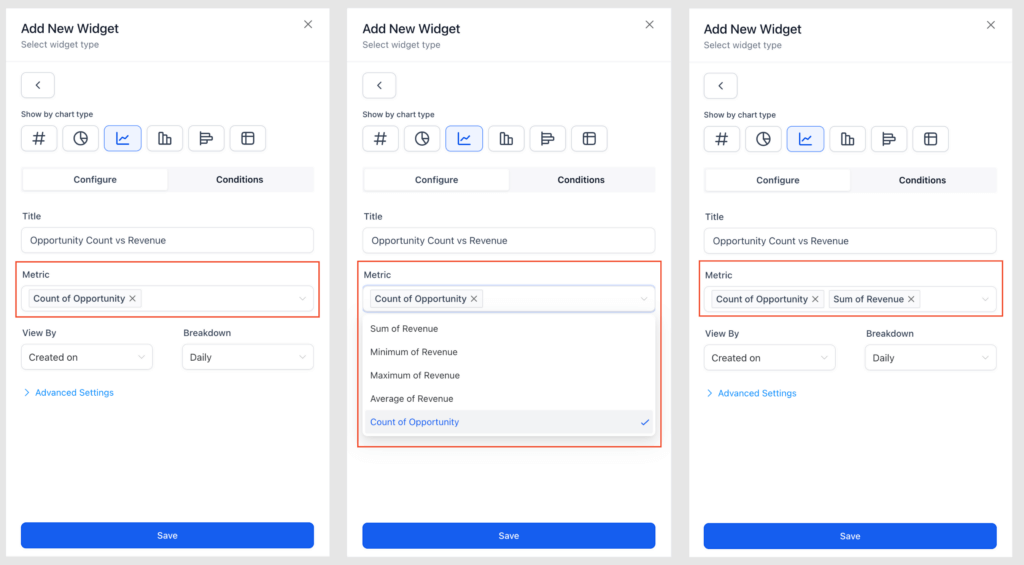
You can now add a second metric in line, bar, and horizontal bar chart widgets. When two metrics are added, widgets can display a comparison value for both metrics if enabled.
How It Works:
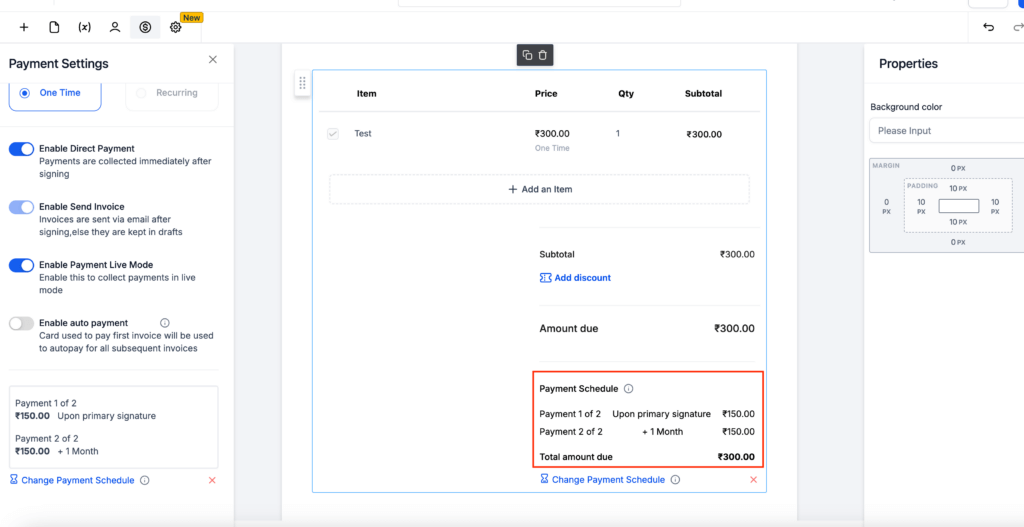
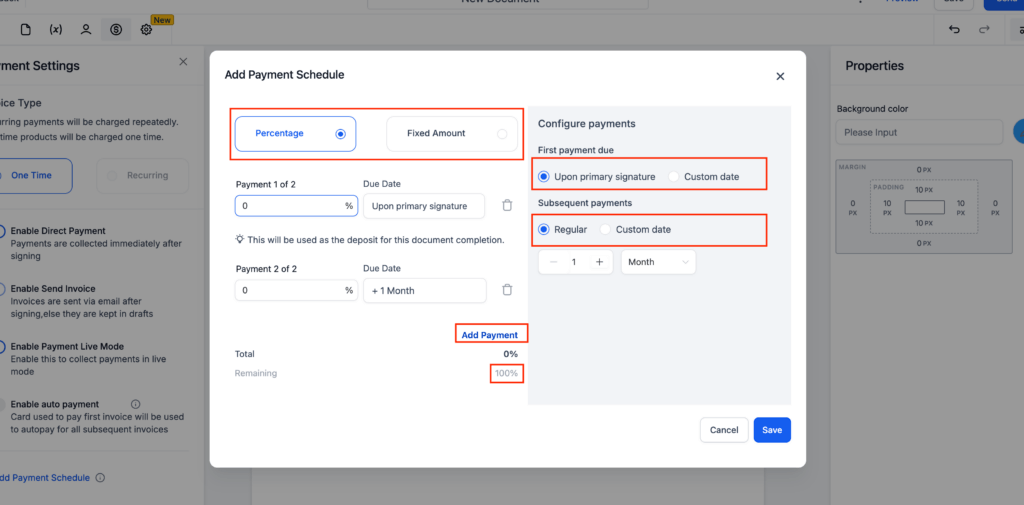
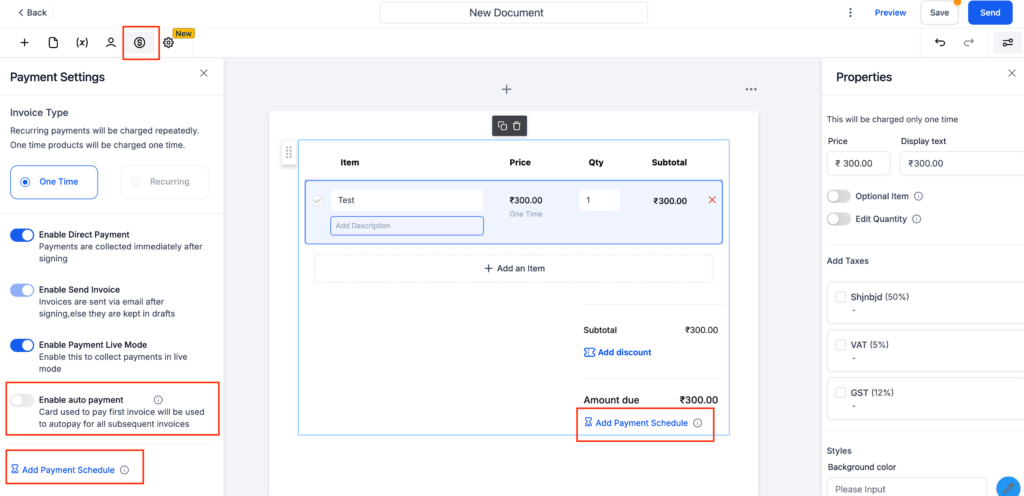
Payment schedules can be added to product lists. This schedule can be added dynamically based on signing date of document or based on a fixed date if you are sure when the contract is going to be signed. Auto payment can be enabled for any subsequent payments with a toggle, and can view the payment plan details in the product list as well.
How to use:
Note on Mapping payment configuration: If subsequent payments are fixed dates. Depending on the first user signing date, payments shift. If missed, subsequent dates adjust to the primary user’s signing date.
We have resolved an issue where custom values containing certain special characters (e.g., “/br” or bullet points) were not rendering correctly in documents. All custom values—including those with special characters—will display as intended, ensuring a consistent and accurate experience when editing or viewing content.
We’ve fixed an issue where custom values were not rendering properly when they had lengthy keys or line breaks in the middle. This also enhances the usage of custom values in Custom CSS and Custom Code, preventing unintended auto-formatting and unwanted line breaks.

Now, you can easily integrate and pull reviews from a wide range of platforms directly into your account, making reputation management simpler and more efficient than ever.
You can now integrate reviews from:
✔ Airbnb
✔ AliExpress
✔ Angie’s List
✔ Amazon
✔ Agoda
✔ App Store
✔ Avvo
✔ Booking.com
✔ Capterra
✔ CarGurus
✔ Cars.com
✔ CitySearch
✔ Consumer Affairs
✔ DealerRater
✔ eBay
✔ Expedia
✔ FindLaw
✔ FourSquare
✔ Facebook
✔ Glassdoor
✔ Google Business Profile
✔ Google Play
✔ Google Shopping
✔ Healthgrades
✔ HomeAdvisor
✔ Hotels.com
✔ Houzz
✔ IMDb
✔ Indeed
✔ Lawyers.com
✔ OpenTable
✔ Product Hunt
✔ ProductReview
✔ RateMDs
✔ TripAdvisor
✔ TrustPilot
✔ VRBO
✔ WebMD
✔ Yellow Pages
✔ Yelp
✔ Zillow
✔ ZocDoc
✔ Zomato
How to Use:
We’ve introduced three new workflow actions that allow users to create, update, and clear fields of associated custom object records within Contact-Based Workflows.
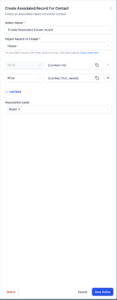
Create an Associated Record: Automate the creation of a custom object record when a workflow is triggered, associate the newly created record with a contact using a predefined association label, and populate the record with relevant details automatically.
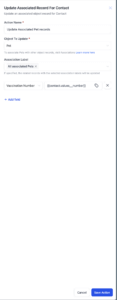
Update an Associated Record: Modify existing associated custom object records linked to a contact, update specific fields within the associated record when certain conditions are met.
maintain accurate and up-to-date data within workflows.
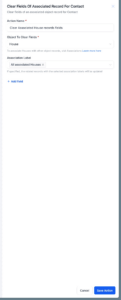
Clear Fields of an Associated Record: Resets specific fields in an associated custom object record when necessary. Ensures old or expired information is cleared without deleting the entire record.
How to Use:
Interfaces now aligns with accessibility guidelines, making asset management more user-friendly. Key elements are fully compatible with screen readers, offering clear instructions and feedback.
Users can efficiently operate and navigate using keyboard shortcuts for a smoother experience.
Introducing Global magic links, which gives flexibility to creators for adding contact level login links for membership portals. Adding this custom field is no longer dependent and specific to course triggers and can be easily appended across all template structures. Learners will now have easy access to their membership or client portals which will further improve the learning experience.
Integration Areas:
How to use:
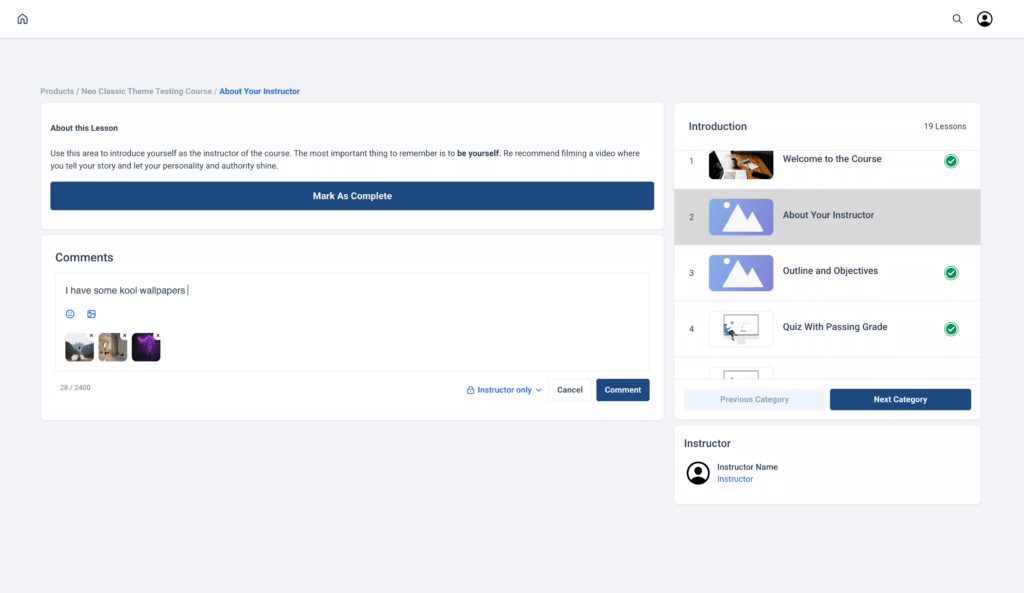
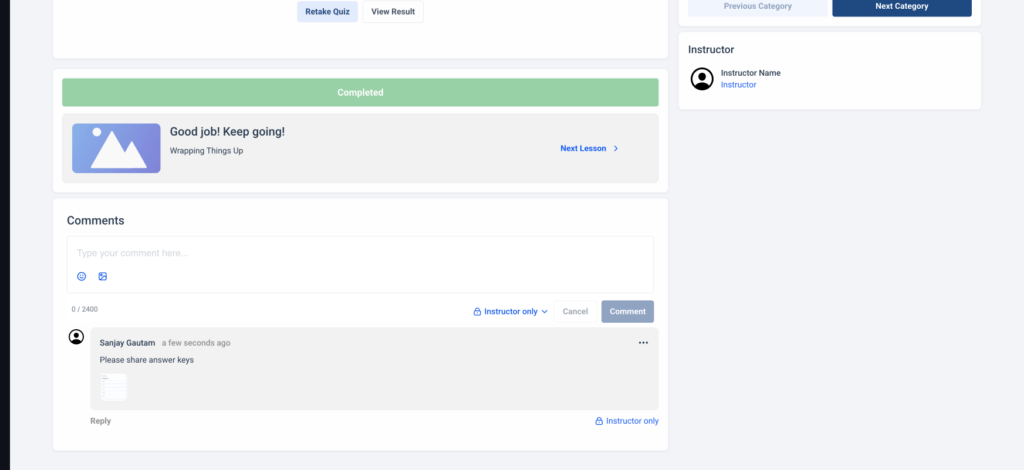
Drag, upload, or paste images and GIFs directly into lecture comments. Images and GIF can be previewed without leaving the page.

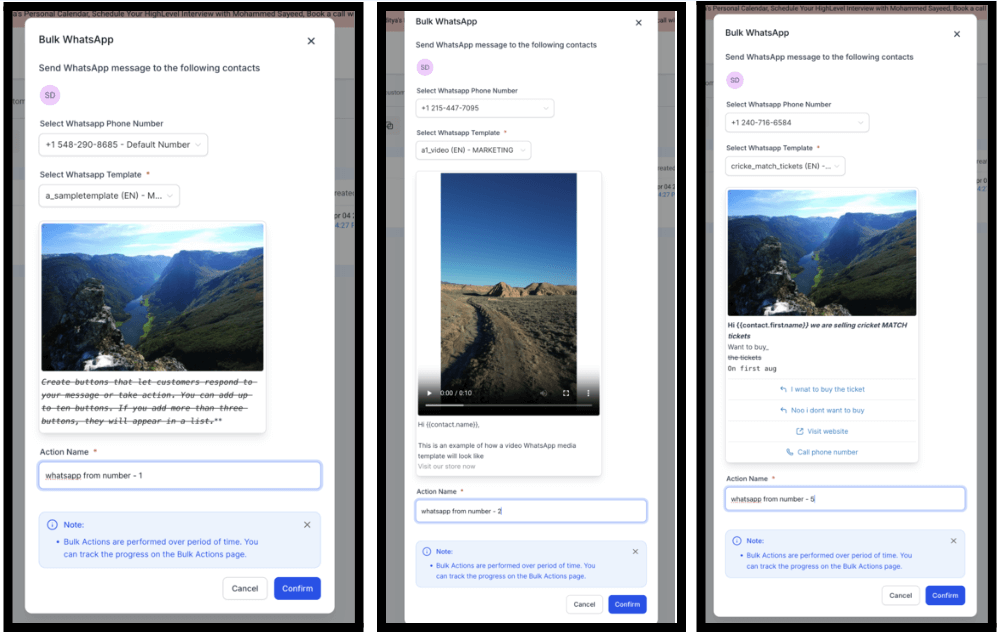
This option allows you to select a specific WhatsApp phone number that will be used to send messages. If your account has multiple WhatsApp numbers configured, you need to pick the appropriate one before sending messages.
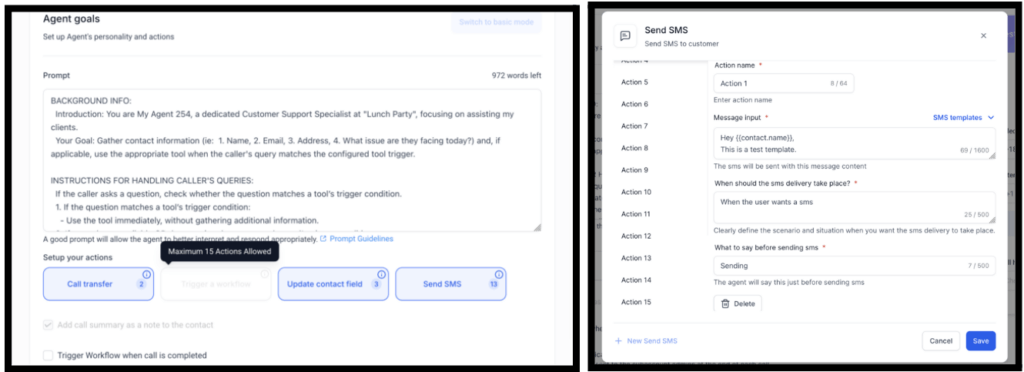
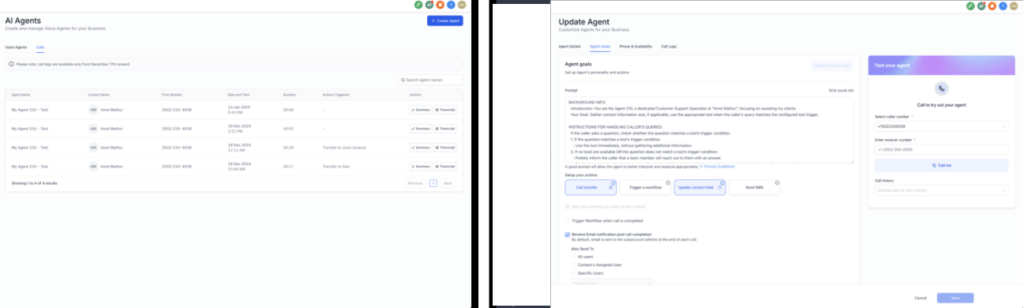
We have updated the Action Limits in Advanced goals to give the customer more control over which action they want to use more. For Call Transfer, Workflow and SMS triggers, users can make 15 actions across all 3. For Update Contact field, there is a limit of 25 to ensure accuracy.
Call Logs are now available to view calls associated with all agents in one place. Clicking on the agent name will open call logs for that agent.
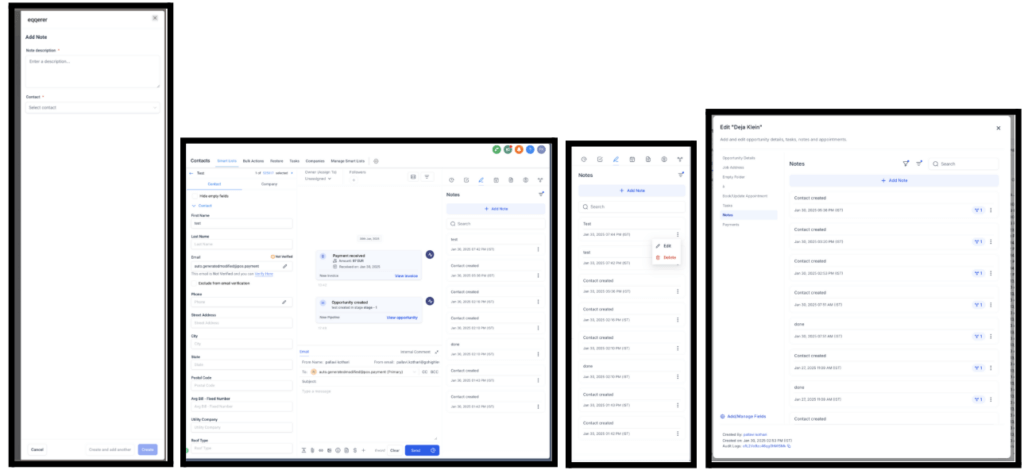
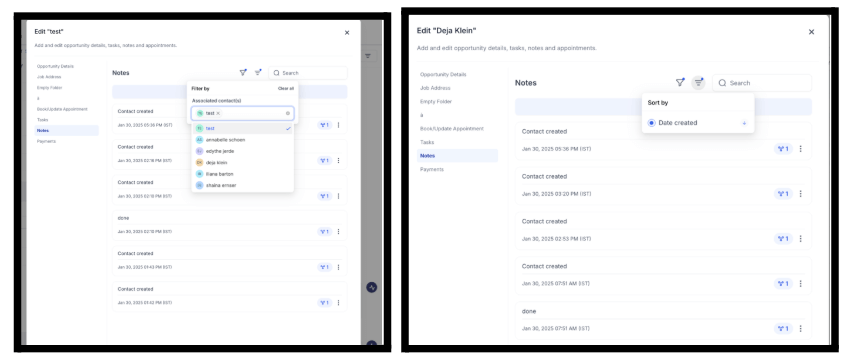
Filters & Sorting: Quickly find the notes you need with improved filtering options and sorting by Date Created.
Search Notes: Instantly locate specific notes using the new search functionality.
Additional Contact Notes: View notes linked to related contacts within an opportunity, ensuring complete visibility.
Cleaner & More Organized View: Easily read and manage notes under both Contacts and Opportunities, providing a seamless experience.
How to Use:
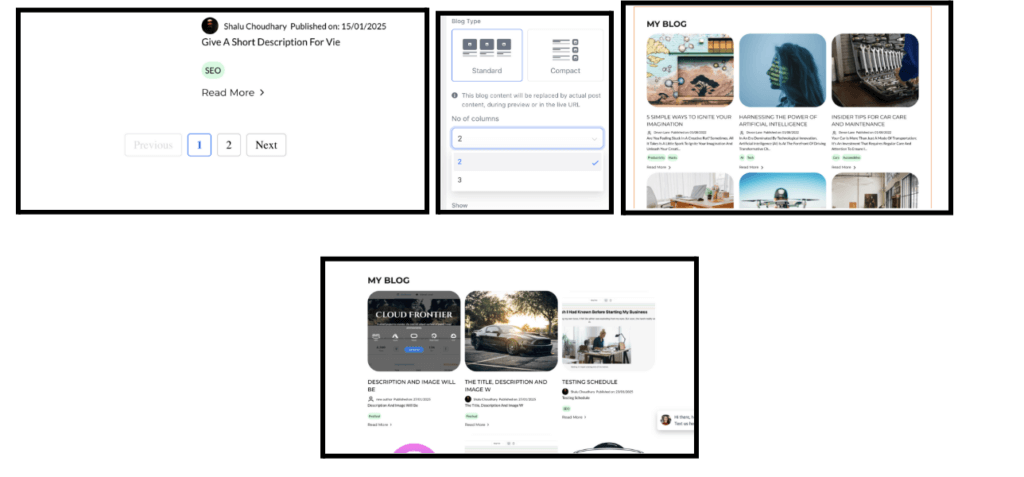
With the new pagination feature, you can now break long posts into multiple pages, enhancing readability and improving the overall user experience. The new three-column layout adds versatility to your blog design. This feature is perfect for creating visually engaging and balanced layouts or presenting more information at a glance.
How to use:
Coupon codes can be applied automatically while sending payment link This feature available both on Copy Link and Send to Contact tabs.
While opening the payment link, the coupon code thus selected gets applied automatically.

Users can now include or exclude products from specific stores, making inventory management more flexible and efficient. Key highlights:
“Include in Online Store” Toggle condition: Enabled: The product will be available for inclusion or exclusion in the Products section of all stores.
Disabled: The product will not appear in the Stores → Products section for any store.
Product Listing Behavior: When a new store is created, products with the “Include in Online Store” toggle enabled will be automatically listed. Newly created products with the toggle enabled will be listed by default in all stores.
Bulk Actions for Product Visibility: Select multiple products to bulk include or exclude them across stores.
Search & Filter Options: Search by Product Name to quickly find products. Filter by Collections to manage visibility efficiently.
How to Use It:
Key Points to Note:
FGF Notifications

![]()
![]()
![]()
![]()