It is time for all the latest updates in FG Funnels from the week of February 14th through the 21st, 2024. If you have questions about any of these updates, or FG Funnels in general, please reach out to [email protected] or live chat in the app and our team will be happy to help.
E-commerce
Shopify order syncing
Users will now be able to sync the orders placed on Shopify inside FG Funnels using the existing Shopify integration. The placed order details will be available inside Payments -> Orders along with the associated transaction values
This setting can be turned on using the checkbox to Sync new Shopify orders. The setting is turned off by default for existing as well as new connections
The order details will be reflected on the Payments tab on the Contacts page along with attribution to the customer LTV.
Abandoned Checkouts are now listed on the Orders page
Users will now be able to keep track of abandoned cart orders on their online stores. The details will be available under Payments -> Orders -> Abandoned Checkouts which will list the customer details along with the items added to the cart.
Order details will also include Email status, which indicates whether an automatic notification for the abandoned cart has been sent to the user. Users can configure the automatic sending of abandoned cart notifications under Settings -> Notifications
If the order is recovered, it will be marked as recovered. These abandoned checkouts are only applicable to online stores.
Forms and Surveys
File and Image upload through Document API
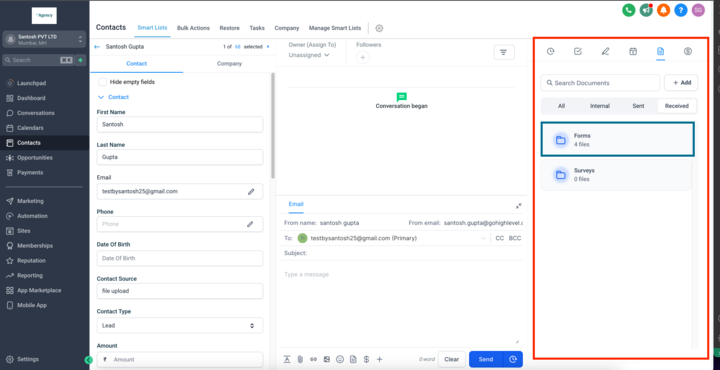
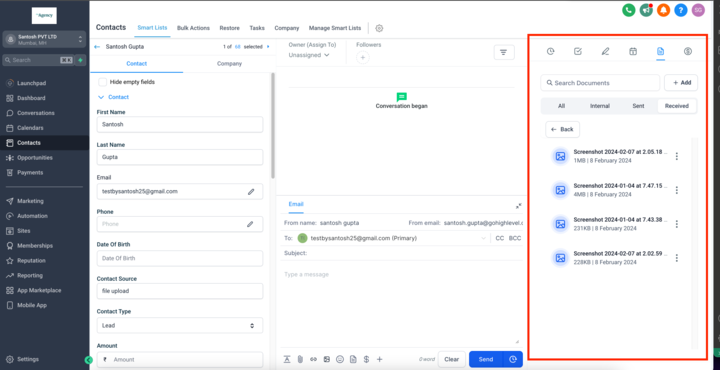
We are introducing an enhancement to our Form and Survey Product. Images and files uploaded through forms and surveys will be listed in the contacts page as well for easy access. All the file and image uploads will be happening through the document API instead of a separate bucket making it all files to be stored in a centralized place. Files submitted through a form or survey will go in the forms folder.
How to access files:
Click on the contacts page
Click on document tab which is on top right side
Click on received tab
Click on forms or survey folder to get file list
Extended Support for right_now Custom Values
In this latest update, we’ve broadened the functionality of custom values by including support for right_now in both field’s hidden values and redirect URLs.
This enhancement allows for real-time data capture, enabling users to incorporate current timestamps directly within their forms and redirection processes for more dynamic and timely interactions.
Client Portal & Communities
Rate limiter with reCaptcha integration
We have Introduced a rate limiter with reCaptcha integration for client portal and communities to avoid fraudulent activities, spam, and abuse.
How it works
Captcha will appear if the user tries to submit more than 12 requests from the same IP address in less than a minute for open endpoints.
Users will be required to solve captcha in order to submit subsequent requests after exhausting the limit of 12 requests / minute .
Bug Fixes
UI carousel fixes for client-portal dashboard
Password icon toggle fixes for login/set-password page on web/mobile
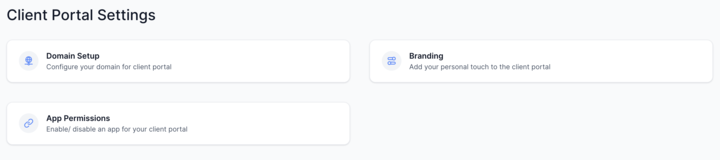
App Permissions
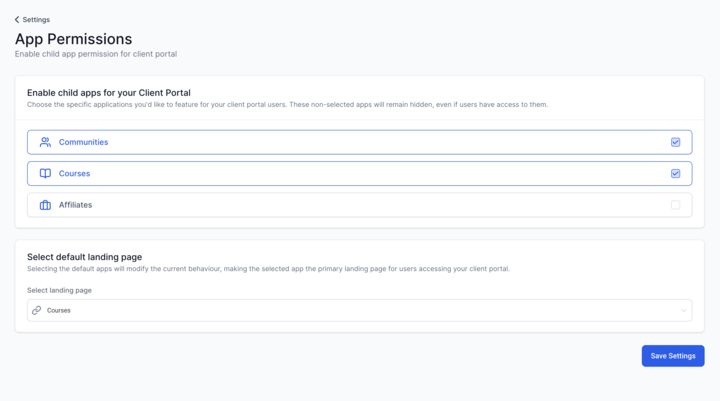
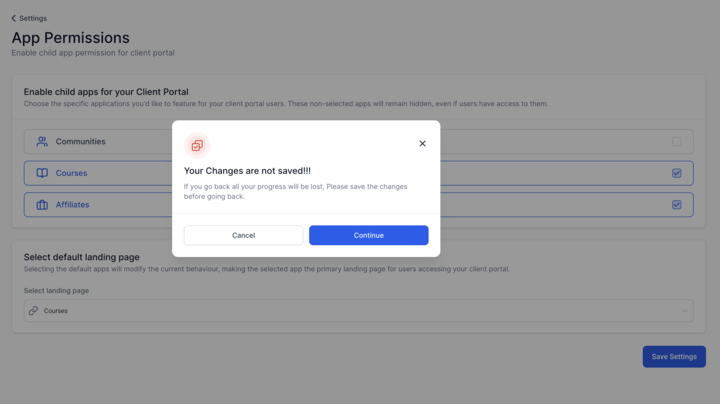
We’re thrilled to introduce app permission feature for client portal where users can customize their app permissions and default page.
Key Features:
Enabling/Disabling an app will show relevant changes in Client Portal
Select default page for the users
Disabling from location permission will hide it in app permissions
On exit will check if progress is saved or not
How to use?
This will be visible inside client portal settings as “App Permissions”
Email Campaigns
Shopify orders in Email Campaign – Conversion Metrics (Email ROI for Shopify Orders)
We’re excited to announce a significant enhancement to our campaign conversion metrics (Email ROI: How is your Email performing in terms of orders placed post an email is sent?)
With the recent release of “Shopify order syncing inside FG Funnels”, Shopify orders are now also included in the Conversion Metrics of Email Statistics.
How to Use:
Navigate the Email Campaigns under Marketing
Navigate to Email Campaign Statistics.
Explore the “Conversion Metrics” section to view revenue attribution statistics.
Note – These statistics are applicable for email campaigns under the Marketing section only.
Calendars
Service Menu Configurations
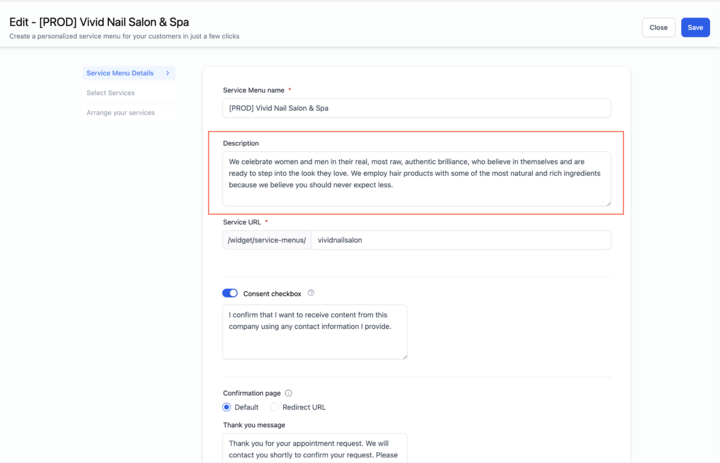
Users can now enjoy enhanced customization in the service menu with configurations related to description, guests, services, and staff selection.
Previously, the service menu had certain default settings and lacked options for customizing them.
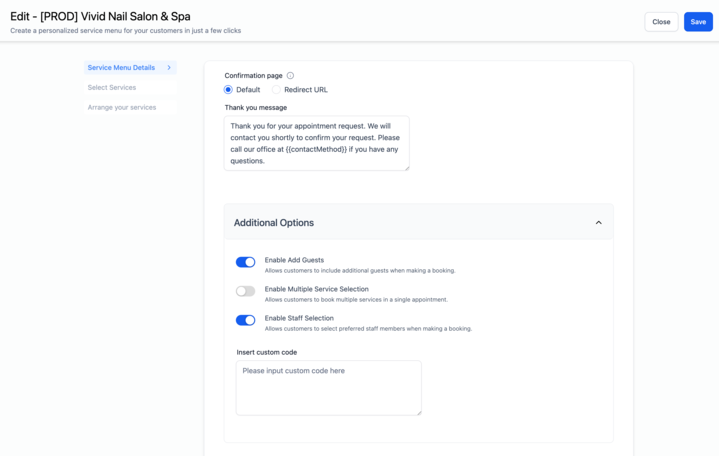
In response to customer feedback, users can now enable/disable bookers from adding additional guests, limit bookers to booking only one service instead of multiple, and determine whether bookers can select their preferred staff member.
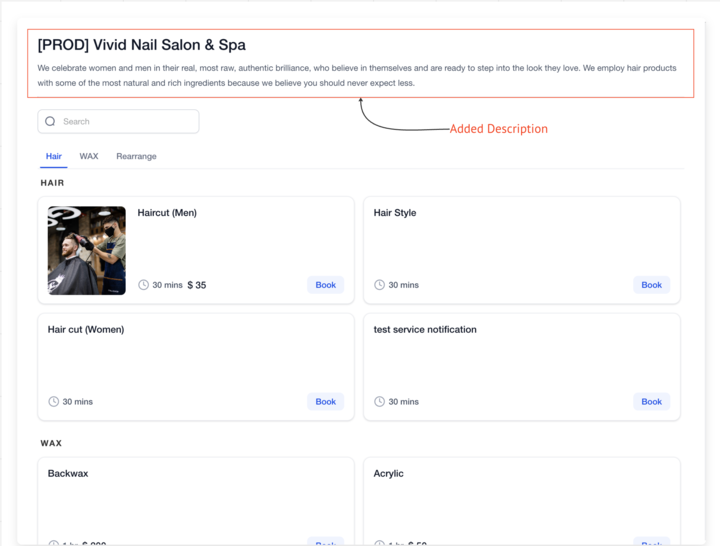
Additionally, users can now add a description to the service menu, which will be visible on the widget, and incorporate custom code for further visual enhancement.
Enhancements:
Added description now visible on the widget.
Enable / Disable bookers to Add Guests.
Enable / Disable Multiple Service Selection.
Enable / Disable Staff Selection.
Add Custom Code to the Service Menu.
How to Use?
Navigate to Service menu settings > Service menu details.
Scroll to find the additional options.
Toggle switches on/off according to your preference.
Click “Save” to apply changes.
Why This Feature?
This feature empowers users to tailor their service menu to suit their unique business cases, providing greater control and customization options.
What’s Next?
In the upcoming enhancement, along with the above features, users would also be able to select custom forms in the service menu, providing even more flexibility and personalization.
Email Builder
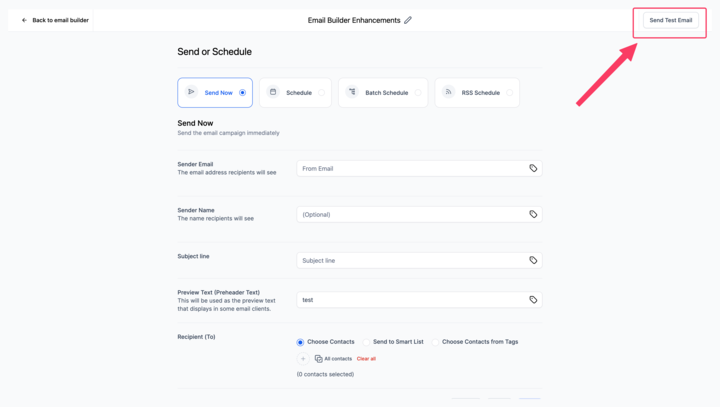
Test Email Button, Status Filters, and Campaign Viewing
What’s New?
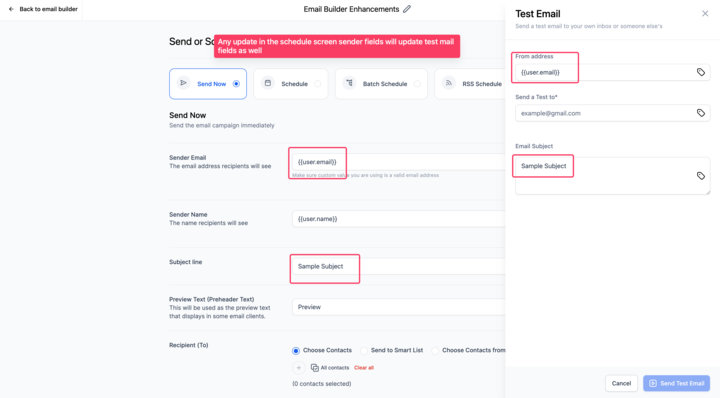
Test Email Button on Send or schedule screen: Added a test email button on the send or schedule screen for quick pre-launch checks.
Status Filters: Introduced filters on the list view, enabling easy sorting of campaigns by status (failed, sent, archived, draft).
Campaign List Viewing Options: Now you can choose to view 10, 20, or 30 campaigns per page, customizing your viewing experience.
Why It Matters:
Simplifies pre-launch checks.
Enhances visibility and organization of campaigns.
Offers flexibility in campaign viewing preferences.
Contacts and Opportunities
Decoupling Opportunity source from Contact source
Previously, creating a new opportunity updates the original contact’s source. The user might not be making any changes to this field and gets confused on why a certain contact source got updated.
Going forward, when a new opportunity is created, the opportunity source will have the contact source pre-filled by default.
Contact and opportunity sources are not linked to one another. Updating the opportunity source would not modify the linked contact’s source.
Social Planner
New Onboarding Screen
The Social Planner is in the process of receiving a UI makeover. We have added options of a new onboarding screen based on customer feedback.
What did we change?
The social integration buttons are more visible that they are clickable.
We have added benefits of using Social Planner
Quick access button of get started lands on Dashboard and Schedule new post will take them to Post Composer.
Also the new onboarding screens are from module federation. In future we will be moving all the screens from iframe to module federation along with design enhancement.
Add Watermark to every image you post on Social Media
A watermark is a visible, often translucent, design or text superimposed onto a digital image or document. Watermarking posts on social media serves several purposes, and individuals or businesses may have different reasons for using watermarks. Here are some common reasons:
Ownership and Copyright Protection: Watermarks can be used to assert ownership and protect the copyright of the content.
By including a watermark with a username, logo, or other identifying information, it becomes more difficult for others to claim the content as their own.
Placing a logo or a brand name on images helps in building brand recognition. This can be particularly important for marketing and establishing a consistent online presence.
Promotion and Marketing: Watermarks can be used strategically for promotional purposes. For example, a watermark might include a website URL, social media handle, or a hashtag related to a campaign, directing viewers to the creator’s online presence or a specific promotion.
How to create a Watermark in Social Planner?
Go to Marketing > Social Planner
Click on Settings
Click on Watermark.
There is a button Add Watermark
User can add the name of watermark
User can add the alignment of watermark – Top, bottom, right, left, center
Opacity can be added to the watermark.
Users can scale – resize the watermark image.
There is an option of auto padding – adding more space around the logo.
5. By default, watermark will be added to all the posts – image(s). In the advanced settings, we provide the option to turn off the watermark.
Note:
We only support one watermark at this time.
Watermarks cannot be applied to videos.
Watermarks will be added for all the socials.
Invoicing
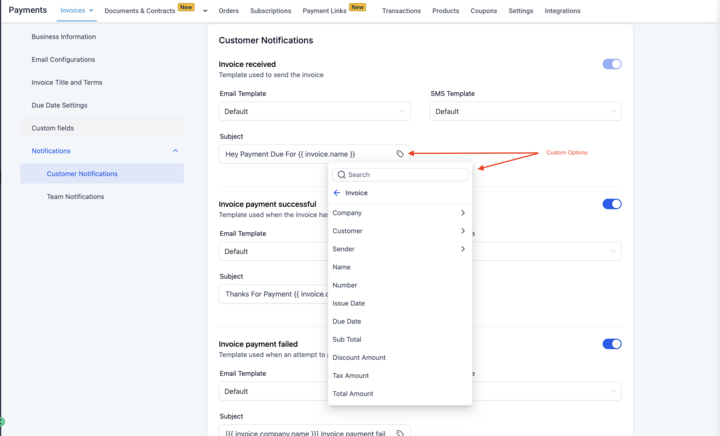
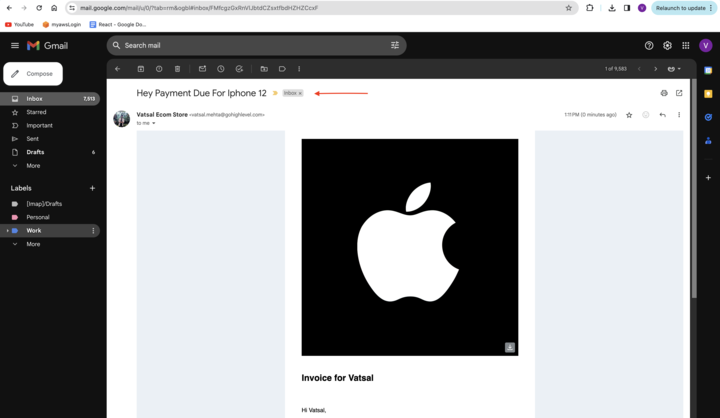
Subject For Invoice Notifications
Users now have the capability to configure the Subject for the Notifications that are being sent out for Invoicing. Custom Values can also be used while configuring the subject.
You can configure a subject for 10 types of notifications which includes Team Notifications as well as Customer Notifications.
How to Use it
Go to Payments Tab -> Invoices -> Click on the settings Icon that you can see on the page.
Click on Notifications -> Start to start authoring your Subject line
Add FromName & FromEmail support while sending out invoice
Users will now be able to configure email and name from which invoices should be sent. This setting will be applicable to both invoices and team notifications.
User Management
New User Creation Flow
We’ve enhanced the new user creation flow enabling newly created users to set their passwords before logging into their accounts. This update prevents admins from setting a password for new users or sharing it via email.
This change was implemented based on customer feedback and to mitigate the negative impact the previous flow had on our domain reputation.
What’s New:
Admins can now create new users without having to set a password for them.
Newly created users will receive an invitation email without password information (unlike before) and a call-to-action (CTA) to proceed with account activation and login.
Upon clicking the CTA, users are prompted to set a password for themselves.
After setting the password, users can log in to their account using their email and the newly created password.
Payments
Add FromName, FromEmail & Subject support while sending out Receipts
Users will now be able to configure email, name & subject for all receipts that are sent. Receipt subject will allow custom values to personalize the subject field.
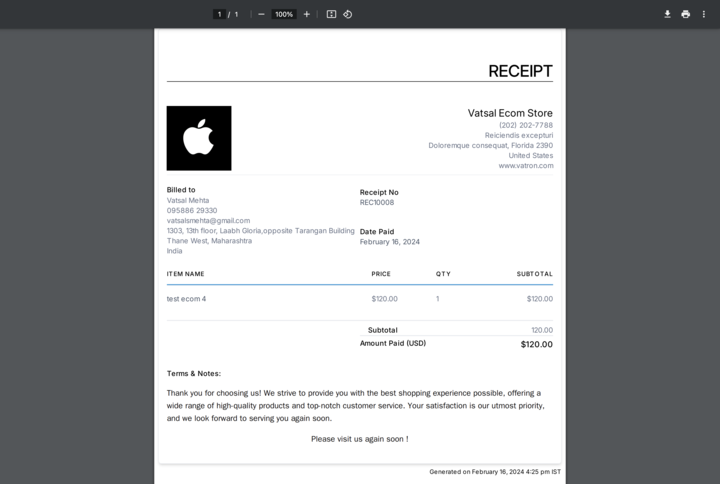
Introducing Terms And Notes On Receipts
Users now have the capability to configure and add the Terms and Notes to Receipts. A text editor is available for the same with different custom values aligned to the receipts. Receipts that are downloaded as well as the receipts url that are sent to the customers will have Terms and Notes.
How to Use it
Go to Payments Tab -> Settings tab -> Click on the Receipts from the side menubar
Scroll down and start adding what you want in the terms and notes section to be displayed on the receipts
Google Business Profile
Ability to Change Chat Widget Profile Picture
Users can now change the profile image of their GBP chat widget. Until this release, users were restricted to using a static image that was applicable for accounts integrated with us. With this update, customers can change their logo to better align with their business preferences.
Additionally, we have added an option to seamlessly visit their Google Business Profile from the integration page. This is the first step before we introduce the ability to manage GBP profiles natively within our platform.
How to Change the Profile Picture for the Chat Widget:
Navigate to any location on the platform.
Access settings and proceed to the Integrations section.
Select Google My Business and navigate to the Change Settings option.
In the settings menu, locate the Profile Image section.
Choose your desired image and click the Update CTA.
Visit your business on Google to verify the updated profile image.
Upon changing the image and submitting it, an email is sent to the Google support team requesting the update of the image on their end. The turnaround time (TAT) for updating the image is between 24 to 48 hours.
Funnels and Websites
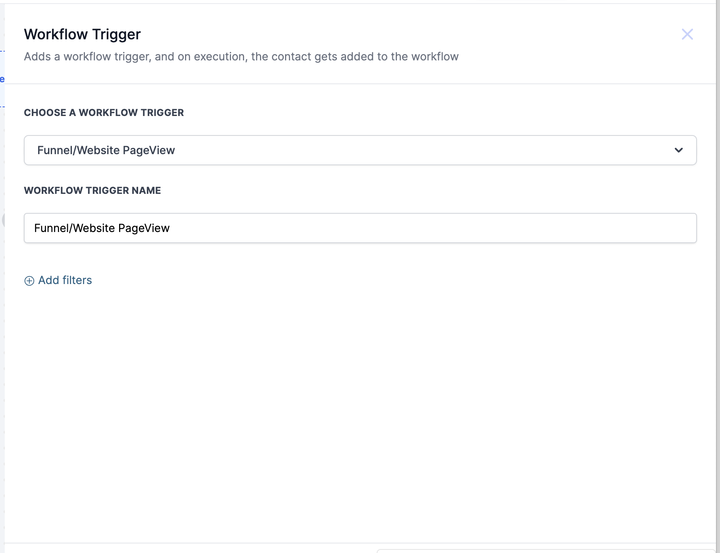
Page View Trigger
We are introducing a “Page view trigger” feature in workflows, which will allow users to set up automation on their funnels and websites.
Some key features & benefits:
Targeted and timely automation enabled by triggering workflows based on customer page visits
Enhanced customer engagement tracking through page view history in the contact record.
Helps in identifying “most engaged” users basis visit summaries
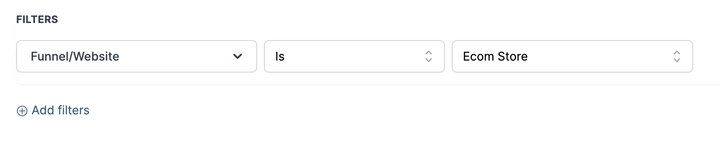
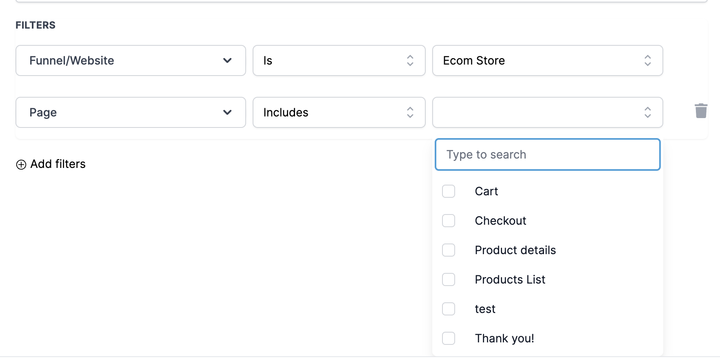
To use this feature:
Navigate to Workflows
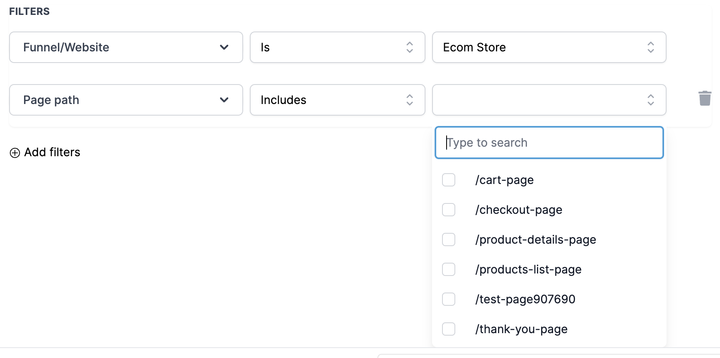
Click on Add Trigger and select “Funnel & Website Page view” trigger under events category
Select Funnel/Website
Select Page/Page URL (Optional)
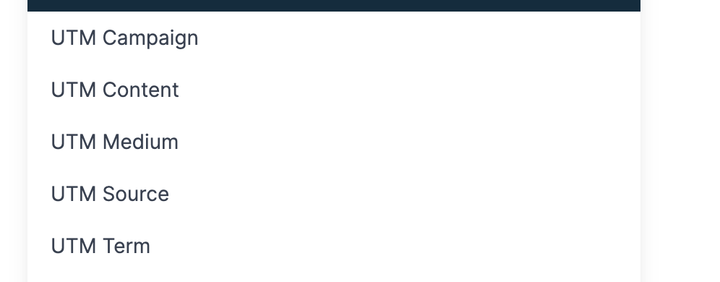
Add UTM Parameters (Optional)
Margin and Padding Mobile Responsive Editing for All Elements
The ability to set margin and padding settings for mobile and desktop views is live. Now with advanced customization options, you can set different margin and padding settings for mobile and desktop views, ensuring optimal and best design layouts for different screen sizes. We have made it easier than ever to build mobile-responsive funnels and sites.
New Features:
Margin and padding settings for mobile view
Enabled margin left and margin right for all elements
Some example use cases of this feature:
Perfecting the look of grid layouts with different margin padding settings for mobile
Improving the visual layout and placement of elements for mobile
Now there is no need to create multiple sections and keep different margin and padding settings in multiple devices and hide from one device.
How to Use:
To change the margin or padding of an element in the new funnel builder and make it responsive across different devices, follow these steps:
Select the desired element in the funnel builder,
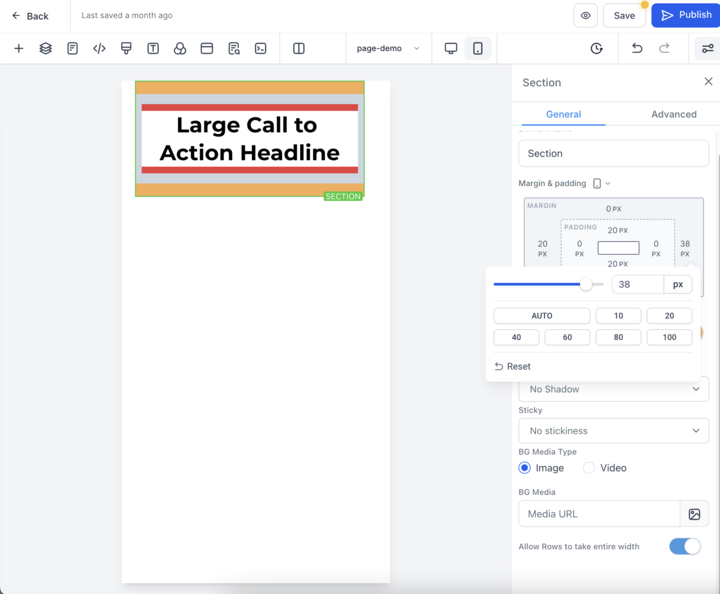
Go to the element settings and navigate to the Margin and Padding setting.
Adjust the setting for the desktop. This change will also apply to mobile devices.
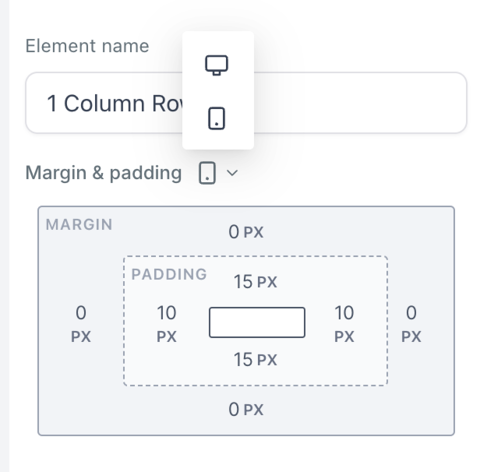
Click on the desktop icon to switch to the mobile view.
Change the margin or padding specifically for mobile. Note that this change will not affect the on desktop.
To modify the margin or padding for the desktop again, switch back to the desktop view and make the necessary adjustments. This change will only affect the setting on the desktop.
Benefits of This Feature:
Mobile specific layouts.
Responsive grid layout systems.
Flexibility of element wrapping and styling.
Security Headers
Web pages are prone to vulnerabilities and can be subjected to various attacks, which can be blocked using headers sent to the browser when the page is loaded and thus safeguarding malicious activities by 3rd parties. A new security tab has been added in the Funnel/Website detail page where customers can add custom security headers of their choice to make their funnel/website more secure against attacks and vulnerabilities.
Key features & benefits:
Security tab in funnels/websites where users can add custom response headers for their funnels
Headers play a vital role in website security, previously there was no option where users can configure these like they could do in other platforms
With this update users can configure the security headers themselves without any limitations
How to use it?
Open any Funnel/Website
Navigate to Security Tab
Click on add security header
On the modal enter the header and value
Click on save
LC Phone
Twilio Compliance and Phishing restrictions
International messaging restrictions: Restricted international messaging for all countries’ phone numbers except US and CA. US and CA numbers can send messages only in cases where they are A2P verified.
Text analyzer: Filtering out phishing sms, disallowed sms, and recruitment patterns on the basis of keywords.
Messaging WarmUp – Similar to Email warmup new locations will have to go through a ramp to have a higher limit.
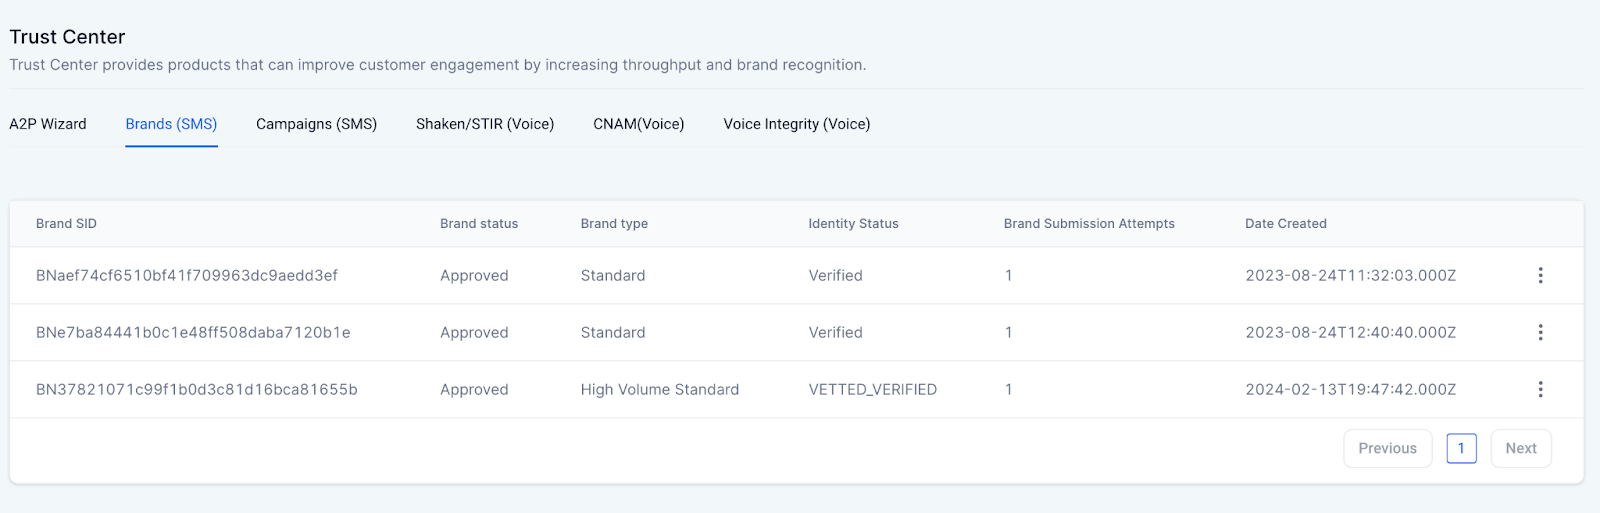
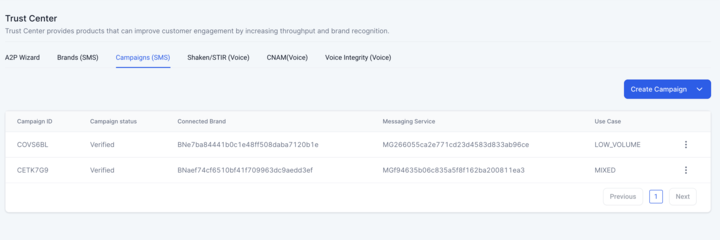
A2P Registration Changes
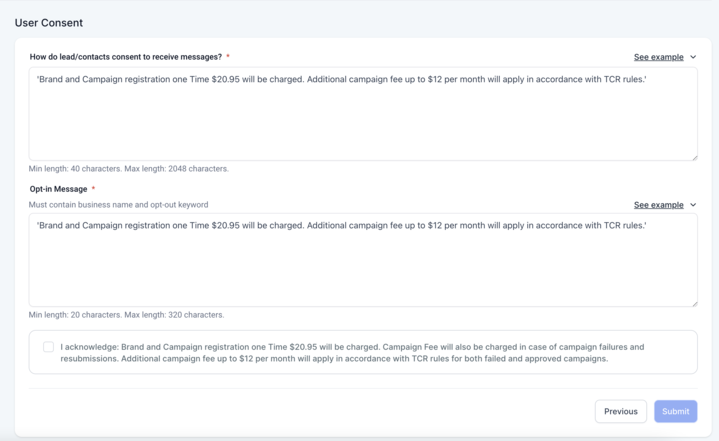
Added a new pricing checkbox for acknowledgement on resubmission or new campaign creation from Campaign tab, on campaign creation and resubmissions.
A2P Wizard campaign price checkbox content changed to reflect that campaign fee (both monthly and one time) will also be charged in case of resubmissions.
Removed the Opt-In keywords section for A2P submissions. The default keywords will be now automatically submitted.
Automatic Submission of Campaign for approved brands – The campaign will now be automatically submitted only one time, when the brand first goes to approved state. If the brand is older than 5 days, the new campaign will not be automatically submitted.
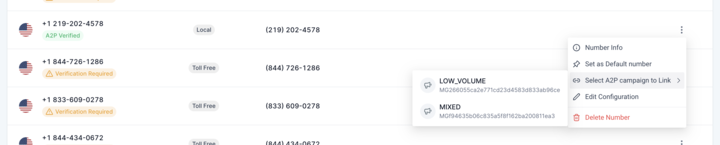
In cases where the Brand is approved and campaign is not started then a CTA to ‘create campaign’ is given to initiate the campaign submission manually.
A2P submissions were failing with a warning “Customer Profile is deleted/in the draft”, this has been handled to auto-create a new customer profile to avoid issues while submitting.
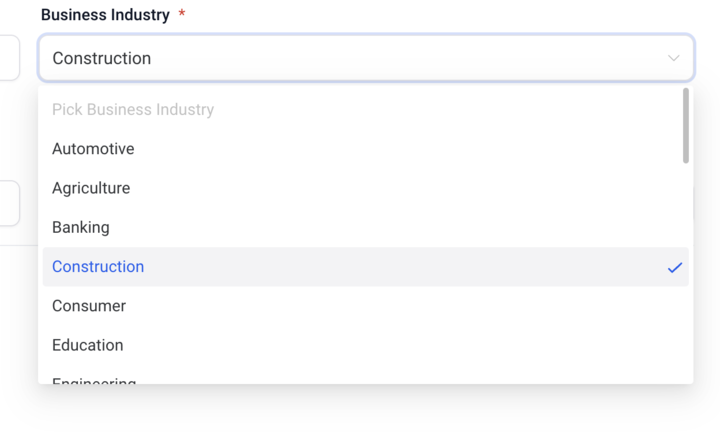
Added ‘construction’ as Business Industry type in dropdown.
Update the A2P statuses with webhooks received from twilio.
Workflow Call Auto Connect
Certain carrier networks aren’t sending out the DTMF tones to Twilio, causing issues with the call flow. We have made the call connect feature optional in workflows, so that the agent will hear the whisper message “You have received a new lead” and automatically start calling the customer.
Reputation
Introducing Filtering reviews in Review Widget
We are excited to introduce a new feature in our Review Widget that enhances your ability to showcase positive reviews tailored to your preferences. With Filtering in Review Widget, you can now easily curate the reviews displayed on your widget to showcase the most positive and impactful feedback from your satisfied customers.
Here’s how to access this Feature:
Navigate to Reputation Tab in your account
Go to Widgets section and create or edit a Widget
In the Layout tab, You can filter out reviews to be displayed using ‘Minimum Rating’ component
Dashboards
Introducing Conversation Widgets
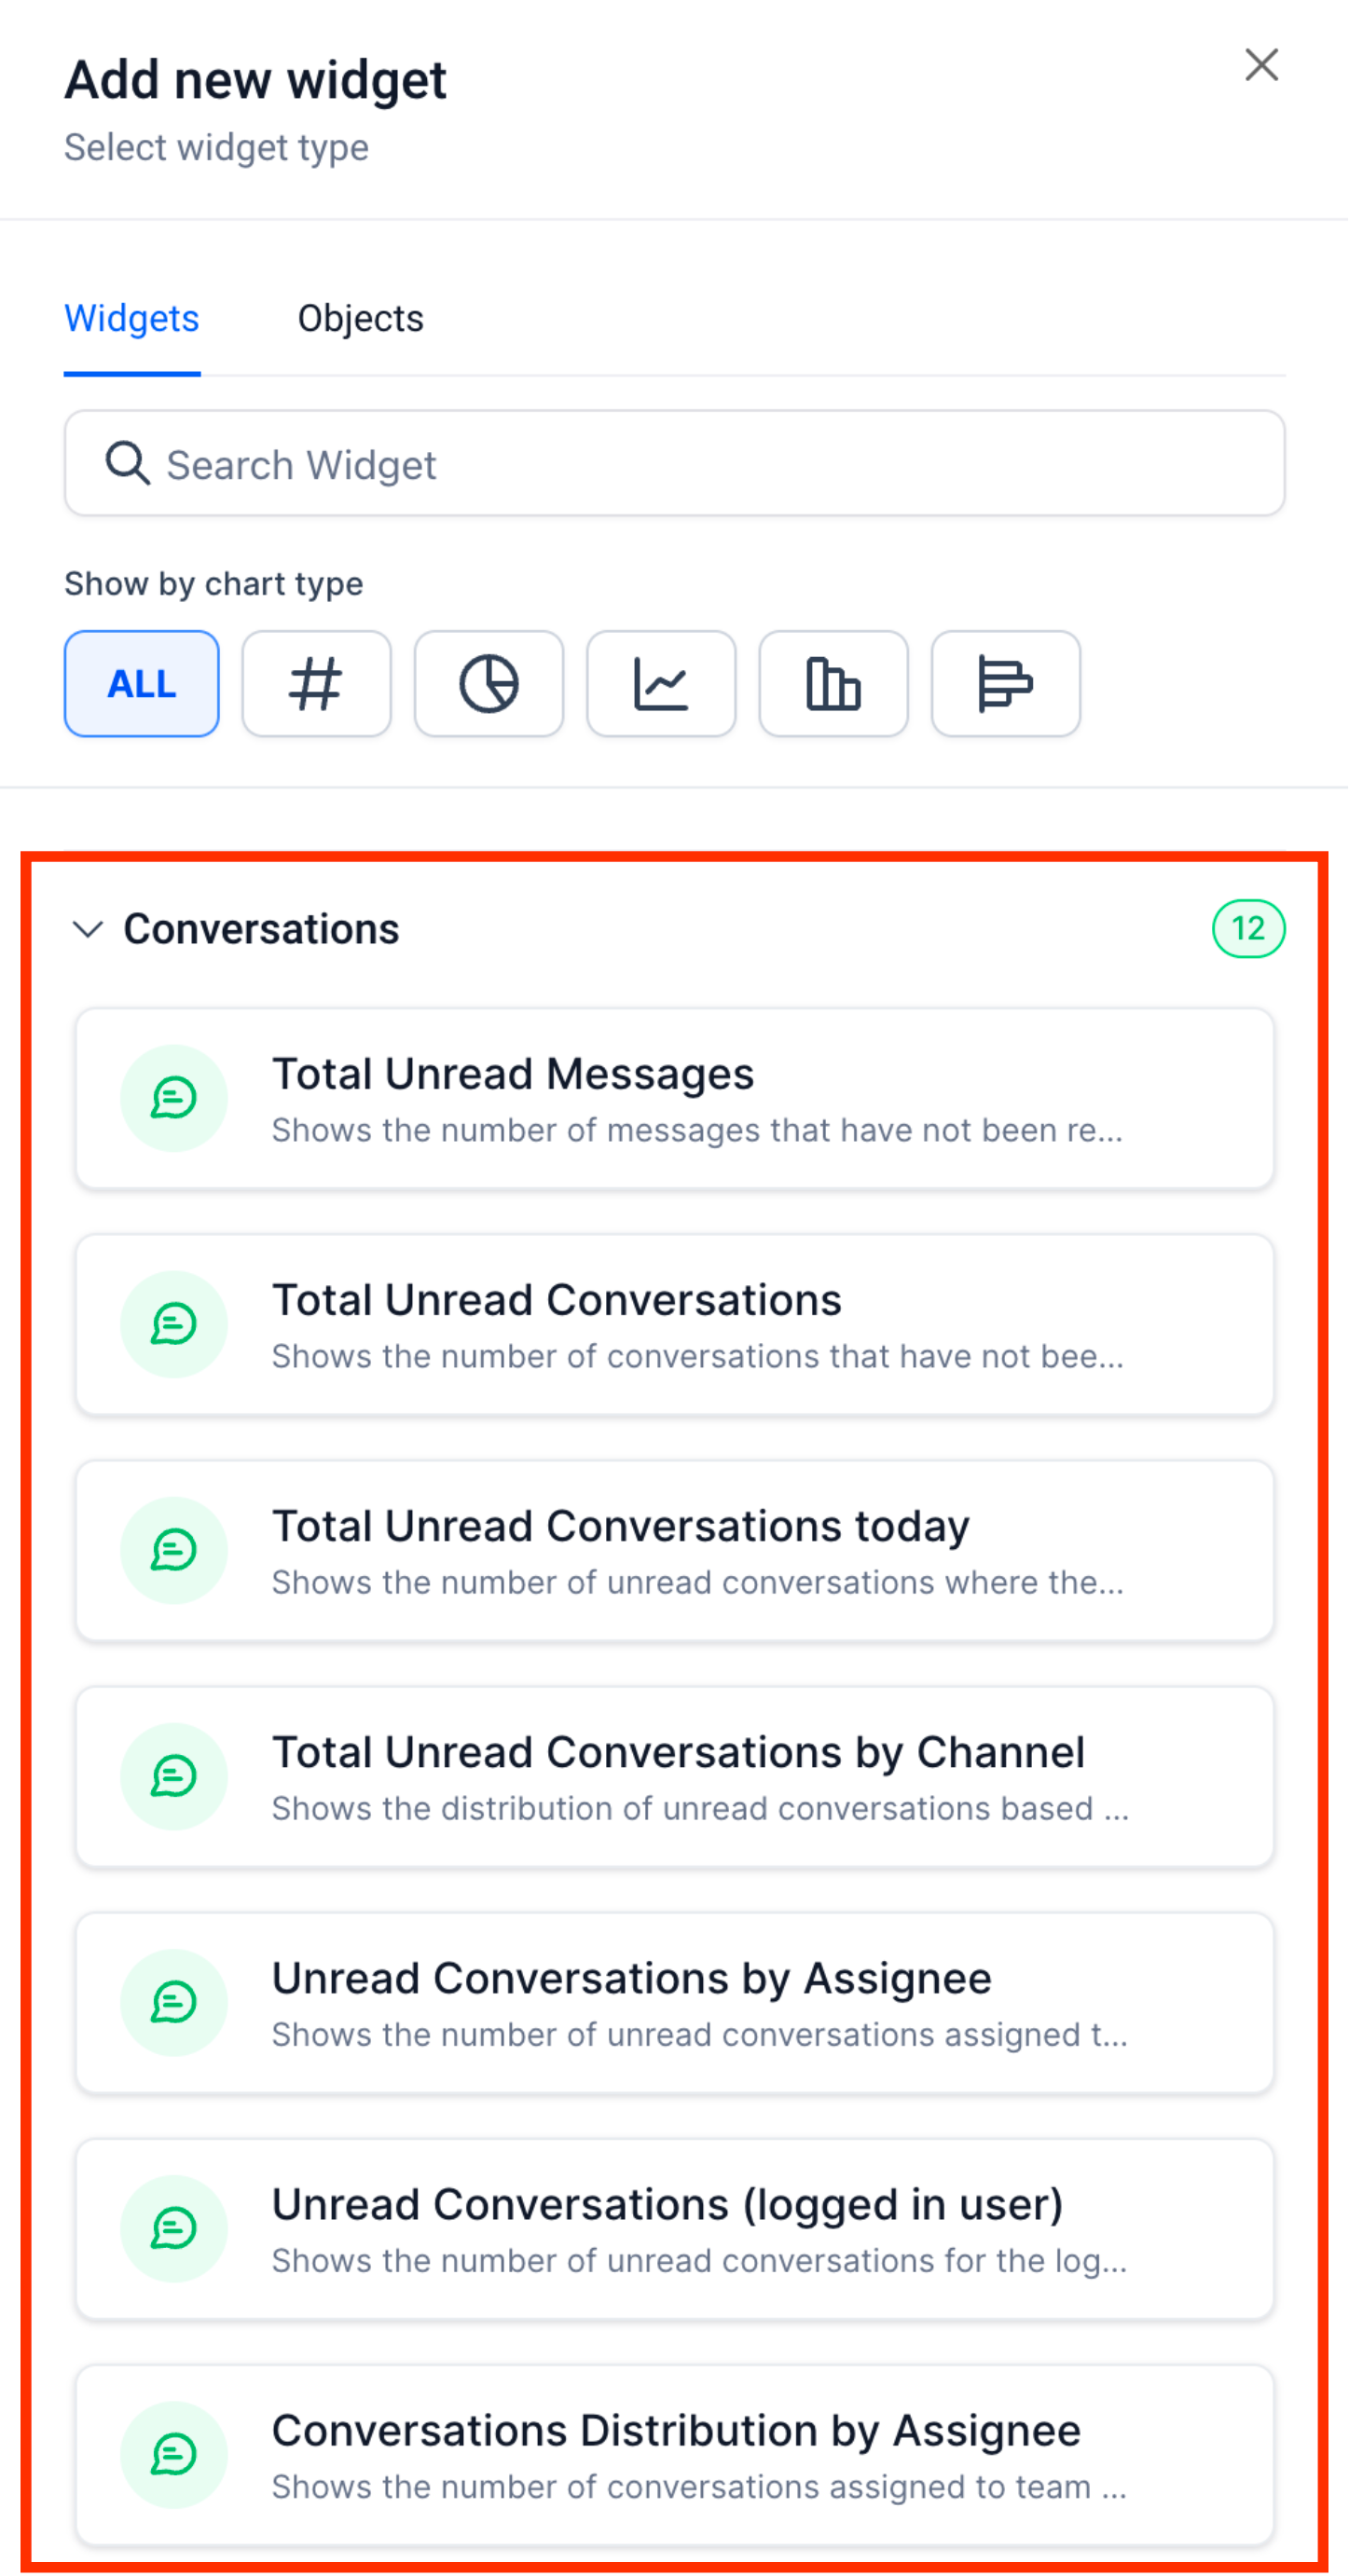
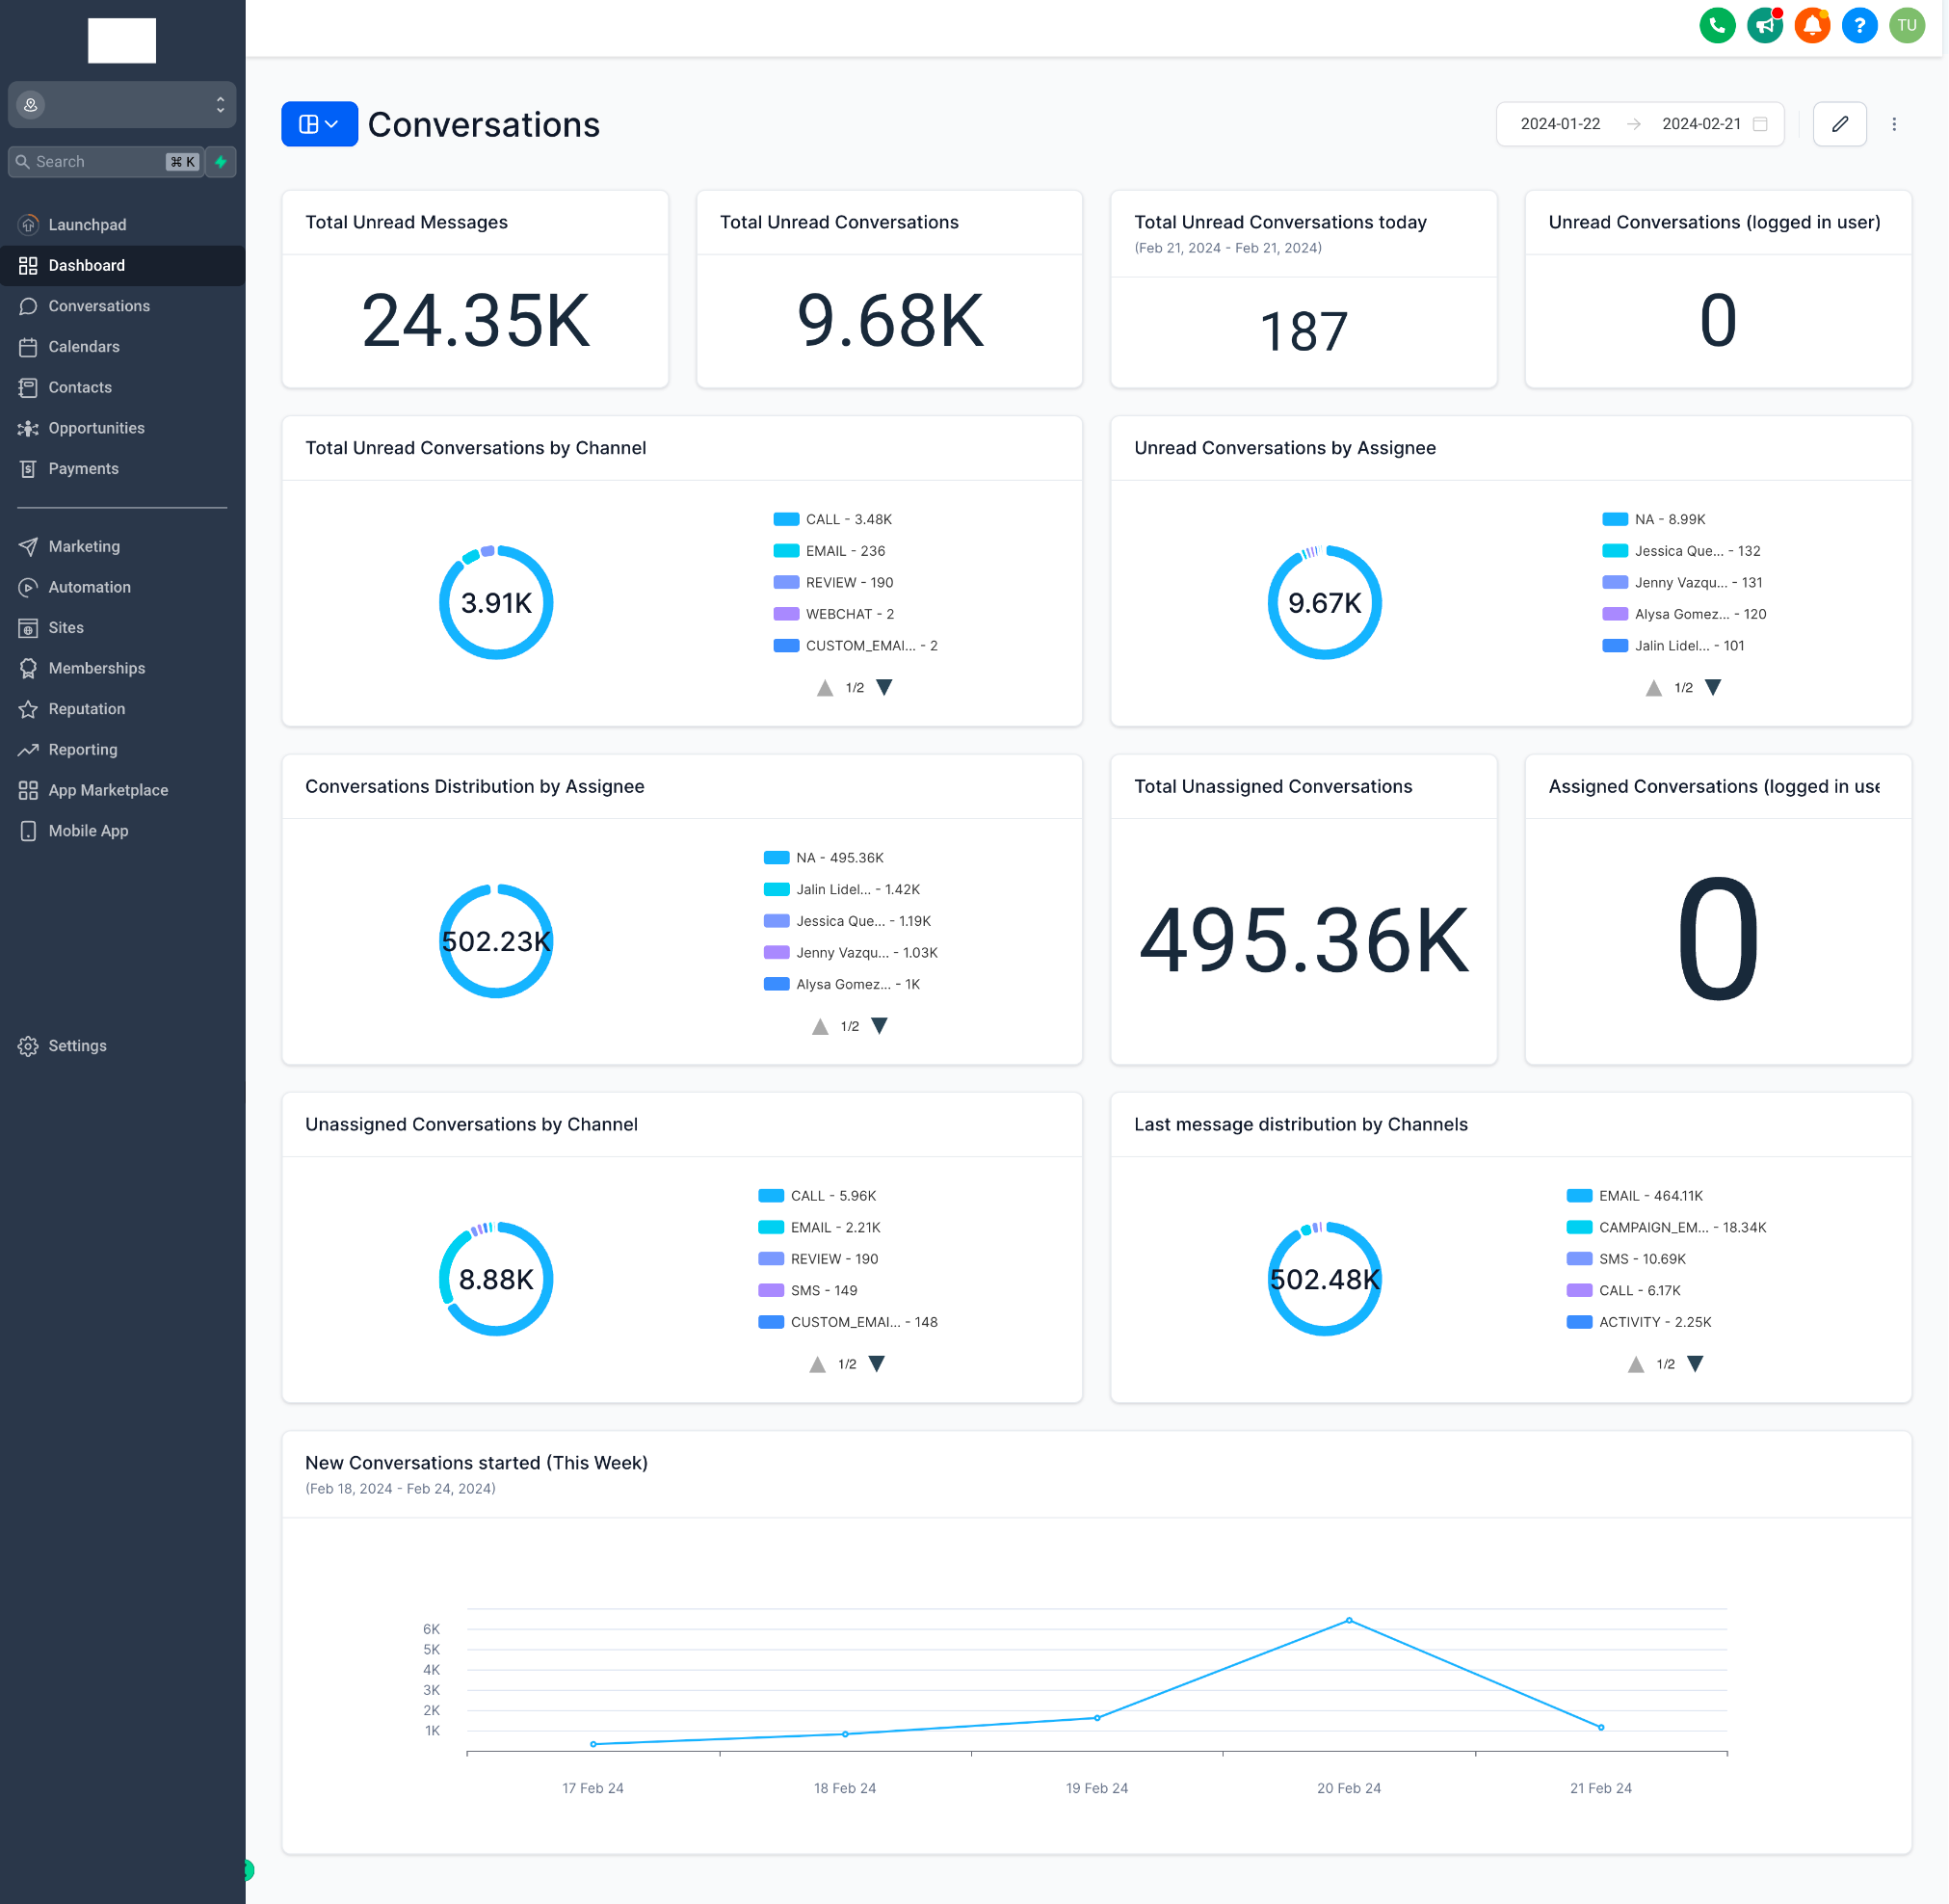
We’ve created a host of new widgets for Conversations for your Dashboards, designed to supercharge your team’s efficiency and elevate customer engagement! Now, with just a glance, you can uncover invaluable insights into unread messages, assignee distributions, and even track new conversations started this week.
Here’s what you can now visualize:
Total Unread Messages: Shows the total messages that have not been read yet
Total Unread Conversations: Shows the number of conversations that have not been read yet.
Total Unread Conversations today: Displays the number of unread conversations where the last message was received today.
Total Unread Conversations by Channel: Shows the distribution of unread conversations based on the channel type of the customer’s last message (e.g., email, SMS, etc.).
Unread Conversations by Assignee: Indicates the number of unread conversations assigned to team members.
Unread Conversations (logged in user): Displays the number of unread conversations for the logged-in user.
Conversations Distribution by Assignee: Shows the number of conversations assigned to team members.
Assigned Conversations (logged in user): Indicates the number of conversations assigned to the logged-in user.
Total Unassigned Conversations: Displays the number of conversations not yet assigned to any team member.
Unassigned Conversations by Channel: Shows unassigned conversations initiated by customers across different channels, considering the channel of the last message from the customer.
New Conversations started (This Week): Indicates the number of conversations started in the current week.
How It Works:
Go to your dashboard.
Click on the edit icon and then Add widget.
Scroll down to the Conversations.
Choose the widget you like from the list of predefined widgets or add your own filters.
Click on save.
New Features In Labs
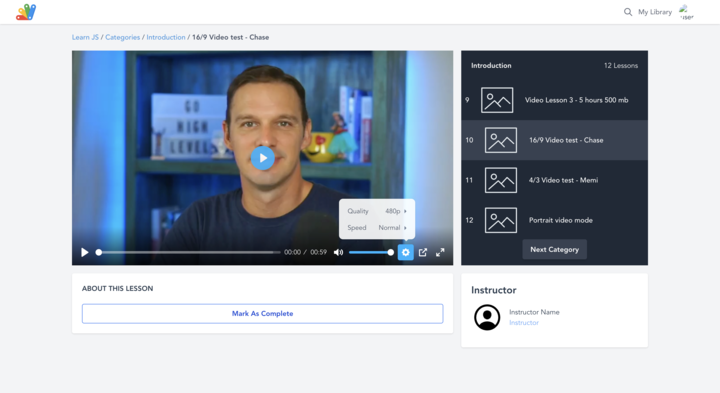
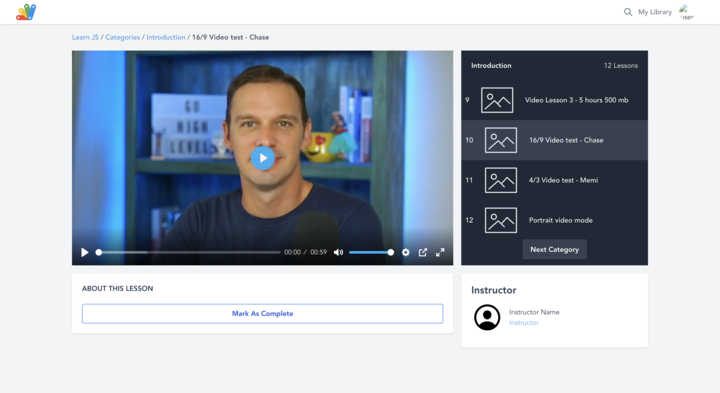
New Video Player for Courses
Introducing a lightweight, accessible, and customizable video player.
Key Highlights:
Video Playback Speed: Take control of your viewing experience with adjustable playback speeds, allowing you to watch content at your preferred pace.
Improved Playback on iOS: We’ve fixed errors in playback on iOS devices, ensuring smooth and uninterrupted viewing across all platforms.
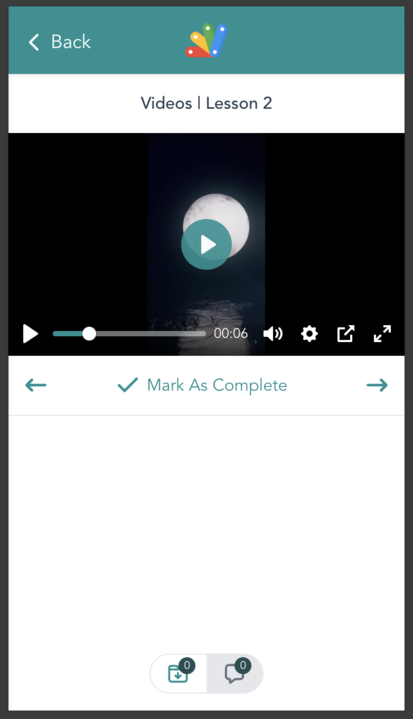
Sleek and Modern UI: The new video player comes with a sleek and modern user interface, providing users with intuitive controls, a seamless playback experience, improved navigation and smoother transitions where users can have great experience while watching the videos.
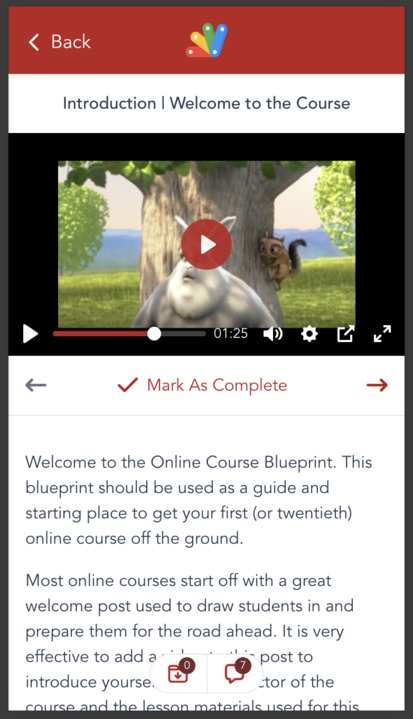
Customizable Themes (Mobile only): Course creators can now personalize the video player experience by selecting from a range of predefined themes that match their preferences. Choose a theme that suits your style and enhances your learning journey.
Note: Only accessible in learner preview mode and can be turned on in labs.