
It is time for all the latest updates in FG Funnels from the week of August 22nd through August 29th, 2024.If you have questions about any of these updates, or FG Funnels in general, please reach out to [email protected] or live chat in the app and our team will be happy to help.
Introducing a new Subscription Management feature within the Client Portal, designed to simplify how you manage your subscriptions, invoices, and transactions—all in one place.
Control Your Subscriptions in Client Portal
Managing your subscriptions has never been easier. Now, you can view, review, and manage all your subscriptions, invoices, and transactions from one convenient location. Whether you need to cancel, review details, or filter through your subscriptions, it’s all just a click away.
Cancel Subscriptions with Ease
Canceling a subscription is now straightforward. You can do it directly from the management page without navigating through multiple screens. However, please note that canceling a community subscription will revoke your access to those communities, and canceling a course subscription will revoke your access to the courses.
Comprehensive Invoice Management
You now have full access to your invoices at any time. Whether you need to download, check billing details, review payment history, or look over transaction summaries, everything is easily accessible.
Advanced Filtering Options
Stay organized with advanced filtering options that allow you to quickly find subscriptions and transactions based on their source, status, or a specific date range. This feature helps you maintain a clear overview of your billing history.
Revamped Settings Page with Enhanced Design
We’ve also refreshed the settings page with a more intuitive design. This user-friendly update improves accessibility and offers a cleaner interface, making it easier than ever to manage your account.
Manage Permissions for Subscription Views
If admins prefer that certain users do not have access to Subscription Management, this feature can be easily disabled through app permissions.
Profile Picture Cropping
Finally, we’ve added a simple tool to help you crop and adjust your profile photo for the perfect fit on your profile page.
This update aims to streamline your experience and give you greater control over your subscriptions and account management.
Bug Fixes:
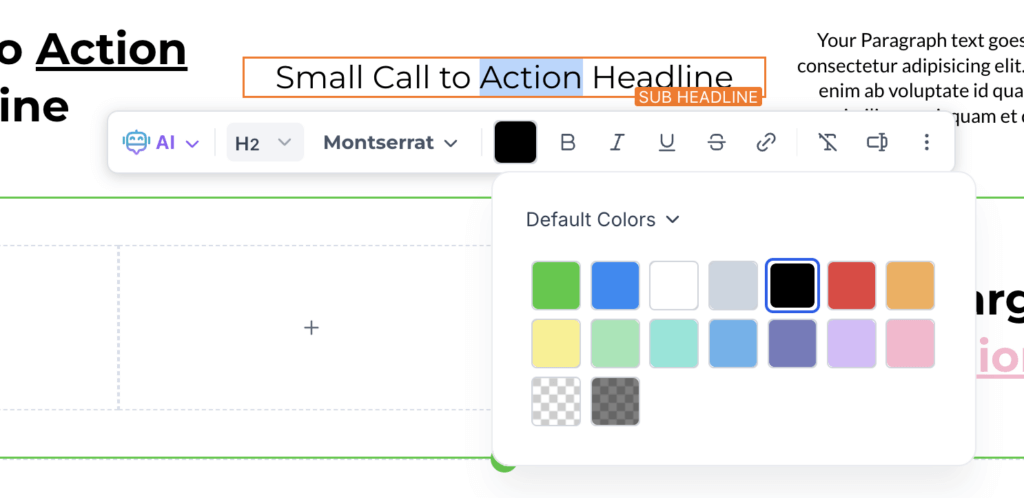
We’ve consolidated multiple color options into a single, unified palette. Now, you can customize text colors without needing to switch between settings for bold, headline, underline, or italics — one color picker to rule them all
The new palette is divided into two sections: Default Colors and Custom Colors. This clear separation allows for easy differentiation between predefined and personalized colors, giving you more control over your design. You can also color selected text directly using the color palette in the inline toolbar, without having to apply the color to the entire block of text.
The new color picker UI lets you add, edit, and delete custom colors. Use the dropper to fine tune the colors in your website and funnel.
How to Use:
Users can now upload compressed .zip files in media storage. Size limit – 100 MB
For uploading the zip files, Navigate to the media storage -> Click New upload button -> select Upload file -> choose any of the zip file from your desktop
Enhancements:
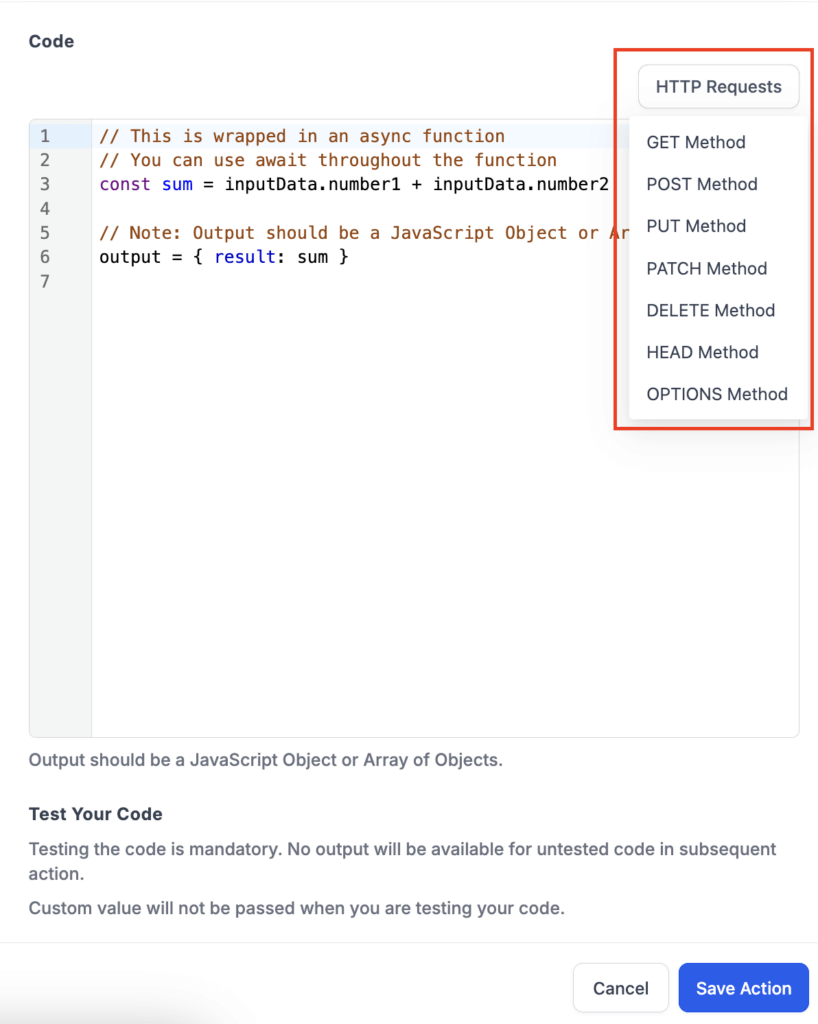
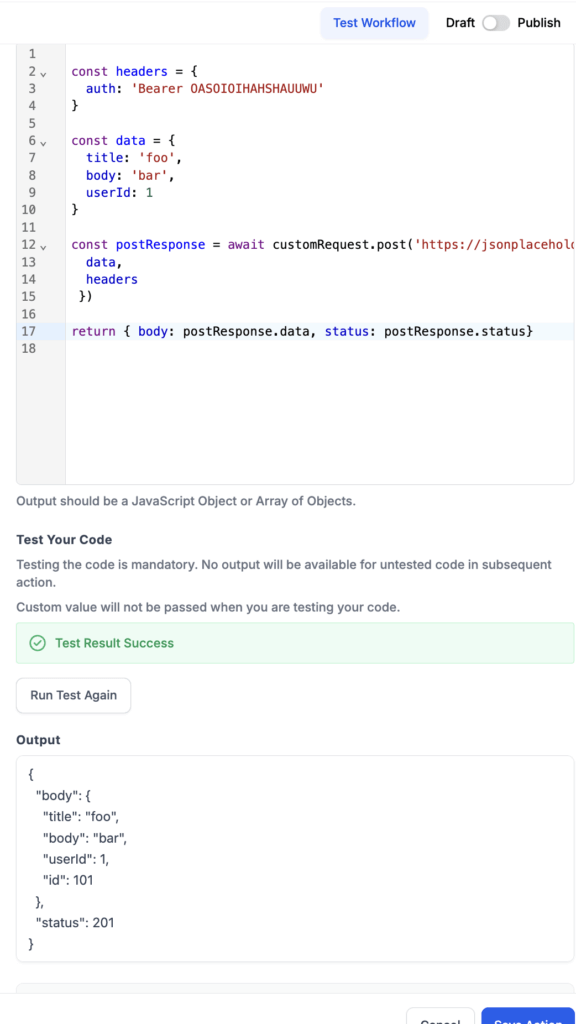
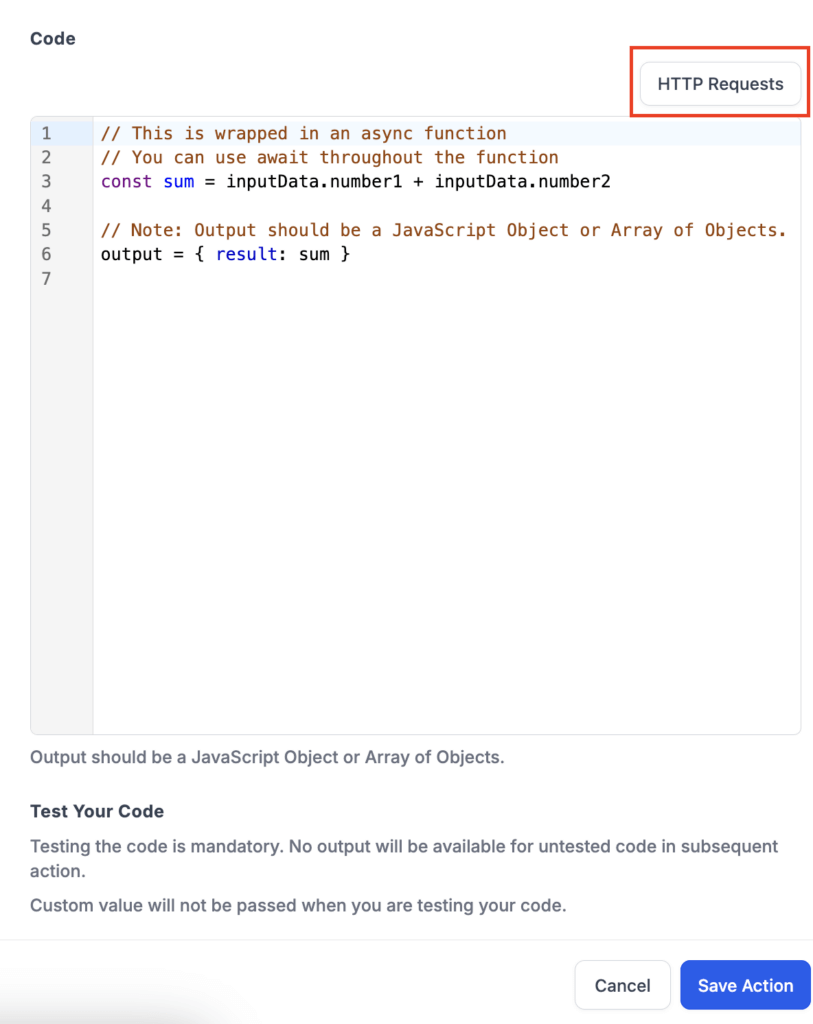
We’ve introduced a new custom code action in workflows that allows users to write, execute, and test their code with integrated HTTP requests directly in the workflow.
How to use?
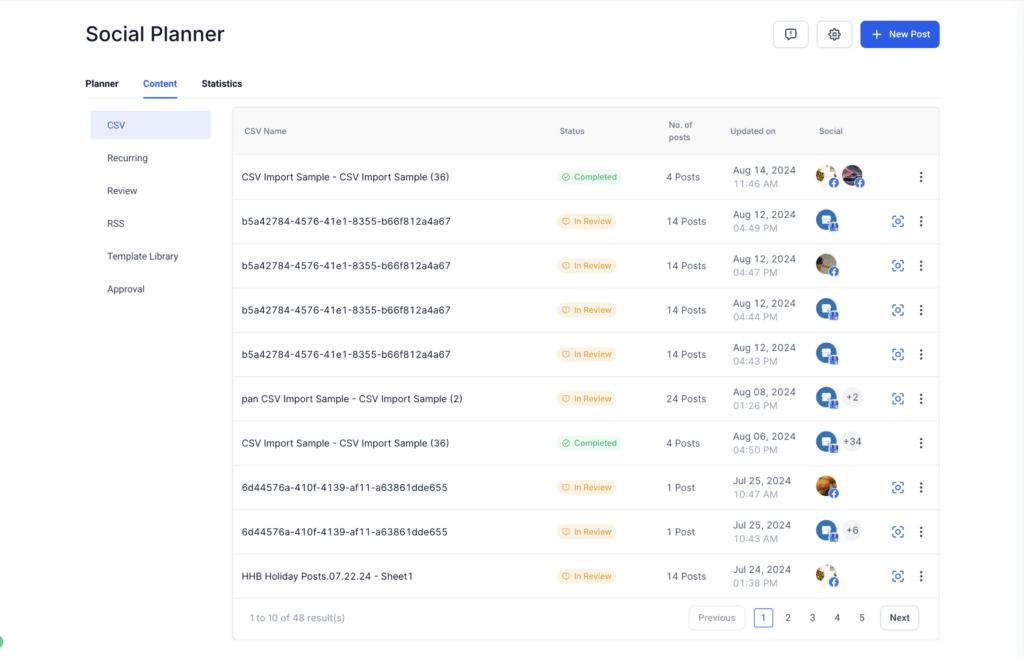
In Planner view, you can easily check content within a specific time range and filter it by content type, status, approval status, creator, approver, category, or tag.
Planner view also offers both list and calendar layouts to give you a clearer perspective on your content. You can preview posts directly from the Planner view without needing to open the post composer. Plus, you can quickly view stats for recently published posts.
In Content view, users can manage a variety of tasks efficiently. They can view CSV content and easily fix any errors by clicking “Review and Schedule.” Recurring settings, like modifying the parent post, can be adjusted, and review settings can be updated, including review automation, background, post schedule, and review stars, with options to play or pause. Additionally, users can modify RSS settings, manage template library settings for selected Social Planner templates, and oversee posts that require approval, whether they created them or are the approver. This view also provides insights into approved and rejected posts, along with the reasons for those decisions.
In Statistics, users can view data of top-performing posts and recent posts.
You can now add late fees to your invoices, either through global settings or individual invoice settings.
To apply late fees to all invoices, go to Invoice Settings -> Payments and configure them globally. The configuration done here will act as blueprint for all invoices. However, you can change it on an invoice level as well.
Late fees will get applied to invoice once it is due. In case an invoice has payment schedule, due date of each schedule will be considered
This feature allows updates to product quantities and the option to “Continue selling when out of stock.” It also includes enhanced search functionality.
How to use:
Important Notes:
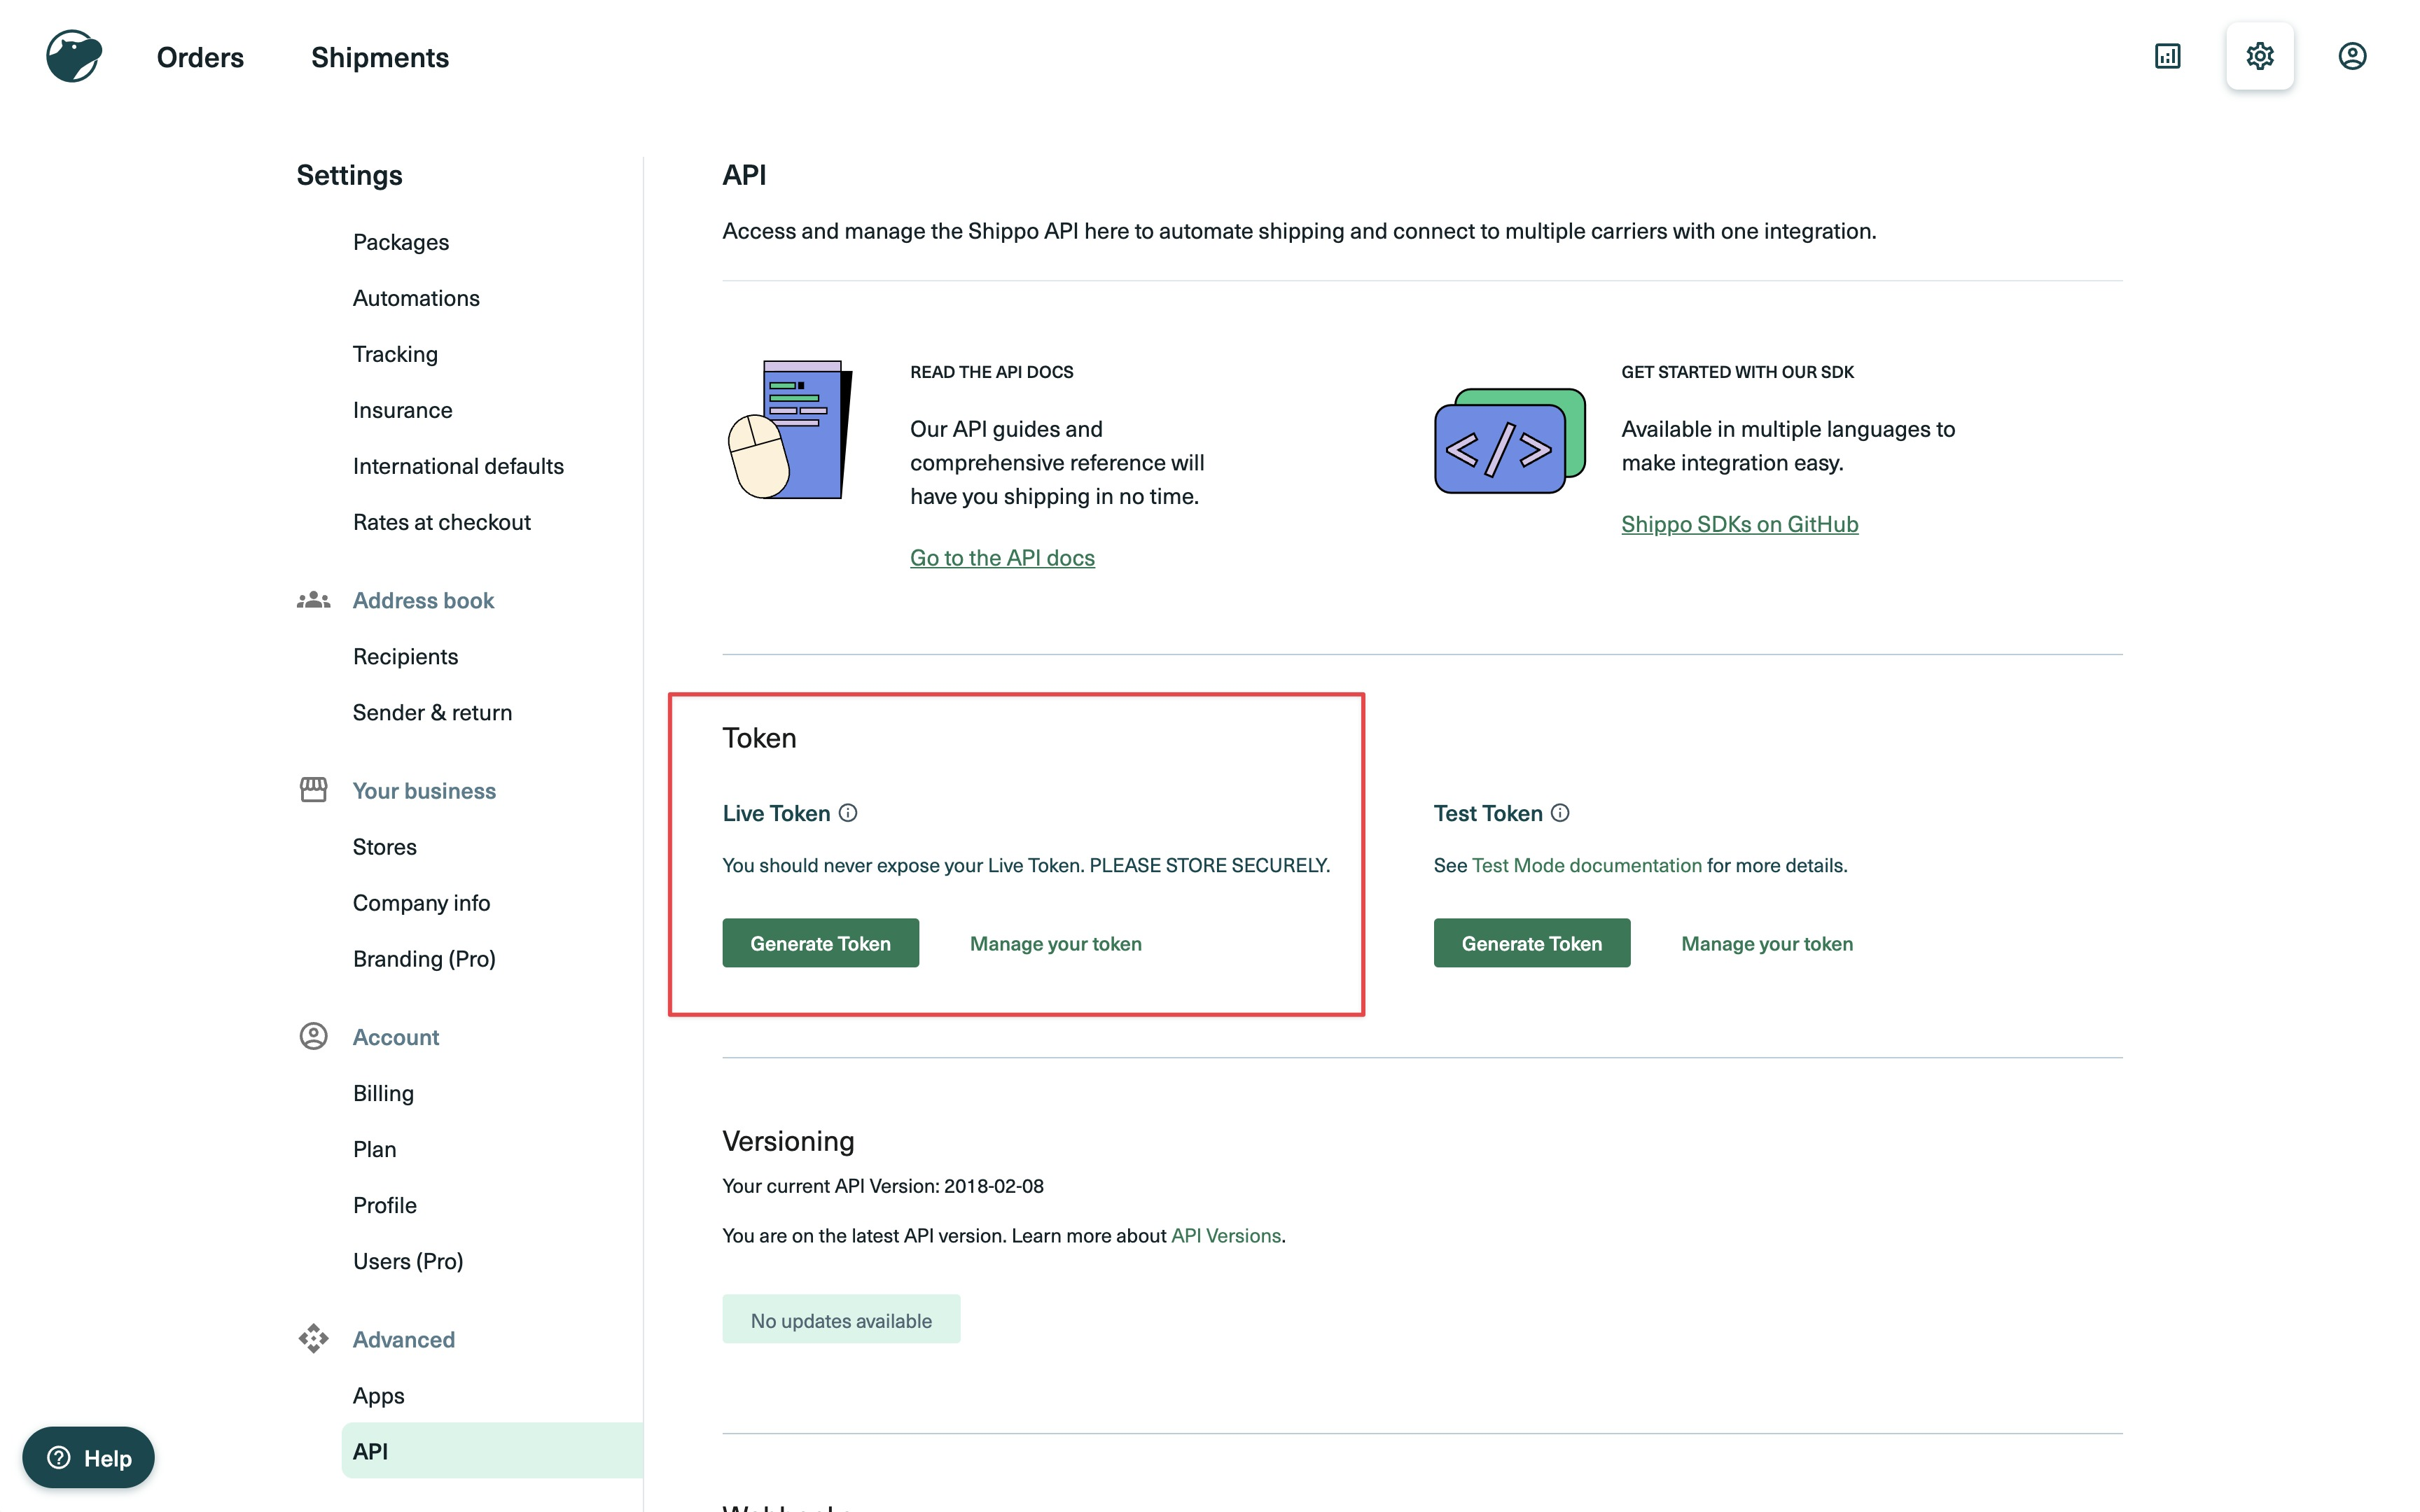
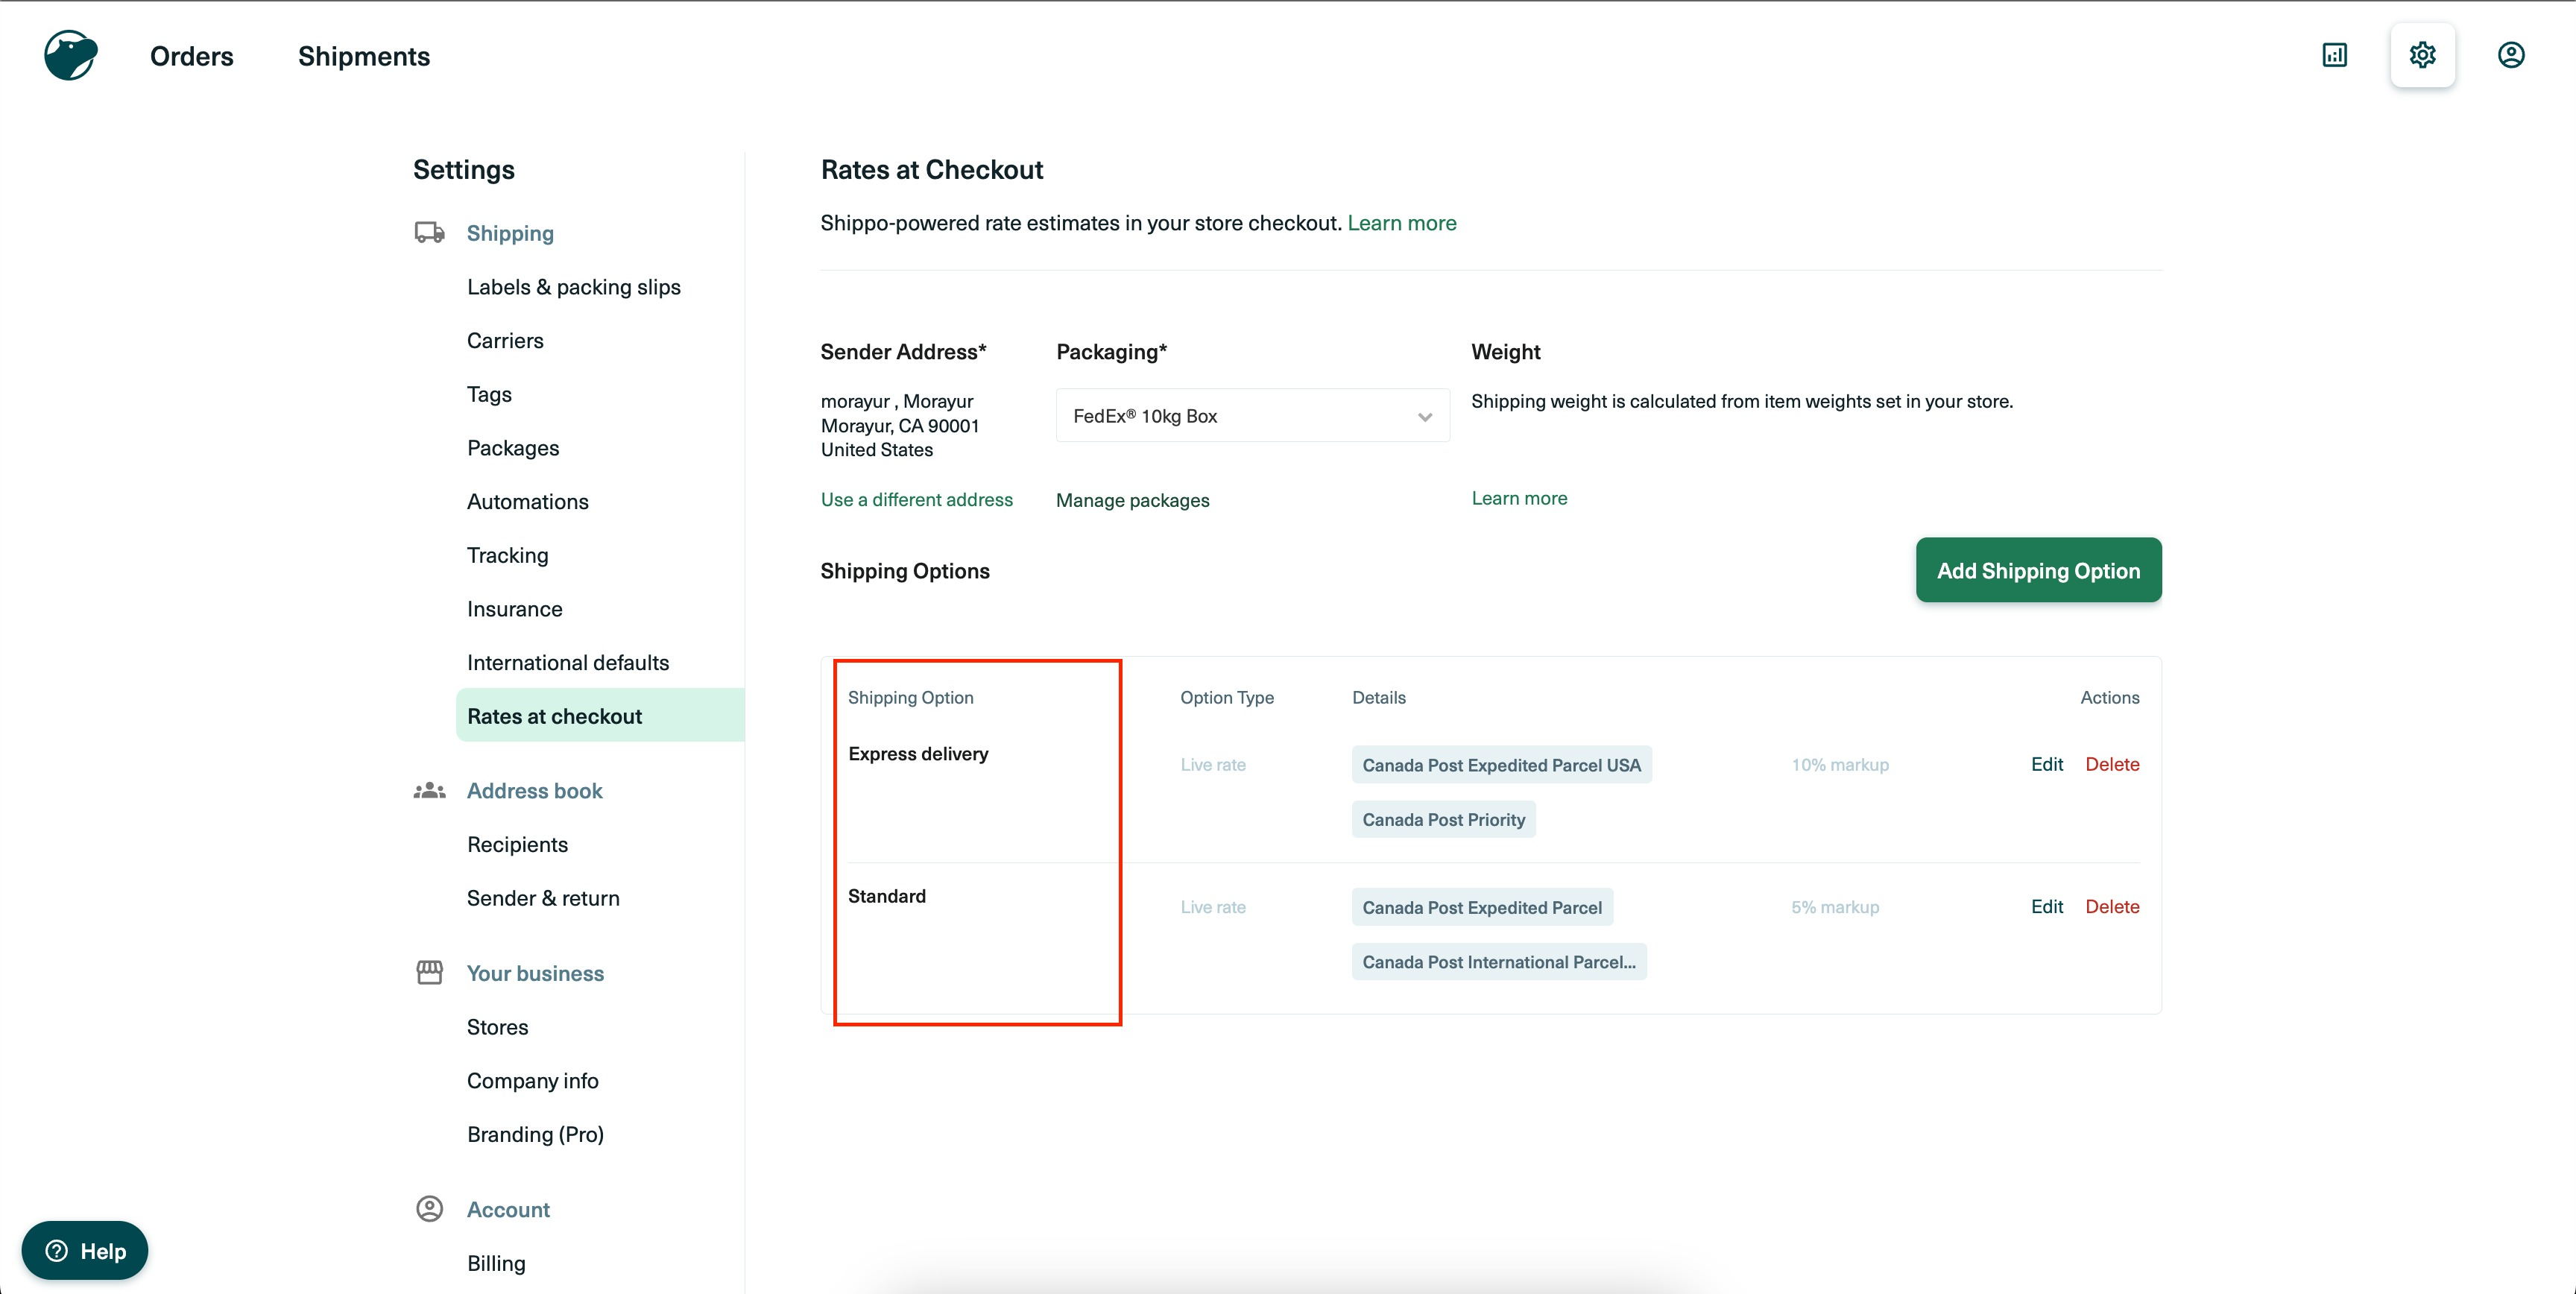
Store owners can now effortlessly sync Ecommerce orders with Shippo, gaining access to the best real-time shipping rates from 40+ carriers. This integration streamlines your shipping process, allowing you to quickly compare live shipping rates, print shipping labels, batch orders, and automatically fulfill their orders. Store owners can also earn by charging markup fees on delivery.
How to use?
In Shippo:
Live token creation:
Setting up Shipping Options:
In FG Funnels:
Important Notes:
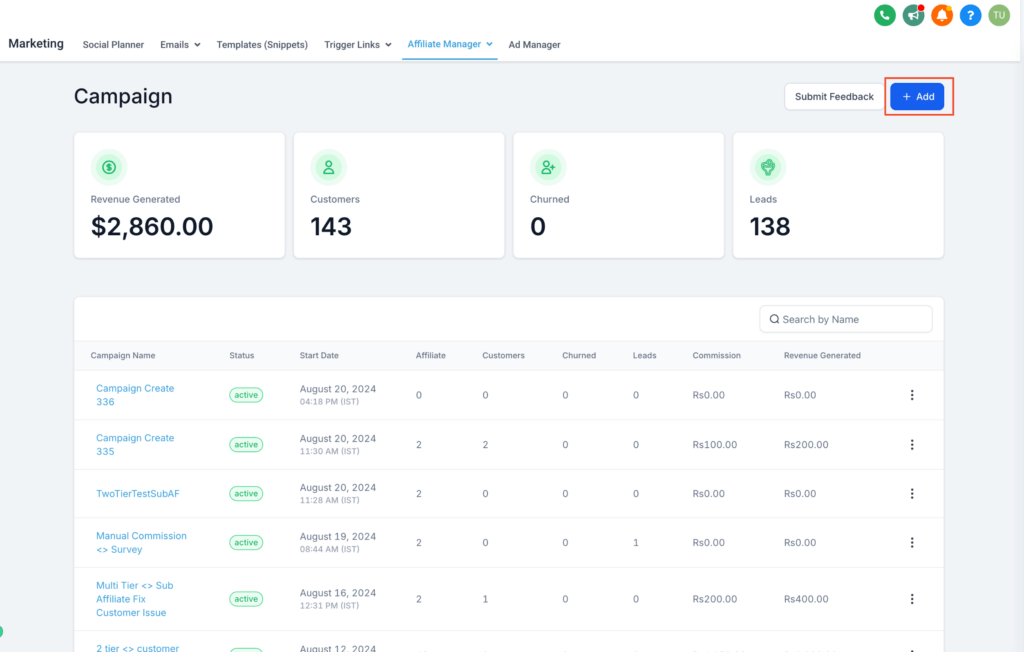
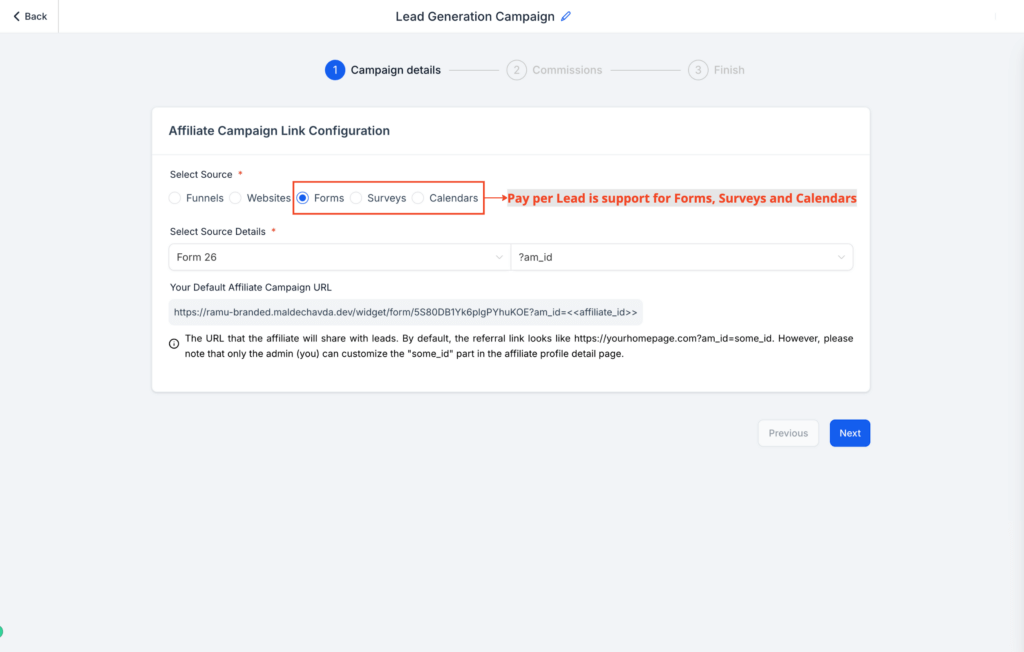
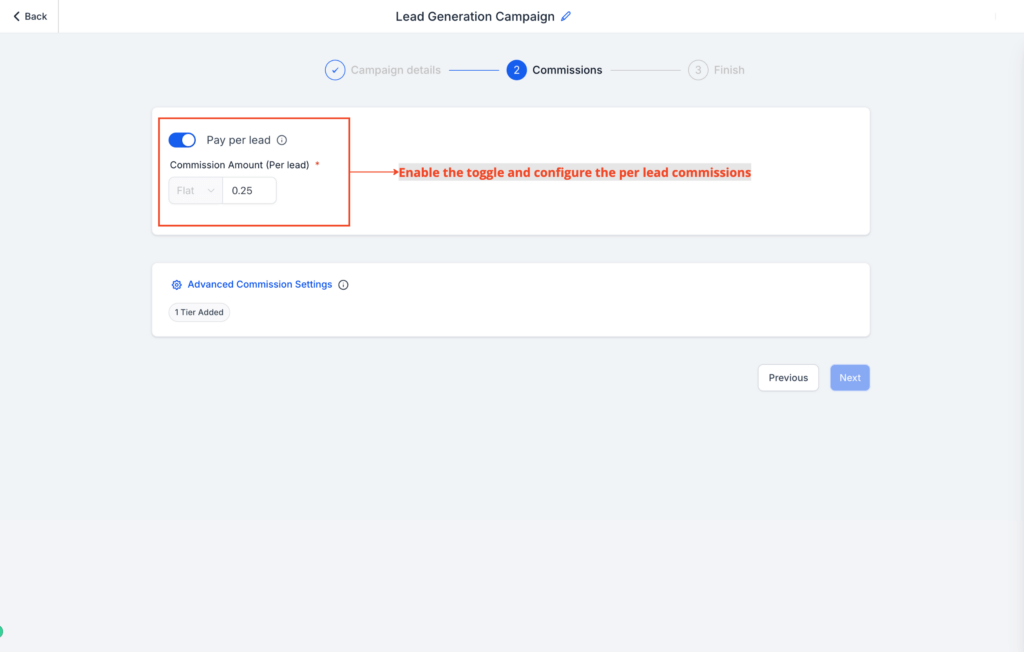
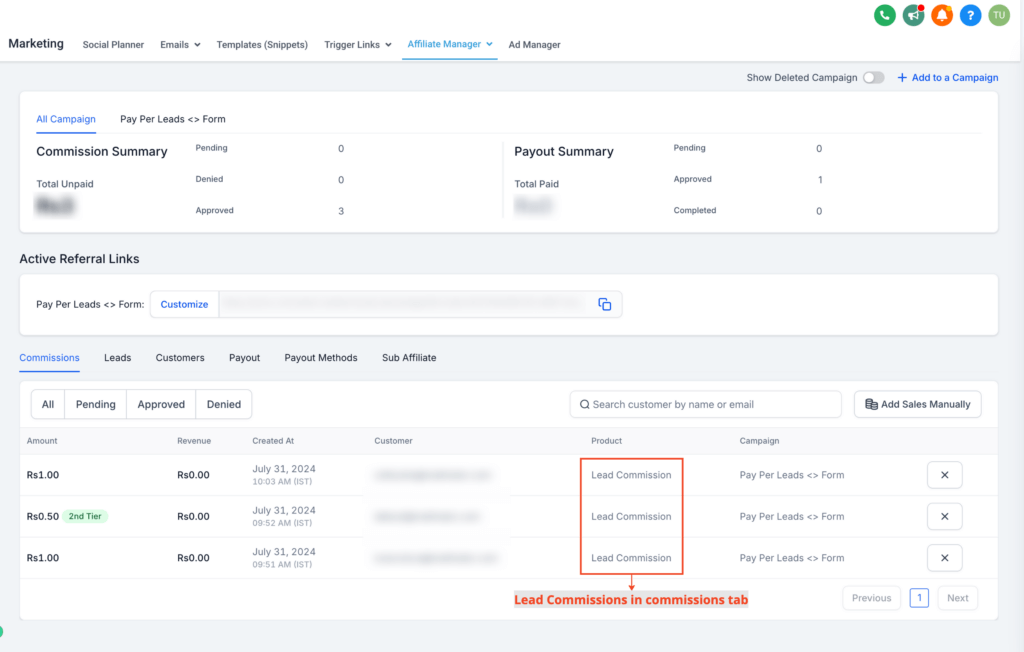
This new feature enables a performance-based commission model where affiliates earn a commission for every lead they refer, not just on completed sales.
Affiliates can now earn commissions based on the leads they generate through actions like form submissions, calendar bookings, or survey completions. The PPL model is now supported for Forms, Surveys, and Calendars.
Configure lead commissions with options for per-lead payments and advanced tiered commission structures
How It Works?
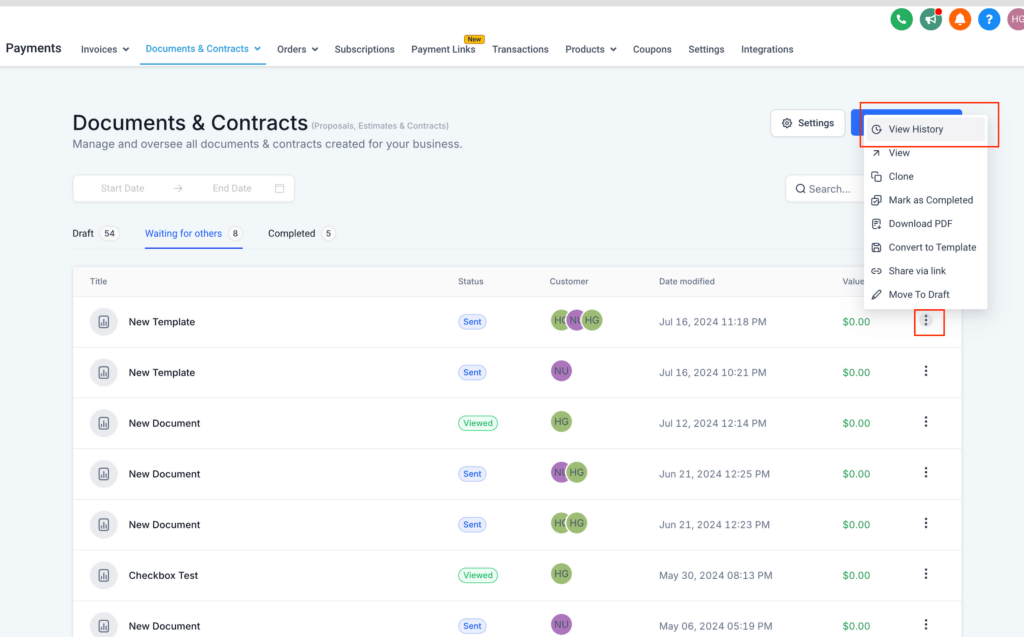
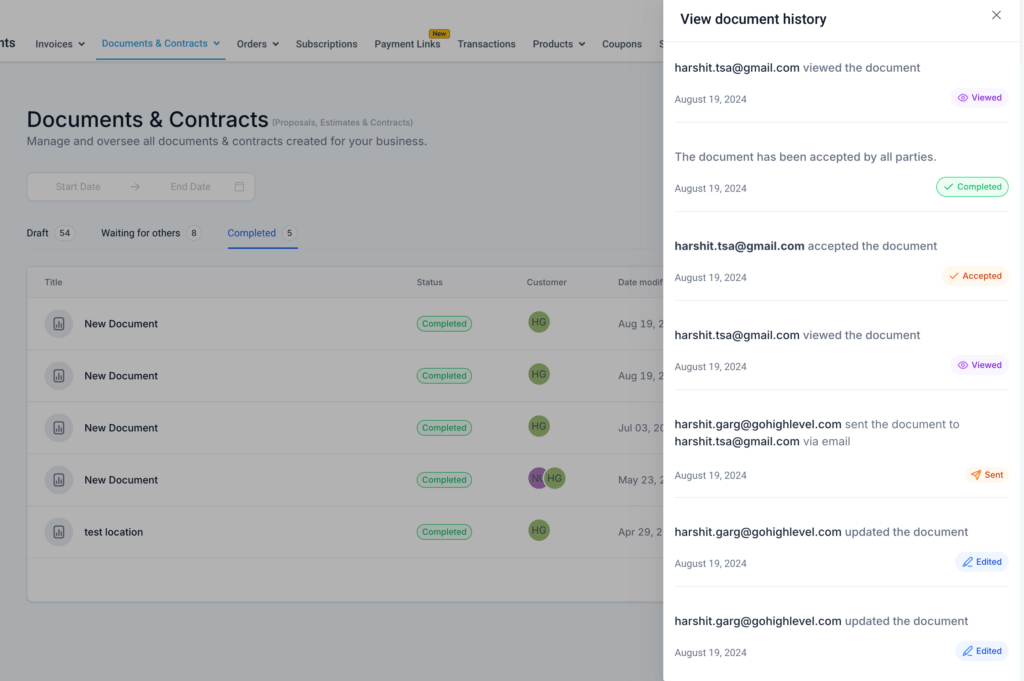
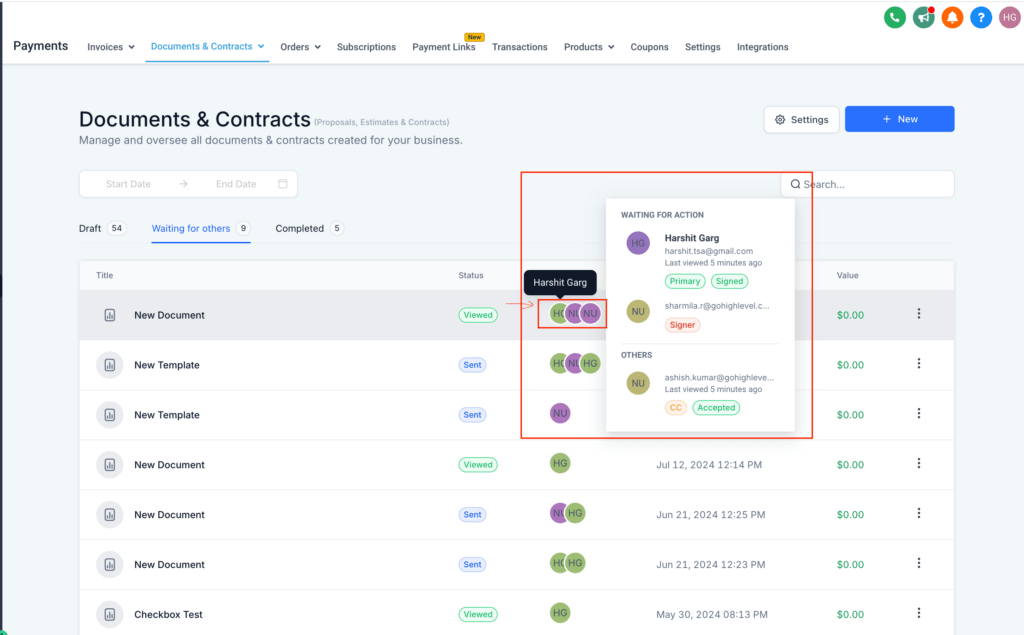
Easily track a document’s entire history—from sent to edited, viewed, and signed—by clicking “View History” in the options menu. Additionally, hover over the contact icon to see the last time the document was viewed and any pending actions required by the user.
How to use?
Important Note: Last action time in the hover modal would only be available for the documents that are sent now onwards. For older documents the time won’t be available.
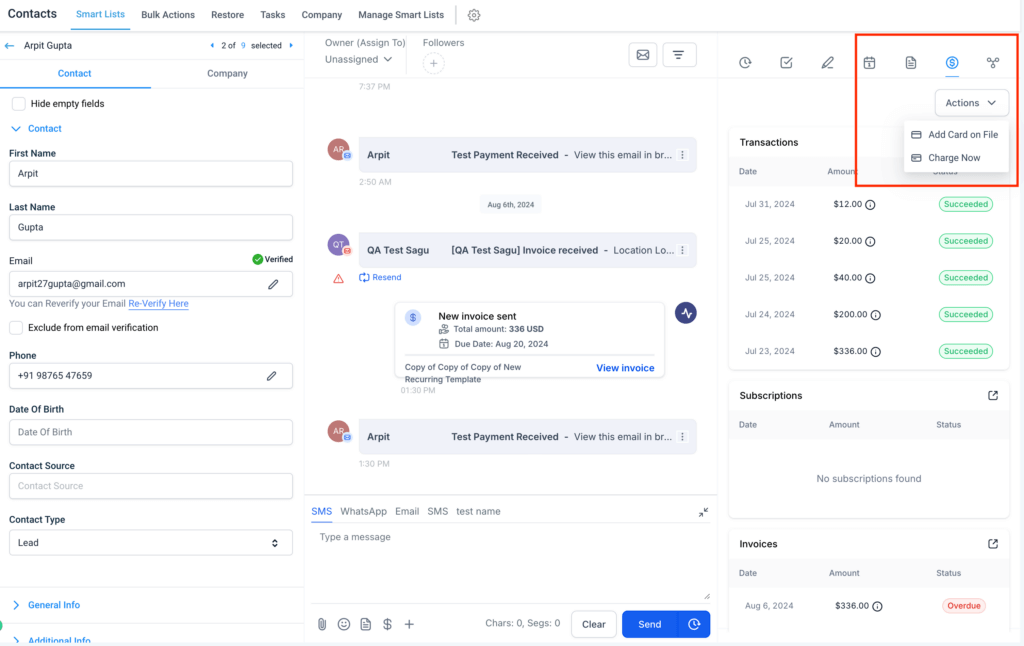
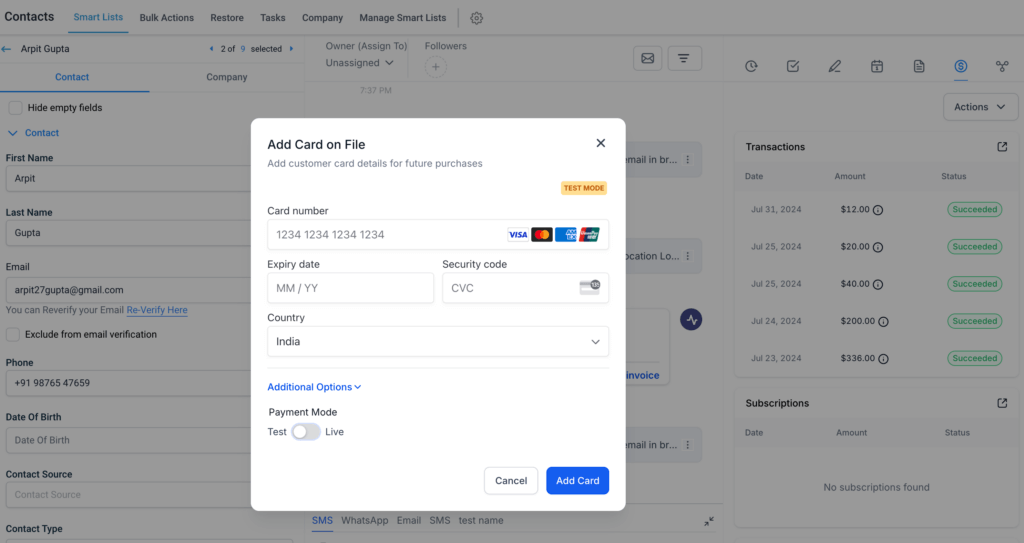
This feature allows you to securely store a customer’s card information, enabling you to easily charge the card later when needed. This is available alongside the ability to charge customers under the Actions button.
Unsent messages in Conversations are now automatically retained. If you begin typing a message and leave the screen before sending, your draft will be preserved and ready when you return.
This feature is currently available via Labs and is not applicable to WhatsApp messages.
Previously only one email address could be added in the global settings. We have extended the limit to 5 reply-to addresses.

We have added ‘Business Category’ as a new field on the company settings page. Previously, the “Business Niche” field had 4,000 options, making it difficult for customers to find the right niche. The “Business Category” field groups these options into sub-categories.
FGF Notifications
