FG Funnels Updates – August 22nd, 2024

August 21, 2024
POSTED IN BLOGS › FG Funnels Release Notes    

It is time for all the latest updates in FG Funnels from the week of August 15th through August 22nd, 2024. If you have questions about any of these updates, or FG Funnels in general, please reach out to [email protected] or live chat in the app and our team will be happy to help.
Blogs

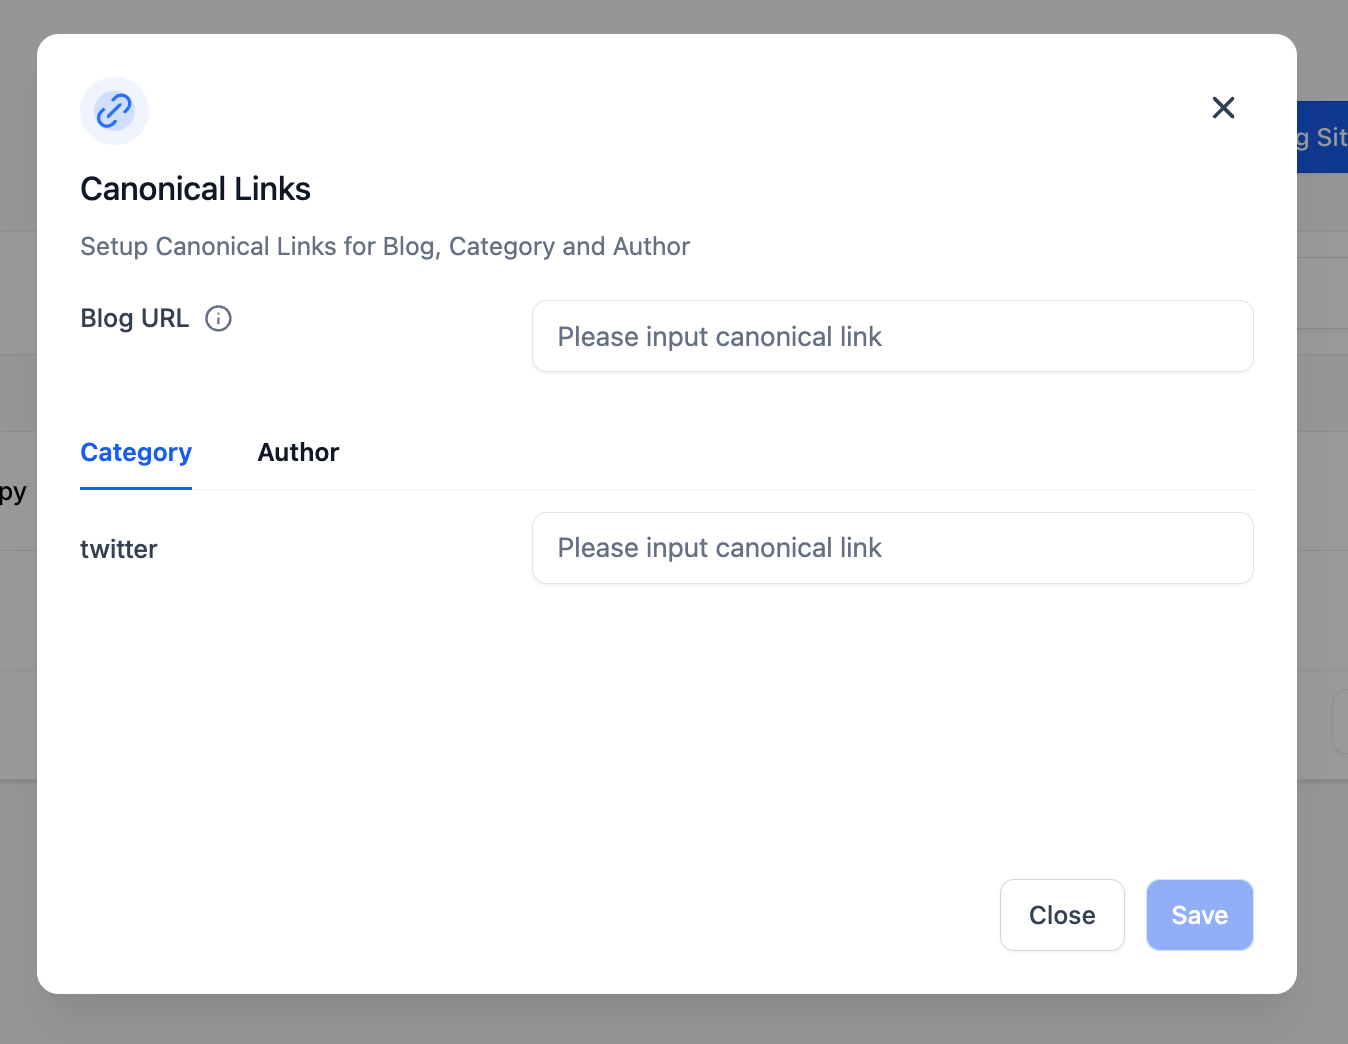
Canonical Support for Category and Author

Users can now streamline their SEO  by adding canonical links to specific category and author.


Key Highlights:
  • SEO optimization:  improve SEO by consolidating links  and directing search engines to the primary version of a page,  leading to better search rankings and enhanced visibility for your content.
  • Duplicate content prevention:  setting canonical links can prevent issues related to duplicate content, which can negatively impact SEO.
  • Enhanced website performance:  optimize website performance by providing clear signals to search engines about the preferred version of a page. This can result in more efficient crawling and indexing.
How to Use:
  1. Navigate to Sites > Blogs
  2. Click on the name of Blog
  3. In the blog list, there will be three dot option beside the New Post option to select the Canonical Settings
Important Note: We have removed the tags pages from the sitemap to prevent duplication of content. In future updates we will allow users to add canonical links for tags.
Screenshot 2024-08-20 at 6


Affiliate Manager

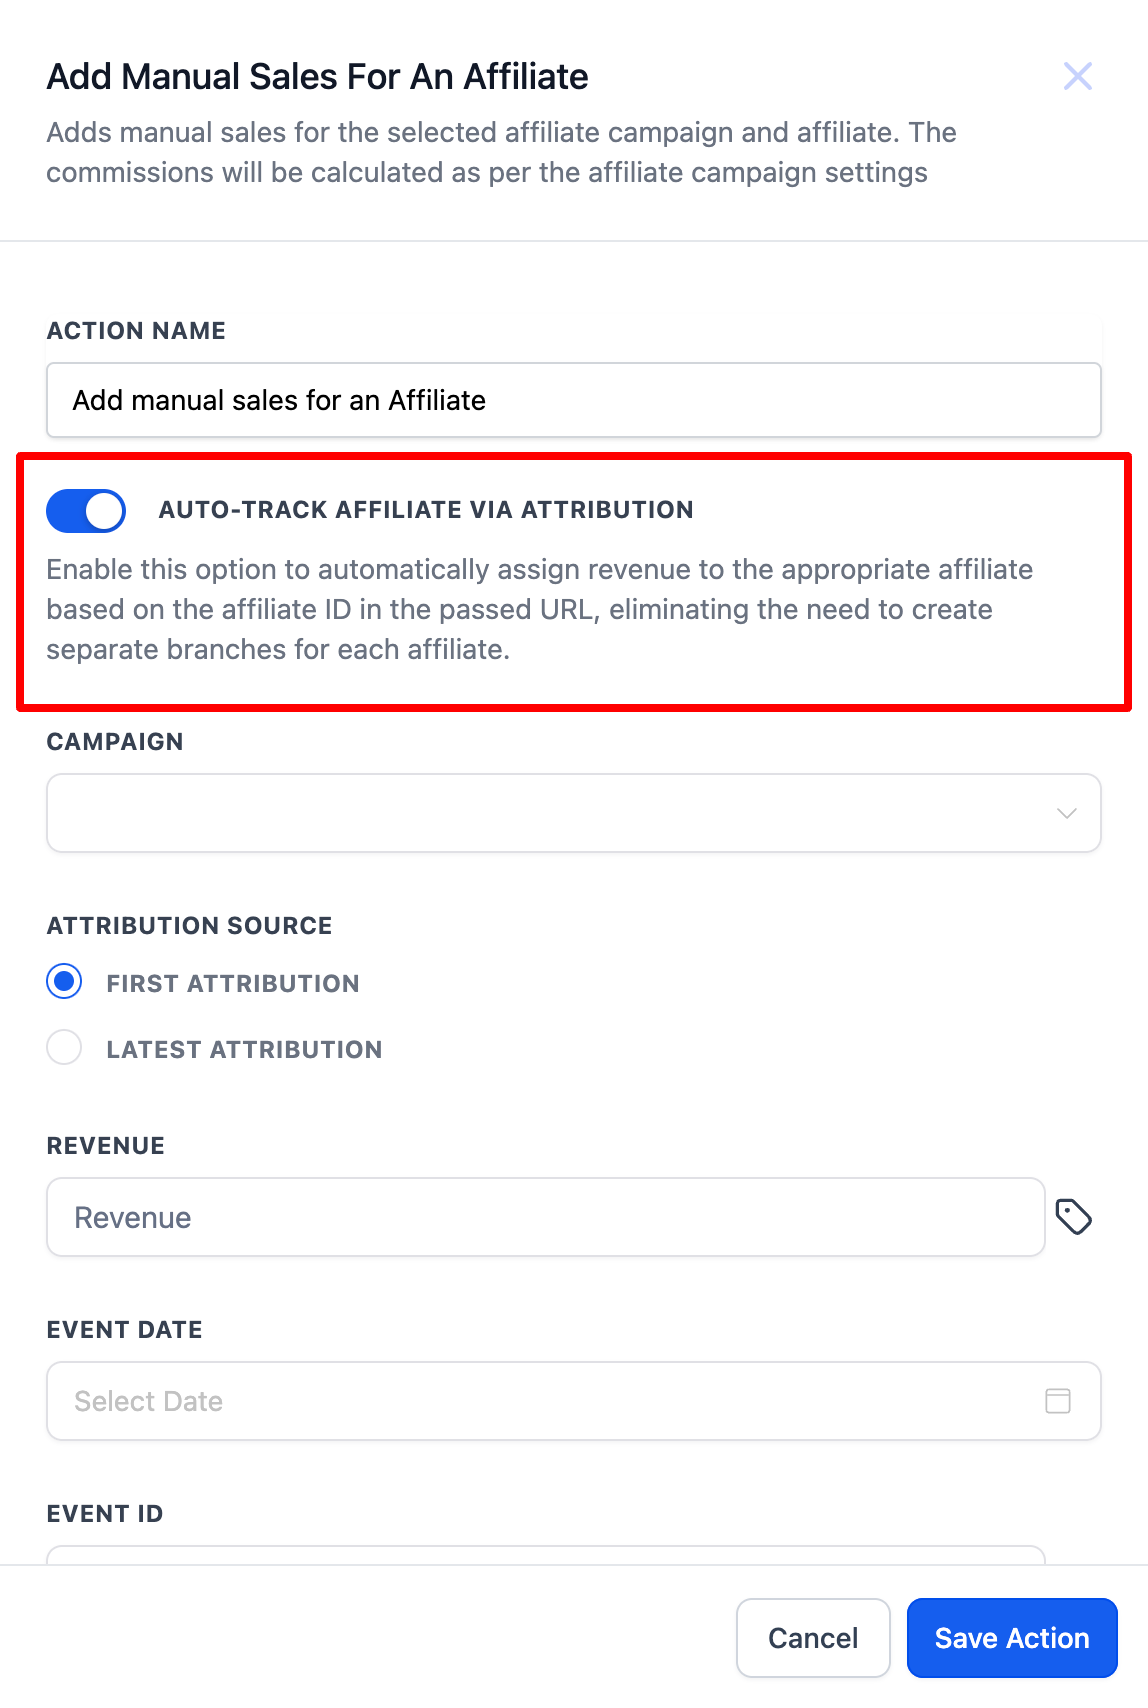
Auto-Track Affiliates via Attribution in “Add Manual Sales For An Affiliate” Workflow Action

You can now seamlessly track and assign manual sales to affiliates with enhanced attribution tracking. The new feature automatically links manual sales to the correct affiliate by tracking their unique affiliate ID in the URL. Additionally, you can choose between first and latest attribution methods to determine how the system assigns sales to affiliates.
 How It Works:
  1.  Select the “Add Manual Sales For An Affiliate” action in your workflow.
  2.  Toggle on the  Auto-Track Affiliate via attribution option.
  3.  Decide whether to use first or latest attribution for tracking.
  4. Pick the relevant affiliate campaign.
  5. Enter Sales Details;  sales amount, event date (optional), and event ID (optional).
  6. Save the Action
 Important Notes:
  • This action assigns manual sales to an affiliate, with commissions calculated based on the campaign’s default settings.
  • Make sure to select the appropriate attribution type to ensure commissions are tracked accurately.
image

Tasks

Daily Summary Reminders

With the Task Reminder Notifications feature, you can set up reminders to be sent via push notifications, SMS, and email at your preferred times. This feature is currently available in Settings > Labs > Daily Task Reminders


How to Use:

1. Head over to Settings > My Profile > Notifications

image

2. Under Task Notifications > Enable daily summary reminders and set up a preferable time of the day.

 3. Save Settings
image

Important Note: reminders will only start triggering one hour after they have been configured. This delay ensures that the system properly syncs your reminders across all chosen notification channels.


Opportunities & Pipelines

Bulk Edit Opportunities

It’s now possible to select multiple opportunities at once, either individually or by selecting all at once. Various fields, including standard fields like Pipeline Name, Stage, or Owner, as well as custom fields, can be updated and cleared across multiple opportunities in just a few steps. Opportunities can be seamlessly moved between pipelines without worrying about losing or duplicating information. The Bulk Actions page also allows for tracking the progress of these bulk edits, offering visibility into success rates and any errors that may occur.


How to Use:

1. Ensure that the List View for Opportunities is enabled from Labs.

Screenshot 2024-08-19 at 1

2. Navigate to Opportunities > List View.

3. Choose multiple opportunities that you wish to edit and click on the Edit button at the top.
4. Select the fields you want to update and enter the new information.
5. Click on Confirm to apply your changes.
6. Head over to the Bulk Actions page to monitor the progress, review successes, and identify any errors.
Important note: This feature is only available in the List View, which must be enabled from Labs.


WhatsApp

Support for Snippets

With this feature, you can now create and use predefined templates for frequently used messages, making it easier and faster to respond to inquiries, send promotional content, and manage routine communications with your customers on WhatsApp.

Predefined Templates for Quick Responses: Create and save message snippets as templates that can be easily accessed and reused across your communication channels. Ideal for common responses, promotional messages, and other frequently sent content.

Customizable Snippets with Dynamic Content: Compose your snippets using Custom Values and Trigger Links to personalize messages.
How It Works:
  1. Go to Marketing > Templates (Snippets) > Add Template (Snippet) > Add Text Template (Snippet)
  2. Go to Conversation > WhatsApp > Insert Snippets
  3. Select Snippet to populate.


Calendar

Configure “Look Busy” in Calendar

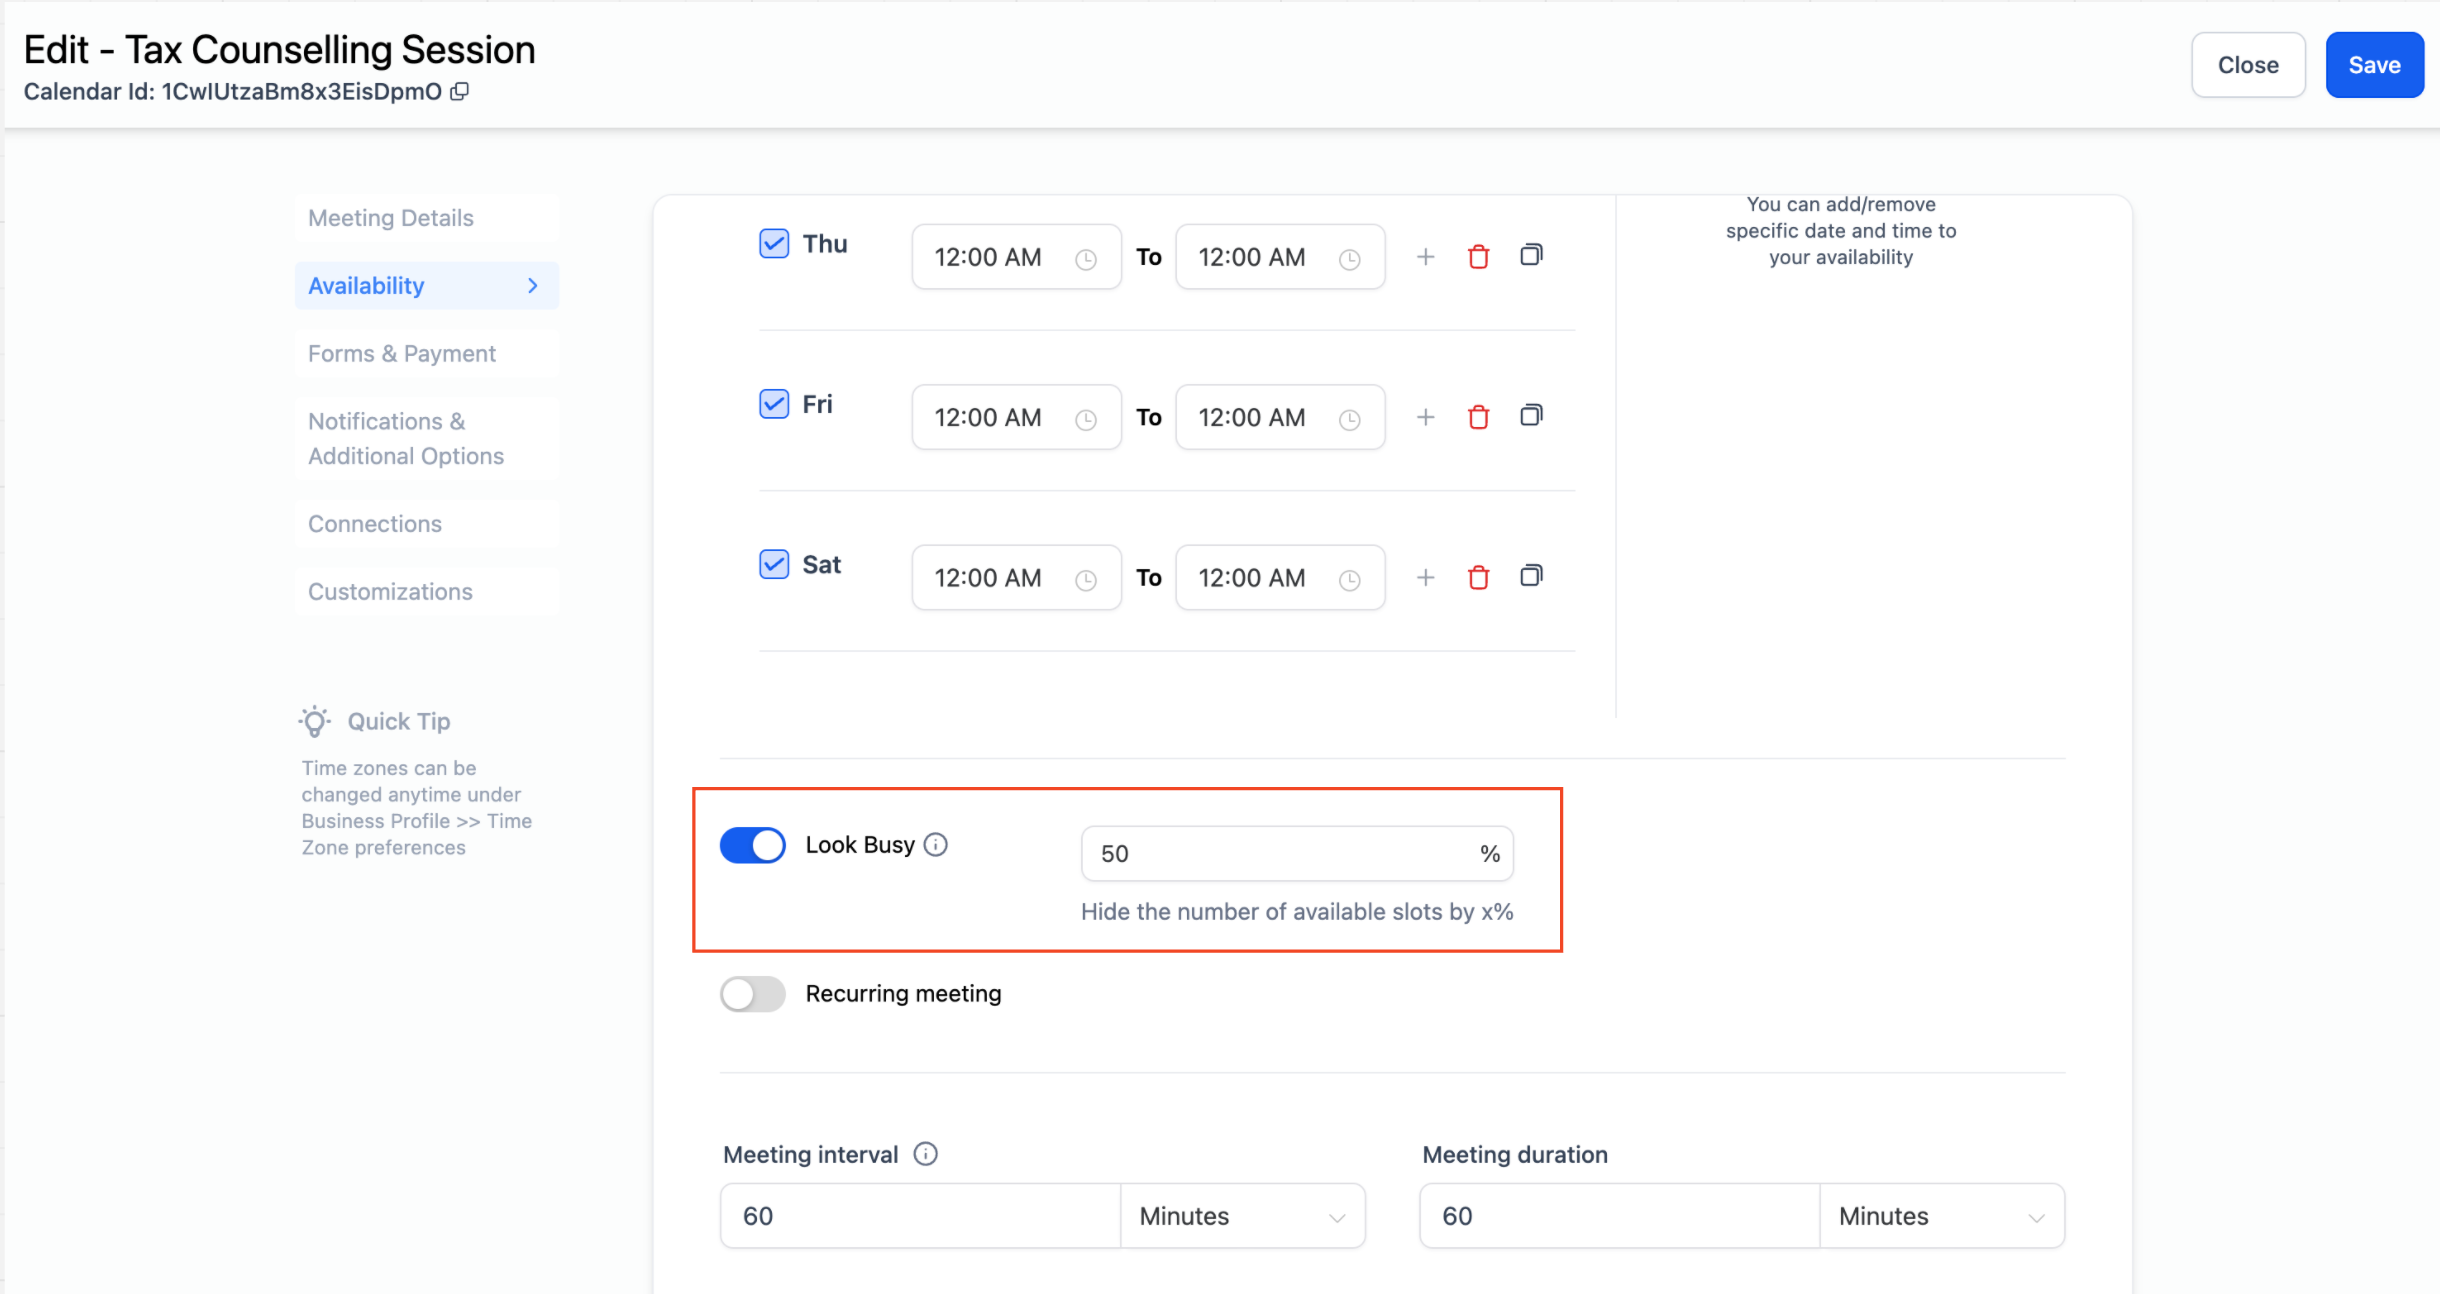
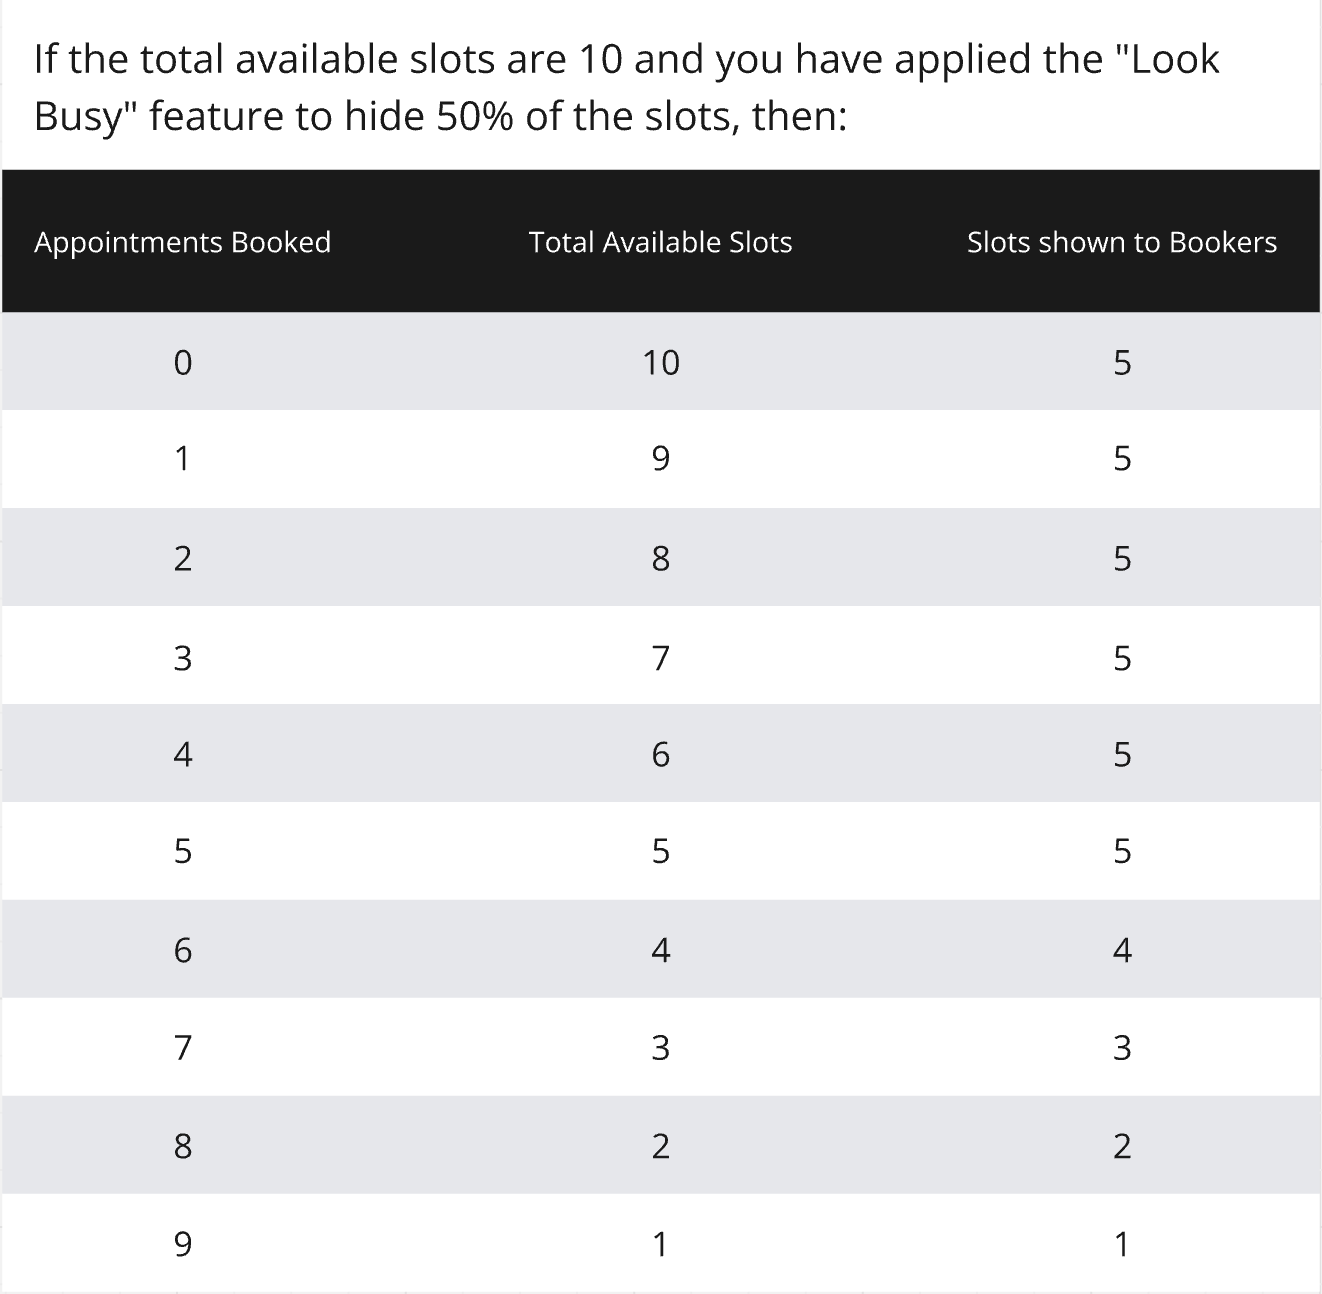
 The “Look Busy” feature helps you appear more in demand by hiding a percentage of available slots on your booking widget, creating urgency for bookers. Once you enable the “Look Busy” feature and set a percentage of slots to hide, that percentage is randomly hidden from the booking widget.
Supported Calendar Types:
  • Event Calendar
  • Round Robin Calendar
  • Collective Calendar
  • Service Calendar
The “Look Busy” feature is currently not applicable for class bookings and service menus.


How to Use?
  1. Go to Calendar Settings and select the desired calendar.
  2. Navigate to the Availability tab.
  3. Locate the Look Busy option.
  4. Turn it on and enter the percentage of slots you want to hide.
  5. Click Save.
image
image

Display Label for Custom Location and Ask the Booker

We have two new enhancements in the multiple meeting location feature: Display Label for Custom Location and Ask the Booker as a New Location Type.

Display Label for Custom Location: You can now add a display label for custom meeting locations. This enhancement allows you to enter a placeholder name, such as “New York Office,” that will be shown on the booking widget until the booking is made. After completing the booking, the actual meeting location will be revealed to the booker.

Ask the Booker: “Ask the Booker” option allows bookers to input their preferred meeting location. This input will be used as the meeting location for all future references.

How to Use? 

Display Label for Custom Location:

  1. Navigate to your calendar settings and select the desired calendar.
  2. Scroll to the meeting location section and click “+Add Location.”
  3. Choose ‘Custom’ and enter the actual meeting location.
  4. In the display label input box, enter the label you want to show on the booking widget.
  5. Click “Save” to apply your settings.

Ask the Booker:

  1. Navigate to your calendar settings and select the desired calendar.
  2. Scroll to the meeting location section and click “+Add Location.”
  3. Select “Ask the Booker” from the location options.
  4. If multiple locations are configured, the ‘Elsewhere’ label will automatically appear on the booking widget.
  5. Click “Save” to update your calendar.


FGF Notifications

Sign Up For FG Funnels Updates Via Email

Share On:

Newsletter sign up

    Let’s be Friends

    © 2018-2025 Funnel Gorgeous LLC©

    Marketing Magic for Flawless Funnels™