
It is time for all the latest updates in FG Funnels from the week of June 12th through June 19th, 2024. If you have questions about any of these updates, or FG Funnels in general, please reach out to [email protected] or live chat in the app and our team will be happy to help.
Coming soon:
FGF Notifications
We’ve introduced a quick resubscribe link directly within the unsubscribe success message. Now, if a user unsubscribes by mistake, they can easily opt back in by clicking the resubscribe link. This action will immediately remove the email from the Do Not Disturb (DND) list.
How to Test:
Note:Users re-opting in may still appear under unsubscribed in campaign statistics. We are working to fix this.
We’re excited to introduce our latest feature: Click Performance Metrics. This new addition empowers you with detailed insights into how subscribers engage with your content through click tracking.
When click tracking is enabled for an email campaign, FGF adds tracking information to each click-through URL. Each time a contact clicks a link in the campaign, the click is tracked through redirection. This ensures that you receive accurate data on link engagement within your campaign reports.
Now you can understand which links are performing well and optimize their placement to improve engagement.
How to use it:
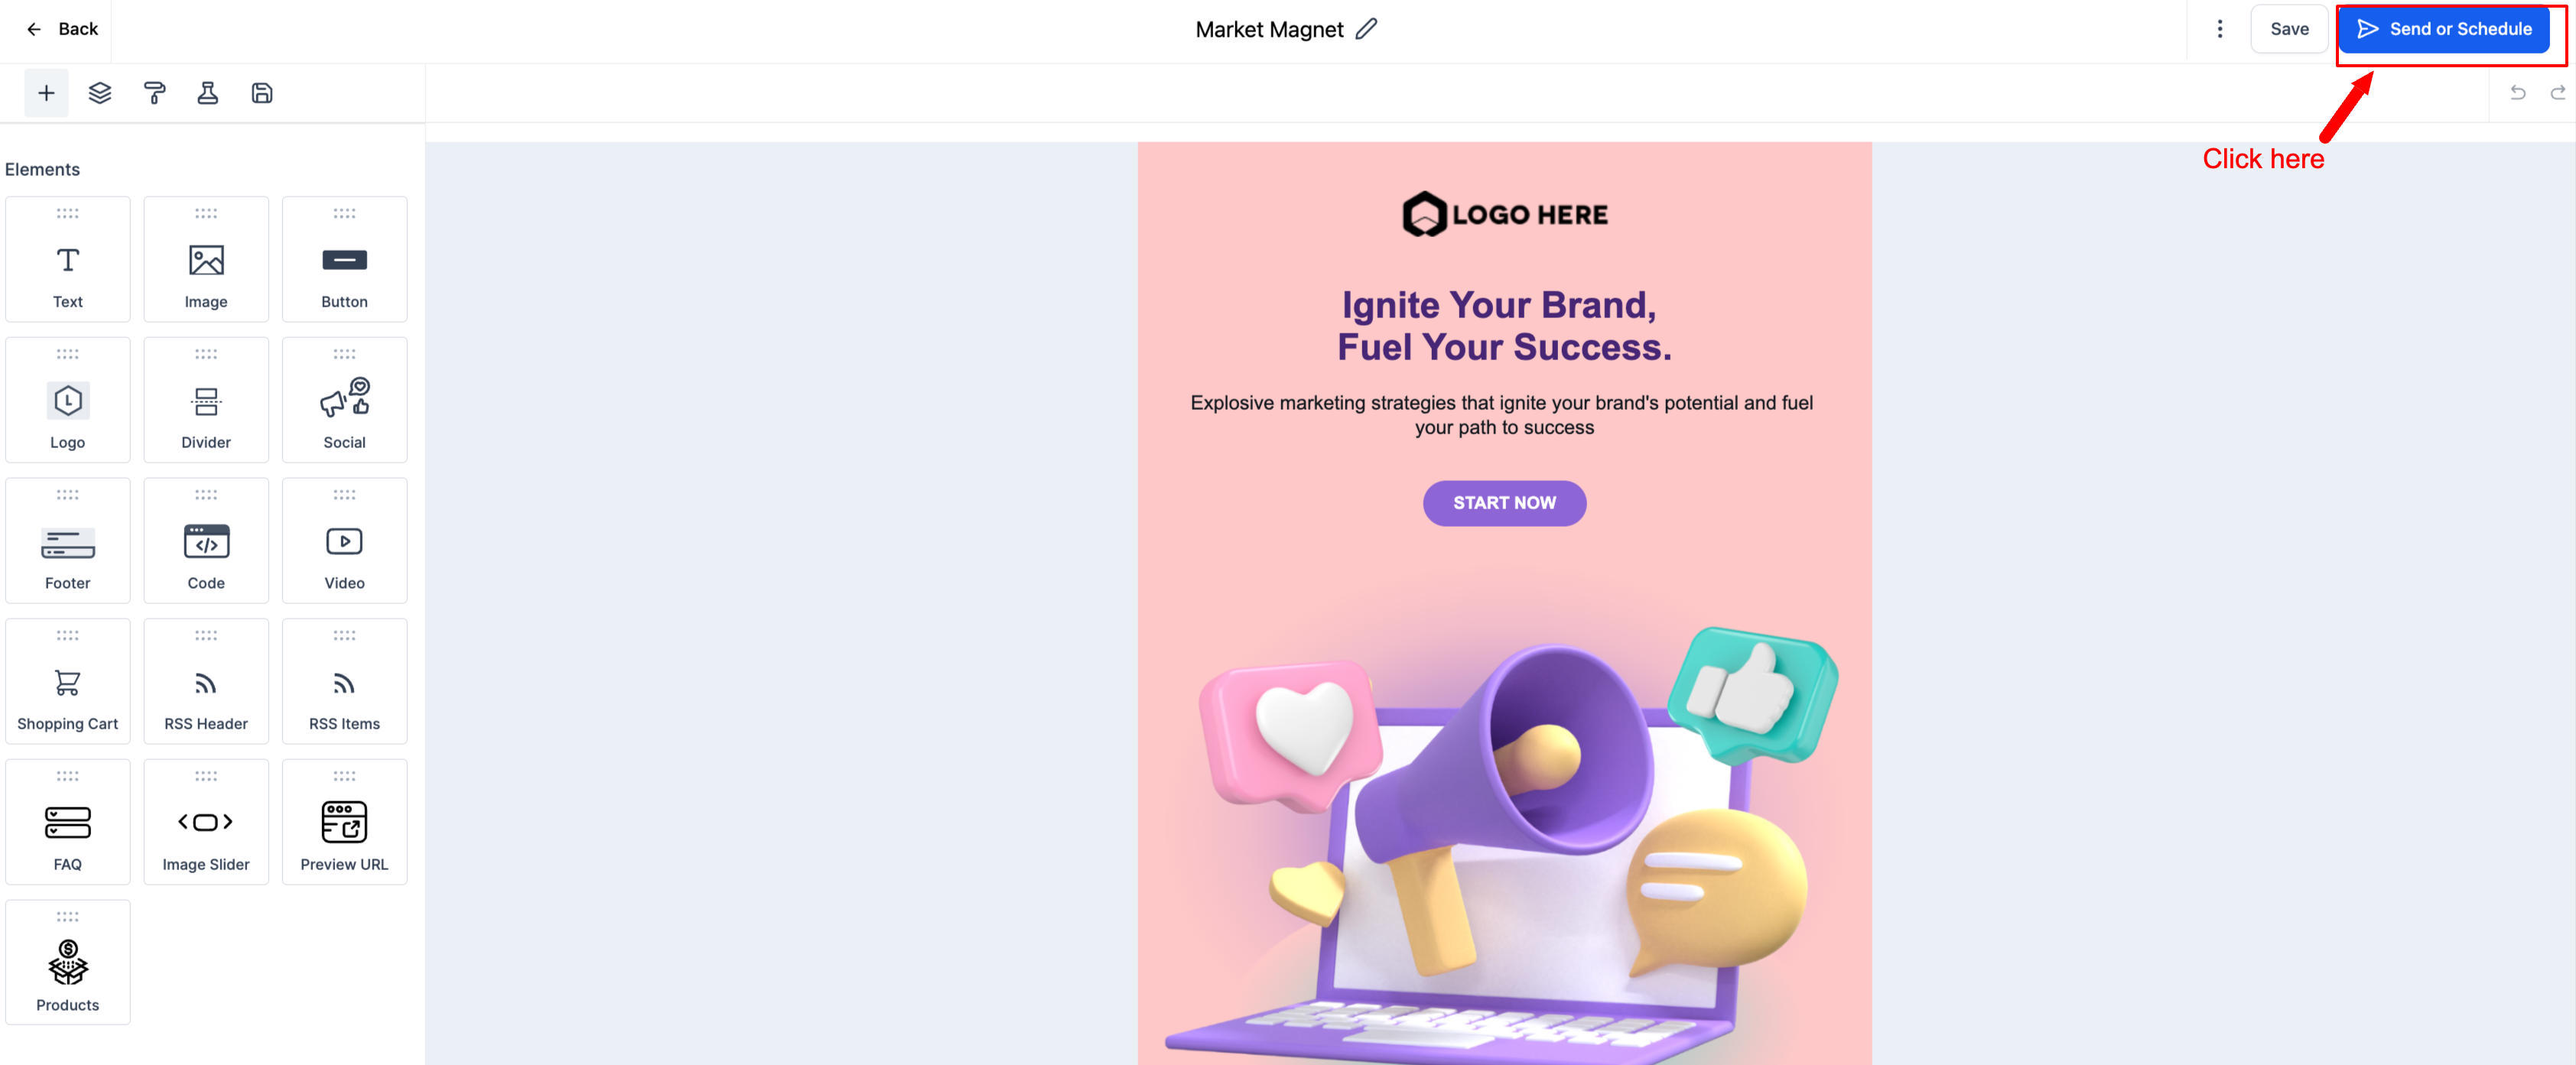
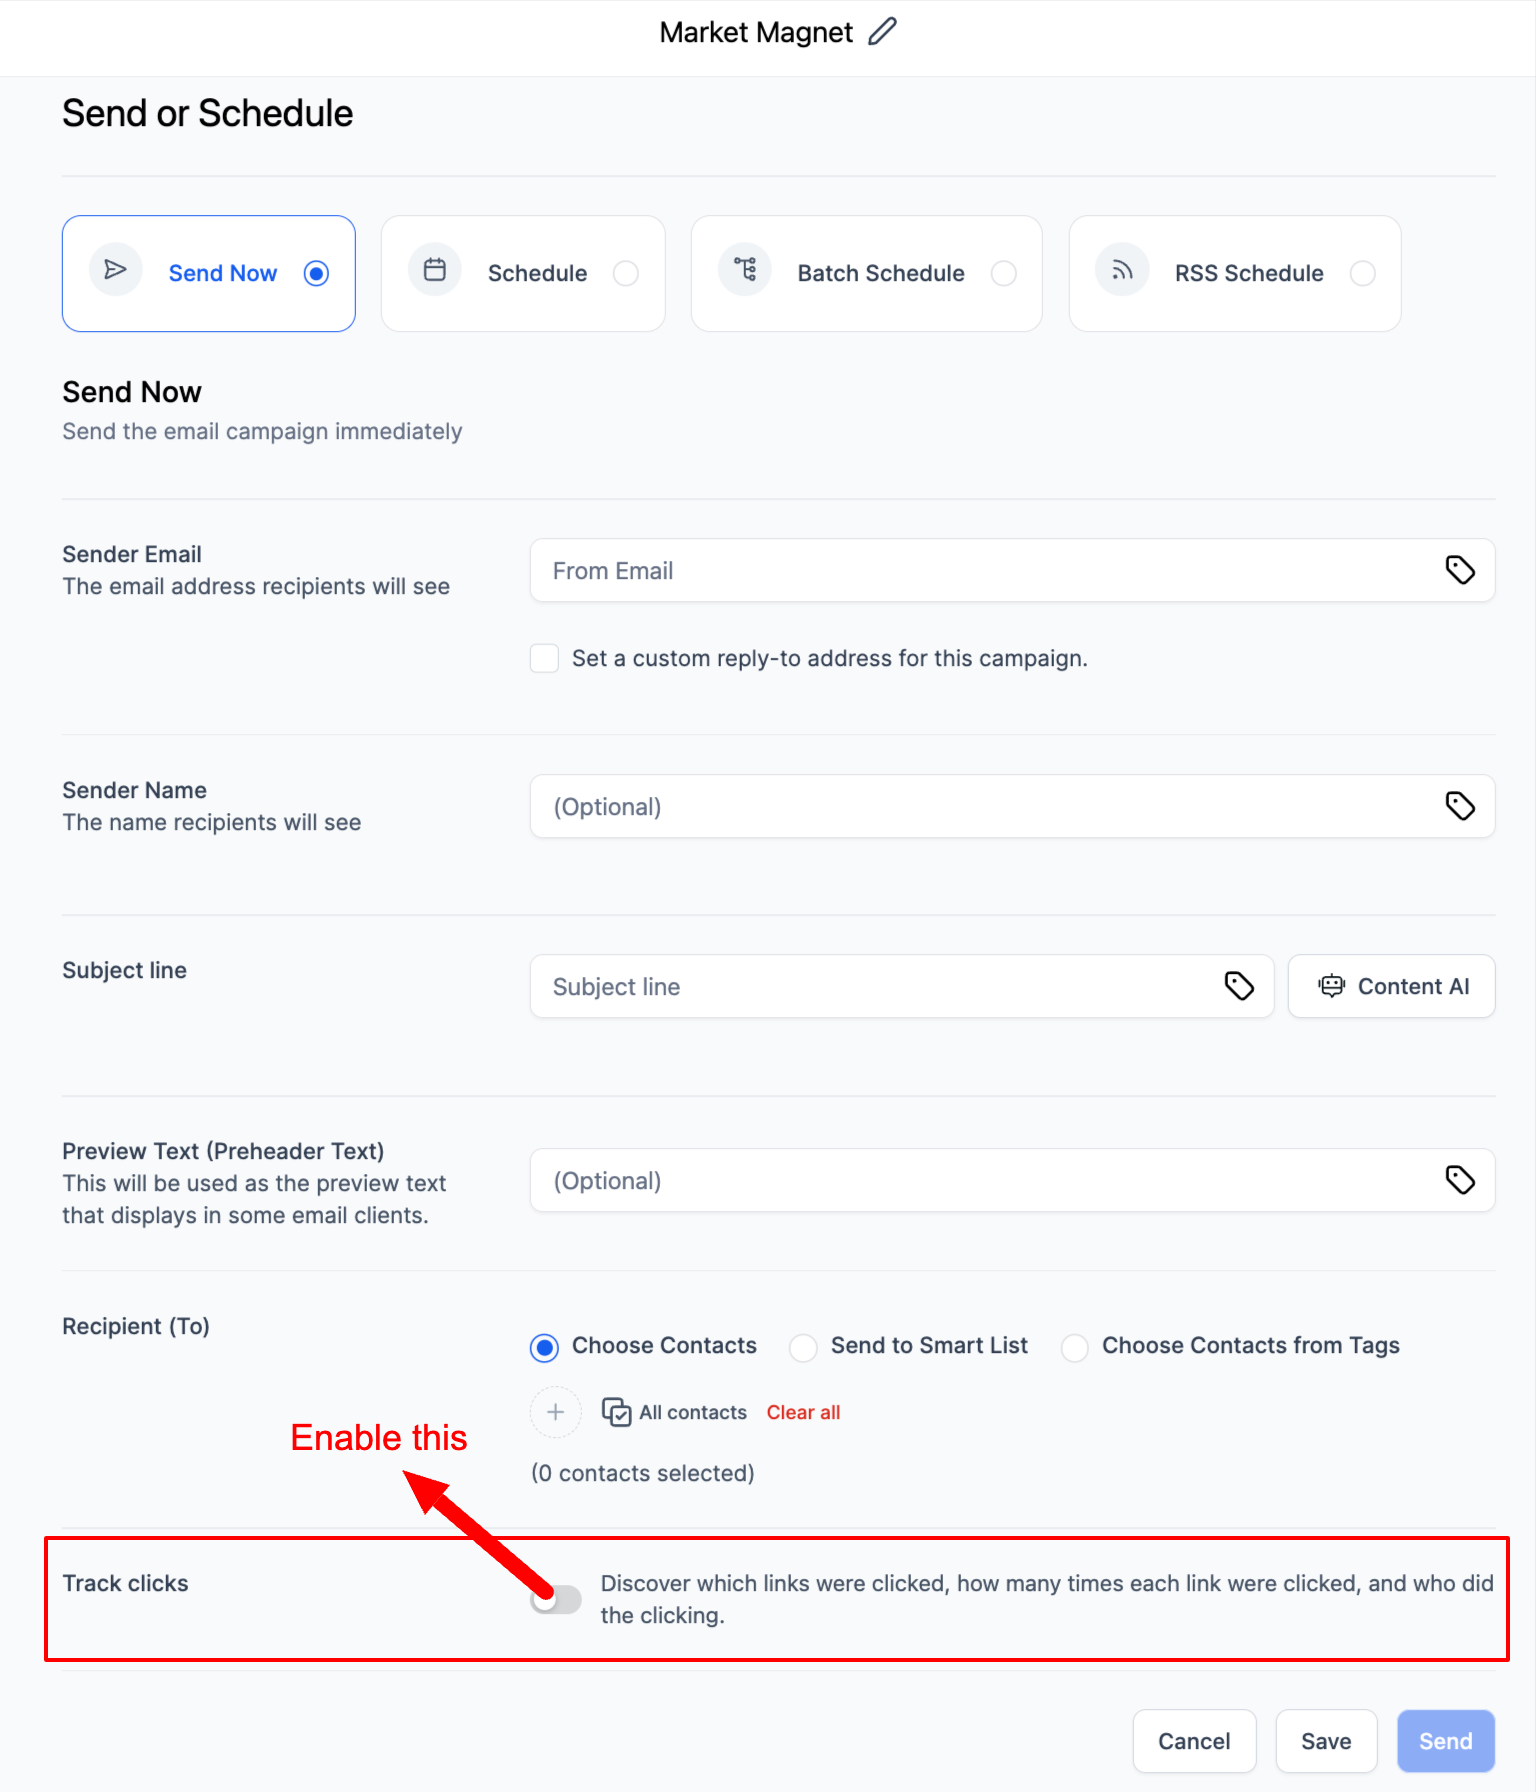
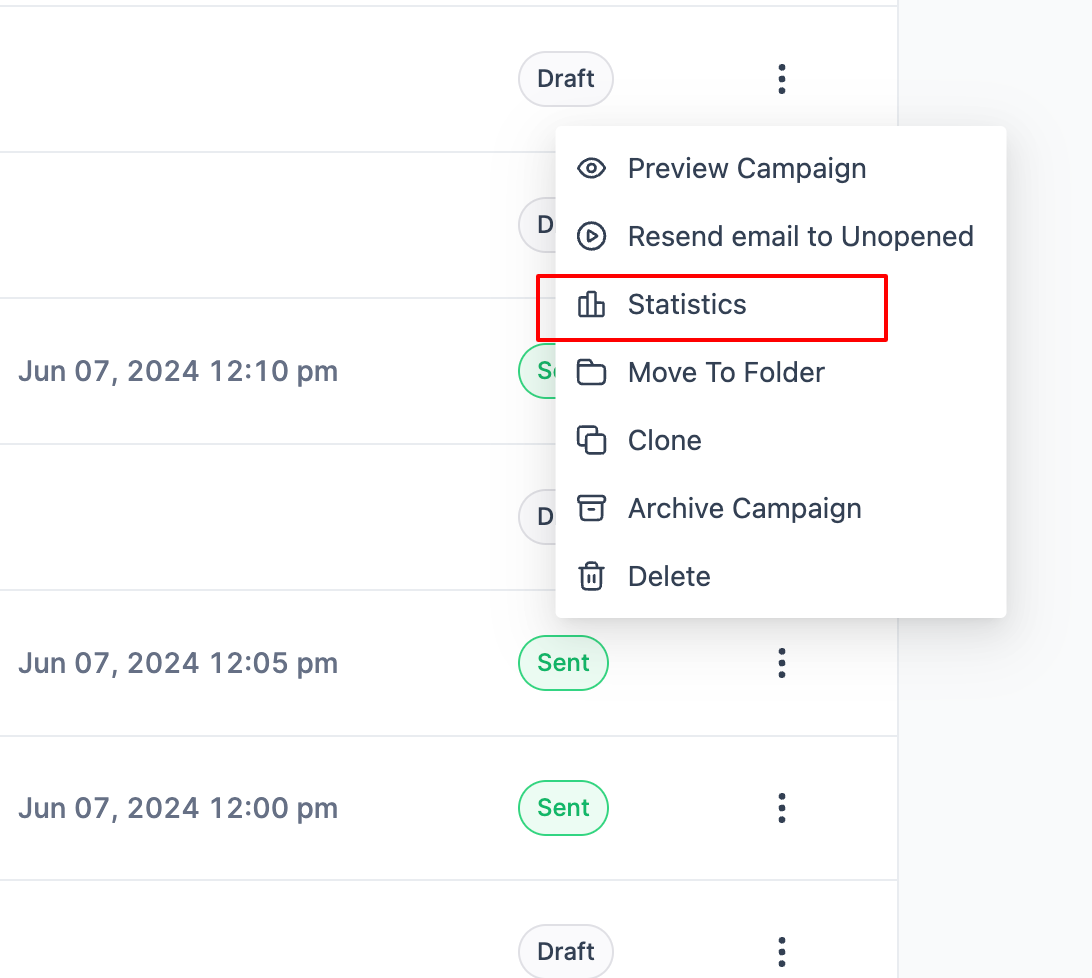
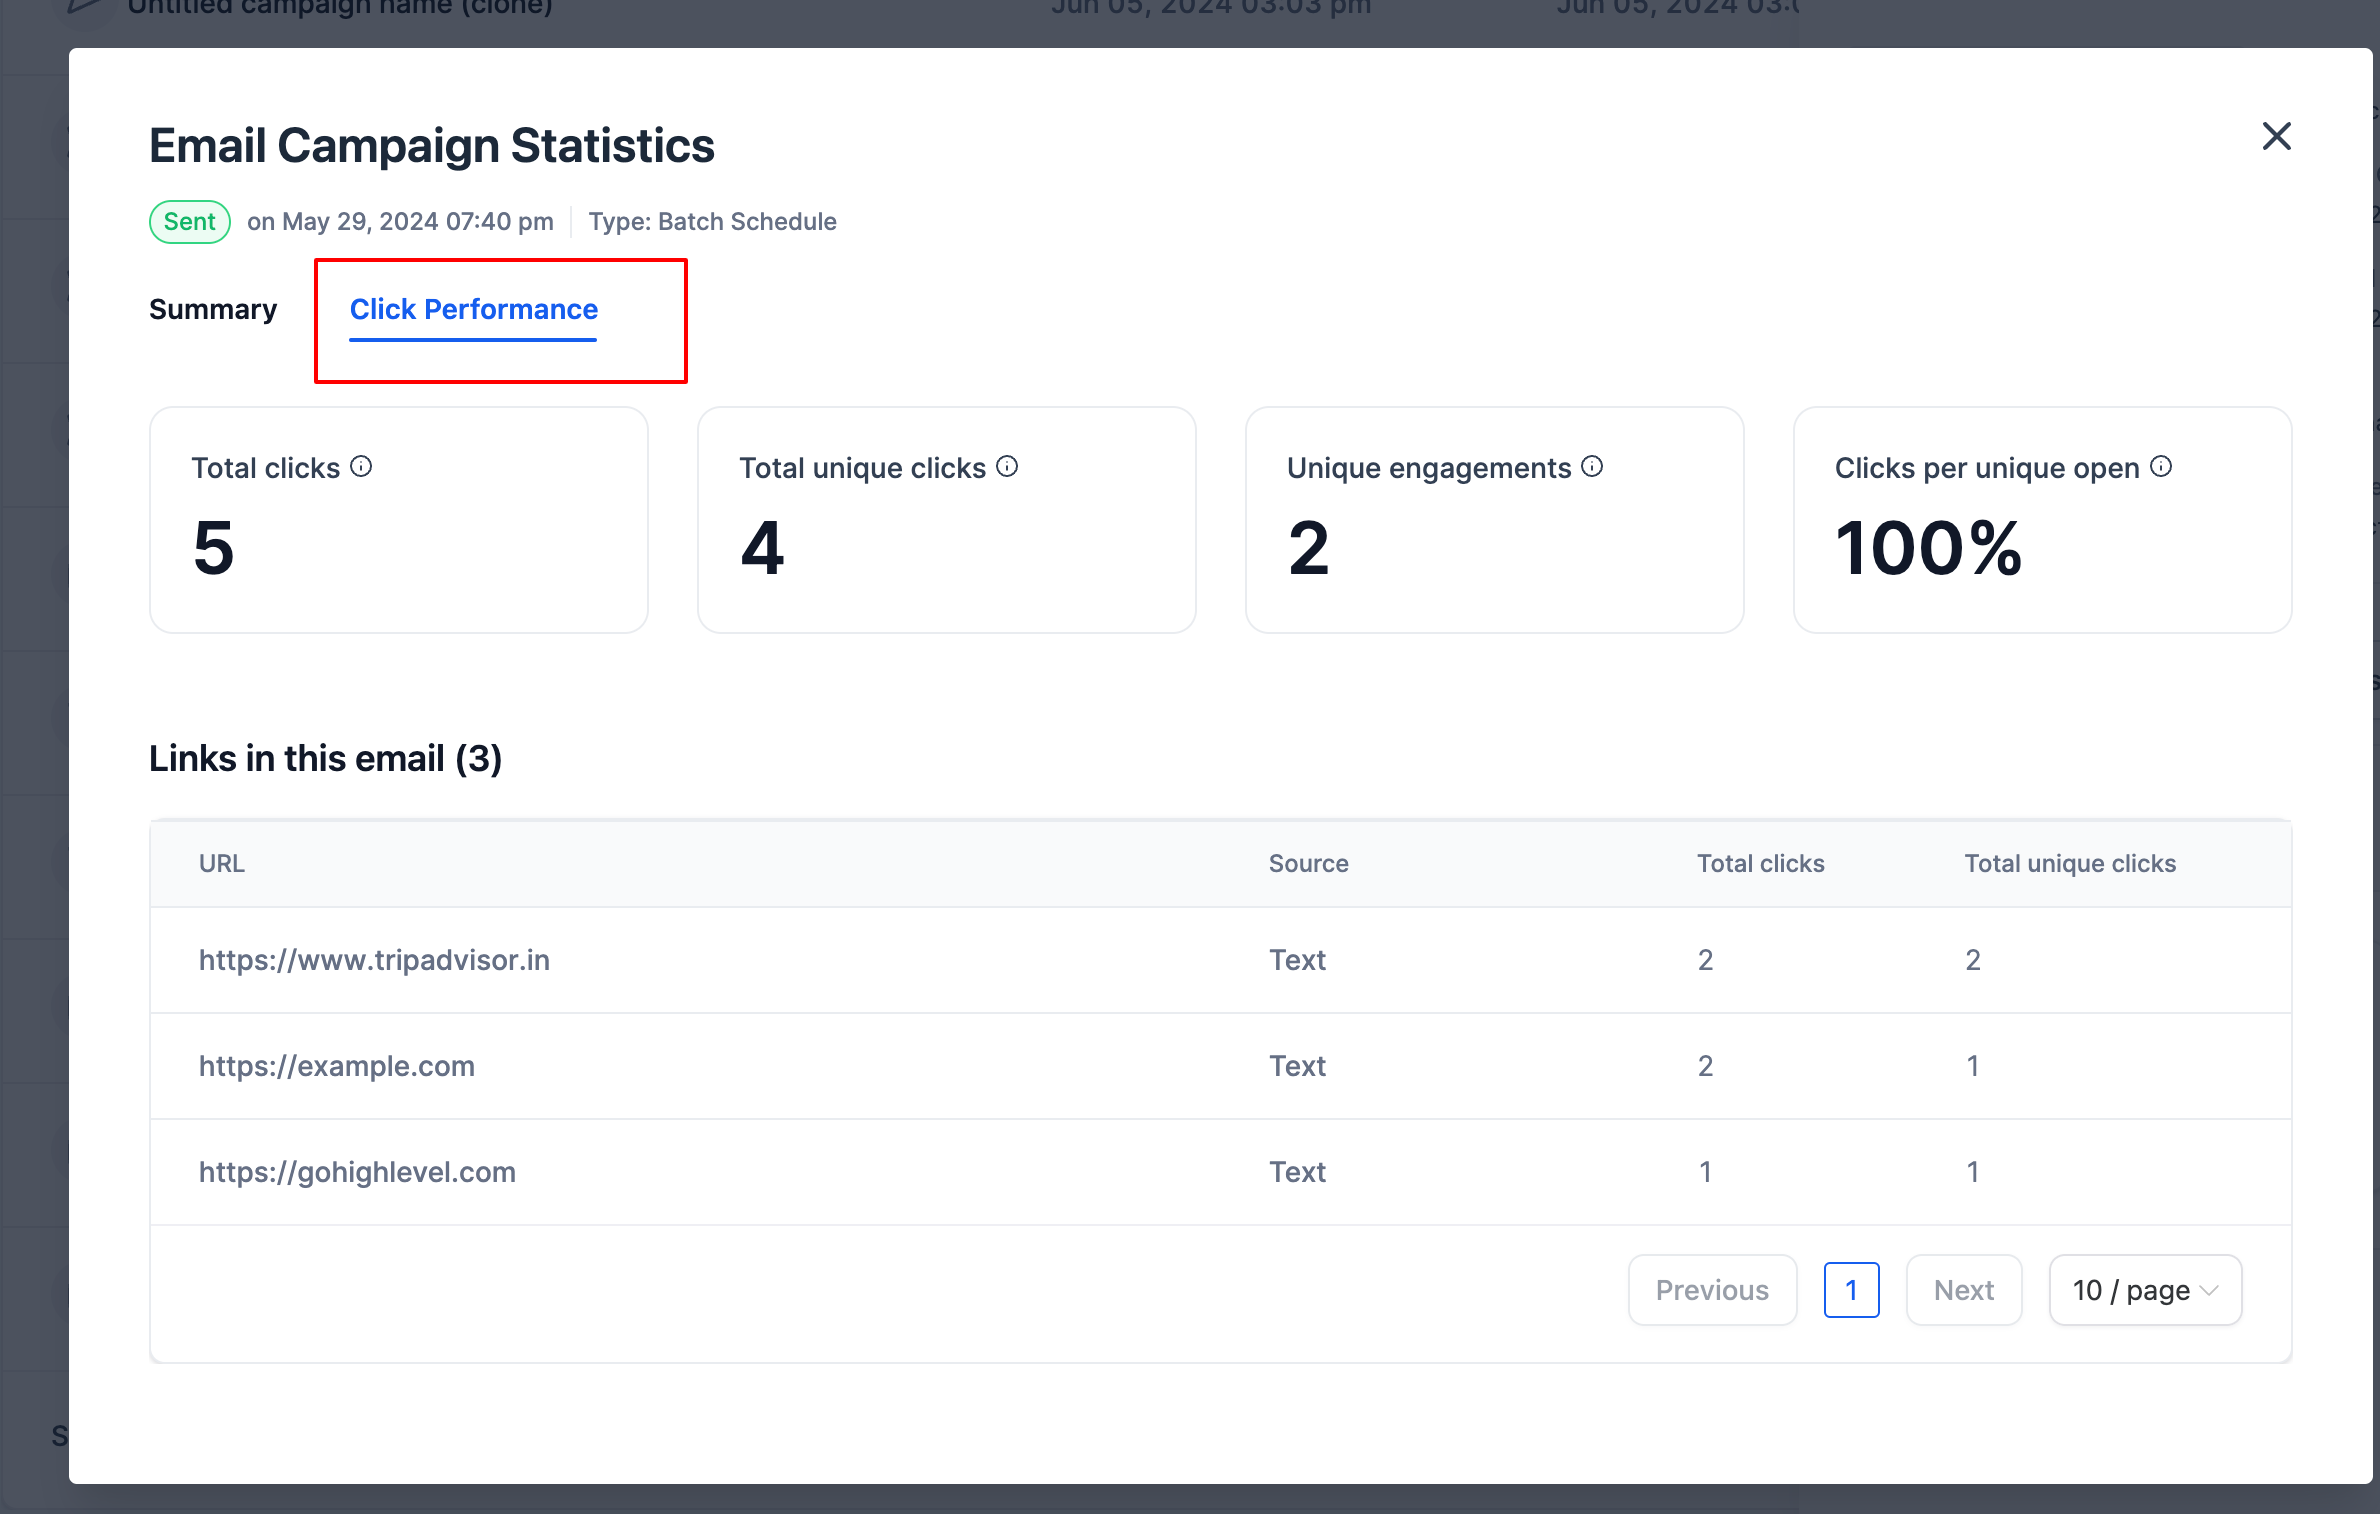
The click performance report would have all individual links and overview details.
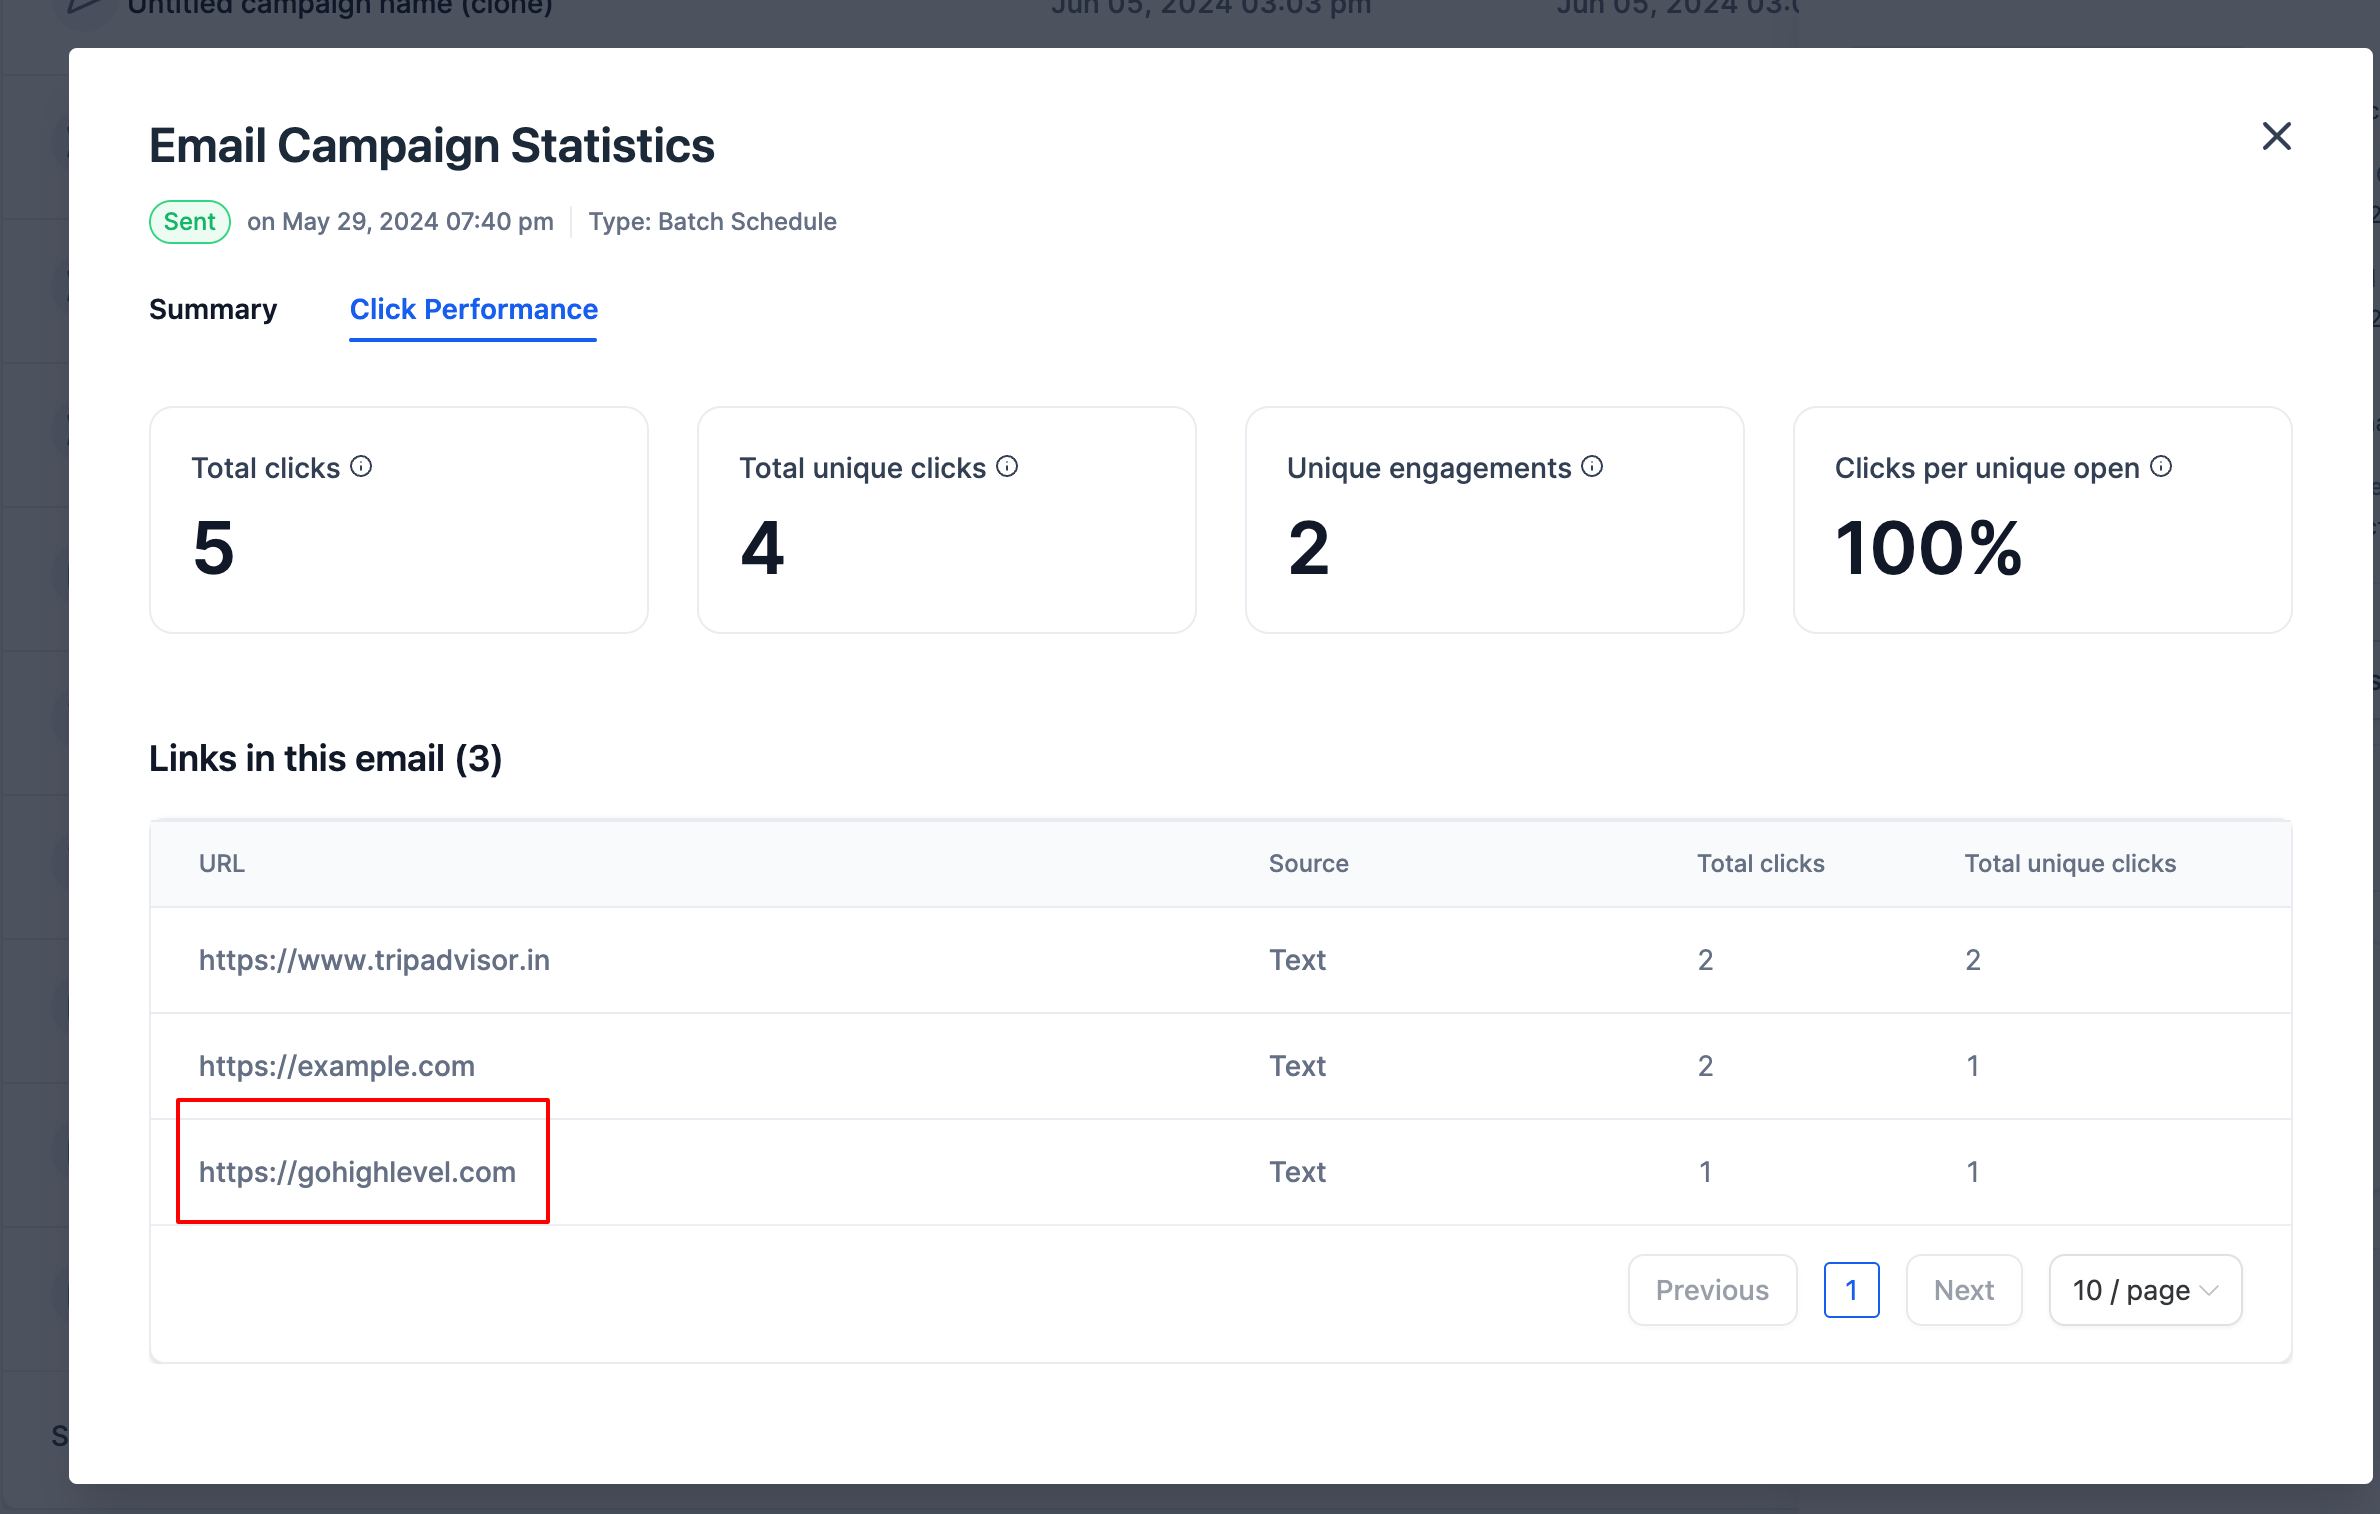
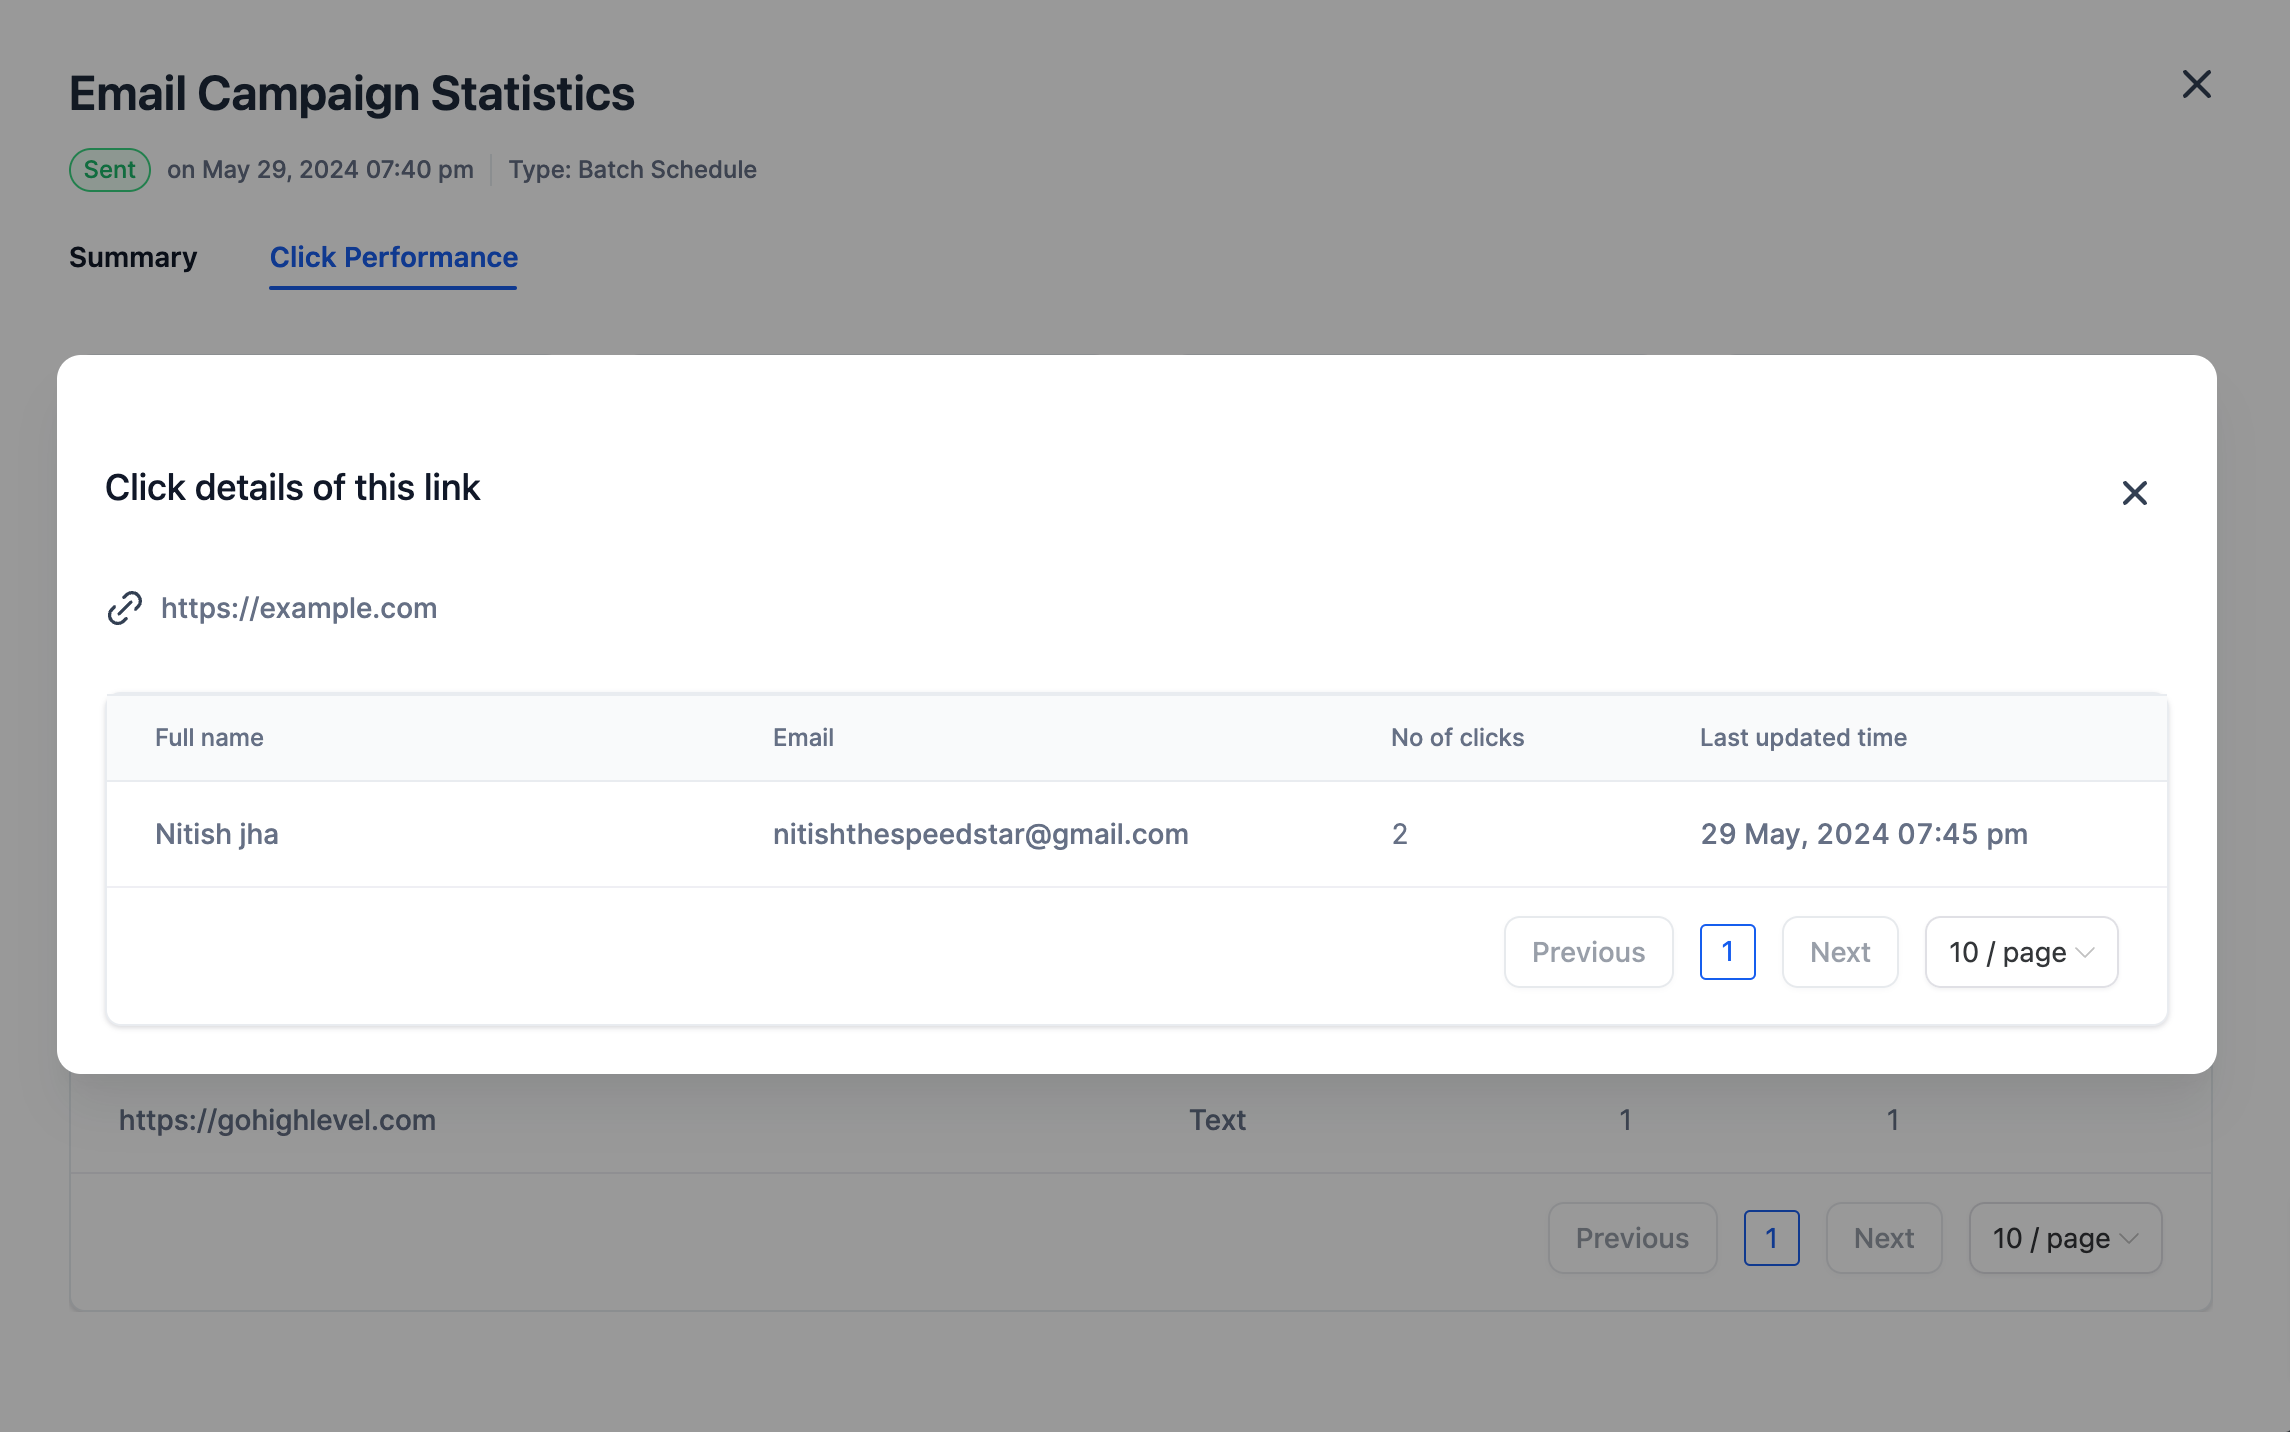
Note:
Coming soon:
FGF Notifications
We’ve introduced single forms and new layout options in our form builder to give you greater flexibility and control over your form designs. Key highlights include:
How to Use:
We are introducing following fields inside payment links:
This will help capture the creators of payment-links meaningful data and pave way to create further features like Automatic Taxes, Support for wider variety of payment methods, etc.
You can now add custom terms and conditions below the Pay Button for Payment Links. (This used to be a stagnant text ). You can also add a link within the T&Cs if you want your users to be able to go through the detailed terms. The text can be edited with different formatting options along with the ability to add a link to T&C that redirects either to new tab or same tab.
How to Use it:
Previously, deleting a group would automatically delete all calendars in that group, which also resulted in the deletion of all appointments in those calendars. With this new feature, users can now decide whether to:
How to Use:

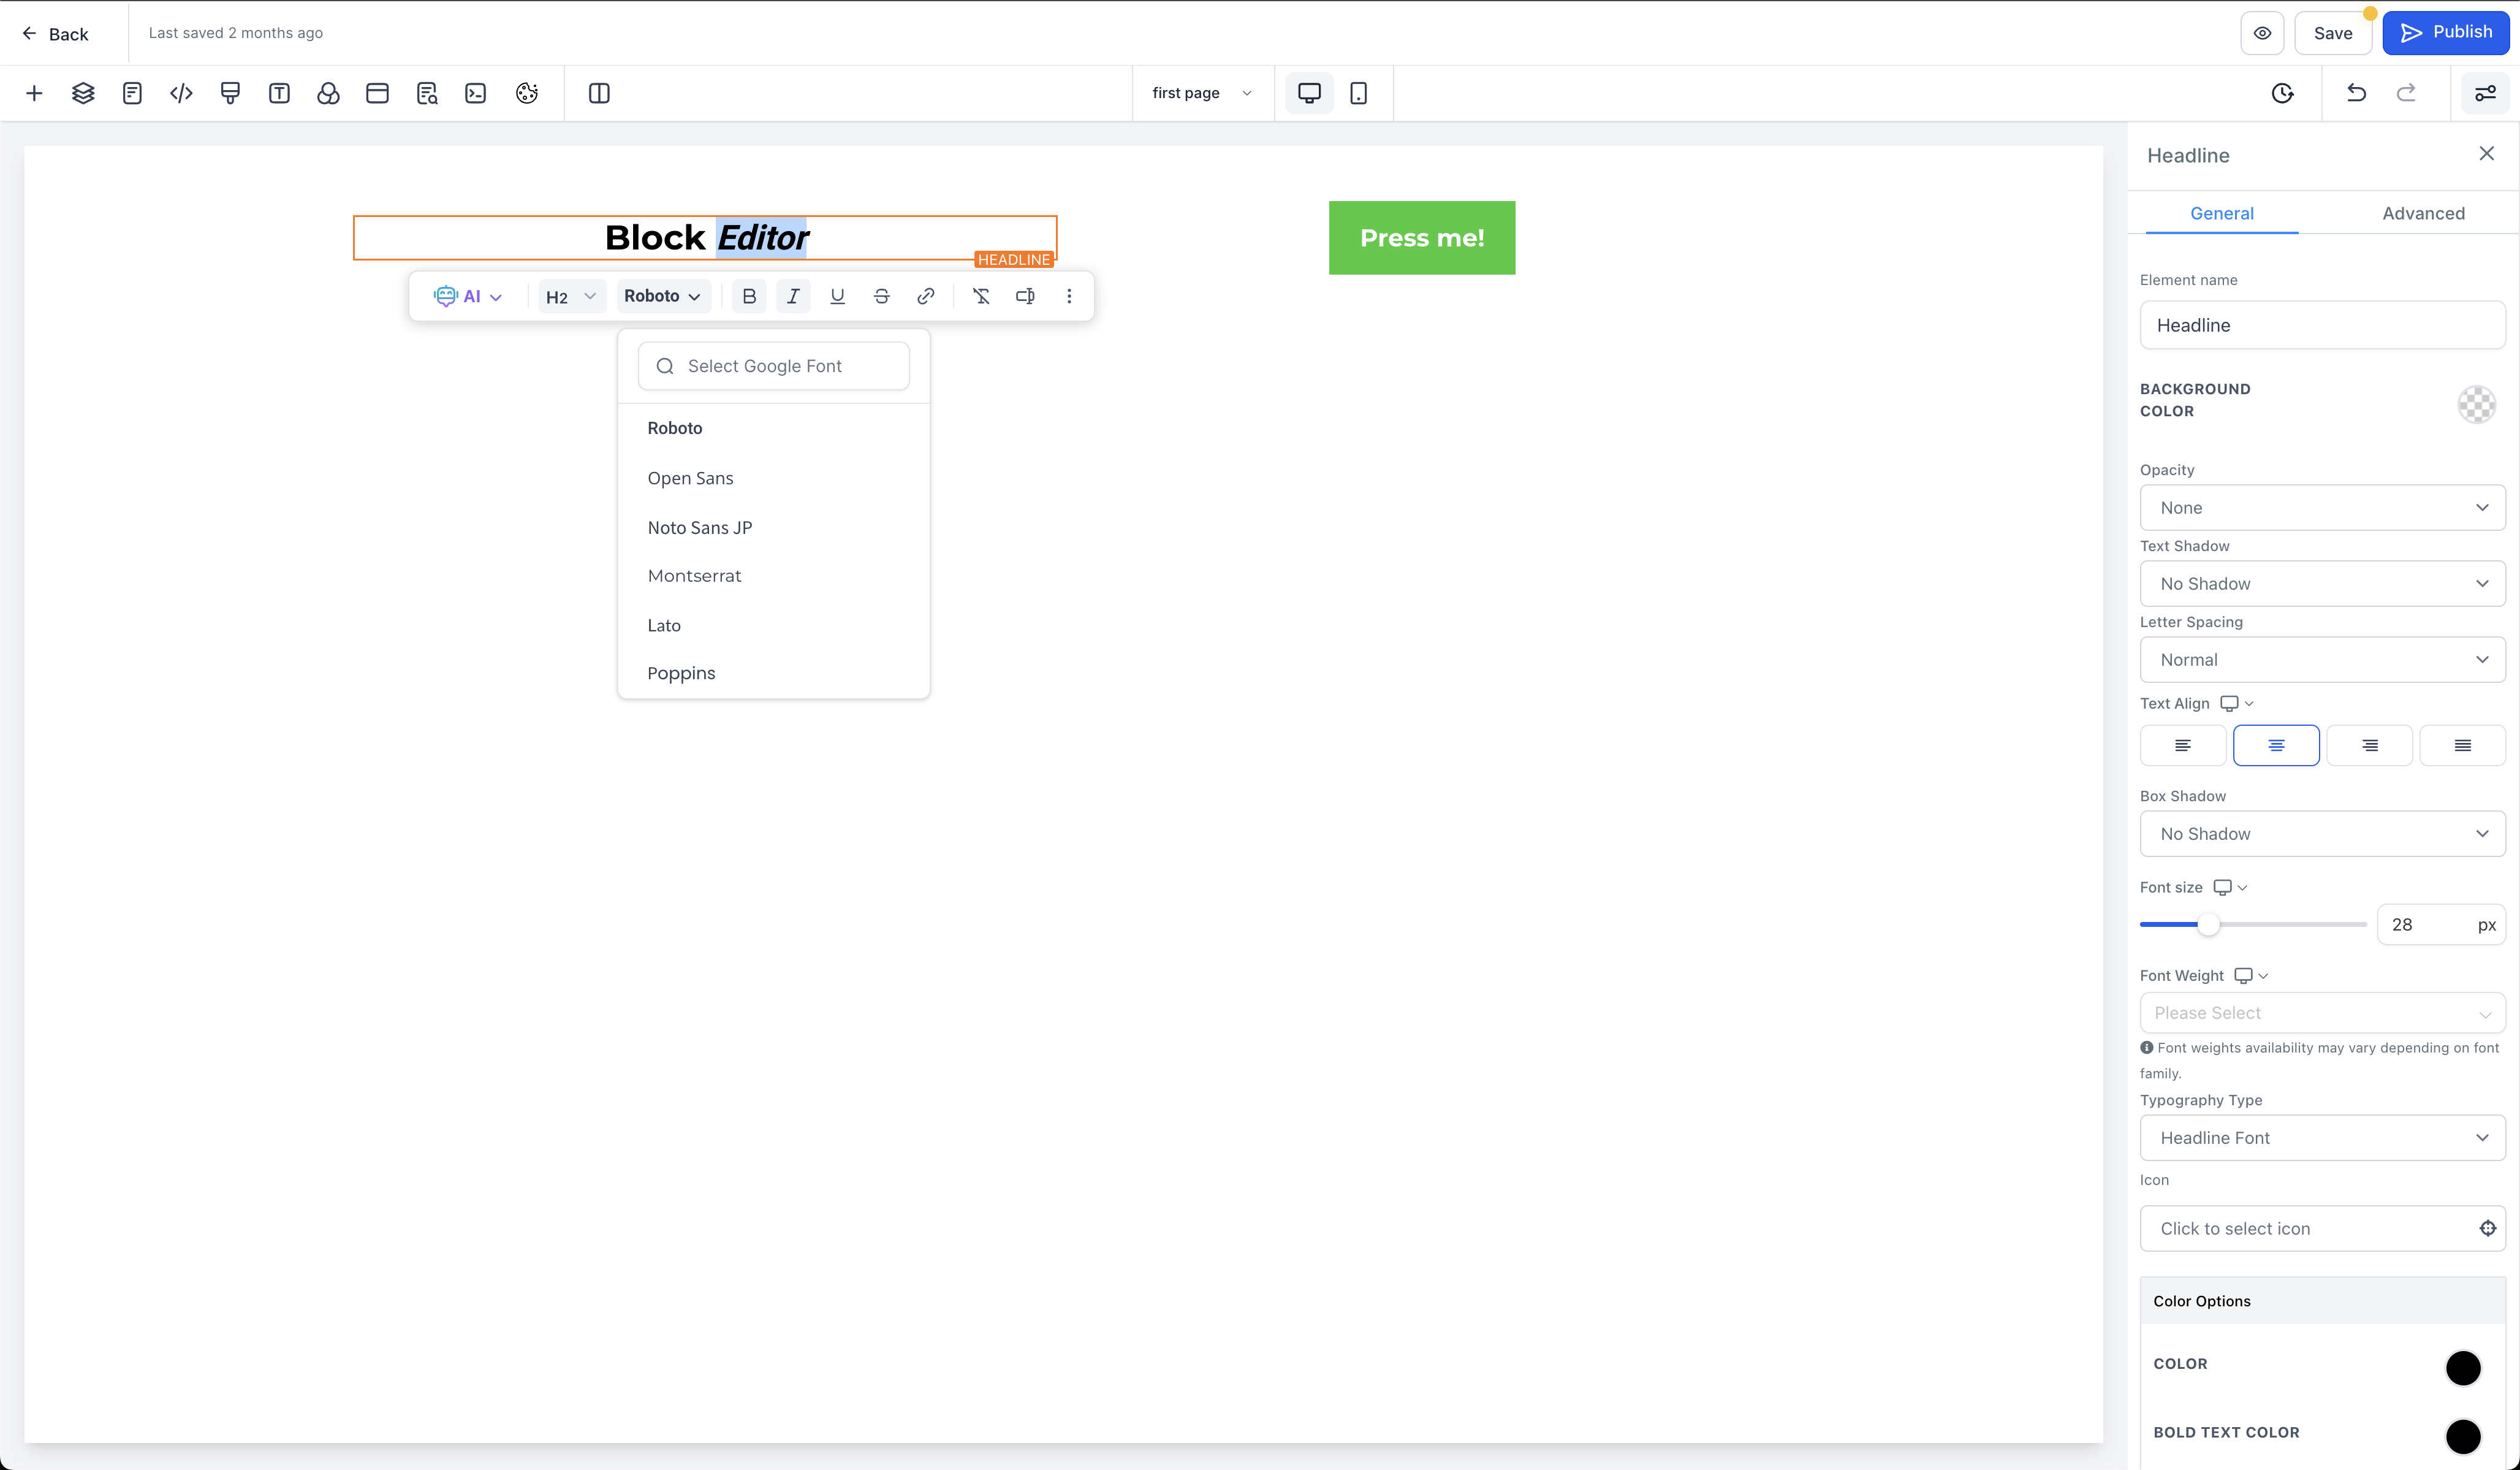
We are excited to unveil our enhanced Block Editor for the Funnel and Website Builder. Key features and benefits include:
Improved UX : Enhanced user experience for smoother and more intuitive editing with a streamlined interface.
Custom Fonts for Highlighted Text: Choose custom fonts directly from the Block Editor to change text of the highlighted text blocks, allowing for more personalized and visually appealing designs.
New Menu Options for Subscript and Superscript: Easily wrap text in subscript and superscript using the new menu options in the Block Editor.
Dedicated Bullet List Section: Bullet lists now have their own section, making list creation and management more straightforward.
Removal of Unwanted Paragraph Options: Improving usability for everyone.
Bug Fixes and Improvements: Enhanced Popups and Positioning
How to Use:
We are now expanding support for Tap to Pay on iOS to 4 additional countries – Canada, Italy, Netherlands, and France! Now accept contactless payments directly on your iPhone (iPhone XS / iPhone XR and above). This update is live on the LeadConnector app with Tap to Pay access enabled.
How It Works:
Note: Tap to Pay on Android is already available for Canada, Italy, France, and Netherlands. This update is only valid for iOS.
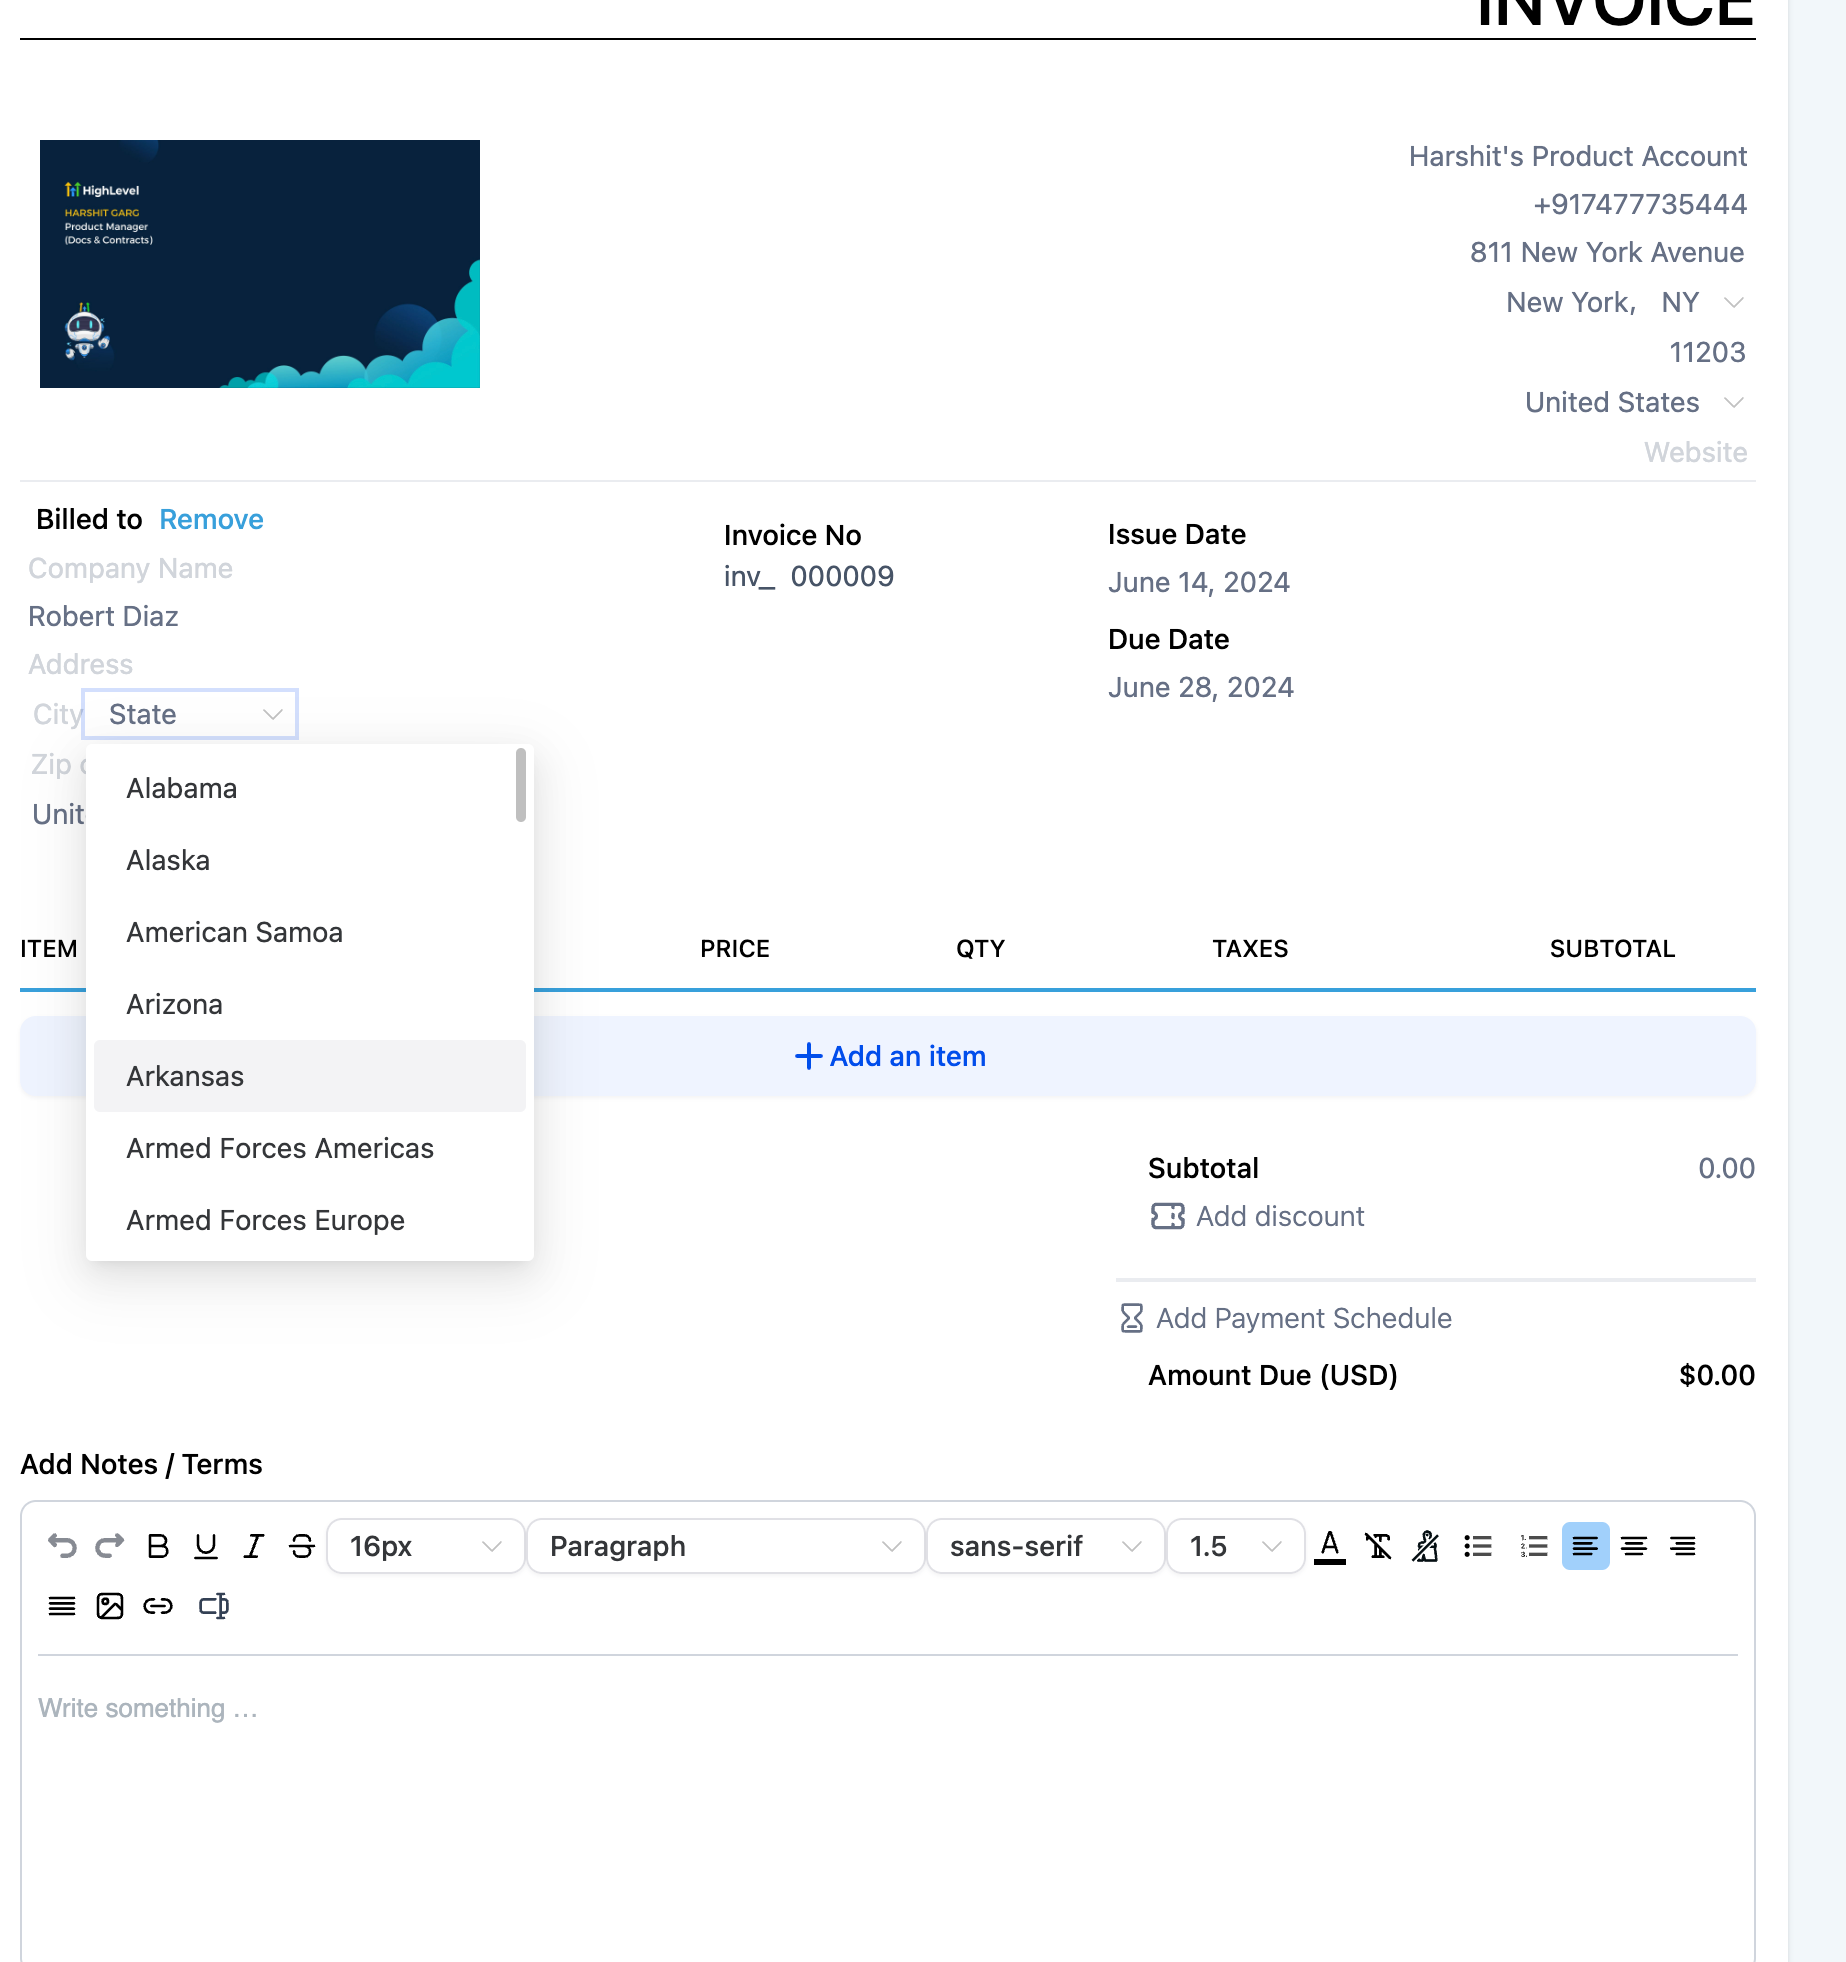
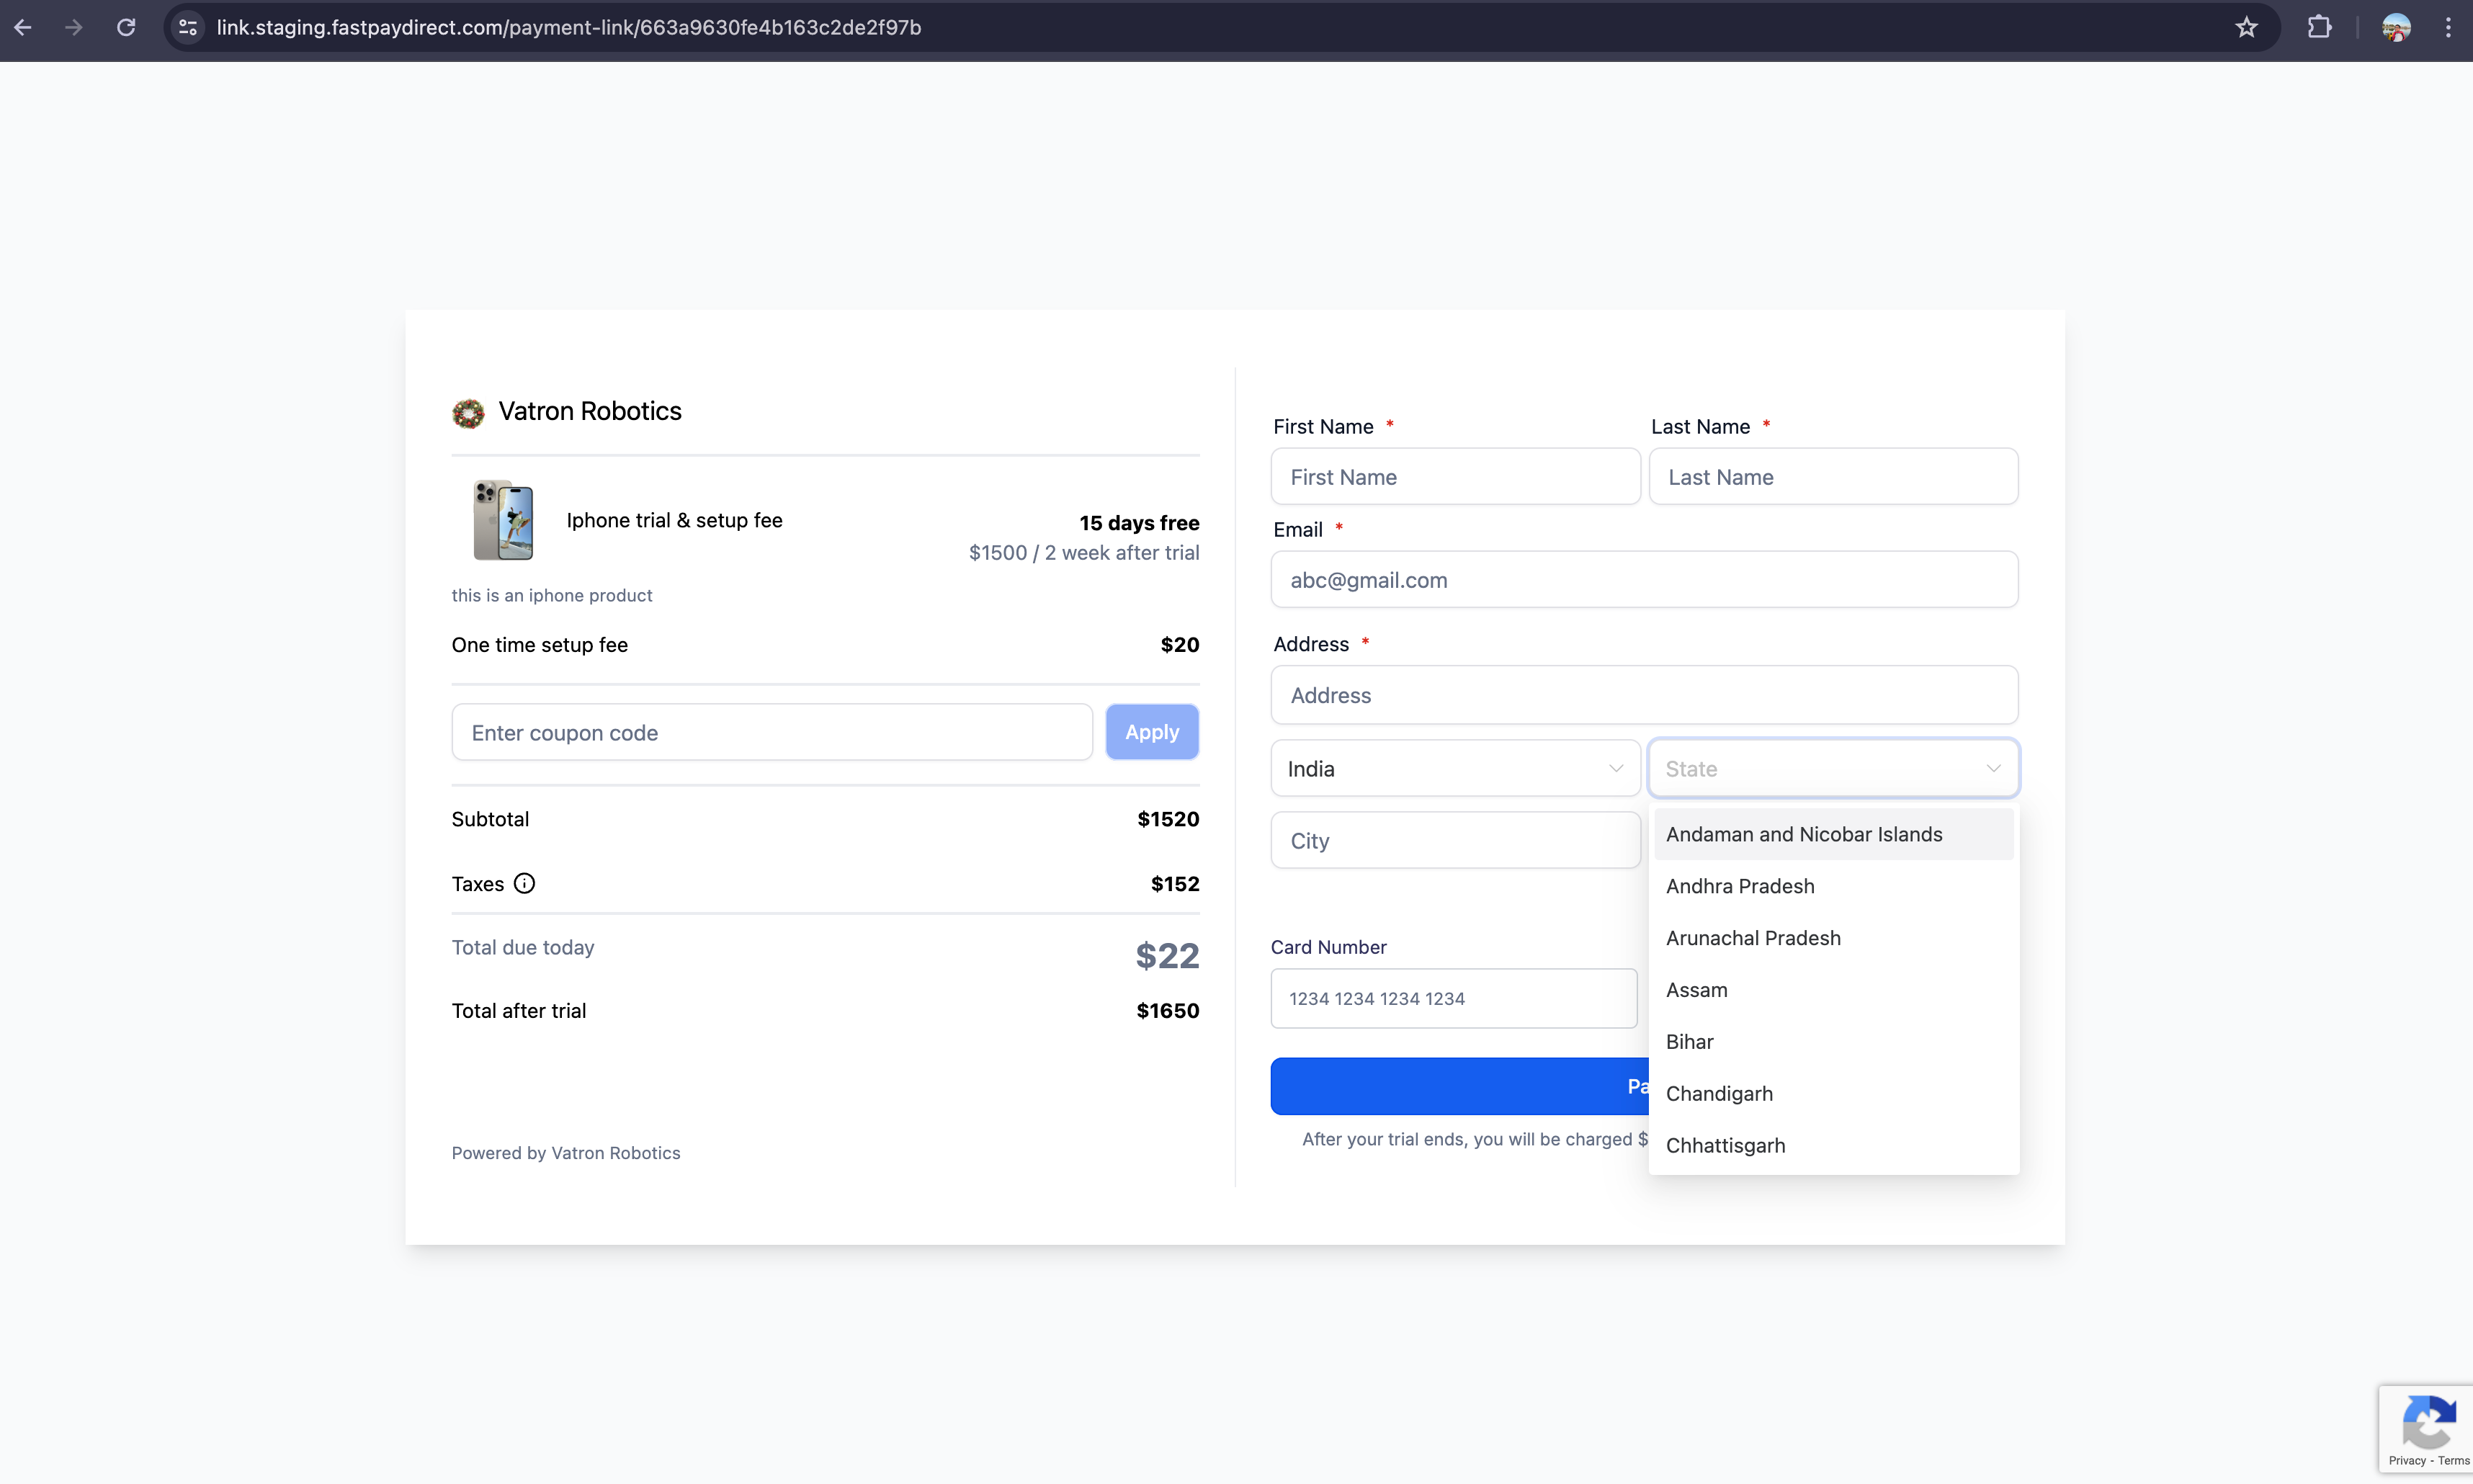
We have introduced a dropdown for state input within Invoices and Payment Links. This update will come for business details, company details, create new contact modal and within invoice settings in the future.
Social Planner now allows users to add @Mentions in the posts. @Mentions will work for socials like Facebook, Linkedin , Twitter (X) and plain text will be available on Instagram, Tiktok and GMB. @Mentions will be the search for public profiles or pages.
If more than one social channel is used, it will ask to customize the post for each channel to be enabled to allow users to search by the name, followers and social wise.
How to use:
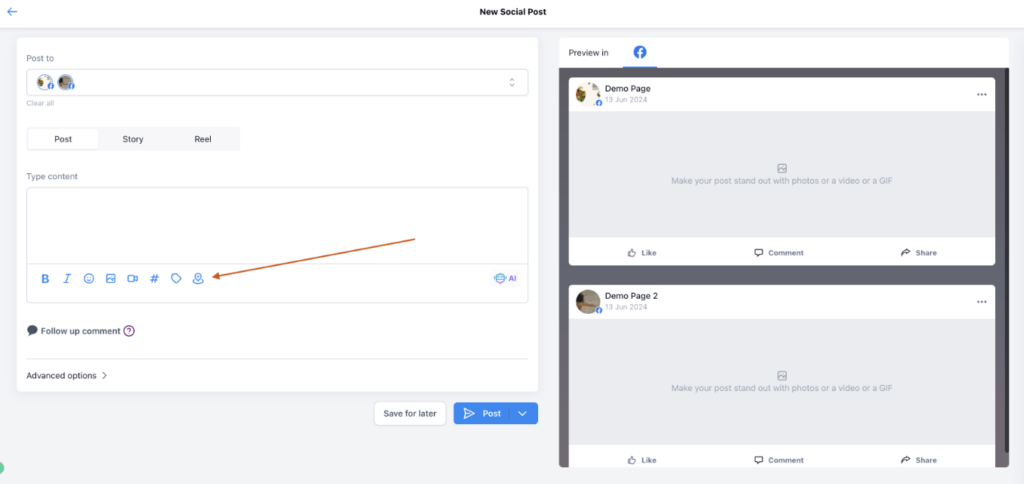
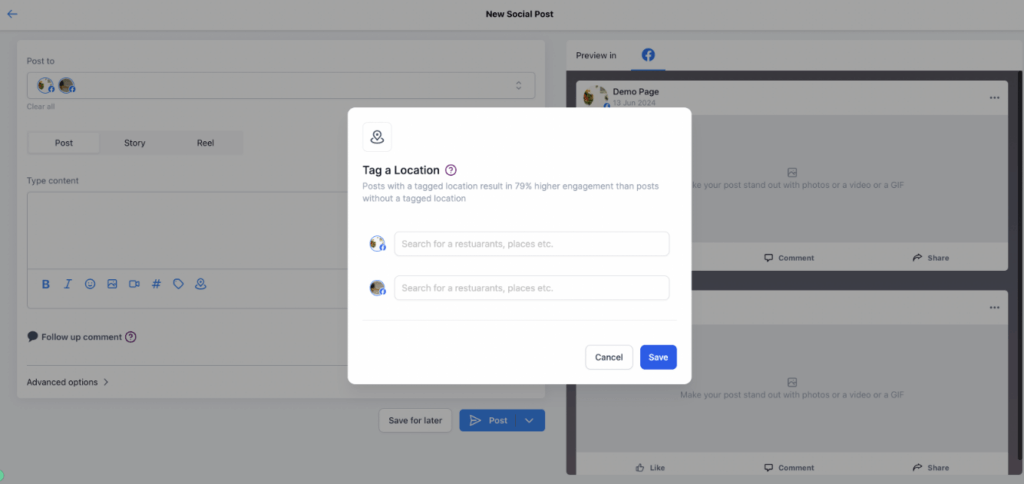
We have launched a brand new feature of tagging a Location to a post on social media. Location tagging can enhance engagement, increase visibility, and boost SEO.
How it works:


We’ve introduced a quick resubscribe link directly within the unsubscribe success message. Now, if a user unsubscribes by mistake, they can easily opt back in by clicking the resubscribe link. This action will immediately remove the email from the Do Not Disturb (DND) list.
How to Test:
Note:Users re-opting in may still appear under unsubscribed in campaign statistics. We are working to fix this.
We’re excited to introduce our latest feature: Click Performance Metrics. This new addition empowers you with detailed insights into how subscribers engage with your content through click tracking.
When click tracking is enabled for an email campaign, FGF adds tracking information to each click-through URL. Each time a contact clicks a link in the campaign, the click is tracked through redirection. This ensures that you receive accurate data on link engagement within your campaign reports.
Now you can understand which links are performing well and optimize their placement to improve engagement.
How to use it:


The click performance report would have all individual links and overview details.


Note:
Coming soon:
FGF Notifications
