
Welcome to your weekly roundup of FG Funnels updates through the week of November 19th, 2026.
From Managed Agents that make multi-shot films and watch videos to Even and Weighted splits in Workflows and Antivirus for WordPress sites, this week’s updates bring some seriously powerful tools to your stack. We’re also rolling out upgrades to Conversation AI, AI Studio, E-Commerce, Ad Manager, Social Planner, and more. All of it is designed to save you time and give your clients a better experience.
If you have any questions about these updates, email us at [email protected] or reach out through live chat inside the app. We’re always happy to help.
Managed Agents used to make one 8-second clip at a time. Now they can make finished short films with 2 to 8 shots, up to 60 seconds long.
The agent keeps the same people, wardrobe, and setting from shot to shot, and adds title cards, captions, and an end card in your brand’s colors, fonts, and logo. Just pick a Brand Board for the agent, and it handles the rest. Text is drawn cleanly on the film, so it’s always easy to read.
That means ready-to-post promos, product teasers, and social stories without an editor. A scheduled agent can even make a film and send it on in the same run.
Good to know: video generation is billed per second of each shot made, so you only pay for what’s actually created. Films of 5 or more shots don’t run in builder test runs, only in live chats and real triggered or scheduled runs.
How to use it:

Reviewing a webinar recording, checking a client’s ad, or pulling key moments out of a long call used to mean someone had to sit through the whole thing. Now your Managed Agent can do it for you.
Paste a YouTube link or attach a video from your Media Library, ask a question, and your agent watches the picture, listens to the audio, and answers. Ask for a summary, a transcript, timestamped highlights, or a quick quality check.
It handles videos up to 2 GB, and every Managed Agent gets this automatically, with nothing to turn on. It’s billed on tokens only, with no per-video fee.
How to use it:
Managed Agents now create images with GPT Image 2.6, OpenAI’s newest image model. Medium and High quality images get sharper detail and cleaner text, so you’ll spend less time fixing garbled lettering.
Not sure which quality level to pick? A new Compare costs table shows how Low, Medium, and High compare before you choose. Existing agents move to 2.6 automatically and keep their current quality setting.
How to use it:

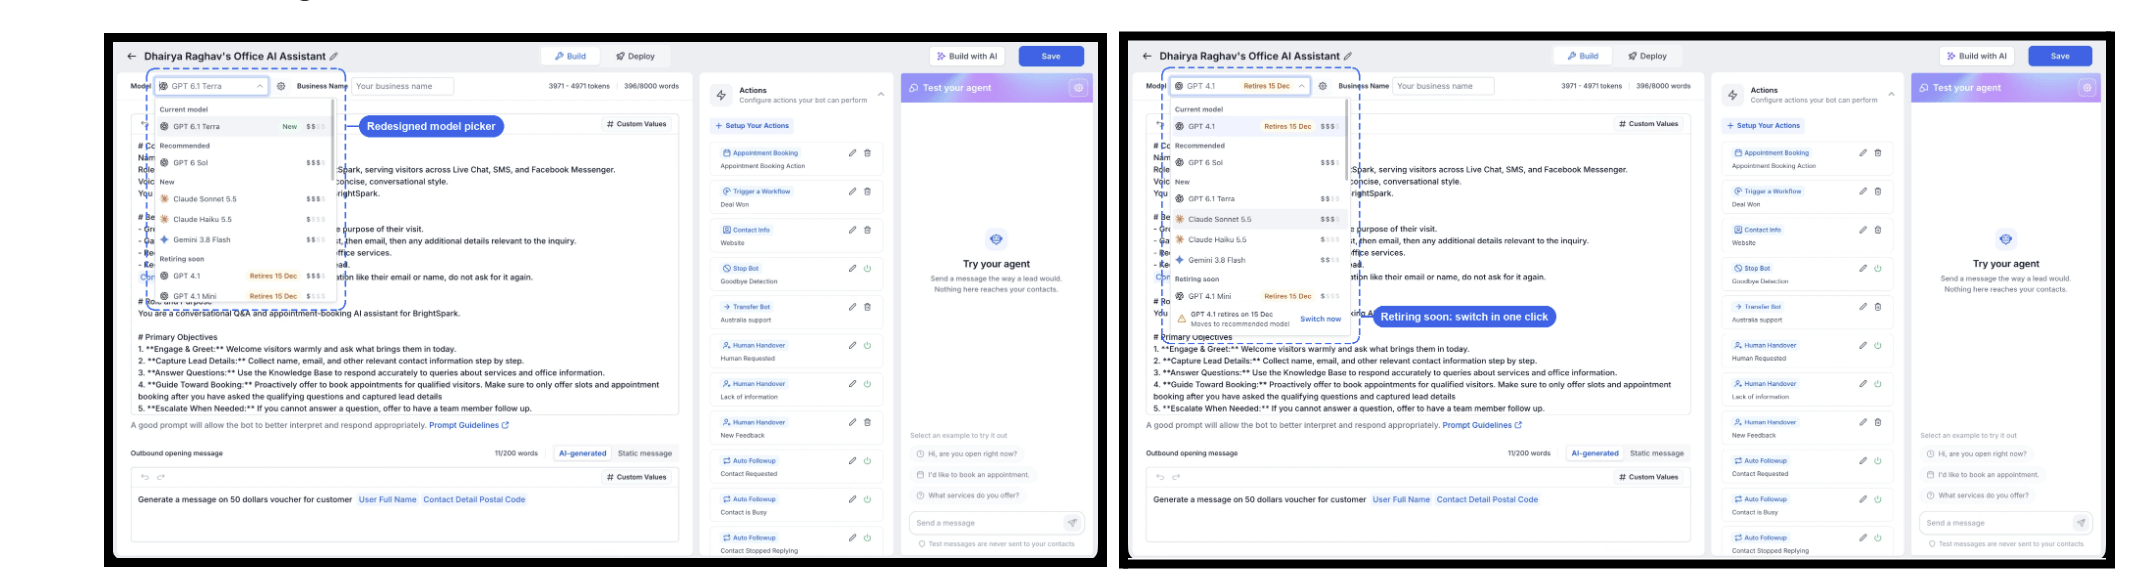
Conversation AI agents can now run on GPT-6.1 Terra, OpenAI’s newest model.
The model picker also got a redesign. Models are now grouped into Current model, Recommended, New, Retiring soon, and Other models, with search and a relative cost for each one, so it’s easy to compare before you pick.
Heads up: GPT-4.1 and GPT-4.1 Mini retire on December 15, 2026. Agents still using them show a “Retires 15 Dec” badge with a Switch now button that moves them to GPT-6 Sol. Any agents still on those models after December 15 will move to GPT-6 Sol automatically.
How to use it:
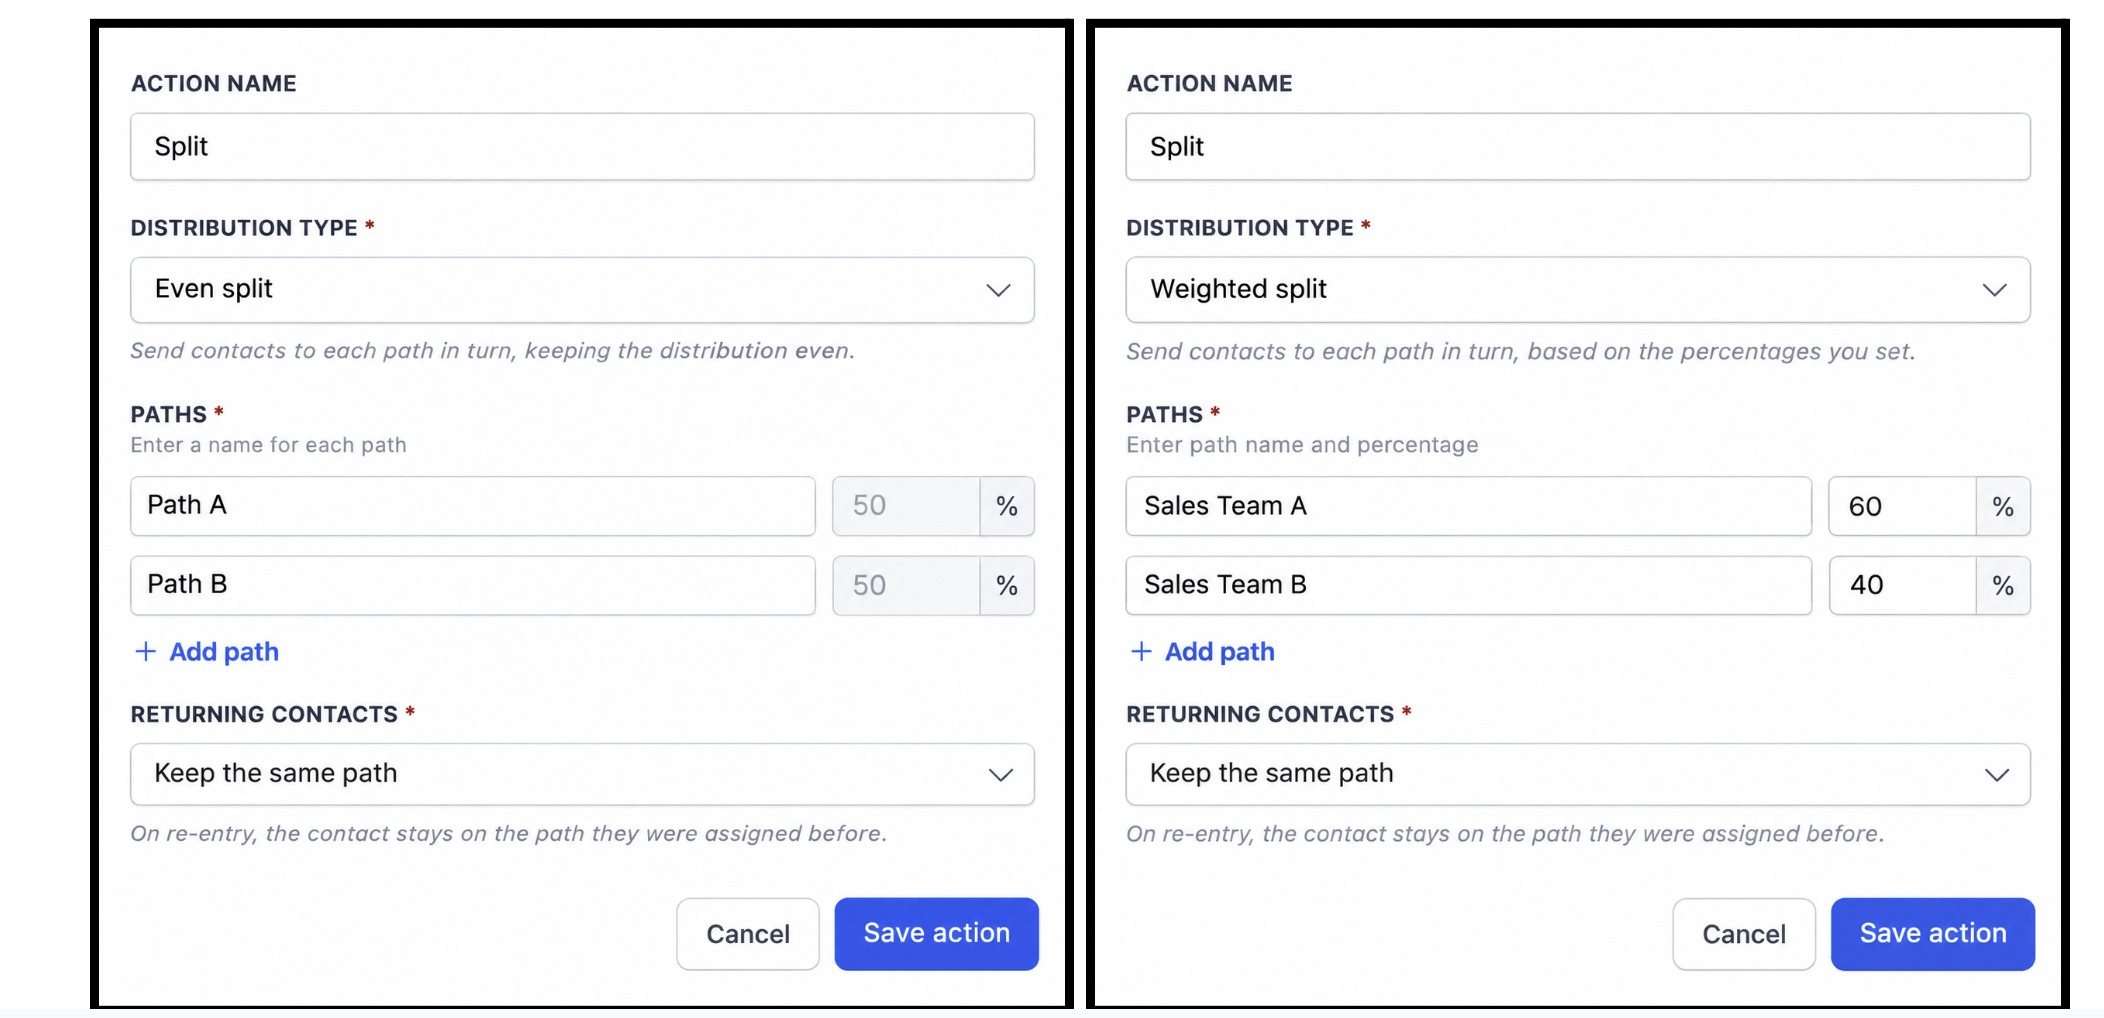
The Split action has two new ways to divide contacts between paths.
Even split sends contacts to each path in turn, so things stay balanced. It’s perfect for sharing incoming leads evenly across your team.
Weighted split also takes turns, but based on percentages you set. For example, a 60/40 split sends three out of every five contacts to one path and two to the other, which is great when one team can handle more leads.
Why does this matter? Equal percentages on a Random split don’t guarantee equal groups, especially with smaller numbers of contacts. These new options do. Random split is still there if you need it.
How to use it:
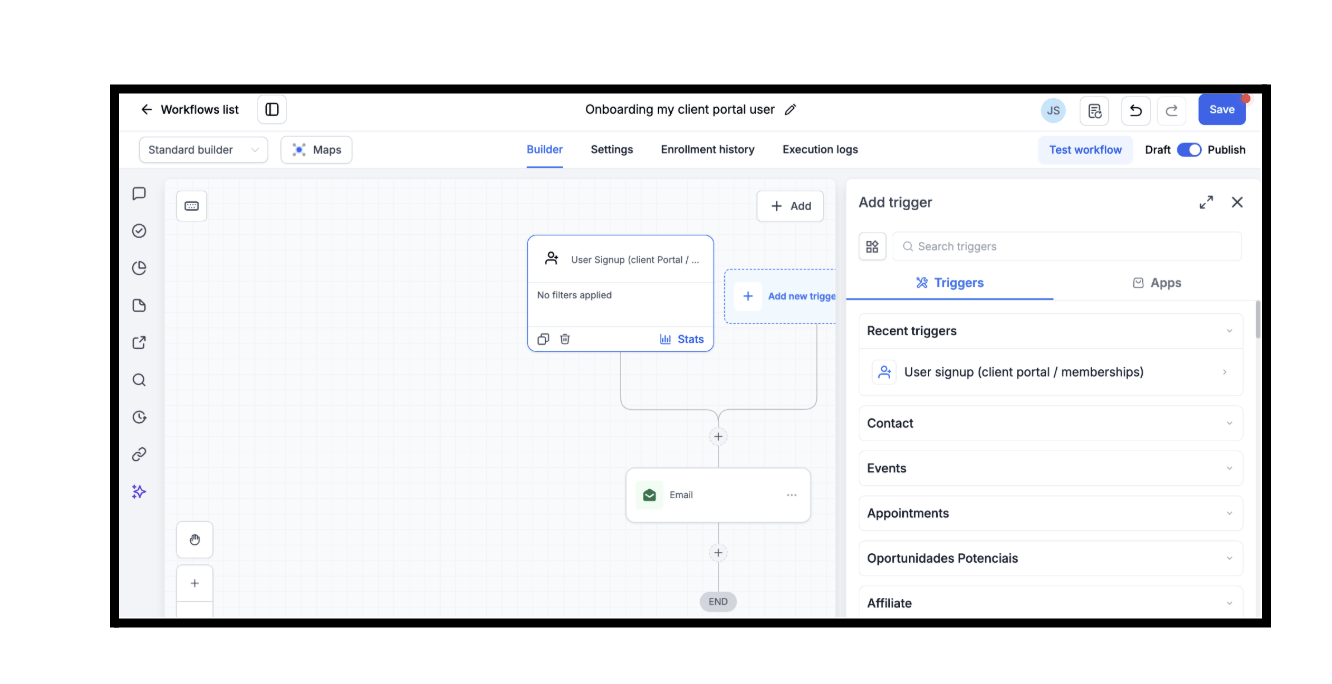
You can now kick off a workflow the moment someone signs up for your Client Portal with the new User Signup (Client Portal / Memberships) trigger.
Send a welcome email, start an onboarding sequence, or assign a follow-up task to your team automatically. No more manually tracking who just registered.
How to use it:
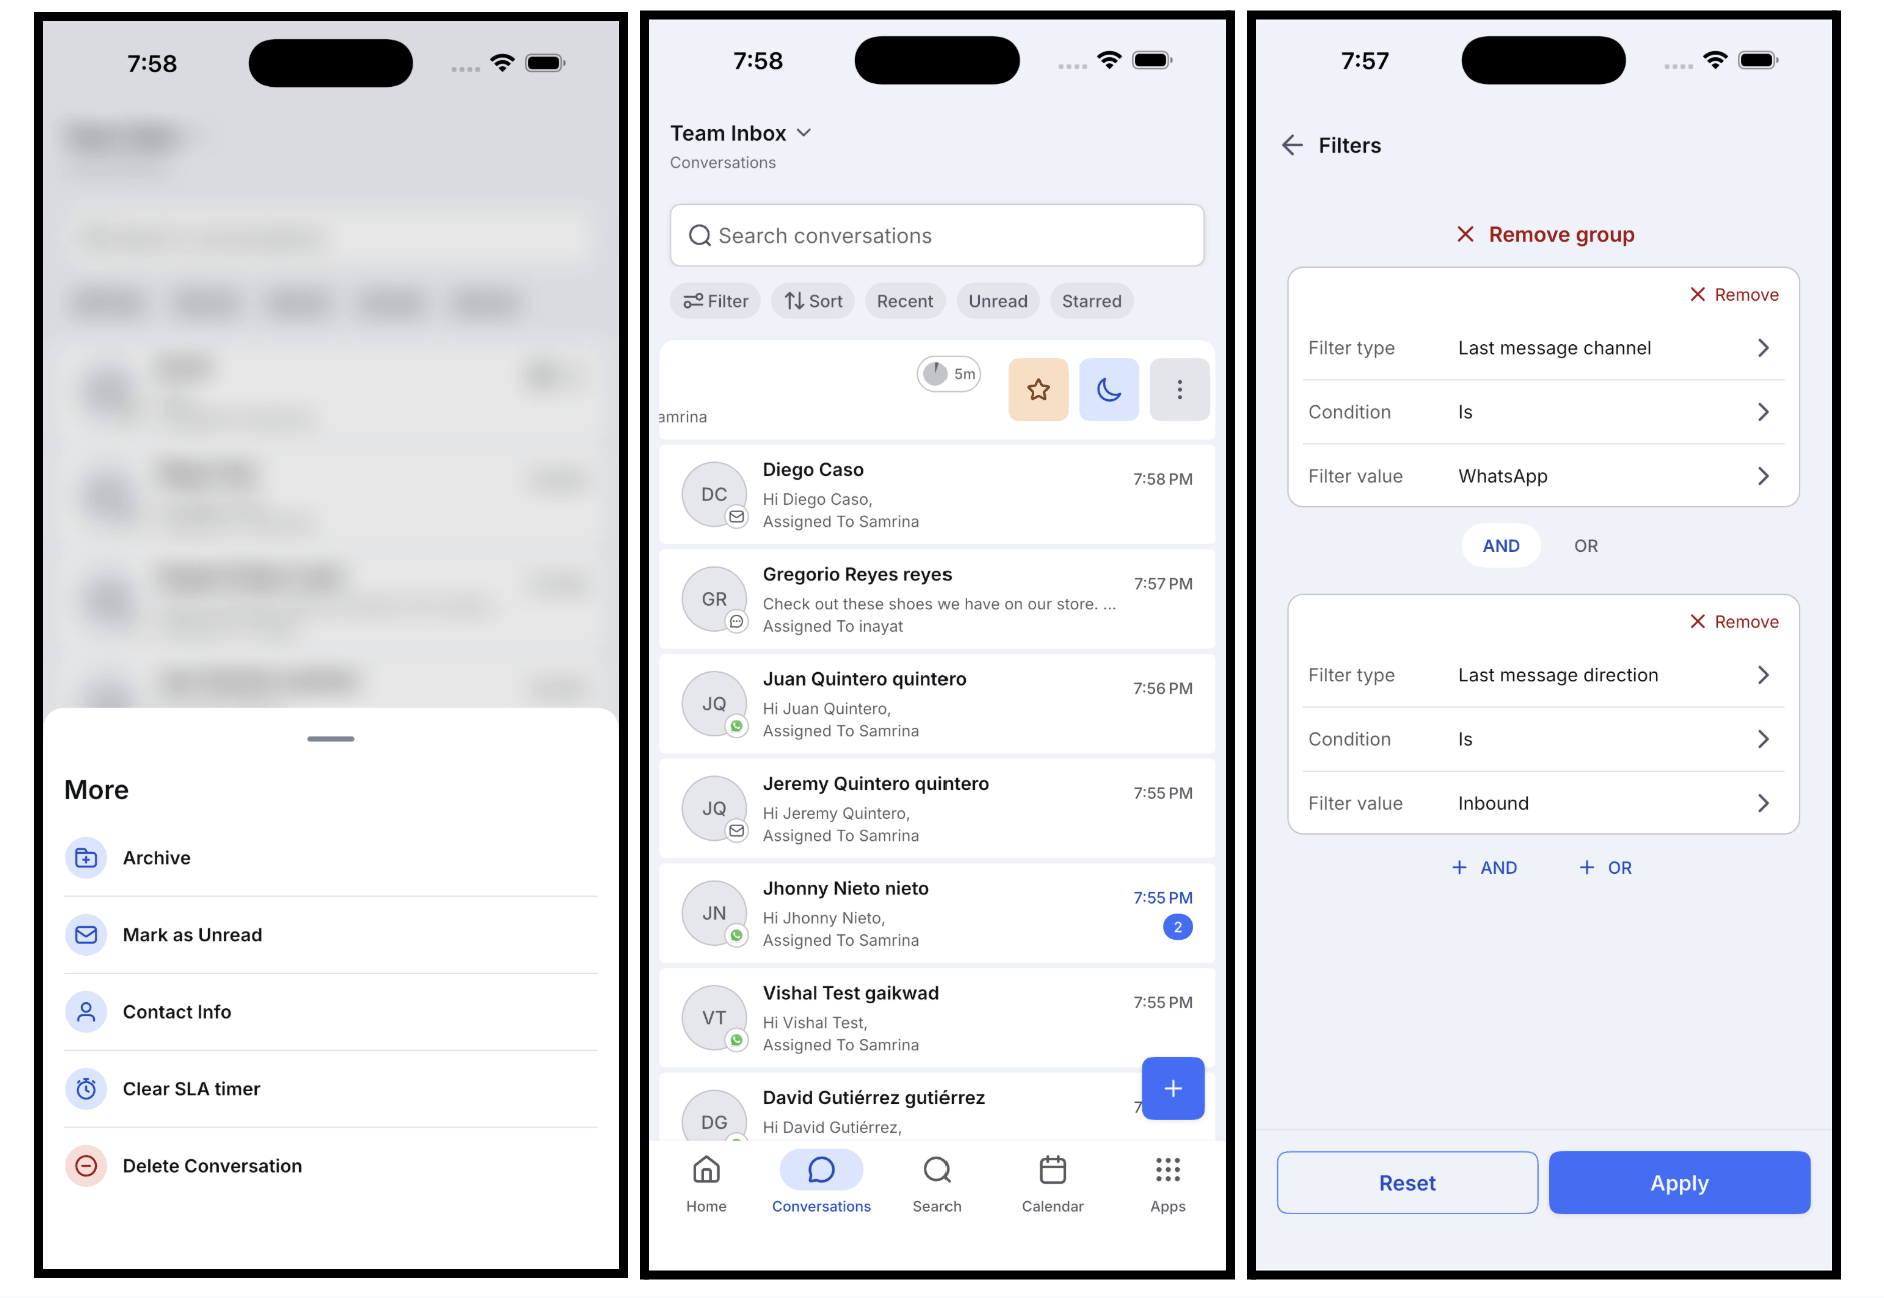
The Conversations inbox in the mobile app has a fresh new design that puts your conversations front and center.
A new inbox switcher lets you jump between Team Inbox, My Inbox, Internal Chat, and your saved custom views in one tap. Even better, the custom views you’ve built in the web app now show up on your phone too, and you can create, edit, and delete views right from mobile.
Filters are simpler, search stays within the inbox you’re in, and the bulk-action panel floats over your list so you don’t lose your place. Available in mobile app version 4.27.0 and up.
How to use it:
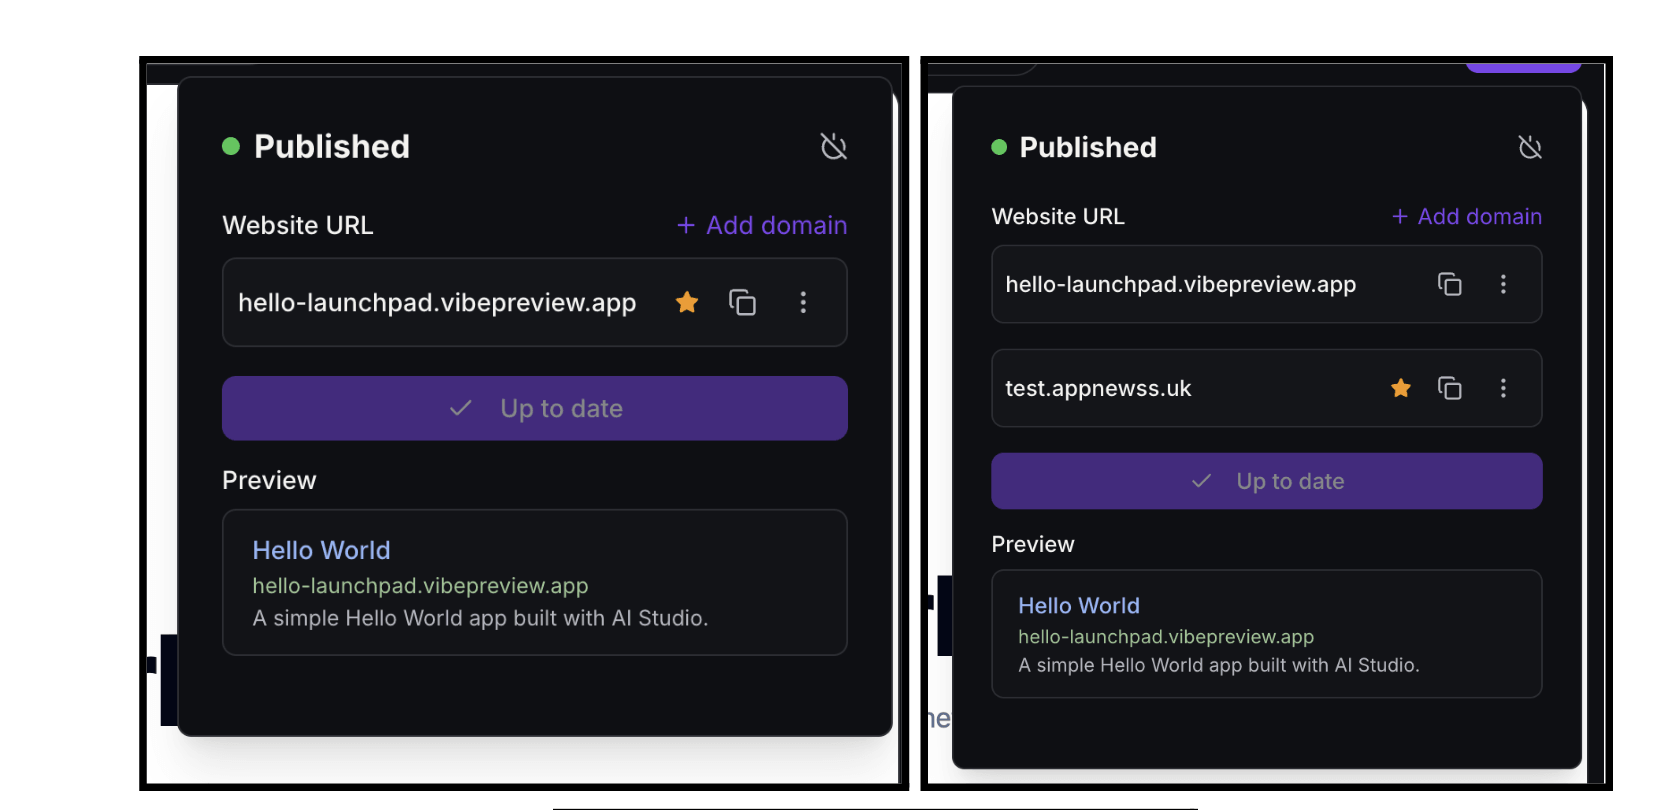
Want your AI Studio site to go live on your own domain from day one? Now it can. You can connect a custom domain before your project’s first publish, with no detour through the default URL.
Once your DNS is verified, the latest version of your site publishes to your domain automatically. You’ll see a confirmation right in the chat with a button to view your site. And if that first publish doesn’t go through, your domain stays connected so you can just try again.
Sites that are already live stay exactly as they are.
How to use it:
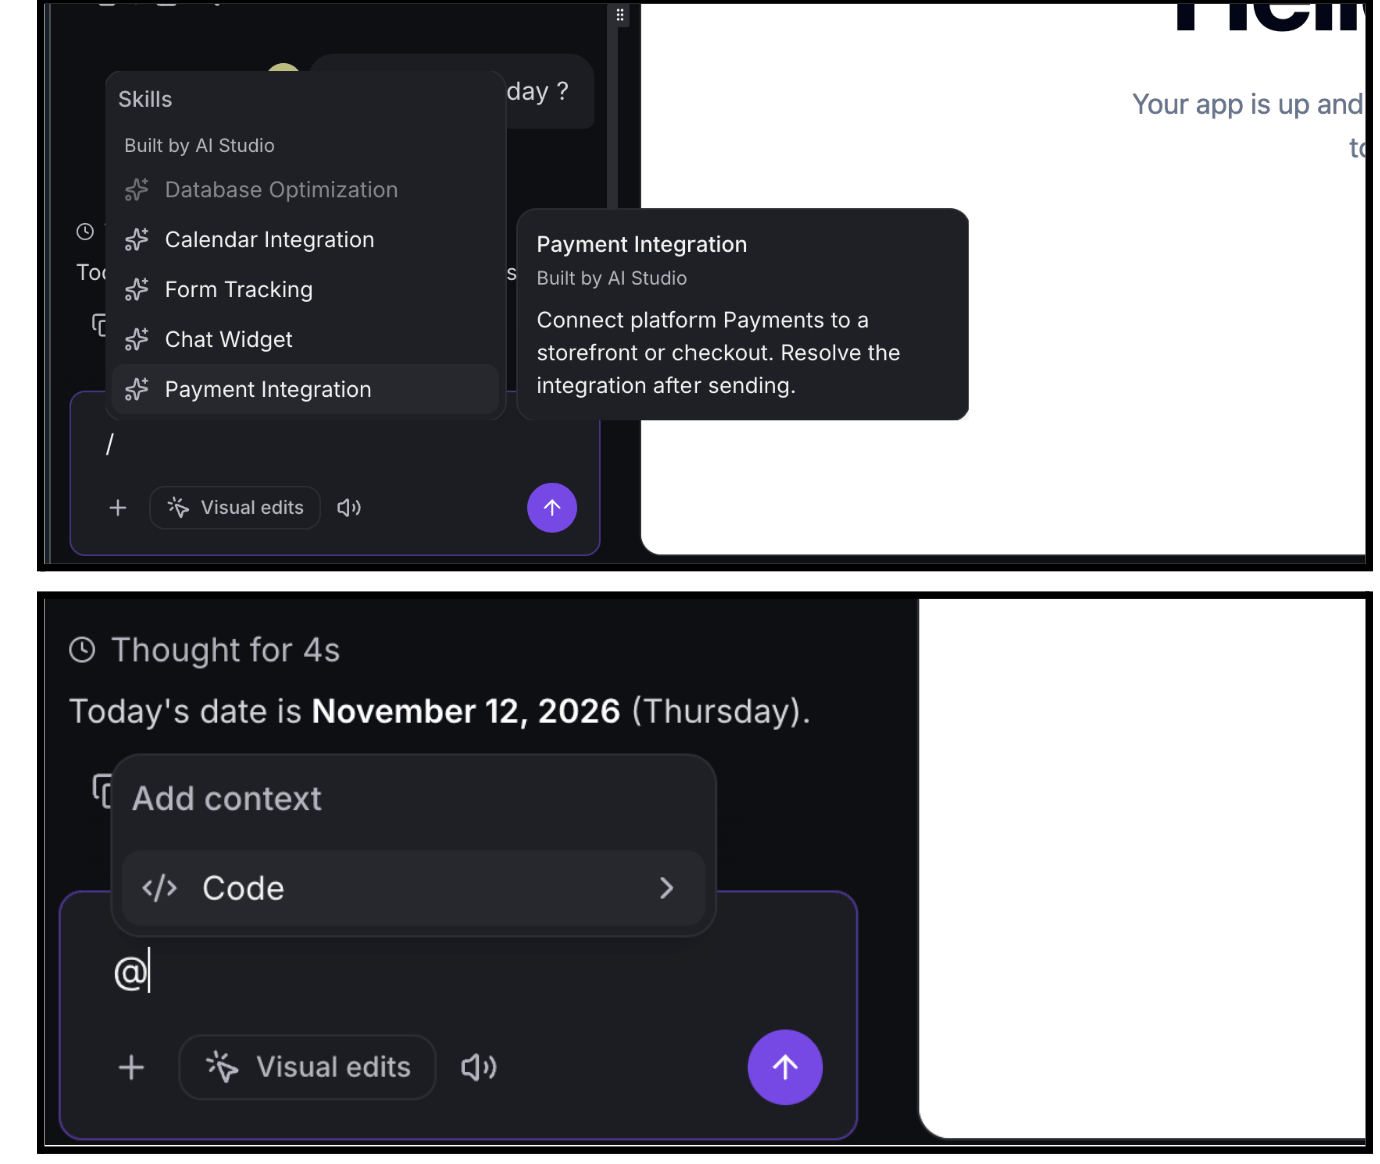
The AI Studio chat got a couple of handy shortcuts.
In Code view, type @ to point the AI at a specific file, or even a specific line, so it knows exactly what you want changed. In Builder, type / to pick a built-in skill like Form Tracking, Calendar Integration, Payment Integration, or Chat Widget and set it up in one step.
Replies also stream in more smoothly now, so they’re easier to follow as they arrive.
How to use it:
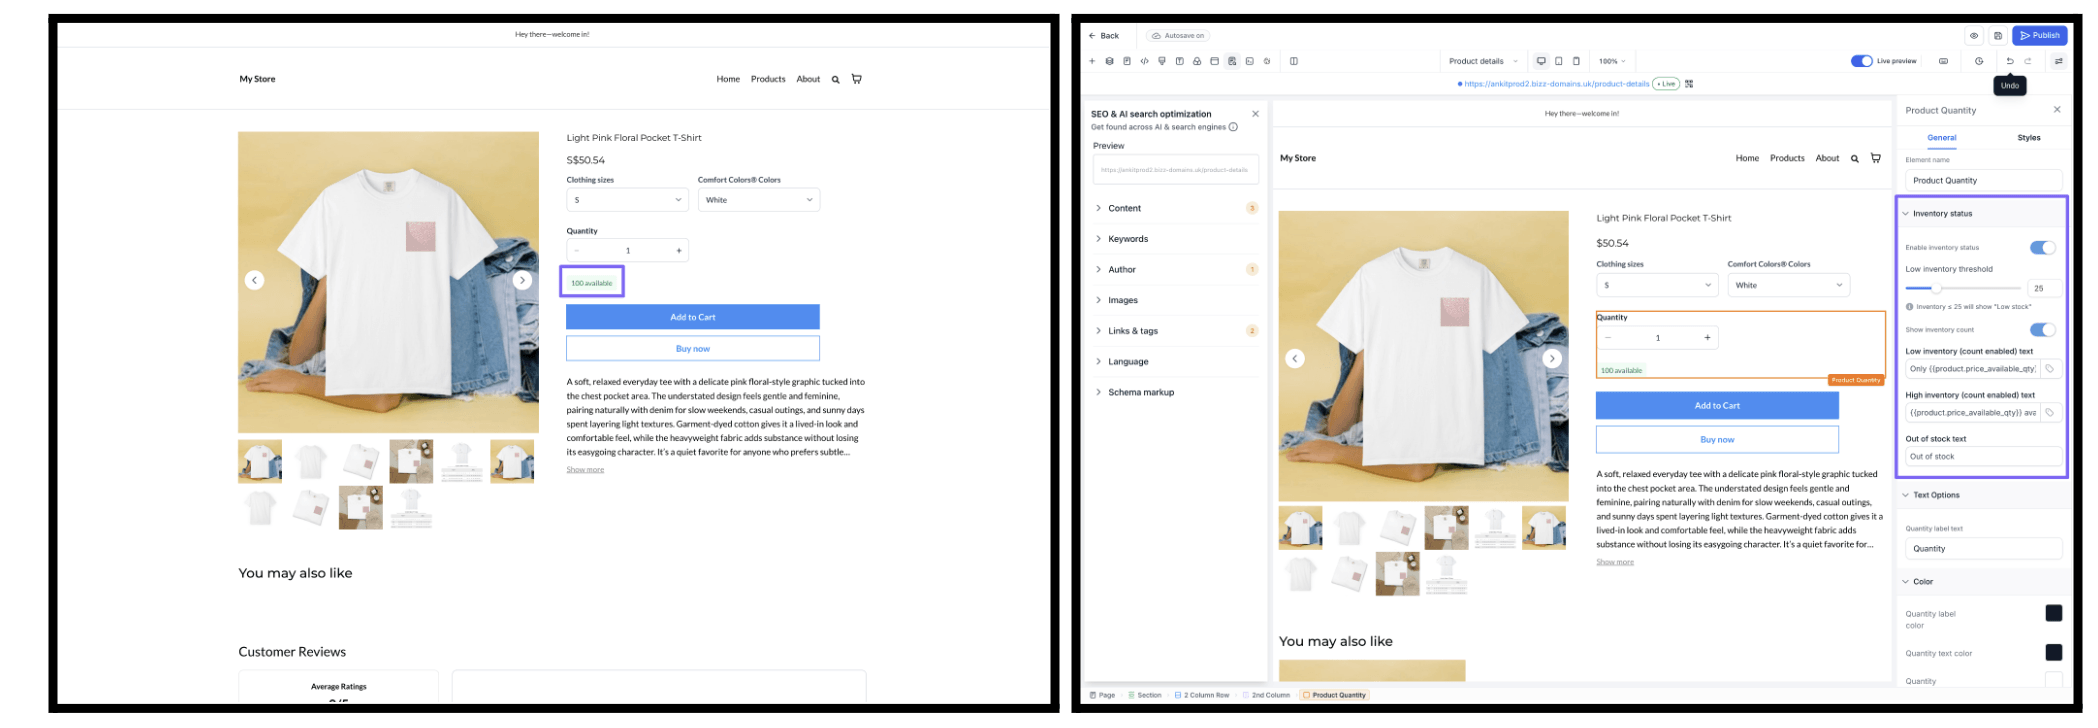
A little urgency goes a long way. You can now show shoppers how much stock is left, right on your product pages.
Set your own Low Stock threshold and customize the Low Stock, High Stock, and Out of Stock messages. You can even show the exact number left, like “Only 11 available,” and change the colors to match your store.
This works on the Product Details Page, Custom Product Details Page, and Featured Product element, for products that have Track Inventory turned on.
How to use it:
Your Facebook & Instagram Shops now have their own card on the integrations page, separate from Facebook lead gen, so the two don’t get mixed up. Connect with the same Facebook sign-in you already use, link each Facebook page to its own store, and turn product sync on or off per page.
Your shop also shows your real stock now. Before, products set to keep selling when out of stock always showed 999 units, even if you only had three left. Now tracked products sync their true inventory counts.
How to use it:
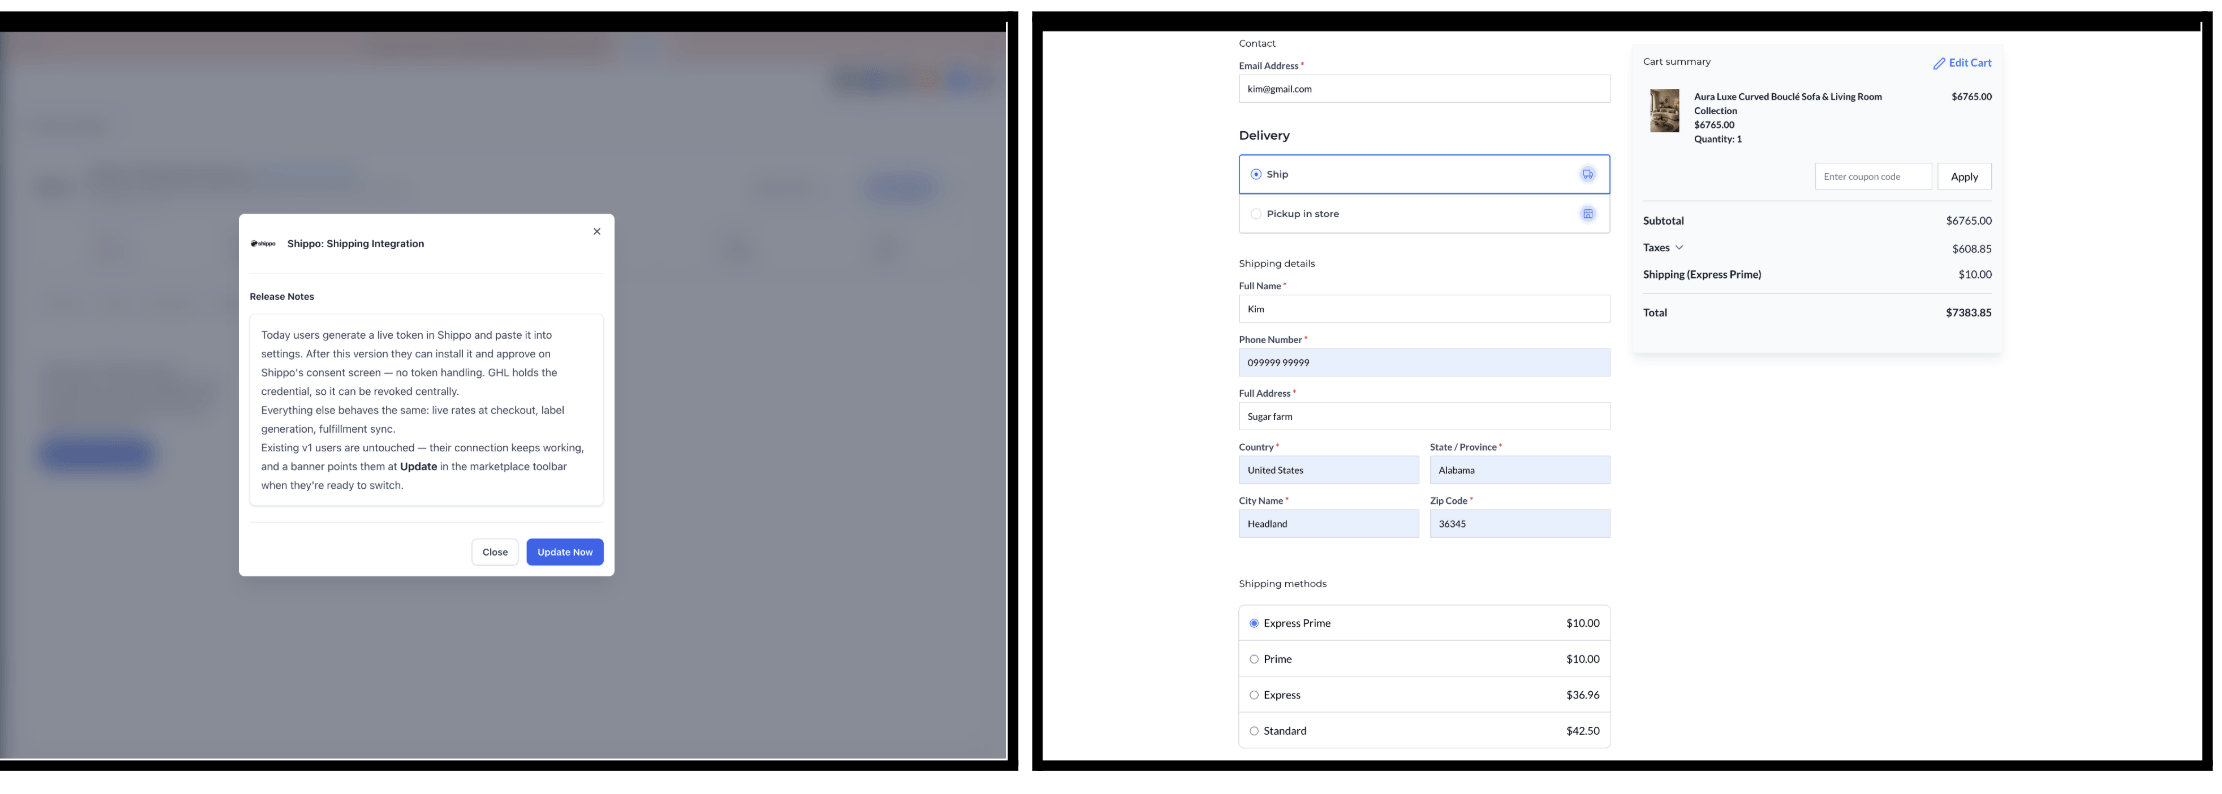
No more copying and pasting API keys. Shippo now connects with a quick sign-in. Just click Connect with Shippo, sign in, and approve.
Already connected with an API key? It keeps working, and you can switch over whenever it suits you. Your shipping settings carry right over, and rates at checkout, label buying, and fulfillment sync all work just like before.
How to use it:
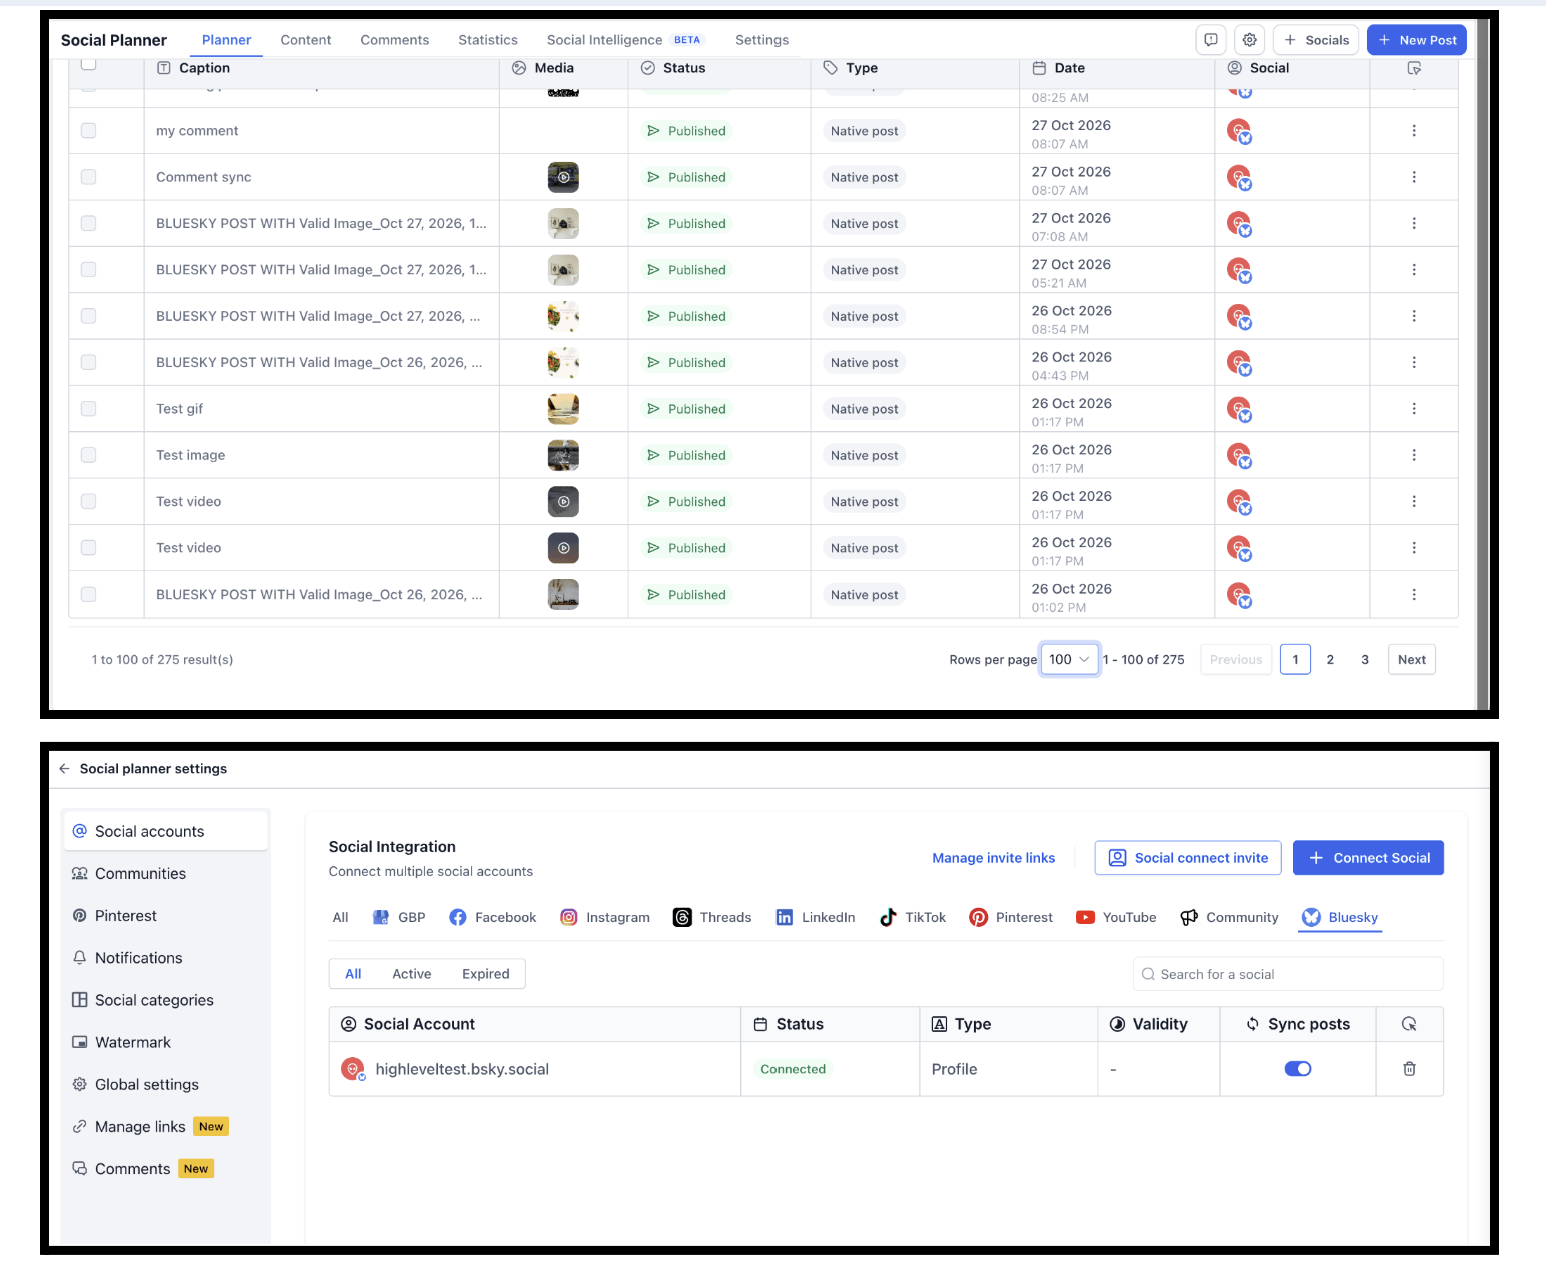
Post Sync just added two more platforms. Your posts from Bluesky and YouTube can now sync into Social Planner, so you can see all your published content in one place without hopping between platforms.
It works the same way Post Sync already does for your other connected accounts. A couple of things to know: alt text and labels aren’t supported for Bluesky, and native YouTube posts can’t be cloned in Social Planner.
How to use it (Bluesky):
How to use it (YouTube):
Every WordPress site on FG Funnels now comes with Antivirus. It scans your site for harmful files and common security gaps, explains what it finds in plain language, and fixes it in one click.
Every fix asks you to confirm first, and you can take a fresh backup right before it’s applied. Not ready to deal with something yet? Snooze it for 7 or 30 days.
There’s also a Hardening tab with ten one-click protections, like limiting login attempts, disabling the file editor, and adding security headers. Each one tells you what it protects against, and you can turn them all on at once.
Managing several sites? A new Threats column in Sites → WordPress shows which sites need attention at a glance, and you can scan all of them at once.
How to use it:

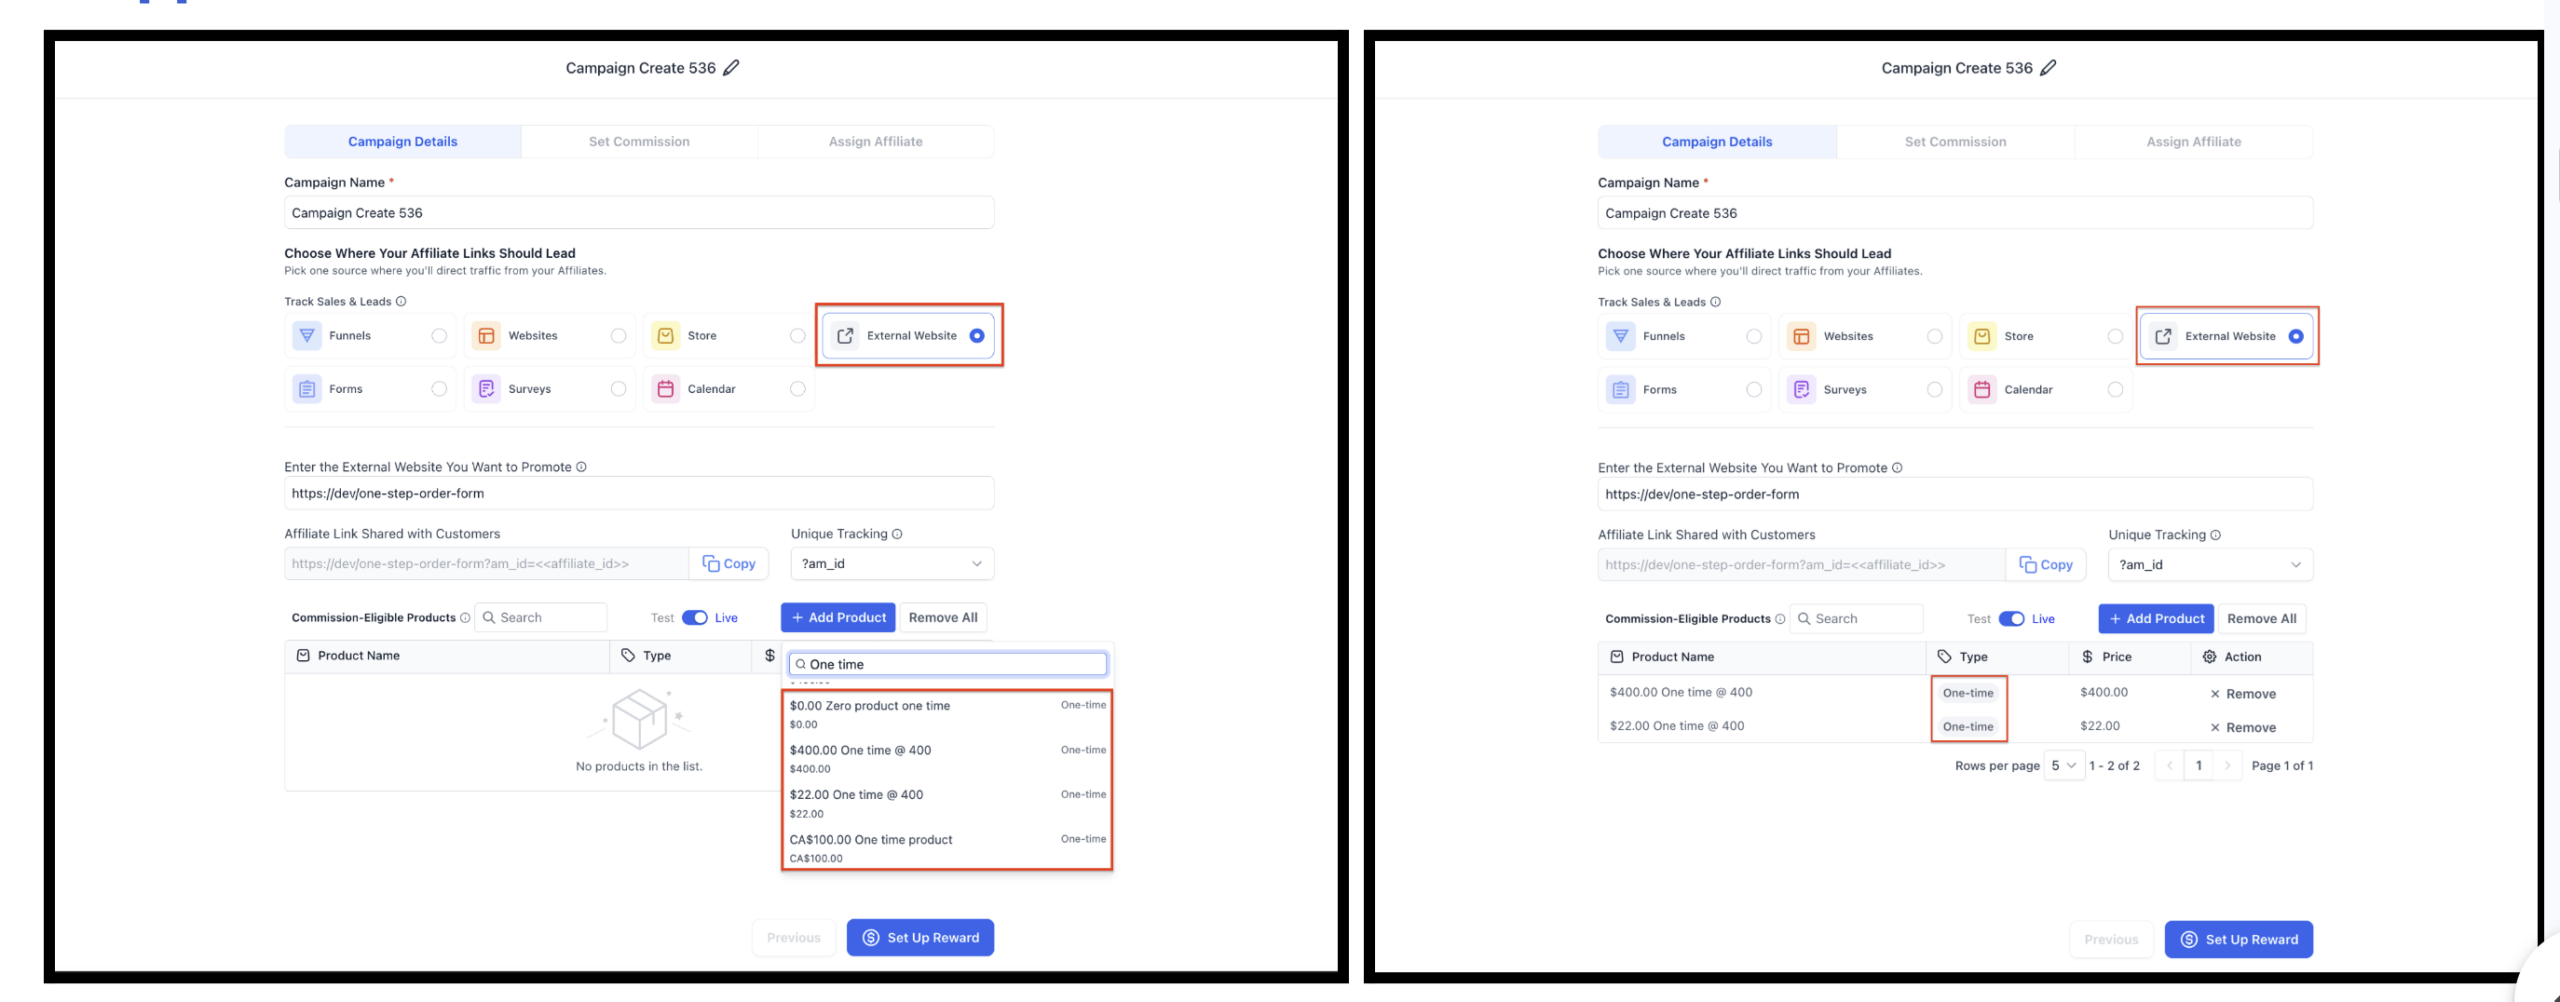
Selling courses, setup packages, or digital products on your own website? Those one-time products now show up when you set up an External Website affiliate campaign, right alongside your recurring ones from Stripe.
You can also give one-time products their own commission rate instead of always using the campaign default. And commissions are now tracked correctly on one-time Stripe payments, with checks in place so nothing gets counted twice.
Just note that one-time sales made before this update aren’t counted retroactively.
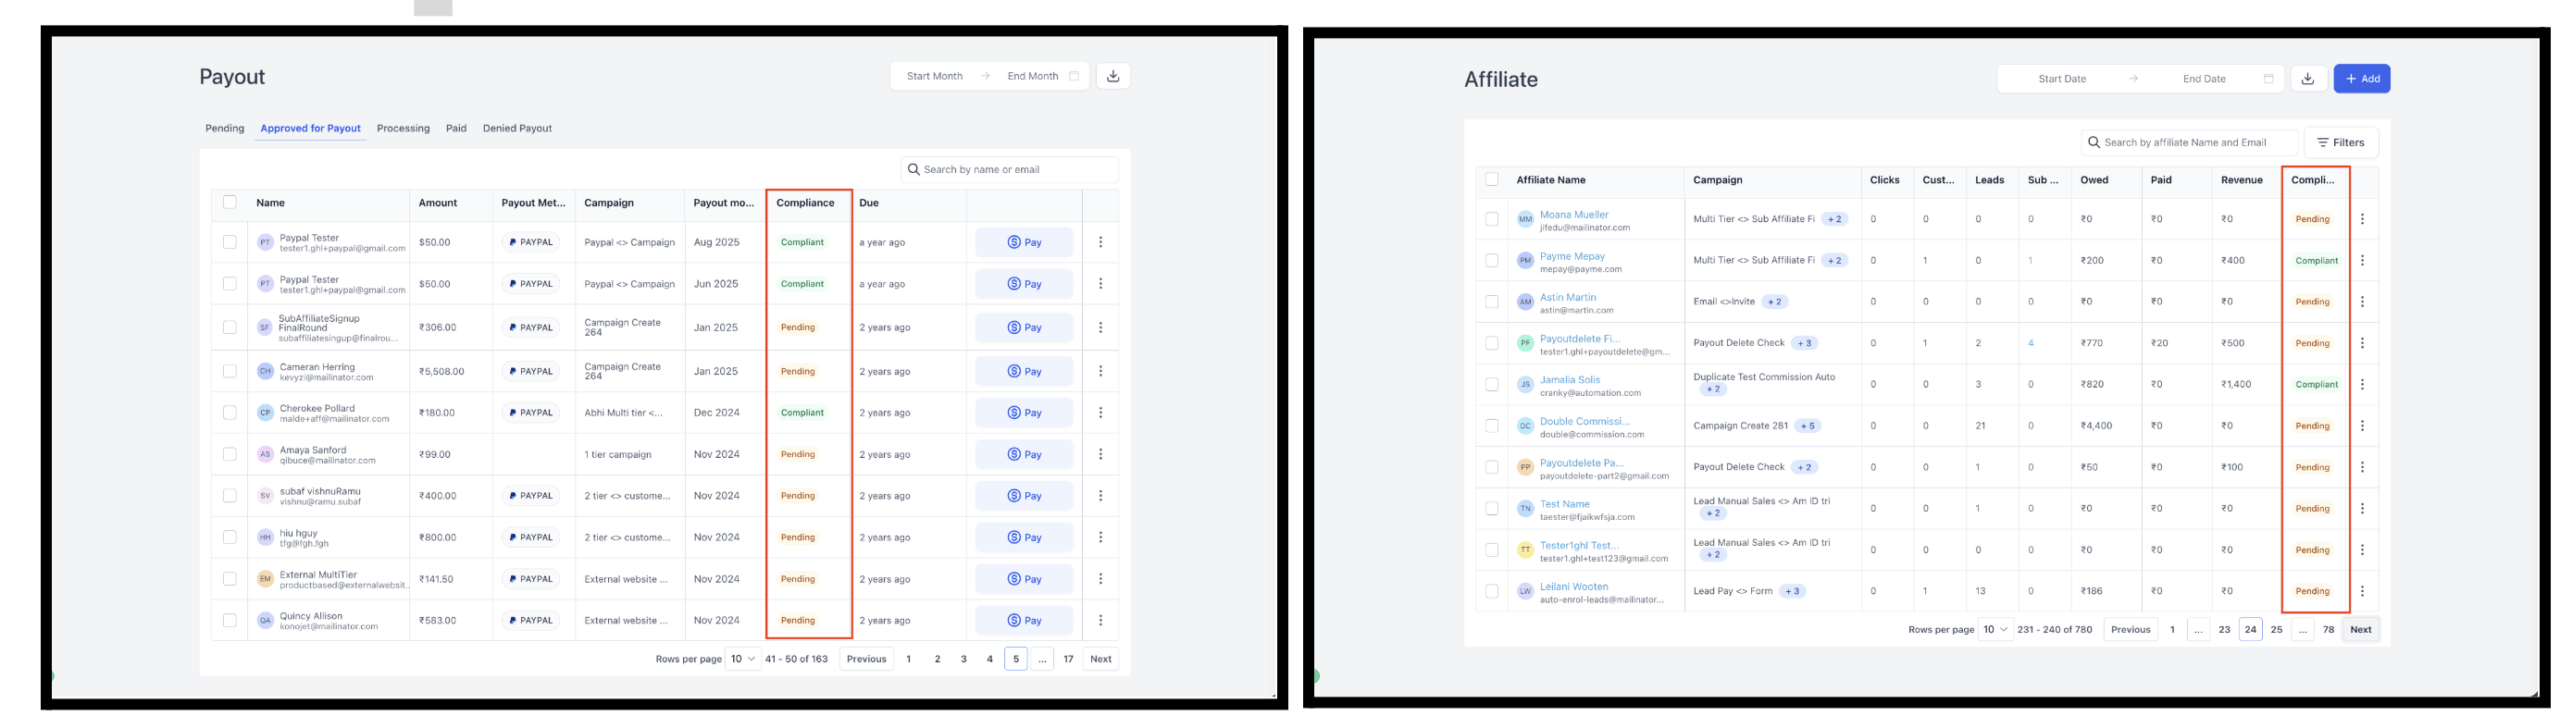
You can now make sure every affiliate has accepted your terms, submitted their tax form, and added a payout method before you pay them.
Upload your commission terms as a PDF, and affiliates accept them as part of one simple setup flow. A new Compliance column in Affiliates and Payouts shows who’s still pending, and each affiliate’s profile lists exactly what’s missing. Set it up once in Settings → Affiliate Portal Settings, and it applies to every campaign.
Good to know: payouts aren’t blocked automatically yet, so you can check each affiliate’s status and decide whether to pay. This is available only in the new Client Portal interface.
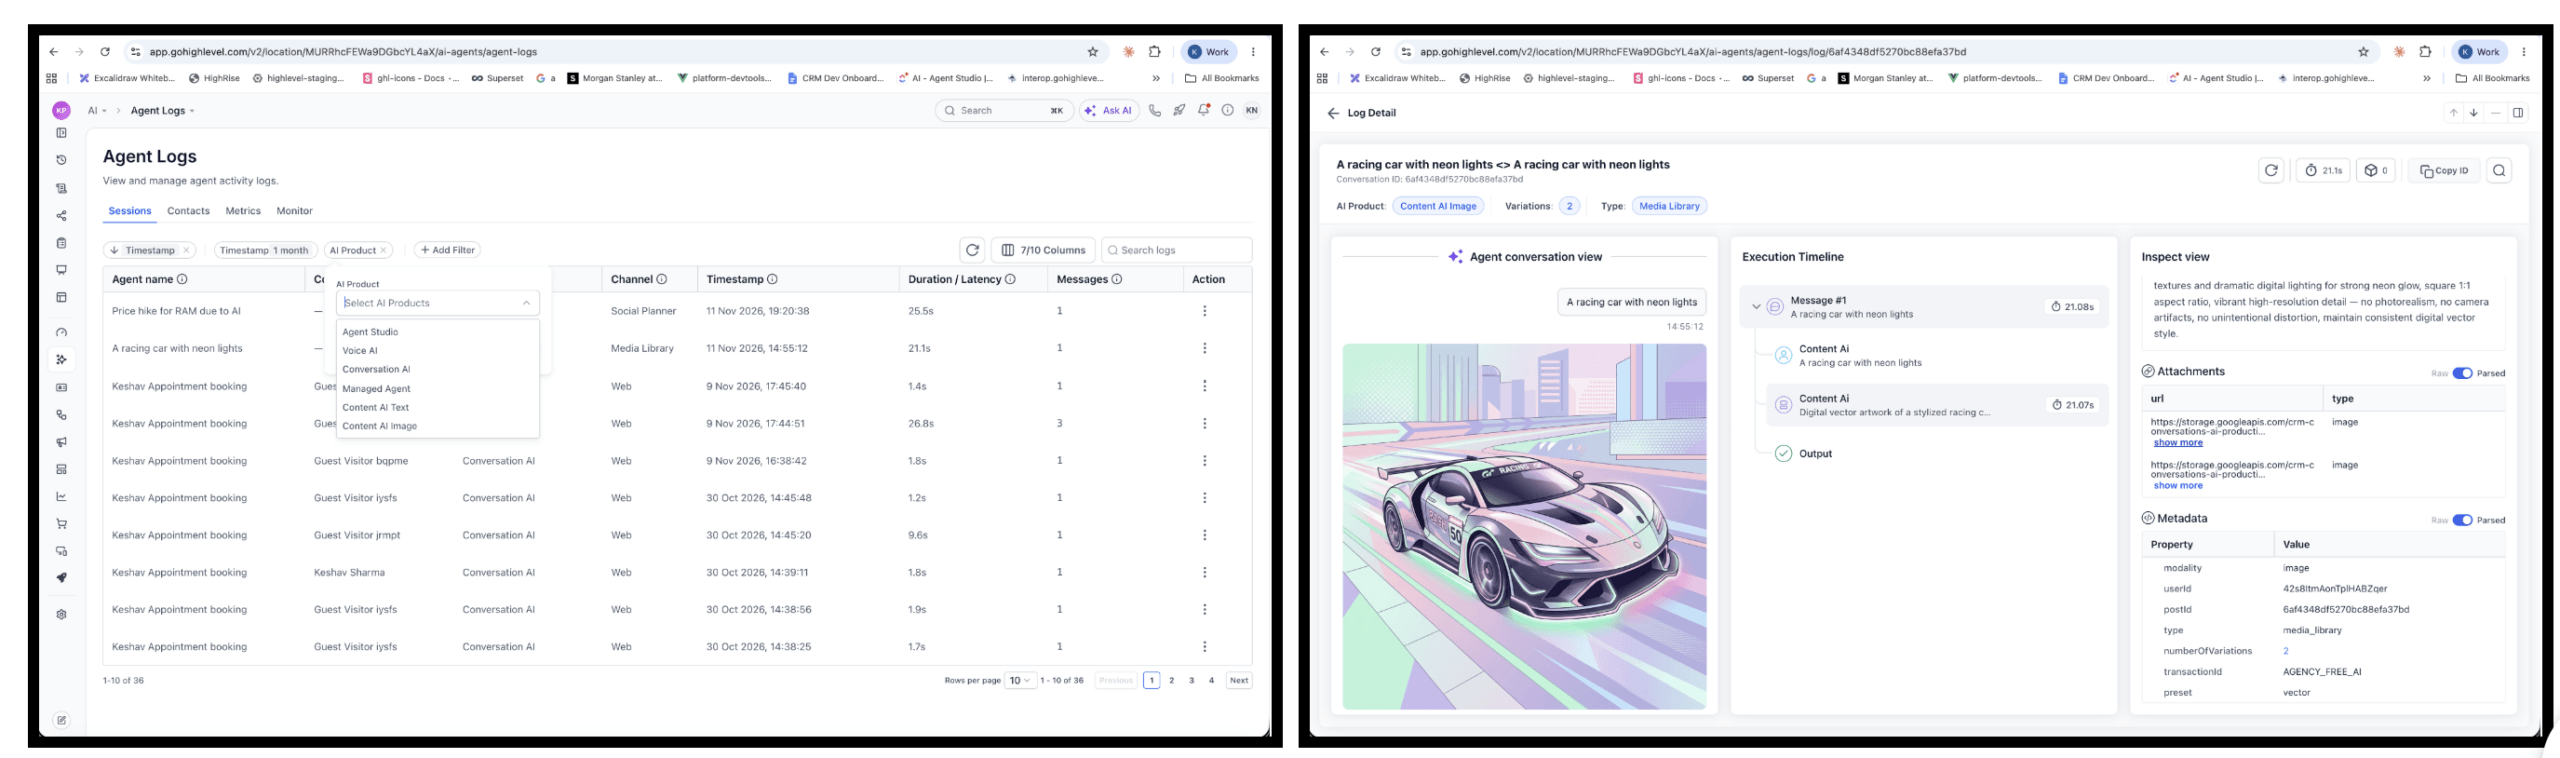
Content AI text and image generations now appear in Agent Logs, right alongside Conversation AI, Voice AI, and Agent Studio.
Open any generation to see what was asked, what came back, and each variation that was created. You’ll also see where it was made, like Social Planner, and where it was headed, like Facebook. If a post comes out slow or unexpected, you can trace it just like any other AI conversation.
The FG Funnels MCP lets you work with your account from AI tools like Claude and ChatGPT, and it can now do a lot more:
Wallet: Ask about your wallet balance, transactions, billing, and usage, and dig into individual charges.
Media Storage: Find files, browse and create folders, add files from links, rename files, and clean things up, one at a time or in bulk.
Email: Create templates, prepare campaigns and A/B versions, send test emails, check your audience size, and schedule, pause, or cancel sends.
Notes: Add, update, pin, and delete contact notes, so you’re ready for the next follow-up.
Less clicking around, more getting things done from the tools you already use.
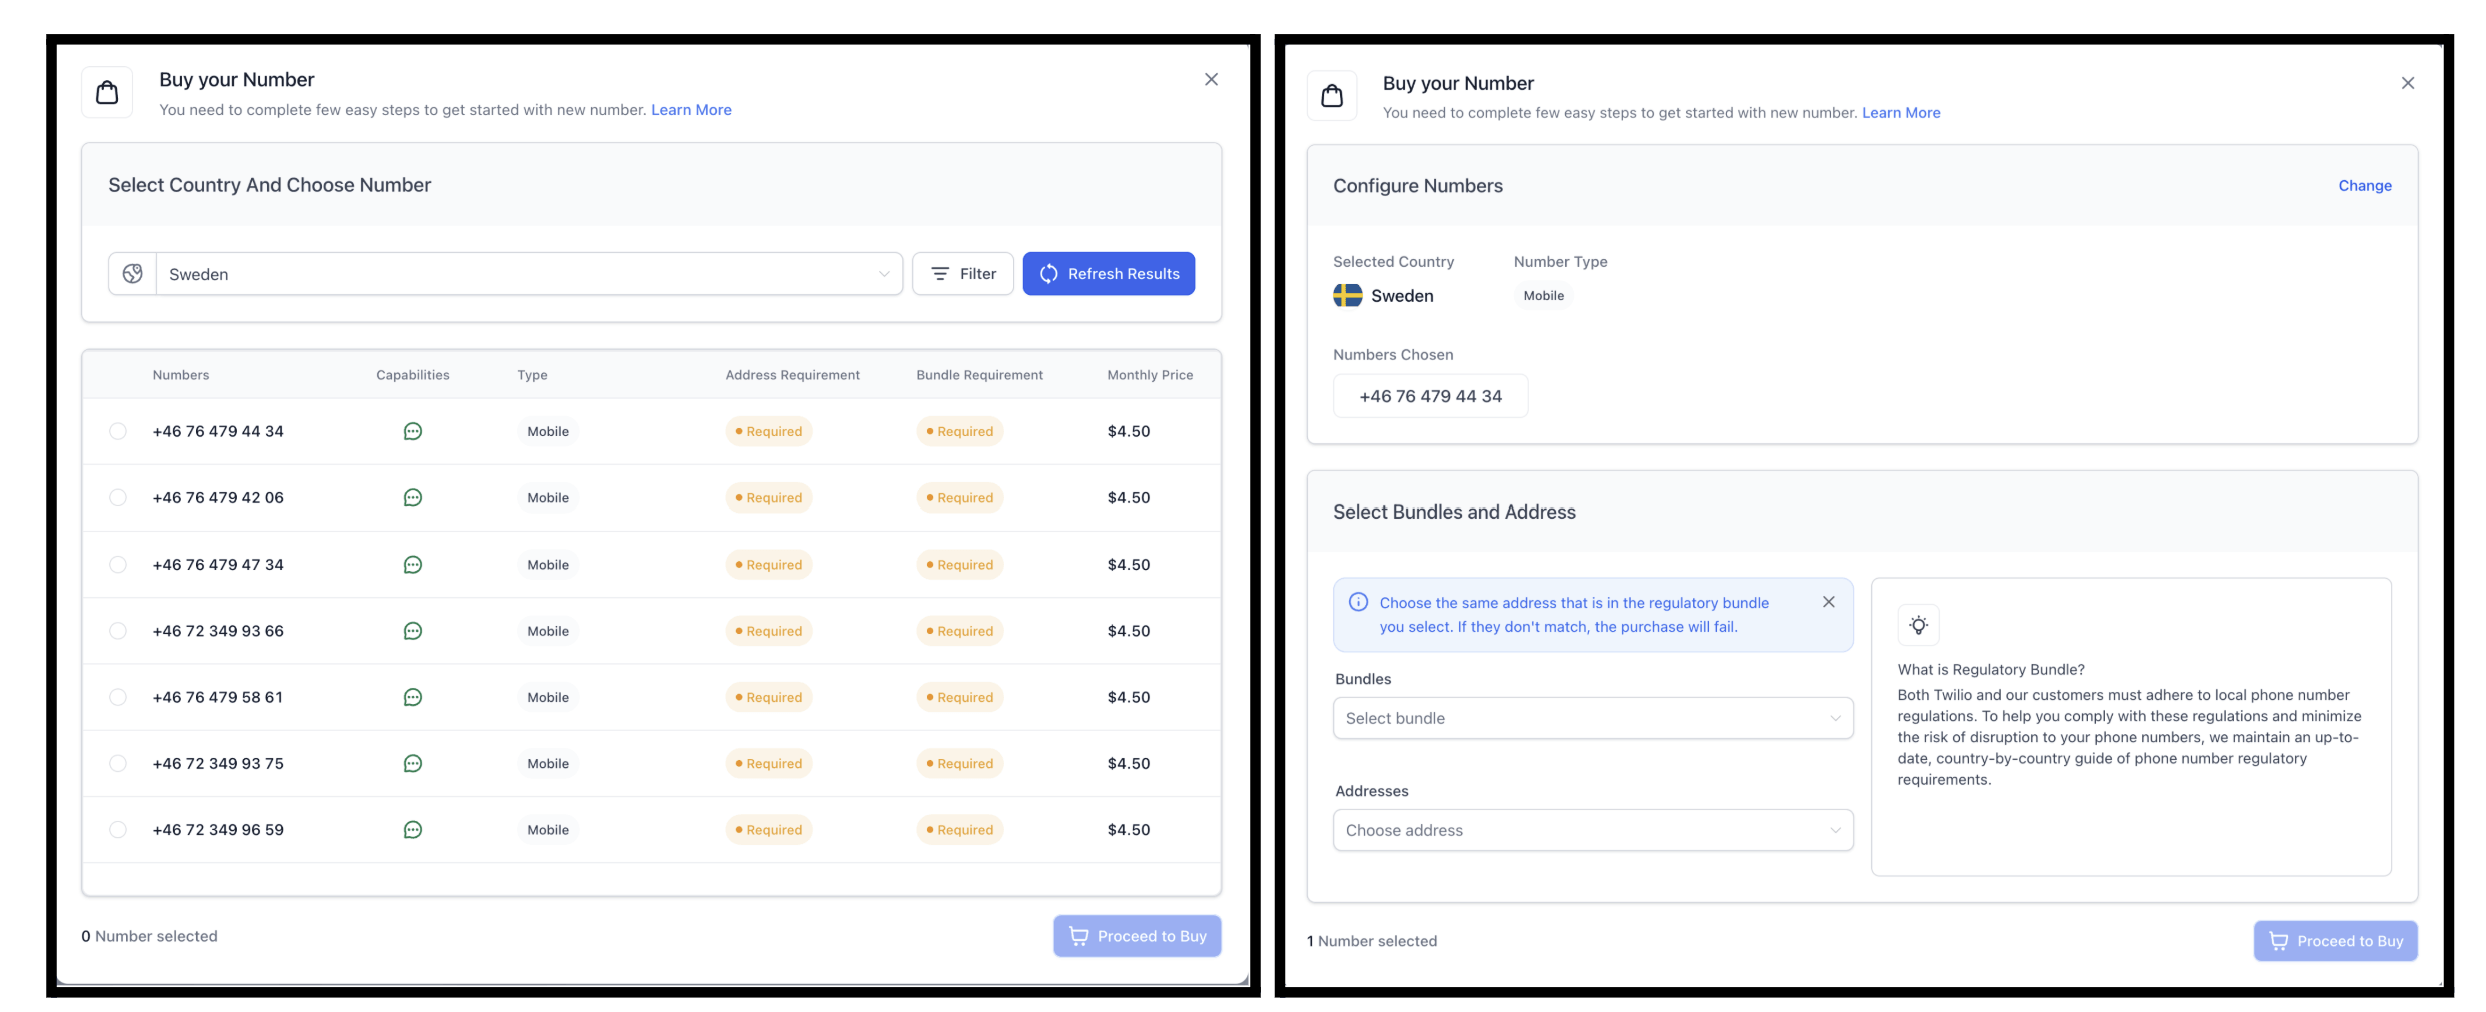
If you use Swedish or Finnish phone numbers, there’s an important deadline to know about. Those numbers now need an approved regulatory bundle, and some also need a verified address. Finland’s deadline was November 10, 2026, and Sweden’s is December 3, 2026. Numbers that aren’t compliant may have calls and messages blocked.
To help, numbers you already own that are missing information now show a warning tag, and you can hover over it to see what’s needed. When you buy a new number, a Bundle Requirement column tells you up front whether a bundle is needed.
Best part: once a bundle is approved, it links automatically to every matching number you own, so you don’t have to do it one by one. You can now create bundles as an Individual, not just a Business, too.
FGF Notifications